All,
Well, it's been more than a week ago now that the Boy General and I played another Napoleonic game using Neil Thomas' One Hour Wargames. Once again it was a blast; we continue our fictional campaign in northern Europe, continuing with the boy leading the British against my dastardly French. The scenario was "Double Delaying Action," with the idea being that I (the French), having been defeated in the last battle, was doing my best to flee to the north, being harried by the British from the south.
The French chose a river as a defensive line to try to slow the British pursuit; the Brits can cross at a ford in the west or a bridge in the east, and the Brits are trying to first take the village of Trois Bras (at the river) and then the road exit in the north, just east of Mont Vert. The two forces are equal in size, at least at the beginning; the French must have one unit depart the table via the north road exit on turns 4, 8, and 12, but still hold either Trois Bras or the northern road exit at the end of the game (15 turns). Failure to do so is a British victory.
The opposing forces, with French on top and Brits on bottom.
The French have their General, the 1st Grenadier Brigade, the 1st, 2nd, and 3rd Ligne Brigades, a grand battery of Horse Artillery, and the 1st Light Cavalry Brigade (a regiment of Hussars and a regiment of Chasseurs a Cheval).
The British have their General, the Foot Guard Brigade, the King's German Legion (KGL) Brigade, the Highlander Brigade, the 1st Brigade of Foot, the Rifle Brigade (95th and 60th), and the Union Brigade (Blues and Scots Greys). General Nickolls complained about once again having no artillery in support; General Dadie replied: such are the fortunes of war (and using a D6 to come up with your force composition).
The map: north is up, a wood in the west (left) impassable to all but the British Rifle Brigade, the river running east-west in the south, with ford visible at left and bridge at right, near the town of Trois Bras. The Trois Bras road is at right, running north-south, with the north road exit at top, just right of Mont Vert.
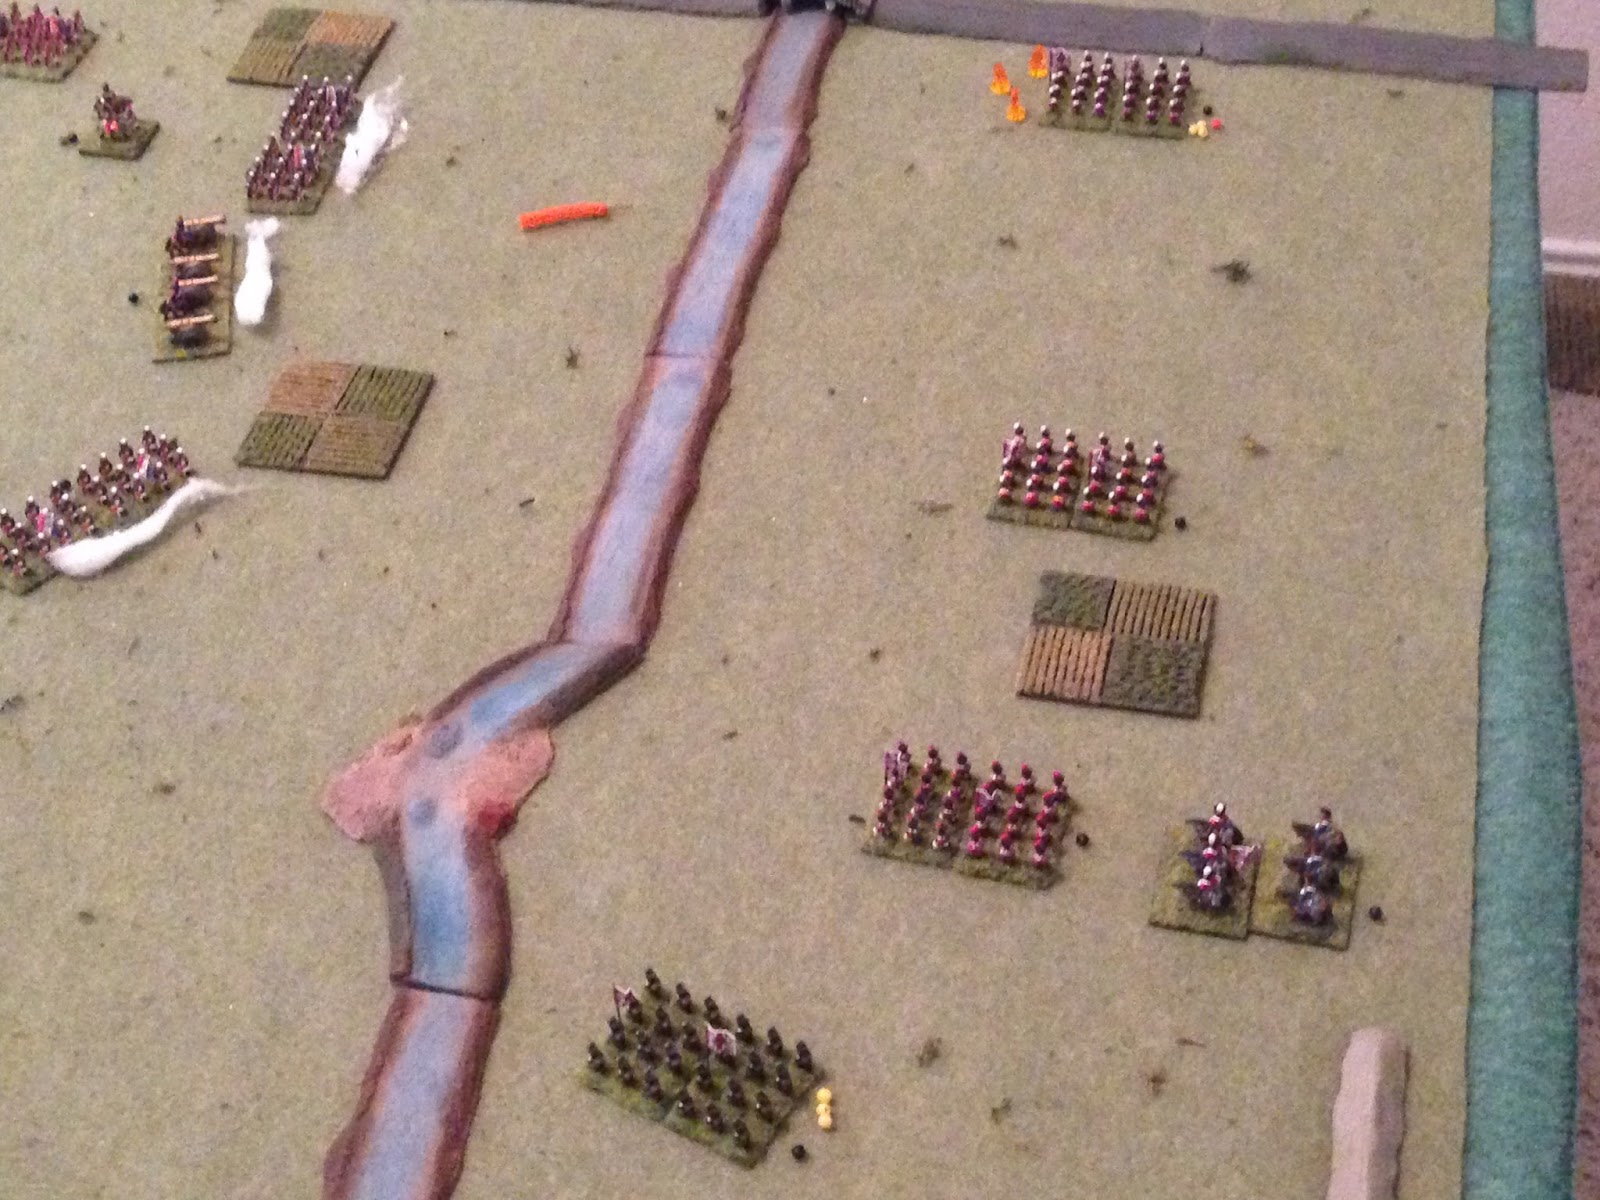
The British begin the game off table, entering their entire force on turn 1 via the south table edge (bottom). The French are arrayed north of the river. From left to right: 1st Ligne, Grand Battery, 2nd Ligne, with General Dadie immediately behind them, 1st Grenadiers to his right, 1st Light Cavalry on the road, and 3rd Ligne in the town of Trois Bras at far right.
My preliminary plan is to give ground at the ford while trying to hold the town as long as possible, using my General to rally hits off them. I will launch my cavalry straight down the road as soon as possible, charging repeatedly until they are nearly destroyed and then having them be my first unit to depart via the north exit. I figure the boy will press for the town, so when the 3rd Ligne is pretty beat up I will have the Grenadiers move up, have the 3rd Ligne fall back behind them for protection and ultimately be my second unit to exit the map. From there is anyone's guess, but that's my plan. Oh, and I'm keeping my arty up close to deliver canister at enemy units crossing the river, then fall back to Mont Vert as it becomes pressed.
Let's see how it worked out.
The fight begins with the KGL (bottom left) charging onto the table, and the 3rd Ligne (right) firing on them, causing moderate casualties with this first volley.
The Highlanders (far right, with KGL below them) come on, and the 2nd Ligne (far left) fire on te KGL again, causing more casualties (8 hits total).
On the left the Rifles (far left), Foot Guards (bottom center), and 1st Foot (bottom right) come on near the ford (center left). The French 1st Ligne fires on the Rifles, causing three hits. The French General is very interested in keeping the Rifles from reaching the wood and flanking the French first line.
The British Union Brigade cavalry (bottom right) come on behind the Foot Guards near the ford, and the French artillery (top left) fires on the KGL (top right), but can't find the range.
I am surprised the Boy General has decided to push so many units towards the ford, with the necessity of taking the town. It will be very difficult to pry the 3rd Ligne from the town without bringing overwhelming force to bear as all casualties on the men in the town will be halved due to solid cover; I think the boy has hurt his chances of victory significantly by lack of concentration of forces on the town. But if he pushes strongly on the ford, maybe he can force the French first line back and isolate the town.
The British General comes on to support the KGL (bottom center right), while the French General, Grenadiers, and Light Cavalry hold position, waiting to see the British attack develop.
The second turn starts with the British General rallying three hits off the KGL (bottom center), but the 2nd Ligne (far left) and 3rd Ligne (in town) open up a hellacious fire that staggers them, leaving them on the brink of routing (13 total hits at this point).
But back on the left the British Foot Guards (bottom center, with Union Brigade just visible below them) and 1st Foot both fire on the French 1st Ligne, getting seven hits.
On the right, the KGL (bottom left) fire on the 3rd Ligne, causing 3 hits (which is actually fantastic, meaning the boy rolled a six).
But then the French Horse Battery (far left) unleashes hell on the KGL (right), routing them and seriously wounding the Boy General!
This is very bad news for the boy; he will no longer be able to rally hits off his infantry units, which is absolutely essential in order to maintain a sustained fight with the 3rd Ligne in the town.
Despite their supporting brigade and their General having just been eliminated (explosions at left), the Highlanders continue the fight, firing on the 3rd Ligne, causing two more hits (five total).
While on the left the British Rifles (bottom left) fire on the 1st Ligne (top center), causing several more hits (10 total). The French General moves to support them as they return fire on the Rifles, causing several more hits (8 total).
The Light Cavalry (on road at center right) again stand fast, as the Grenadier Brigade (top right) turns to depart the battlefield (remember, I have to exit units on turns 4, 8, and 12).
The French General (top center) rallies the 1st Ligne, but only manages to remove one hit, while the Union Brigade charges across the ford and crashes into them!
The heavy British Cavalry make quick work of the 1st Ligne (far left), routing them from the battlefield, but the French General is okay, moving right to shelter behind the 2nd Ligne (far right). But now the guns are exposed to the British cavalry!
Perhaps I moved the Grenadiers to the exit a bit too early...
The French guns pivot and unload a volley of canister into the Union Brigade, obtaining six hits.
But the British 1st Foot (bottom center, with Foot Guards to their left and Union Brigade at top left) pour fire into the French artillery (top center), getting six hits.
Sorry for the confusing picture; this is looking west to east (left to right on the table). The French 2nd Ligne (center left) form column and move left to protect the guns (far left, with British cavalry at bottom left), while the 3rd Ligne (in town at top center) fires on the Highlanders (top right), getting a few hits.
Back on the left, the British Rifles (bottom left) and Foot Guards (bottom center) both fire on the 2nd Ligne (top center, with guns behind them and Union Brigade to the left), getting six hits (total).
Just off camera to top right, the French Grenadiers leave the table and the Light Cavalry again stand fast.
The Highlanders return fire on the French 3rd Ligne, getting three more hits.
Thus ends turn 3. But turn 4 starts very fortuitously for the French...
The French are able to activate first, and so the guns launch another volley of canister into the British cavalry, and they suffer horrendous casualties (14 hits total; one more and they're gone). The French 2nd Ligne stands by at left.
And the Union Brigade has one more charge left in it, heaving into the French 2nd Ligne, leaving them with 14 total hits!
I made a mistake here: having failed to eliminate the French 2nd Ligne (top center right), the Union Brigade should have been forced to fall back six inches. In any case, the British 1st Foot (bottom center) poured fire into the 2nd Ligne, routing them!
This is getting ugly! It feels like both sides are on the ropes...
Back on the right, the 3rd Ligne (top left) launches a terrible volley into the beleaguered, isolated Highlanders, for a total of nine hits (though the 3rd Ligne has eight, I should be able to get my General over there to rally some hits off before they are eliminated). The French General moves to support the 3rd Ligne, looking to help them and put some distance between himself and the Brits in the west.
And now is the time for my reserve: the French Light Cavalry storm into the Union Brigade, easily routing them.
But the British react quickly, pushing the Rifles to the ford (far left) while the Foot Guards (bottom left) pour fire into the Light Cavalry (top right, protecting the guns), getting five hits on them.
On the right, the Highlanders continue their firefight with the 3rd Ligne, putting three more hits on them (11 total).
Turn 4 ends, and turn 5 again starts well for the French.
The French artillery (top right) activates first, pivoting to catch the British Rifles (top left) in the midst of crossing the ford, and mowing them down with more canister!
But at this point it, with no French infantry left but the 3rd Ligne in Trois Bras (off camera to bottom right), the French artillery commander decides it's a good time to displace rearward. At bottom left you can see the explosion where the Rifles were eliminated, and at center you can see the smoke from the cannon fire, with the French artillery at top right, climbing Mont Vert.
But then the British Foot Guards (bottom left) and 1st Foot (bottom center) open a hellacious fire on the French Light Cavalry, scoring many hits. But, once again, the French are incredibly fortunate: the total hits scored on the Light Cav now stands at 14, one short of eliminating them. I guess I know which unit I'm going to retreat off the map for turn 8.
But then, at Trois Bras (far right), the 3rd Ligne does the same thing: it fires on the Highlanders (bottom right), scoring hits that take the British (Scottish) infantry to 14 hits. The French Light Cavalry fall back out of range, towards the north exit (top center left, from explosion at bottom left).
But the Highlanders are near death; as I said, without a General to pull hits there was no way they could survive a protracted shootout with the 3rd Ligne. The only hope the boy had there was charging into close combat with the KGL and Highlanders, General supporting. It still would only have had a 50-50 chance of success, but it least it was a chance. But I understand his hesitance in charging forward with several French infantry and artillery units pouring fire into them the whole way, and with the Light Cavalry staring menacingly down the road, just hoping the Brits would charge across the bridge.
The Highlanders return fire, and it is significant. Both units now stand at 14 hits, one from elimination. But my General is with the 3rd Ligne, and he immediately rallies them back down to 10 hits.
And with the first activation of Turn 6 (once again French luck held with the first activation, though there's no way the Highlanders were going to win as they could only inflict a max of three hits per turn), the 3rd Ligne fired and finished off the Highlander Brigade. In the west, the British Foot Guards and 1st Brigade of Foot fell back to the south to recuperate and reorganize.
Good grief, what a fight! The fight ended with me having only the 3rd Ligne, the Light Cavalry, and the artillery Grand Battery, while the British had only the Foot Guards and 1st Foot. But keep in mind, the Light Cavalry had only one hit to give, and needed to leave by turn 8, and the 3rd Ligne or Artillery would have had to leave on Turn 12. We could have played on, but there's no way, even with me having to take two units off the table, that realistically he could have won: I would have been forced to leave Trois Bras, but he would have had to move across a lot of open ground to take the north exit, being pounded by my artillery the entire time, to include canister (causing double hits) in the last 12", and without a General to rally hits off. Not to mention, we like keeping it a little more realistic, not fighting to the death.
Honestly, I'm not sure he could have won that fight. I helped him by running my grenadiers off the table too early, which helped him in collapsing my left flank. I should have kept the grenadiers on the table, and used my cavalry earlier, then ran them off on Turn 4. Again, I think he should have charged the town with the KGL and Highlanders, and pushed more aggressively on the left to get across the river there. But that's easier said than done; it really sucks pushing your troops forward into the waiting guns. He may have lost, but he sure scared the hell out of me when he threw the Union Brigade at me, destroying the 1st and 2nd Ligne Brigades in quick fashion, and staring down my guns.
I hope you liked it; we're having a great time, and have already played the next fight, which I'm working on.
V/R,
Jack


Great AAR. His skills are developing nicely. I know I'd rather be defending with an extra artillery battery than attacking with an extra infantry unit. A fun game. Did it play out in an hour?
ReplyDeleteCheers, Andy
Andy,
DeleteYeah, the boy's getting good, and it's really just too cool to be able to play with him now. And hey, the arty didn't hurt ;)
The game was a blast and played out in about an hour and forty minutes. My little changes do cost some time, but the games have been fantastic.
V/R,
Jack
In some other of NT's rules (the Napoleonic book), when one side pushes through the enemy and exits a unit of heir board edge - the enemy automatically have to lose 2 on board units. that sort of ule would have been a good help to you.
ReplyDeleteNorm,
DeleteI think you mean would have helped the boy, which I'm not interested in ;)
That's an interesting concept; what's the thinking behind losing two units though? And in OHW you only have six units, so losing two units for an enemy exiting the board could be pretty catastrophic, particularly in this scenario where I had to exit three of my own units as it is.
I hope you liked the batrep, thanks for commenting.
V/R,
Jack
How is the kid liking the muskets and horsies?
ReplyDeleteHe's loving them. Who wouldn't? They're pretty, you get to shoot stuff up, and he still gets to charge me every chance he gets ;)
DeleteV/R,
Jack