All,
There lies a patch of earth, treasured for its natural resources. From mountains to savannas to emerald forest to pristine beaches, it is a land of two tribes: the Zambouli and the Jabalani. In early times they behaved as long lost brethren, but time passed and on came the Portuguese, then the French, and the Belgians, and the Dutch, before finally the British. And for more than 50 years the British reigned over the area, which they labelled "Prideland," which combined the Zambouli and Jabalani into one tribe. But these were not happy times; during the British rule the Zambouli and Jabalani forgot they were brothers, as each sought to curry favor with their colonial masters. The world moved on, and following the cataclysm of The Second World War, the time came for the British to take their leave of Prideland, to restore ownership to its native peoples, and this occurred on the second of May, 1946. Internal strife was rampant; during British rule the tribes were integrated and some members forcibly moved. As the British withdrew, violence broke out between the tribes, and a short but fierce war was fought. The result of this war was that Prideland was disintegrated, and in its place the Zambouli and the Jabalani formed new countries: Hakuna and Matata.
Hakuna and Matata cover roughly the same area and have roughly the same population numbers, though they are shaped very differently. Hakuna is roughly rectangular, with its back against the sea and separated by the Mashandane River in the east, while Matata is slender, curving to hug Hakuna from the sea in the north, along the river in the east, and to the mountains in the south, covering Hakuna on nearly three sides. Both are very well off, particularly relative to other African states, in terms of infrastructure, transportation, government, and economy. Blessed with bountiful natural resources, each has money to burn.
And burn it they are, though it is not without its problems on the world stage. You see, both Hakuna and Matata have but a singular strategic goal in the realm of geo-politics: the elimination of the opposing state, and the subjugation of its people. Though they began as brothers, centuries of foreign rule has begot a burning hatred between the Zambouli and Jabalani, one which can only be quenched by blood.
Militarily there was a fair bit of British kit left behind to the nominal government of Prideland. As that government evaporated in the heat of Zambouli-Jabalani conflict, through pure luck of geography Hakuna inherited the bulk of the military equipment. Left with but a few armored cars and aging fighter aircraft, Matata quickly began its search for a benefactor, and the Soviet Union and its client states welcomed them with open arms. Where France, the United Kingdom, and the United States didn't think backing Hakuna or Matata to be a good idea, the menace of global Communism meant they suddenly needed a counterbalance to Matata, and so a friendship was born in Hakuna as well.
It is now 3 March 1952, and the two countries prepare on the eve of war. Since the War of Independence in 1946, the two countries have refrained from all-out war, but there has remained a savage animosity between the two tribes, punctuated on a regular basis by strong outbursts of violence. The border areas are a veritable no-man's land, with air and ground patrols regularly clashing over 'contested' tracts of land. Each side regularly conducts nighttime incursions into the other's territory, stoking the embers of war with petty acts of retribution. This latest casus belli revolves around the ownership of an island in the Mashandane River; both sides dispatched government officials to argue and negotiate, with little progress made. As frustrations grew with the process, calls for war were made, and when it didn't occur locals on both sides of the border took matters into their own hands. One evening in late February, members of a local village ambushed the delegation from Matata as they returned to their side, sinking their boat and killing all aboard. That night Matata dispatched more than one hundred soldiers across the river, and the entire population of the offending village was massacred.
After several days of harried negotiations since, it has become clear war is the only answer...
Yes, that's right, it's time I entered the world of modern African Imagi-Nations. The campaign idea is very much inspired by IrishSerb's ongoing war between Uwanda and Mugabia, Kyote-John's Sultanate of Ifat, and the ever present Bongolesia. The use of the minis is inspired by Thaddeus' work, Bishnak's work, and some guy who's name I don't even know, but he runs the "Tinpot Revolutionary" blog and I just thought his singly-based 3mm stuff was cool as hell (Google "1/600 Canada at War Little Italy" to see what I'm talking about).
Campaign Plan:
My rather ambitious plan is to play out all the wars between Hakuna-Matata, approximately a dozen of them from 1952 to present. I will play against the elder of my two sons (soon to be seven years old, and already an old pro on the tabletop) using Ivan Sorensen's 5Core Company Command. The minis are 3mm from Pico Armor, though as we get further into the timeline I'll have to buy some aircraft Pico doesn't make from Tumbling Dice. The fights will be company-to battalion level, and each will be preceded by an air to air fight between fighter aircraft of each nation, with the winner of that battle having air support in the next ground battle. The rules for the air fights are a bit modified, but are from Pz8. The fights will be small, 2-4 aircraft per side.
I don't have a set length for each campaign, and I'm trying to figure out a limiter to judge when to end the campaign. These fights will be highly mechanized (no such thing as foot infantry), so I'm thinking the pride and joy of each army is their tank forces (each side has a regiment of tanks, 78 total). So what I'm thinking to do is track tank losses (and simply, no such thing as vehicle recovery. If it's knocked out in the game it's lost), and when one side reaches 'x' amount of tank losses that side sues for peace and that war is finished. I think it works conceptually, I'm just not sure where to set the bar.
Each fight will see each side have between nine and twelve tanks on the table, so if I set the number at 50, and a side lost 10 tanks per fight, the war would be over in five fights. I don't really know what's reasonable, what to expect, but I know I'd like each war to be about 8 or 10 fights, so I need to feel out what normal losses will be and go from there.
V/R,
Jack
Showing posts with label background. Show all posts
Showing posts with label background. Show all posts
Wednesday, August 3, 2016

Sunday, November 29, 2015
Cronistria Cries For Help, AKA, The Next Campaign
And Free Cuba responds! This is the scenario background for my next campaign in the Cuba Libre series. This will be a (an as yet undetermined number of) skirmish fights in a campaign to aid a foreign entity attempting to establish a democratic state, which is in the process of breaking away from Yugoslavia. The fight will be conducted in 20mm with individually-based figures from Elhiem; each fight will feature between 2 and 9 figures per side, and I have available exactly one vehicle, a Revell kit (which gave me fits) of a West German Fox, 6-wheeled armored car. The rules will be 5 Men in Normandy, the 5Core Skirmish variant.
Situation: the time is April 1990, and The Wall fell only five months ago, but the reverberations are being felt throughout the Soviet Union's sphere of influence. Yugoslavia, with a multitude of varying artificial and real nationalities, ethnic groups, and religions held together by the iron fist of Communism, is now being torn asunder. Suddenly, overnight, the world became aware of Serbs, Montenegrins, Bosniaks, Kosavars, Croats, Slovenians, Macedonians, etc... Into the ring another group threw its hat in the ring: the proud people of Cronistria.
Along with various other ethnic/religious groups, the Cronistrians have formally seceded and declared themselves a sovereign state. The territory is slightly smaller than the US state of Connecticut, with a population of approximately 650,000 persons. The territory is largely ripped from the Slovenes, with borders with Croatia, Italy, and the Adriatic. The terrain is supremely rural, forested, and mountainous, with the only real city being the capital of Miran (fictionaly, came up with from a random name generator).
The good news is that Cronistria is an ethnically and religiously homogeneous tract of land with no natural resources of note, so the Slovenians aren't particularly interested or troubled by the loss of territory (and they have their own problems in any case). The bad news is that Yugoslavia, really the Serb president Slobodan Milosevic, is very keen on maintaining the Federal Republic of Yugoslavia (FRY), and the very people of Cronistria, while seeing eye to eye on cultural and religious issues, are of two minds regarding the system of governence. So the Cronistrians are fighting two wars: one to break away and become a state separate of the FRY, and one to decide the path of the nation.
Declaring independence was the easy part; immediately the Serb president began threatening the life of the fledgling nation, and shortly thereafter it became obvious there were two Cronistrias: one dedicated to the freedoms of a constitutional republic and its free-market underpinnings, the other still grasping to the cold yet familiar trappings of communism. Previously a semi-autonomous province, the local government was swiftly cast aside by the commander of the National Guard, the hard-line communist General Ambroz Zlatan. The fact Zlatan commanded roughly a brigade of troops made him the de facto leader of Conistria. But many in the country aspired to something greater, or at least to something different, and they came to be led by a former FRY Navy officer (but ethnic Cronistrian), Andraz Gregor, and so Gregor and Zlatan immediately found themselves at odds, and it quickly became apparent that only a military solution would suffice to decide the matter. Though many argued the two factions should join together in order to deal with the Yugoslavian issue, as these things often go, passions ran hot on both sides of the aisle and the prospect of cooperation disappeared amidst shouted threats.
We must also deal with the issue of the FRY Army; the six constituent socialist republics (Serbia, Slovenia, Croatia, Macedonia, Montenegro, and Bosnia/Herzegovina), as well as several of the autonomous/semi-autonomous regions/provinces maintained their own militaries, commonly referred to as National Guard (in Western parlance, and please keep in mind I'm making most of this up just to fit my scenario needs), while also being levied to provide troops for the FRY military. The FRY Army has a barracks in Miran, and several outposts across Cronstria, for a total of approximately 2000 troops. But, owing to the fact the FRY is rapidly dissolving morale is low and there have been many desertions as FRY soldiers return to their homes to fight for independence, or, in the case of Serbians, to fight to keep the country together. But a great many Serbians in the FRY military see it as their duty to remain at their posts, and substantial numbers of other ethnic groups do as well, for various factors such as loyalty to Yugloslavia, fear of the unknown, simply needing a job, etc...
So the overall situation is that Cronistria has seceded from the FRY. The Cronistrians find themselves looking at armed conflict between Communists led by General Ambroz Zlatan and Democrats led by Andraz Gregor, with both having to deal with FRY and Serbian attempts to reign them in by force. Here is the ledger:
Cronistrian Communists: (led by General Ambroz Zlatan)

Cronistrian National Guard (Cro NG, ~3000 men, led by Brigadier Dragomir Jadranko)

Cronistrian People's Army (CPA, ~1500 men, led by "Colonel" Anej Urh)

FRY Army in Cronistria:
13th Infantry Regiment (~1200 men, led by Colonel Nikola Valter)

Serbians en route to Cronistria:
4th Special Forces Battalion (~400 men, known as Damjanovic's Tigers, led by Major Mirko Damjanovic)

versus the Cronistrian Democrats (led by Andraz Gregor)

Cronistrian Democratic Militia (CDM, ~2500 men, led by former FRY General Miroslav Denis)
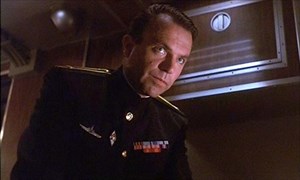
Andraz Gregor appeared before the United Nations Assembly to seek assistance from the freedom and peace-loving peoples of the world, and was ignored. Except for Free Cuba; El Presidente, Jericho Waraldonez, believes it is Free Cuba's destiny to stand with freedom loving people in peril, no matter where, answers the call and provides promises of support. But Free Cuba is not yet a world power, and so they're offerings are humble, but President Waraldonez meets with his Minister of Defense: Generalissimo Cledado Estavante, and they decide to deploy a team of special operations soldiers.
The Cuban Liberation Expeditionary Force prepares to deploy Lieutenant Trojas' Operational Detachment Alpha 626 of Major Talamantes' 10th Special Forces Group. Lt Trojas is a veteran of the Campaign for Liberation, decorated with the Cruz Servicio Distinguido. Due to operational requirements/restrictions, Lt Trojas' entire ODA will not be deployed in country. Lt Trojas will a detachment of 20 soldiers into Cronistria (ODA 626-), with another detachment standing by (covertly) in Italy to reinforce (ODA 626 Forward), and the remainder in Cuba on 72-hours notice (ODA 626 Rear).
Mission: conduct Unconventional Warfare activities to ensure the survival of the Cronistrian state and its governance in accordance with Free Cuban principles, i.e., a western-style democracy.
Execution:
Phase I:
Forward deploy to a covert location in Italy
Stage
Establish Liaison
Conduct Reconnaissance
Phase II:
Infiltrate operational area
Affect link up with CDM
Establish communications
Establish life support systems
Conduct route reconnaissance/area familiarization
Phase III:
Infiltrate echelon B personnel
Conduct foreign internal defense training (echelon B)
Conduct Unconventional Warfare with CDM (echelon A) and Direct Action missions in order to defeat Serb SF, nullify FRY, and eliminate Cro NG/CPA (echelon A)
Phase IV:
Exfltrate to covert location in Italy
Redeploy
The campaign will pick up with Step 3 of Phase III, UCW and Direct Action to knock out the Serb "Tigers" and Cronistrian Commies, and to keep the local FRY elements at bay. Echelon B is part of ODA 626, but they are there only to train, not to fight. Not realistic, but I didn't want to get bogged down with 'how are these 20 guys fighting AND training all these CDM troops?' So I've got unnamed guys doing training behind the scenes, while the twenty guys I follow (plus reinforcements from Italy, i.e., 626-Fwd, when I get guys killed and wounded) will do all the fighting.
For those familiar with the five-paragraph operations order, please forgive me as I'll be skipping the the rest, just wanted to set the table for the campaign. Additionally, here's my disclaimer: on the political front, I don't care. This is not a political statement, and I have nothing against anyone on any side in the Balkans, I just wanted an interesting backstory to my campaign. Regarding historical accuracy, I only care a little bit. That is, I've made up a country, have purposefully not nailed down its exact geo-location, have mixed around certain timeline and political/military facts to meet my needs (mostly to simplify). This was done because I'm a wargamer, not a Balkans specialist, I just want to play games in a semi-plausible environment.
Games coming right up!
V/R,
Jack
Situation: the time is April 1990, and The Wall fell only five months ago, but the reverberations are being felt throughout the Soviet Union's sphere of influence. Yugoslavia, with a multitude of varying artificial and real nationalities, ethnic groups, and religions held together by the iron fist of Communism, is now being torn asunder. Suddenly, overnight, the world became aware of Serbs, Montenegrins, Bosniaks, Kosavars, Croats, Slovenians, Macedonians, etc... Into the ring another group threw its hat in the ring: the proud people of Cronistria.
Along with various other ethnic/religious groups, the Cronistrians have formally seceded and declared themselves a sovereign state. The territory is slightly smaller than the US state of Connecticut, with a population of approximately 650,000 persons. The territory is largely ripped from the Slovenes, with borders with Croatia, Italy, and the Adriatic. The terrain is supremely rural, forested, and mountainous, with the only real city being the capital of Miran (fictionaly, came up with from a random name generator).
The good news is that Cronistria is an ethnically and religiously homogeneous tract of land with no natural resources of note, so the Slovenians aren't particularly interested or troubled by the loss of territory (and they have their own problems in any case). The bad news is that Yugoslavia, really the Serb president Slobodan Milosevic, is very keen on maintaining the Federal Republic of Yugoslavia (FRY), and the very people of Cronistria, while seeing eye to eye on cultural and religious issues, are of two minds regarding the system of governence. So the Cronistrians are fighting two wars: one to break away and become a state separate of the FRY, and one to decide the path of the nation.
Declaring independence was the easy part; immediately the Serb president began threatening the life of the fledgling nation, and shortly thereafter it became obvious there were two Cronistrias: one dedicated to the freedoms of a constitutional republic and its free-market underpinnings, the other still grasping to the cold yet familiar trappings of communism. Previously a semi-autonomous province, the local government was swiftly cast aside by the commander of the National Guard, the hard-line communist General Ambroz Zlatan. The fact Zlatan commanded roughly a brigade of troops made him the de facto leader of Conistria. But many in the country aspired to something greater, or at least to something different, and they came to be led by a former FRY Navy officer (but ethnic Cronistrian), Andraz Gregor, and so Gregor and Zlatan immediately found themselves at odds, and it quickly became apparent that only a military solution would suffice to decide the matter. Though many argued the two factions should join together in order to deal with the Yugoslavian issue, as these things often go, passions ran hot on both sides of the aisle and the prospect of cooperation disappeared amidst shouted threats.
We must also deal with the issue of the FRY Army; the six constituent socialist republics (Serbia, Slovenia, Croatia, Macedonia, Montenegro, and Bosnia/Herzegovina), as well as several of the autonomous/semi-autonomous regions/provinces maintained their own militaries, commonly referred to as National Guard (in Western parlance, and please keep in mind I'm making most of this up just to fit my scenario needs), while also being levied to provide troops for the FRY military. The FRY Army has a barracks in Miran, and several outposts across Cronstria, for a total of approximately 2000 troops. But, owing to the fact the FRY is rapidly dissolving morale is low and there have been many desertions as FRY soldiers return to their homes to fight for independence, or, in the case of Serbians, to fight to keep the country together. But a great many Serbians in the FRY military see it as their duty to remain at their posts, and substantial numbers of other ethnic groups do as well, for various factors such as loyalty to Yugloslavia, fear of the unknown, simply needing a job, etc...
So the overall situation is that Cronistria has seceded from the FRY. The Cronistrians find themselves looking at armed conflict between Communists led by General Ambroz Zlatan and Democrats led by Andraz Gregor, with both having to deal with FRY and Serbian attempts to reign them in by force. Here is the ledger:
Cronistrian Communists: (led by General Ambroz Zlatan)
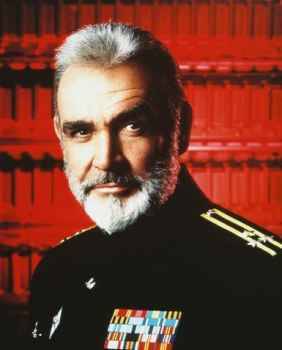
Cronistrian National Guard (Cro NG, ~3000 men, led by Brigadier Dragomir Jadranko)

Cronistrian People's Army (CPA, ~1500 men, led by "Colonel" Anej Urh)

FRY Army in Cronistria:
13th Infantry Regiment (~1200 men, led by Colonel Nikola Valter)

Serbians en route to Cronistria:
4th Special Forces Battalion (~400 men, known as Damjanovic's Tigers, led by Major Mirko Damjanovic)

versus the Cronistrian Democrats (led by Andraz Gregor)

Cronistrian Democratic Militia (CDM, ~2500 men, led by former FRY General Miroslav Denis)
Andraz Gregor appeared before the United Nations Assembly to seek assistance from the freedom and peace-loving peoples of the world, and was ignored. Except for Free Cuba; El Presidente, Jericho Waraldonez, believes it is Free Cuba's destiny to stand with freedom loving people in peril, no matter where, answers the call and provides promises of support. But Free Cuba is not yet a world power, and so they're offerings are humble, but President Waraldonez meets with his Minister of Defense: Generalissimo Cledado Estavante, and they decide to deploy a team of special operations soldiers.
The Cuban Liberation Expeditionary Force prepares to deploy Lieutenant Trojas' Operational Detachment Alpha 626 of Major Talamantes' 10th Special Forces Group. Lt Trojas is a veteran of the Campaign for Liberation, decorated with the Cruz Servicio Distinguido. Due to operational requirements/restrictions, Lt Trojas' entire ODA will not be deployed in country. Lt Trojas will a detachment of 20 soldiers into Cronistria (ODA 626-), with another detachment standing by (covertly) in Italy to reinforce (ODA 626 Forward), and the remainder in Cuba on 72-hours notice (ODA 626 Rear).
Mission: conduct Unconventional Warfare activities to ensure the survival of the Cronistrian state and its governance in accordance with Free Cuban principles, i.e., a western-style democracy.
Execution:
Phase I:
Forward deploy to a covert location in Italy
Stage
Establish Liaison
Conduct Reconnaissance
Phase II:
Infiltrate operational area
Affect link up with CDM
Establish communications
Establish life support systems
Conduct route reconnaissance/area familiarization
Phase III:
Infiltrate echelon B personnel
Conduct foreign internal defense training (echelon B)
Conduct Unconventional Warfare with CDM (echelon A) and Direct Action missions in order to defeat Serb SF, nullify FRY, and eliminate Cro NG/CPA (echelon A)
Phase IV:
Exfltrate to covert location in Italy
Redeploy
The campaign will pick up with Step 3 of Phase III, UCW and Direct Action to knock out the Serb "Tigers" and Cronistrian Commies, and to keep the local FRY elements at bay. Echelon B is part of ODA 626, but they are there only to train, not to fight. Not realistic, but I didn't want to get bogged down with 'how are these 20 guys fighting AND training all these CDM troops?' So I've got unnamed guys doing training behind the scenes, while the twenty guys I follow (plus reinforcements from Italy, i.e., 626-Fwd, when I get guys killed and wounded) will do all the fighting.
For those familiar with the five-paragraph operations order, please forgive me as I'll be skipping the the rest, just wanted to set the table for the campaign. Additionally, here's my disclaimer: on the political front, I don't care. This is not a political statement, and I have nothing against anyone on any side in the Balkans, I just wanted an interesting backstory to my campaign. Regarding historical accuracy, I only care a little bit. That is, I've made up a country, have purposefully not nailed down its exact geo-location, have mixed around certain timeline and political/military facts to meet my needs (mostly to simplify). This was done because I'm a wargamer, not a Balkans specialist, I just want to play games in a semi-plausible environment.
Games coming right up!
V/R,
Jack
Friday, November 27, 2015
Cuba Liberation Epilogue
All,
This is to put a wrap on Cuba Libre's Campaign for Liberation and set the stage for the next campaign.
The campaign lasted from 1 Feb 1990 to 5 Feb 1990, and comprised thirty-two tactically significant engagements, thirty of which were company-sized, and two which were platoon-sized raids on high value targets (the former conducted in 10mm with multi-based stands and individual vehicles, the latter with individually based 15mm figures). In those fights, the Cuban Liberation Army racked up an impressive record, with 24 wins, three losses, and five draws.
Total losses for the campaign:
CLA Regime
Casualties 570 865
POW/EPW 10 240
Tanks 8 18
APC 4 10
Armored Car 1 4
SP Gun 0 1
Light Vehicle 1 1
Helicopters 1 0
Fighter Aircraft ** **
**I shamefully admit I have yet to play out the air-to air portion of the campaign, which obviously has no impact on the group portion. In any case, my plan is for the CLA to have an air force of a squadron or two of F-4 Phantoms, and for them to have a number of engagements with Regime MiG-21s. I just need to get around to it... Once I do I'll come back and update the stats here.
The campaign ended with daring Special Operations raids which captured El Presidente and eliminated the last holdover, hard line regime general. While regime holdovers remain, they have fled Cuba for other locations (which will be dealt with in future campaigns). While the CLA spread out across the island to mop up, the Free Cuba Government in Exile (FCGE) was flown in and installed as the interim government. On 1 April 1990, the island nation announced itself to the world as the new sovereign nation of Free Cuba, and held its first free elections of the new era. The former commanding general of the Cuban Liberation Army, Generalissimo Jerico Waraldonez, was elected Free Cuba's first president, and the nation was immediately recognized by the US, UK, Australia, Canada, and New Zealand, rapidly followed by Israel, France, Germany, and Italy, and then the UN.
The island nation vowed to never again allow a despot to rule over it, and so a republican constitution was quickly ratified in order to combat that potentiality. Additionally, it was decided to form a strong military for self defense, governed by civilian leadership. But the Free Cuban state was scarred by so many years of dictatorial rule, and resolved to aid free nations under attack, and peoples yearning to be free, wherever and however it could. To that end, the CLA and the regime military was dissolved, and in its place the Free Cuban military was created. The vast majority of the Free Cuban military comprised the CNDF, or Cuban National Defense Force, charged with safeguarding the homeland from foreign aggression. But a sizable portion was dedicated to that lofty goal of aiding freedom-loving people worldwide; led exclusively by former members of the CLA, this new entity was known as the Cuban Liberation Expeditionary Force (CLEF). Based in Free Cuba, it is prepared for worldwide deployment at the prerogative of the Free Cuban government, to protect the weak, to free the oppressed, and to ensure freedom's light is never extinguished (cheesy, I know, but I'm having fun). The CLEF table of organization will come out in a separate post; from now on there will be a master OOB, and a campaign specific OOB (i.e., showing only the units taking part in a specific campaign, as the entire CLEF will never be deployed to one location). And it's entirely possible that I end up running separate campaigns concurrently.
With regards to international relations, the government of Free Cuba is none to pleased with Venezuela, given the latter's attempts to prop up the regime by dispatching paratroopers. President Waraldonez signed a secret executive order stating his intent for the CLEF to conduct covert activities against the government of Venezuela.
One last aspect of the War of Liberation to deal with; early on, CLA Special Operations Forces were inserted into Havana to take over a radio station and broadcast propaganda messages to marshal local militias and alert the local populace to the CLA's arrival. A fierce firefight broke out, and the CLA troops found themselves in combat not only with soldiers of the regime, but also with members of Iran's Revolutionary Guards (IRGC). What they were doing in Havana is anyone's guess; interrogation of former regime officials revealed only that Cuba enjoyed its status amongst the non-aligned nations of the world, as did the Islamic Republic, and so the two had relations. In any case, the CLA and IRGC definitely came to grips in Havana, with that battle being the only 'stand-up' fight between the two entities. However, following the collapse of the regime, Captain Fordesante's 1st Troop, 5th Tank Battalion was mopping up in Havana and came upon a fortified compound. CLA troopers moved ahead, attempting to defuse the situation, but it turned out the occupants of the compound didn't respond to communications in Spanish or English. Multiple attempts were made to make a parley, but things didn't work out as planned, and when a burst of small arms fire was received from the compound, wounding a CLA trooper, Fordesante brought his M-48s on line and leveled the building. The Islamic Republic was not amused and vowed to even the score.
And there we go, the stage is set; the War of Liberation was just a springboard to other campaigns. My intent is for Cuba Libre to provide me years of modern gaming material. I hope you like it.
V/R,
Jack
This is to put a wrap on Cuba Libre's Campaign for Liberation and set the stage for the next campaign.
The campaign lasted from 1 Feb 1990 to 5 Feb 1990, and comprised thirty-two tactically significant engagements, thirty of which were company-sized, and two which were platoon-sized raids on high value targets (the former conducted in 10mm with multi-based stands and individual vehicles, the latter with individually based 15mm figures). In those fights, the Cuban Liberation Army racked up an impressive record, with 24 wins, three losses, and five draws.
Total losses for the campaign:
CLA Regime
Casualties 570 865
POW/EPW 10 240
Tanks 8 18
APC 4 10
Armored Car 1 4
SP Gun 0 1
Light Vehicle 1 1
Helicopters 1 0
Fighter Aircraft ** **
**I shamefully admit I have yet to play out the air-to air portion of the campaign, which obviously has no impact on the group portion. In any case, my plan is for the CLA to have an air force of a squadron or two of F-4 Phantoms, and for them to have a number of engagements with Regime MiG-21s. I just need to get around to it... Once I do I'll come back and update the stats here.
The campaign ended with daring Special Operations raids which captured El Presidente and eliminated the last holdover, hard line regime general. While regime holdovers remain, they have fled Cuba for other locations (which will be dealt with in future campaigns). While the CLA spread out across the island to mop up, the Free Cuba Government in Exile (FCGE) was flown in and installed as the interim government. On 1 April 1990, the island nation announced itself to the world as the new sovereign nation of Free Cuba, and held its first free elections of the new era. The former commanding general of the Cuban Liberation Army, Generalissimo Jerico Waraldonez, was elected Free Cuba's first president, and the nation was immediately recognized by the US, UK, Australia, Canada, and New Zealand, rapidly followed by Israel, France, Germany, and Italy, and then the UN.
The island nation vowed to never again allow a despot to rule over it, and so a republican constitution was quickly ratified in order to combat that potentiality. Additionally, it was decided to form a strong military for self defense, governed by civilian leadership. But the Free Cuban state was scarred by so many years of dictatorial rule, and resolved to aid free nations under attack, and peoples yearning to be free, wherever and however it could. To that end, the CLA and the regime military was dissolved, and in its place the Free Cuban military was created. The vast majority of the Free Cuban military comprised the CNDF, or Cuban National Defense Force, charged with safeguarding the homeland from foreign aggression. But a sizable portion was dedicated to that lofty goal of aiding freedom-loving people worldwide; led exclusively by former members of the CLA, this new entity was known as the Cuban Liberation Expeditionary Force (CLEF). Based in Free Cuba, it is prepared for worldwide deployment at the prerogative of the Free Cuban government, to protect the weak, to free the oppressed, and to ensure freedom's light is never extinguished (cheesy, I know, but I'm having fun). The CLEF table of organization will come out in a separate post; from now on there will be a master OOB, and a campaign specific OOB (i.e., showing only the units taking part in a specific campaign, as the entire CLEF will never be deployed to one location). And it's entirely possible that I end up running separate campaigns concurrently.
With regards to international relations, the government of Free Cuba is none to pleased with Venezuela, given the latter's attempts to prop up the regime by dispatching paratroopers. President Waraldonez signed a secret executive order stating his intent for the CLEF to conduct covert activities against the government of Venezuela.
One last aspect of the War of Liberation to deal with; early on, CLA Special Operations Forces were inserted into Havana to take over a radio station and broadcast propaganda messages to marshal local militias and alert the local populace to the CLA's arrival. A fierce firefight broke out, and the CLA troops found themselves in combat not only with soldiers of the regime, but also with members of Iran's Revolutionary Guards (IRGC). What they were doing in Havana is anyone's guess; interrogation of former regime officials revealed only that Cuba enjoyed its status amongst the non-aligned nations of the world, as did the Islamic Republic, and so the two had relations. In any case, the CLA and IRGC definitely came to grips in Havana, with that battle being the only 'stand-up' fight between the two entities. However, following the collapse of the regime, Captain Fordesante's 1st Troop, 5th Tank Battalion was mopping up in Havana and came upon a fortified compound. CLA troopers moved ahead, attempting to defuse the situation, but it turned out the occupants of the compound didn't respond to communications in Spanish or English. Multiple attempts were made to make a parley, but things didn't work out as planned, and when a burst of small arms fire was received from the compound, wounding a CLA trooper, Fordesante brought his M-48s on line and leveled the building. The Islamic Republic was not amused and vowed to even the score.
And there we go, the stage is set; the War of Liberation was just a springboard to other campaigns. My intent is for Cuba Libre to provide me years of modern gaming material. I hope you like it.
V/R,
Jack
Sunday, December 22, 2013
Insurgent Commander
Insurgent
Commander
These are what I've been using for my French Foreign
Legion vs. Islamist Insurgents battles, four
of them now in the books. I've had a lot
of fun, and I think it's because these are a good, flexible toolset that can
easily be modified to do whatever you want them to do. So, take what you want from them, that's how
I do it anyway!
Please understand these are a quasi-offshoot of a set of
published rules, I didn't see a need to explain every last aspect. But, because these are a quasi-offshoot of
some published rules, please keep in mind they are heavily modified, and so
please don't ask why/point out that they are different than the published set;
I know, and because I wanted to do something other than what they were doing, I
changed it. Having said that, I love to talk
about rules, so if you have comments, suggestions, or wonder why I did
something (i.e., you don't understand what I was trying to accomplish), please
feel free to ask.
Command and Control
-Two types of elements, leader and maneuver (tank, truck,
rifle team, MG team, etc...)
-One side goes, then the other side goes.
-Roll for activation.
Each element rolls for activation separately, or a leader can activate a
group.
-Unlike regular "XXX Commander," each element
rolls for activation, not only leaders.
Leaders are pretty much there to unpin units, though they can add their
1 Fire Power (FP) dice to combat.
-Each element that is not pinned gets a 'free'
action. All subsequent actions must be rolled
for: French need 7+, Insurgent need 8+, goes up for each success. Leader in base contact adds +1 to roll. Double 6=2 actions, Double 1=blunder.
-During opponent's phase, unpinned elements may react one
time to an enemy action. Reactions
only occur by elements
that observe an enemy action, and they can only react to the enemy
that carried out the observed action (can't see one enemy
element move, then react by shooting
at another enemy element). The reaction occurs after the observed action
and before the next enemy action (if the enemy is on a "move and shoot"
action, you cannot react until the enemy has moved and shot). The only exception to this is if an element
is on Overwatch, in which case it will take its action at any point after it
has observed an enemy action (if an enemy is on a move and shoot action, the
Overwatch element may shoot as soon as it see the enemy move).
-The only caveat to this is if an element 'charges' into
close combat with an unpinned element that has not used its reaction. If this happens, the element closes but
receives reaction fire prior to close combat occurring.
-As previously stated, pinned elements cannot react. However, leaders in base contact may attempt
to rally the pinned element.
-Once the first player has finished issuing orders, the
second player issues orders, and the first player's unpinned elements may react
as above. Unless there is a very good
tactical reason for doing otherwise, the better quality troops (French) should go
first, and the lower quality troops (Insurgents) go second. Surprise attacks and ambushes by Insurgents
might dictate giving them the first phase.
Blunders
-When you take a command roll and roll double 1s, roll a
D6:
1 - A sniper takes out the closest friendly leader.
1 - A sniper takes out the closest friendly leader.
2 –An enemy mortar barrage comes down on the team, roll
FP of 5D6, hit on 4+
3 –Unit gets confused, fires full FP on furthest friendly
element in LOS.
4 –Unit gets confused, falls back two moves, pinned.
5 –Unit gets confused, takes two moves towards the
nearest enemy unit (even, or especially if it takes them into close combat),
pinned (if close combat, pinned after close combat, not before).
6 – Unit confused, stays in place pinned.
After any of the blunders are carried out, the element’s
activation is over. Leaders cannot
influence the unit that turn except to try to unpin it.
Actions
-Move and Shoot/Shoot and Move (make 1 move any
direction, fire to front 180, -1 to hit)
-Sprint (make two moves any direction)
-Shoot (fire to front 180)
-Load/Unload (get in/out of a vehicle; this is a full
action, can't shoot and move into a
vehicle)
-Go on Overwatch (element can stay on Overwatch for
multiple turns, until it uses its OW action, or until the player gives it
another order).
-Rally (action carried out by leaders to unpin an
element; there are no 'free' unpins, must make command roll (CR). Pinned elements unpin themselves by declaring
an order and passing a CR, i.e., they don't have to make a rally action to
unpin, then they can roll for more actions.
They don't get a 'free' action, so if they pass their command roll they
are unpinned.
Fire Combat
-Two types, AP and AT, which each element is rated for.
-With play on a 4' x 4' table, all elements can range the
entire table.
-Elements can engage any enemy element they have LOS to
in their forward 180. If target not in forward
180, element must move to face (usually a move and shoot action, -1 to hit).
-AP and AT combat rolls number of Firepower dice vs that
category of target. AP rolls saves with
value below, AT targets roll against armor value.
-To Hit:
AP
Saves: French Insurgent
Open: 4+
Open: 6 -
Obscured: 5+ Lt Cover 5+ 6
Hvy Obscured: 6 Hvy Cover 4+ 5
Flank/Rear: +1 *Save values different because of French body
armor
Close Range: +1
(10cm AP, 20CM AT)
*Armor saves are -1 to flank and -2 to top/rear. Aircraft saves are same regardless of aspect.
Type AP FP AT FP Strength Armor Notes
Leader 1 - 1 - None.
French Rifle 5 3* 5 - *AT vs armor '6' only.
***Can fire one AT volley per game (AT-4/M72 LAW), AT: 6,
make sure to track this***
Ins Rifle 5 4 5 - Fire AT or AP per action, not both
MMG (7.62) 6 3* 3 - *AT vs armor '6' only.
SMAW/Gustav 5* 4* 3 - *AP -1 to save against hard target
(wall,
bldg) only, AT vs 4-6 armor only.
ATGM 3* 7 3 - *Against hard target (wall, bldg)
only.
SAM 1 6* 3 - *AT vs aircraft only.
Technical RR 5* 4 - 6 *AP -1 to save
Technical HMG 4* 4* - 6 *AP -1 to save, AT vs 5-6 armor
only.
Panhard 5* 4 - 4+ *AP -1 to save
Range Rover - - - 6 None.
RR Mk-19 4 4* - 6 *AT vs armor 5-6 only.
Scorpion 4 3 - 4+ None.
AAV 4 4* - 5+ *AT vs 5-6 armor only.
HMMWV Mk19 4 4* - 5+ *AT vs 5-6 armor only.
HMMWV M2 4* 4* - 5+ *AP -1 to save, AT vs 5-6 arm only.
LAV 4 3 - 4+ None.
T-72 5* 5 - 3+ *AP -1 to save.
M-48 5* 5 - 3+ *AP -1 to save.
M-1 5* 6 - 2+ *AP -1 to save.
T-55 5* 4 - 3+ *AP -1 to save.
BMP-2 4 3 - 4+ None.
M113 M2 4 4* - 5+ *AP -1 to save, AT vs 5-6 arm only.
M113 TOW 3* 7 - 5+ *Against hard target (wall, bldg)
only.
M2/3 Bradley 4 7 - 4+ None.
Utility Helo 3 - - 6 None.
Attack Helo 5 6 - 5+ None.
F-16 'style' 5 4 - 6 None.
A-10 'style' 6 7 - 4+ None.
**In AP combat, when infantry elements have lost all
strenght points they are eliminated. As
infantry
elements lose SPs, they lose AP capability, i.e., Inf w/5
SP has 5 AP, 4 SP=4FP; MG w/3 SP has 6 AP FP 2 SP=4 FP, etc...
**In AP combat, infantry roll 1D6 per unsaved hit,
needing a 4+. If any fail, the element
is pinned.
**In AT combat, roll to hit, all hits are re-rolled to
save against the target's save value. If
there is one unsaved hit, roll 1D6 against the appropriate vehicle damage
table. If there are more than 1 unsaved
hit, add each unsaved hit after the first to the D6 total
(if you had three unsaved hits, roll 1D6 and add '2' to the result, apply to
the table).
Vehicle Damage
Charts
Civilian Vehicle (or equivalent, i.e., Land
Rover/Technical)
1 - Pinned
2, 3 - Immobilized
4, 5 - Vehicle Destroyed, passengers take one hit per SP
and roll for saves.
6+ - Vehicle Destroyed, all KIA.
Armored Vehicles (save value of 5+)
1 - Pinned
2 - Optics destroyed, -1 'to hit' for rest of fight
3 - Engine damage, move half speed for rest of fight
4 - Immobilized
5-6 Main armament KO'ed (can continue to happen until all
weapons are KO'ed).
7 - Vehicle Destroyed, passengers take one hit per SP and
roll for saves.
8+ - Vehicle Destroyed, all KIA.
Aircraft
1 - Pinned
2 - Optics destroyed, -1 'to hit' for rest of fight
3 - Main armament KO'ed (can continue to happen until all
weapons are KO'ed).
4, 5 - Forced to land, passengers take one hit per SP and
roll for saves.
6+ - Destroyed, no survivors.
**Every time a vehicle is hit and the result is greater
than 1 but less than destroyed, roll the D6= to number of unsaved hits, need 4+
each. If any fail, vehicle is pinned.
**If a vehicle has previously received damage, then
receives the same damage again, add another damage marker, the point of which
is to show that for the remainder of the game the vehicle's CR is -1 (can
accumulate more than one).
**For immobilized/main gun KO vehicles, roll 1D6, need 4+
or crew bails.
Close Combat
-Close combat occurs when opposing elements come into
base contact with each other. You can
end up with multiple elements taking part in close combat, even though close
combat is carried out as soon as it occurs, i.e., as soon as two opposing
elements come into contact.
-I don’t mess around with supports or really any
modifiers, unless something just stand out as so different that it absolutely
has to be accounted for. For example, I
don’t give defenders in an open-topped, sandbagged emplacement any bonus; I
figure the attacker has gotten close enough to negate that advantage, the point
of which was to protect them from fire so they could keep the enemy at length
with their own weapons. Having said
that, I’d probably give defenders in an enclosed, concrete bunker some sort of
bonus, because the attacker is not inside, he’s sticking muzzles through vision
slits, etc… Having said that, you could
say neither say gets a bonus, as the defender can’t really get at the attacker
either, so there we are.
-The only modifier I solidly support is one for pinned
elements. If an element is pinned, it’s
-2 ‘to hit,’ i.e., it doesn’t hit on 2+, it hits on 4+.
-Whether it’s one element vs one element, or five vs
three, etc…, if it’s one big fight, calculate the whole FP for the both sides,
roll the dice, count up the hits, and split them as evenly as possible between
all the elements of the same side. Don’t
forget to roll for pins.
-For infantry, use their FP factor (to include the idea
of losing FPs as you lose SPs). Roll the
FP, hit on 2+ (yes, very bloody), no saves, allocate the hits and roll for
pins.
-If one side is eliminated, the close combat is
finished. If not, close combat will be
rolled up again every single time one of the involved elements uses an action
(free or CR).
-This goes on until someone is eliminated, there’s no
backing out.
-Good guys can’t shoot into close combat, bad guys can if
they want, though hits will be evenly split between the two sides.
-Nobody shoots out of close combat, or does anything else
but close combat, until one side is eliminated.
-In accordance with normal rules for activation, you can
have as many elements join the close combat as you like.
-I don’t really run into it often, but if you want to go
close combat between infantry and a vehicle, have at it. Use the infantry’s value as above, use the
vehicle’s AP value (if it doesn’t have one, use ‘1’). Roll against the infantry as above, for vehicles roll saves as follows:
Civilian-style vehicles, jeeps: 6
APCs, open-topped AFVs: 5
Tanks: 4
Take care of unsaved hits on the vehicle in accordance
with the AT procedures (roll on the vehicle damage chart).
-There is no vehicle vs. vehicle close combat.
-For that matter, there’s no air to air combat rules,
either (though this should probably be someplace else).
Movement
-A single move for infantry is 10cm. (Truth be told, I
use popsicle sticks, just lay it down and that's a single move)
-A single move for vehicles is 20cm. (Two popsicle sticks)
-Wheeled vehicles get another single move if they start
and end on a road.
-Aircraft can move from off-board to anywhere on the
board in one move action. Helos can stay
there, fixed wing must move off the table next move. This creates quite a tactical
dilemma: Your A-10 starts off-table, and just like every other element, it gets a free action and has
to roll for additional actions. So, the
question is, do you use a "move and shoot" action, with its -1 to hit
modifier, or do you use the free action to move to the target, then try to roll
for a shoot action? If you fail, next
turn your only allowable action is to leave the table. I'll say it again: fixed wing A/C on the
table must use their 'free' action to leave.
-Fixed wing A/C may not react, but helos can.
-Helos taking off spend one action to get into the air,
then another to move. Helos landing move
to where they want to land, then spend an action to sit down. I will say that quite often I will let troops
fast-rope/rappel out of helos, but this often times leaves your helo very
vulnerable to AA fire.
-With regard to passengers (both helo and ground
vehicle), I go back and forth about who can give the order to unload; I really
don't have a problem with the vehicle giving the order, but I would say that,
if it fails, the infantry can't use their actions to unload, meaning their
trapped. Again, it's a tactical dilemma
(to me the point of rules is to force you to make decisions): your helo uses
its free action to move on table, and it goes to the LZ. Now you can make one CR to fast-rope the
troops down. If you succeed, you can
have the helo make another CR to leave the table (and dodge AA fire), while the
troops are now on the ground and can use their 'free' action to do whatever they
like, and make CRs after that. But, if
the helo fails, the troops are stuck in the bird. Next turn (or even as a reaction) the helo
can fast-rope the troops down, then make a CR to leave the table. The benefit to landing is, if you land in
dead
ground, there aren't a bunch of insurgents with RPGs
slobbering about knocking off one of your helos.
Terrain
-I don't do too much with terrain regarding effects on
movement. Basically I have three
categories:
1. Open, no problems
2. Impassable, can't go there (can be different for
infantry and vehicles)
3. Difficult: an element moves to the terrain and must
stop there, can pass with another action.
For example:
With a shallow canal, I will let infantry move to it and
halt, next action puts them on the other side, next
action lets them move away, vehicles can't cross.
A river ford, infantry and vehicles move to it and stop,
next move lets them cross and move away.
A wall, infantry move to it and stop, next move lets them
cross and move away, wheeled vehicles can't traverse, tracked vehicles handle
as infantry, but remove a section of the wall.
-With regards to fire combat, I kinda handle like this:
*Open is open, 4+ to hit and no save (not counting body
armor)
*There are things that obscure, there are things that
provide cover, and there are things that provide both.
I'm real flexible like these, and don't use hard and fast
rules, I try to look at the situation (Lardie's style).
-So, infantry firing small arms at enemy in a small,
thick building might look like '6' to hit (hvy obscure),
4+ to save (hvy cover).
But a tank firing at that same target with a 105mm gun might look like
4+ to hit (all he's got to do is hit the building), and 5+ to save (it's hvy
cover, but if that 105mm round hits the bldg there's gonna be trouble. A crop field might give a 6 (hvy obscure) to
hit, but treated as 'open' for save (corn doesn't stop many bullets).
-With trees I go through the same calculus; some clumps
can be so thick it blocks LOS, a little less gives a hvy obscure, all the way
to an orchard with evenly spaced trees and the enemy looking straight down an
aisle might be treated as in the open for 'to hit' and save.
-Don't forget to think of vehicles in terms of being
obscured or not as well, for the 'to hit' portion. That's the point of going hull-down (heavy
obscure, hit on 6). However, you will
still use the vehicle's armor value for the save.
Garnish
Solo: I play
most of my games solo, and sometimes, for the sake of speed, I make what I
believe is the most logical decision. But there are plenty of times when it's
not clear, or I want to make sure I'm not unduly influencing, or I want to give
an opportunity for something unexpected to happen, so I use a 'decision
matrix." I use a D10 thusly:
1-3 = Most dangerous course of action.
3-9 = Most likely course of action.
10 = Goofiest, craziest, dumbest, most different course
of action.
Example: An enemy rifle team is sitting dug-in, with two
of my rifle teams not far from it, and one of my tanks behind them.
I would probably set it up like this:
Most likely is, the enemy team stays in its hole and
fires its weapons at my rifle teams.
Most dangerous is, the enemy moves from its holes (hvy
cover) to its right, behind lt cover, but then takes an AT shot at the flank of
my tank. This assumes my rifle teams
can't just gun them down as soon as they move.
And for folks thinking this should be 'most likely,' I disagree, must
guys don't want to move with enemy nearby, unless it's backwards.
Goofiest/craziest/etc... could be, they get heroic and
decide to leave the cover of their holes and charge into close combat with my
rifle teams; or, they're in a decent position, but get a little flustered and
decide to bug out, that is, leave the holes by falling back out of LOS to my
units. The key is to figure out your three options before you roll, and stick
to it!
Casualties: A
feature of modern warfare is that Western armies are quite concerned with the
proper, immediate treatment of their casualties. So, what I like to do is, when an element is
eliminated, I place a casualty marker in its place. That casualty then has to be retrieved and
evacuated, either by getting it onto a helo and off-table or getting it into a ground
vehicle and off-table, though I suppose the CASEVAC point could be a secure
spot on table as well. The whole point is
that you can't just pretend like the elimination of one of your rifle teams, or
the conversion of one of your tanks into a heap of smoldering metal, doesn't
mean anything and can be ignored, as we so often do in our games.
I'm not doing to be macabre or make light of 'real-life'
casualties, I'm just trying to present another tactical challenge for the
player. And, if you're playing solo,
it's a challenge for the player, because the insurgents have no such
requirement! I haven't really gone down the path of "how many turns can
you let them sit there," or "what happens if the player just leaves them
there?" Ummm, I dunno, I hadn't
thought that far ahead. As with the rest
of these, if you don't like this particular rule, don't use it. If you do like it, then use it! I'll also point out that your SAM team
doesn't have a lot to do, not a lot of insurgent aircraft flying around, so I
like to designate them as the CASEVAC guys.
Civvies:
Again, not trying to get anyone riled up, just saying that they are a feature
of many modern battlefields, and generally this is a tactical challenge for
Western armies and not so much for insurgents.
So, I play that if the French have civvies in their line
of fire to insurgents, it’s treated as blocking LOS (it’s not a lot of fun
having to leave cover in order to clear your lane of fire).
Furthermore, sometimes you have to roll to see if you hit
them even if they’re not in your lane of fire.
If a friendly element fires at an enemy element, it scores no hits ( you
can play it no hits on the ‘to hit,’ which will happen occasionally, or no hits
after saves, which will bump up the likelihood of occurrence a bit), and there
are civvies 10cm to either side of your lane of fire, or still in your lane of
fire past the enemy element, roll your FP again, on a 5 or 6 (how generous do
you want to be with yourself?) you whack a civilian. Again, I don’t have any rules worked out for “how
does this effect who wins?” etc…, I just know it’s not good, and if it doesn’t
raise its ugly head in my game, it certainly will in my campaign.
I can tell you I’ve played a couple scenarios focused on
civvies that’s been a lot of fun!
Well, I hope that’s everything, and I hope you like them.
V/R,
Jack
Monday, October 14, 2013
All Americans, Non-Battle Period (14-20 July 1943)
All,
1st Platoon performed admirably in the first phase of the invasion of Sicily and was rewarded with six days out of the line to rest, refit, and bring in replacements. The platoon dropped onto an alien land in the dark of night, formed itself in the face of the enemy, and fought its way to the battalion staging area before moving out smartly to eliminate enemy AAA nearby. Following this the platoon led the assault on the German "Objective Y" defenses, taking Olive Tree Hill then turning it over to 2nd Platoon, which was badly mauled when elements of the German FallschirmPanzer Division Hermann Goering counterattacked Olive Tree Hill in its bid to reach the 1st Infantry Division's landing beaches. 1st Platoon immediately mounted a counterattack and ejected the Germans from the hill; however, the HGD soon returned, this time with Tiger tanks, but the platoon held fast. Again the Germans attacked, with the platoon first holding its ground but then being forced to abandon the position. 2Lt Shepherd and SFC Ford immediately reorganized the platoon and led them back up Olive Tree Hill, evicting the Germans, who fell back in disarray.
The next morning advanced elements of the 1st Inf Divsion arrived to relieve the hard-pressed paratroopers of the 82nd Airborne Division. Shepherd and Ford happily led their troops to the rear for some R&R, having no idea it would be almost a full week before their number would again be called. All of the platoon's walking wounded are healed up, and all the locally evacuated men returned. All replacements save one (a tough little Corporal named Keepers from 3rd Battalion) were 'boots' straight off the landing ships. Shepherd promoted several of the 'old hand' Privates were promoted to PFC (though not anyone that ran!).
Happenings:
-I finally rolled up Sgt Glenn's attributes: conformist, religion, and bold. He's a quiet, humble man, devoted to the Lord, family, and his country. He believes in being a part of something larger than himself, and, while he doesn't desire to die, his devoutness makes him unafraid of it and thus aggressive on the battlefield.
-Due to his personal valor, the performance of his squad and the platoon as a whole, and the friendship of Sgt Hume, Sgt Hurley has broken free of the depression that gripped him early on.
-SFC Ford (if you've forgotten, he's hedonistic, a drunk, reckless, but a helluva guy under fire) took the Squad Leaders out on the town (strictly against US Army standing orders), where they all became quite drunk and Ford gave his best attempt at causing an international incident when he was caught 'getting to know' the local mayor's significant other. This got all the way to the Bn Cmdr, who was none to pleased. Heads didn't roll, but stern warnings were dispensed.
-Two days later Ford again found himself drunk and this time, instead of mixing it up with a local female he decided on an altercation that got physical with a logistics officer from the 45th Infantry Division. Despite getting the better of the rear-echelon Captain, the BC was not impressed, and Ford finds himself once again occupying the rank of Staff Sergeant. BC has a neutral opinion of Ford.
-Due to increases in experience and performance in battle, the following progressions were made:
Lt Shepherd becomes a Level III leader
Lt Shepherd becomes a Level III leader
SSgt Ford becomes a Level III leader
Sgt Carlyle becomes a Level I leader
Sgt Hume becomes a Level II leader
Cpl Locke becomes a Level I leader
Sgt Hurley becomes a Level II leader
Cpl Keepers becomes a Level I leader
Sgt Glenn becomes a Level II leader
Cpl Pace becomes a Level I leader
The next phase of the battle sees the 82nd Airborne moving west along the coastal road towards Marsala, largely against inferior opposition, while the German frontline units pull back towards Messina at the northeast tip of the island. 1st Platoon is being brought back into the line to face off against flagging German and Italian opposition. Up next for the platoon: Card H, "Screen." Engineers will be off-board checking a substantial portion of road to determine if it can support an armored column. The platoon will have battalion 81mm mortars in support, an M-3 Stuart in support, and Sgt Lapidus' MMG in support, covering Sgt Austen's engineers. Also, the Lt has put it off a couple fights already, but his college chum, 1Lt Nickelson, has been begging to accompany Shepherd on a mission, and this seems to be as good as any.
V/R,
Jack
Saturday, September 28, 2013
Yet Another Project (82nd Airborne, Platoon Forward)
All,
So, it has been decided. I am moving ahead with a Platoon Forward campaign. I will label it "All American," and it will center on an airborne rifle platoon from 1943 to 1945 in the Mediterranean and Northwest European theaters. This will be done in 10mm with individually based figures (from Pendraken), using the modified KR-16 rules, and played solo in the context of Joe Legan's excellent "Platoon Forward" solo campaign system for troop and scenario development.
Here's the boys:

Here is the whole platoon, 39 red-blooded American boys looking to throw the Nazis out and come home to Sweet Suzy Rottencrotch. I am dealing with a dilemma though. I have a Platoon Commander, a Platoon Sergeant, a radio man, a two-man MMG team, a two-man 60mm mortar team, and a two-man bazooka team, and three 10-man rifle squads. My dilemma is whether to have the platoon as a PC, Plt Sgt, RTO, and 3 squads, with the MMG, mortar, and bazooka as company-level support that may or may not be attached (this would probably work better in Plt Fwd), or as I built them: a 39-man platoon (this gives me zero support options in Plt Fwd outside of vehicles).
I want to do the latter, but should probably do the former. My biggest concern is running into a tank and not having a bazooka, so maybe I'll do the former but with a bazooka as part of the HQ element. I think that's probably the way to go.
 Assuming I go with what I just outlined, here is the HQ element with Wpns Plt support. Starting at bottom left and working clockwise: 2-man MMG team, two-man 60mm mortar team, 2-man bazooka team, RTO, PC, and Plt Sgt.
 Same group from rear. PC has vertical stripe, Plt Sgt has horizontal stripe. Neither figure is carrying a weapon, but both will be handled as carrying an M-1 carbine.
 1st Squad, with Squad Leader with rifle team on left, and Assistant Squad Leader and BAR team on the right. Both teams are a mix of Thompsons, M-1 Garands, and M-1 Carbines (plus the BAR in the BAR team).
 2nd Squad, same way. I should mention that the majority of the figures are from Pendraken's US Airborne D-Day range, but I did use some guys from the US Airborne Ardennes range as well. I painted them all the same, but if you look closely you'll see a few greatcoats. Okay, I shouldn't have done it, but the D-Day range doesn't have any BARs or carbines, plus I wanted as many different poses as possible. You'll also see two different 'Mohawks' from the D-Day Pathfinders pack.
 3rd Squad. Gold bases are senior leaders (PC and Plt Sgt), silver bases are junior leaders (Squad Ldrs), yellow bases are SMGs, red bases are MGs (I did the BAR and the M-1919 w/A-gunner), blue bases are rifles, and dark gray bases are various specialty figures (RTO, mortar team, bazooka team).
Unit:
1st Platoon, Dog Company, 1st Battalion, 499th Parachute Infantry Regiment, 82nd Airborne Division
Campaigns:
Operation Husky, the Invasion of Sicily, 10 July 1943 to 17 August 1943.
Operation Avalanche, the Landing at Salerno, 13 September 1943 to 4 January 1944.
Operation Shingle, the Landing at Anzio, 22 January 1944 to 23 March 1944.
Operation Overlord, the Invasion of Normandy, 6 June 1944 to 13 July 1944.
Operation Market-Garden, the Invasion of Holland, 17 September 1944 to 25 September 1944.
Operation Wacht Am Rhein/Unternehmen Herbstnebe, the Battle of the Bulge, 16 December 1944 to February 10, 1945.
Operation Varsity, the Push into the Ruhr, 24 March 1945 to May 2, 1945.
Order of Battle:
10 July 1943 (Sicily)
HQ Element: Personality Motivation Combat Temp Backgr
Platoon Commander - 2Lt Jack Shepherd Conformist Family Even Average
Platoon Sergeant - SSgt Sawyer Ford Fanatic Hedonism Reckless
Radio/Telephone Operator - Cpl Daniel Farraday
Bazooka Gunner - Cpl Boone Carlyle
Bazooka Assistant - Pvt Able
1st Squad, Rifle Team:
Squad Leader - Sgt Desmond Hume Idealistic Revenge Reckless
Rifleman (kneel SMG) - PFC Baker
Rifleman (stand carbine) - Pvt Charleston
Rifleman (port Garand) - Pvt Delta
Rifleman (rush Garand) - Pvt Echo
1st Squad, BAR Team:
Assistant Squad Leader - Cpl John Locke
Automatic Rifleman - PFC Fox
Rifleman (crouch carbine) - Pvt George
Rifleman (fire Garand) - Pvt Hotel
Rifleman (port Garand) - Pvt India
2nd Squad, Rifle Team:
Squad Leader - Sgt Hurley Reyes Fickle Wealth Even
Rifleman (kneel Mohawk) - PFC Juliet
Rifleman (stand carbine) - Pvt King
Rifleman (crouching carbine) - Pvt Lima
Rifleman (port Garand) - Pvt Mike
2nd Squad, BAR Team:
Assistant Squad Leader - Cpl Sam Jarrah
Automatic Rifleman - PFC Nancy
Rifleman (rush Garand) - Pvt Oscar
Rifleman (fire Garand) - Pvt Papa
Rifleman (port Garand) - Pvt Quebec
3rd Squad, Rifle Team:
Squad Leader - Sgt Michael Dawson Corrupt Avarice Bold Rifleman (stand Mohawk) - PFC Romeo
Rifleman (stand SMG) - Pvt Sierra
Rifleman (stand carbine) - Pvt Tango
Rifleman (port Garand) - Pvt Uniform
3rd Squad, BAR Team:
Assistant Squad Leader - Cpl Charley Pace
Automatic Rifleman - PFC Victor
Rifleman (rush Garand) - Pvt Whiskey
Rifleman (crouch carbine) - Pvt Xavier
Rifleman (port Garand) - Pvt Zander
Weapons Platoon Support:
Medium Machine Gun Team:
Gunner - Cpl Frank Lapidus
A-Gunner - Pvt Apple
60mm Mortar Team:
Gunner - Cpl Richard Alpert
A-Gunner - Pvt Black
Regimental Support:
57mm Anti-Tank Gun (single, section, platoon)
Divisional Support
M4 Sherman (single, section, platoon)
So, it has been decided. I am moving ahead with a Platoon Forward campaign. I will label it "All American," and it will center on an airborne rifle platoon from 1943 to 1945 in the Mediterranean and Northwest European theaters. This will be done in 10mm with individually based figures (from Pendraken), using the modified KR-16 rules, and played solo in the context of Joe Legan's excellent "Platoon Forward" solo campaign system for troop and scenario development.
Here's the boys:

Here is the whole platoon, 39 red-blooded American boys looking to throw the Nazis out and come home to Sweet Suzy Rottencrotch. I am dealing with a dilemma though. I have a Platoon Commander, a Platoon Sergeant, a radio man, a two-man MMG team, a two-man 60mm mortar team, and a two-man bazooka team, and three 10-man rifle squads. My dilemma is whether to have the platoon as a PC, Plt Sgt, RTO, and 3 squads, with the MMG, mortar, and bazooka as company-level support that may or may not be attached (this would probably work better in Plt Fwd), or as I built them: a 39-man platoon (this gives me zero support options in Plt Fwd outside of vehicles).
I want to do the latter, but should probably do the former. My biggest concern is running into a tank and not having a bazooka, so maybe I'll do the former but with a bazooka as part of the HQ element. I think that's probably the way to go.


Unit:
1st Platoon, Dog Company, 1st Battalion, 499th Parachute Infantry Regiment, 82nd Airborne Division
Campaigns:
Operation Husky, the Invasion of Sicily, 10 July 1943 to 17 August 1943.
Operation Avalanche, the Landing at Salerno, 13 September 1943 to 4 January 1944.
Operation Shingle, the Landing at Anzio, 22 January 1944 to 23 March 1944.
Operation Overlord, the Invasion of Normandy, 6 June 1944 to 13 July 1944.
Operation Market-Garden, the Invasion of Holland, 17 September 1944 to 25 September 1944.
Operation Wacht Am Rhein/Unternehmen Herbstnebe, the Battle of the Bulge, 16 December 1944 to February 10, 1945.
Operation Varsity, the Push into the Ruhr, 24 March 1945 to May 2, 1945.
10 July 1943 (Sicily)
HQ Element: Personality Motivation Combat Temp Backgr
Platoon Commander - 2Lt Jack Shepherd Conformist Family Even Average
Platoon Sergeant - SSgt Sawyer Ford Fanatic Hedonism Reckless
Radio/Telephone Operator - Cpl Daniel Farraday
Bazooka Gunner - Cpl Boone Carlyle
Bazooka Assistant - Pvt Able
1st Squad, Rifle Team:
Squad Leader - Sgt Desmond Hume Idealistic Revenge Reckless
Rifleman (kneel SMG) - PFC Baker
Rifleman (stand carbine) - Pvt Charleston
Rifleman (port Garand) - Pvt Delta
Rifleman (rush Garand) - Pvt Echo
1st Squad, BAR Team:
Assistant Squad Leader - Cpl John Locke
Automatic Rifleman - PFC Fox
Rifleman (crouch carbine) - Pvt George
Rifleman (fire Garand) - Pvt Hotel
Rifleman (port Garand) - Pvt India
2nd Squad, Rifle Team:
Squad Leader - Sgt Hurley Reyes Fickle Wealth Even
Rifleman (kneel Mohawk) - PFC Juliet
Rifleman (stand carbine) - Pvt King
Rifleman (crouching carbine) - Pvt Lima
Rifleman (port Garand) - Pvt Mike
2nd Squad, BAR Team:
Assistant Squad Leader - Cpl Sam Jarrah
Automatic Rifleman - PFC Nancy
Rifleman (rush Garand) - Pvt Oscar
Rifleman (fire Garand) - Pvt Papa
Rifleman (port Garand) - Pvt Quebec
3rd Squad, Rifle Team:
Squad Leader - Sgt Michael Dawson Corrupt Avarice Bold Rifleman (stand Mohawk) - PFC Romeo
Rifleman (stand SMG) - Pvt Sierra
Rifleman (stand carbine) - Pvt Tango
Rifleman (port Garand) - Pvt Uniform
3rd Squad, BAR Team:
Assistant Squad Leader - Cpl Charley Pace
Automatic Rifleman - PFC Victor
Rifleman (rush Garand) - Pvt Whiskey
Rifleman (crouch carbine) - Pvt Xavier
Rifleman (port Garand) - Pvt Zander
Weapons Platoon Support:
Medium Machine Gun Team:
Gunner - Cpl Frank Lapidus
A-Gunner - Pvt Apple
60mm Mortar Team:
Gunner - Cpl Richard Alpert
A-Gunner - Pvt Black
Regimental Support:
57mm Anti-Tank Gun (single, section, platoon)
Divisional Support
M4 Sherman (single, section, platoon)
Wednesday, September 11, 2013
CLA Ground Forces Organization/Leadership
Here's the CLA Table of Organization:


Commander, C Co, 1st AB Inf: Capt DeNostro, awarded the Estrella de Bronce and Corazon Purpura, KIA (F30).

Sergeant Pena, Team 1, C Co, 1st AB Bn, awarded the Estrella de Bronce and Corazon Purpura (F30).


3rd Infantry Battalion, Commanding Officer: Colonel Malusio Galban


 Acting Commander, F Co, 4th Inf Bn: Lieutenant Proviso, decorated for valor with the Estrella de Bronce, Corazon Purpura (F26).

Sgt Espinale, Team 4, F Co, 4th Inf Bn, decorated for valor with the Estrella de Bronce, WIA, out for campaign (F26).


Sgt Guillardo, 1st Air Assault Co, 4th Inf Bn, awarded the Cruz Servicio Distinguido (F15).

Sgt Segovia, 1st Air Assault Co, 4th Inf Bn, decorated for valor with the Estrella de Bronce (F15).


5th Tank Battalion, Acting Commanding Officer: Captain Solar, decorated for valor with the Estrella de Plata (F23). Three tank kills (F23; T1 also got one). WIA (F23).


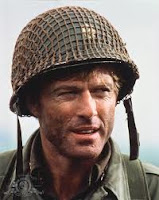


7th Infantry Battalion, Commanding Officer: Colonel Tomas Barnejesus, WIA F17.


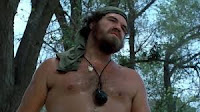 Commander, G Co, 7th Inf Bn: Captain Cubio


9th Popular Force Battalion, Commanding Officer: Binyamin Bustamante, awarded the Cruz Servicio Distinguido (F16). He was wounded in F16 and captured by the enemy.
 Acting Commander, 9th Popular Force Battalion: Captain Afflexio, awarded Cruz Servicio Distinguido and Corazon Purpura (F24), out for campaign.


Acting Commander, F Co, 9th PF Bn: Sgt Ordonez


 10th Popular Force Battalion, Commanding Officer: Colonel Willem Elias, decorated for valor with the Estrella de Bronce (F28).


Ladies and Gentlemen, I present the Commanding General of the Cuban Liberation Army:

Generalissimo Jerico Waraldonez

1st Airborne Infantry Battalion, Commanding Officer: Colonel Bartolo Lucastro, decorated F3: Estrella de Bronce. WIA F11, Out for Campaign

Acting Commanding Officer, 1st Airborne Infantry Battalion: Captain Olejandro

Commander, A Co, 1st AB Bn: Captain Banos

Acting Commander, B Co, 1st AB Bn: Sgt Villagrosa, decorated for valor (F11) with Estrella de Plata
Commander, C Co, 1st AB Inf: Capt DeNostro, awarded the Estrella de Bronce and Corazon Purpura, KIA (F30).
Sergeant Pena, Team 1, C Co, 1st AB Bn, awarded the Estrella de Bronce and Corazon Purpura (F30).

2nd Airborne Infantry Battalion, Commanding Officer: Colonel Salvino Carreno, WIA F4. Decorated for valor with the Estrella de Bronce (F20).

Commander, E Co, 2nd AB Inf Bn: Captain Halabrio, decorated F4, Estrella de Plata

Commander, F Co, 2nd AB Inf Bn: Captain Guerrero

Commander, G Co, 2nd AB Inf Bn: Captain Cuervesco, awarded the Medall de Honor (F14), dubbed "El Diablo de El Rincon"

Sergeant Trojas, Team 3, G Co, 2nd Airborne Battalion, awarded the Cruz Servicio Distinguido (F14).

3rd Infantry Battalion, Commanding Officer: Colonel Malusio Galban

Commander, 1st Marine Co, 3rd Inf Bn: Captain Benavides

Commander, B Co, 3rd Inf Bn: Captain Torrencio

Commander, C Co, 3rd Inf Bn: Capt Cruze, WIA (F23), out for campaign.

Acting Commander, C Co, 3rd Inf Bn: Lieutenant Muniz
Acting Commander, C Co, 3rd Inf Bn: Lieutenant Muniz
4th Infantry Battalion, Commanding Officer: Colonel Cledado Estavante, awarded the Medall de Honor (F15), dubbed "El Leon de El Sandino" Awarded the Estrella de Plata and Corazon Purpura (F26).

Commander, E Co, 4th Inf Bn: Captain Cannastria

Commander, F Co, 4th Inf Bn: Captain Chavez, decorated for valor with the Estrella de Plata, WIA, out for campaign (F26).
Sgt Espinale, Team 4, F Co, 4th Inf Bn, decorated for valor with the Estrella de Bronce, WIA, out for campaign (F26).


Commander, 1st Air Assault Co, 4th Inf Bn: Captain Bronchovio, decorated for valor with the Estrella de Bronce (F15).
Sgt Guillardo, 1st Air Assault Co, 4th Inf Bn, awarded the Cruz Servicio Distinguido (F15).
Sgt Segovia, 1st Air Assault Co, 4th Inf Bn, decorated for valor with the Estrella de Bronce (F15).
5th Tank Battalion, Commanding Officer: Colonel Miguel Colavantes, decorated for valor with the Estrella d Plata, KIA (F26).

5th Tank Battalion, Acting Commanding Officer: Captain Solar, decorated for valor with the Estrella de Plata (F23). Three tank kills (F23; T1 also got one). WIA (F23).

Commander, 1 Troop, 5th Tank Bn: Captain Fordesante, WIA (F26), WIA (F27), out for campaign. (1 TK, F27)


Acting Commander, 1 Troop, 5th Tank Bn: Sgt Barrientes
Acting Commander, 2 Troop, 5th Tank Bn: Sergeant Aguilera

Commander, 3 Troop, 5th Tank Bn: Captain Basilone (1 TK, F25)

6th Infantry Battalion, Commanding Officer: Colonel Ricardo Colvasquez, decorated F7: Estrella de Bronce.
Decorated F12: Cruz Servicio Distinguido
Decorated F12: Cruz Servicio Distinguido

Commander, A Co, 6th Inf Bn: Captain Pilar-soto

Commander, B Co, 6th Inf Bn: Captain Rolando
 Team 3, B Co, 6th Inf Bn: Sgt Madre-Animral, decorated with Estrella de Bronce for knocking out two enemy tanks (F25).

Commander, 2nd Marine Co, 6th Inf Bn: Captain Spirovales, decorated F7, Estrella de Plata


Sergeant Trevino, Team 3, 2ns Marine Company, 6th Infantry Battalion, awarded the CLA's highest honor for gallantry, the Medall de Honor, and meritoriously promoted to Lieutenant (F29).

7th Infantry Battalion, Commanding Officer: Colonel Tomas Barnejesus, WIA F17.
Commander, Co E, 7th Inf Bn: Captain Michoacana

Commander, 2nd Air Assault Co, 7th Inf Bn: Captain Wallestre, WIA F17.

8th Popular Force Battalion, Commanding Officer: Colonel Eugenio Habanera, decorated for valor (F13).

Commander, A Co, 8th PF Bn: Captain Welasquez

Commander, B Co, 8th PF Bn: Captain Muertosa

Commander, C Co, 8th PF Bn: Captain Talamantes, decorated for valor with the Estrella de Bronce (F19).

9th Popular Force Battalion, Commanding Officer: Binyamin Bustamante, awarded the Cruz Servicio Distinguido (F16). He was wounded in F16 and captured by the enemy.
Acting Commander, 9th Popular Force Battalion: Captain Afflexio, awarded Cruz Servicio Distinguido and Corazon Purpura (F24), out for campaign.
Acting Commander, 9th Popular Force Battalion: Captain Captain Elias (brother of Col Elias)

Acting Commander, E Co, 9th PF Bn: Sergeant Aponte

Acting Commander, E Co, 9th PF Bn: Sergeant Aponte
Commander, F Co, 9th PF Bn: Captain Ballesteros, KIA (F24).
Acting Commander, F Co, 9th PF Bn: Sgt Ordonez
F Co, Team 4: Sergeant Caballero, awarded Estrella de Plata (F24), Corazon Purpura (F24), out for campaign.
Acting Commander, G Co, 9th PF Bn: Sgt Huerta
10th Popular Force Battalion, Commanding Officer: Colonel Willem Elias, decorated for valor with the Estrella de Bronce (F28).
Commander, I Co, 10th PF Bn: Captain Ermera KIA F10
Acting Commander, I Co, 10th PF Bn, Sgt Deppinosa
Commander, K Co, 10th PF Bn, Captain Fulgencio, decorated for valor with the Cruz Servicio Distinguido (F28), WIA (F28).
Sergeant Soares, Team 5, K Company, 10th PF Bn, decorated for valor with the Estrella de Plata (F28).
Commander, L Co, 10th PF Bn: Captain Reynaldo

CLA Special Operations, Commanding Officer: Colonel Donalo Quilveras

Commander, A Squadron: Captain Stelosavo

Commander, B Squadron: Captain Villanueva, decorated for gallantry with the Estrella de Bronce and Corazon Purpura (F9, Out for Campaign).

Sgt Estevez, B Sqdn, decorated F1: Estrella de Bronce.


Commander, C Squadron: Captain Bosanova, awarded the Estrella de Bronce and Corazon Purpura (F31).

CLA Unconventional Warfare Group, Commanding Officer: Colonel Hector Huistrella, Decorated for valro with the Cruz Servicio Distinguido (F18). Decorated for valor with the Estrella de Bronce and Corazon Purpura (F22). Awarded the Corazon Purpura (F32).

Commander, A Co: Captain Kalabera; decorated for valor with the Estrella de Plata and Corazon Purpura (F22).

Commander, B Co: Captain Galban (son of Col Galban), awarded the Estrella de Bronce and Corazon Purpura, KIA (F32).

Commander, C Co: Captain Gonzalez, KIA F18.
Acting Commander, C Co: Sgt Gouveia, decorated with the Estrella de Plata and Corazon Purpura (F18).
Estrella de Plata
Cruz Servicio Distinguido
Medall de Honor
Corazon Purpura
Subscribe to:
Posts (Atom)