All,
Morning, 13 April 1941
Here we are, continuing Kampfgruppe Klink's campaign in Greece. The first battle saw Captain Freitag's 1st Schutzen Battlegroup take a key mountain crossroads manned by members of the British Royal Engineers supported by Armored Cavalry from New Zealand. The fight saw the Germans infantry nearly eliminate the Commonwealth battlegroup, which fell back in disarray. Captain Freitag pressed his advantage, immediately pursuing south down, where it ran into defensive positions manned by the remnants of the New Zealand 21st Infantry Battalion. 1st Schutzen then evicted the NZ 21st Inf Bn from its positions, forcing them to fall back. The third fight saw 1st Lt Ginter's 2nd Schutzen moving secure a crossing over the D3 bridge, forcing the 27th MG Battalion back. The fourth fight saw Major Bohm's 2nd Recce Battlegroup push back the Australian 2nd Battalion, 8th Infantry Regiment after some fierce fighting. The fifth battle saw Captain Freitag's beleaguered 1st Schutzen Battlegroup defend the B3 bridgehead against attacks by the British Rangers/9th King's Royal Rifle Corps, and the Royal Engineers/New Zealand Cavalry, pushing the former back and destroying the latter! The sixth battle saw Battlegroup Wehner (1st Recce) attack and destroy the Lee Force/Australian 2nd Battalion, 7th Infantry Regiment, though they suffered so many casualties they were in then combined with the 2nd Recce battlegroup. The seventh fight saw Lt Loeb's Panzers absolutely shellack the Allies' 4th Hussars, seeing the final defeat of Allied armored reserves, opening the road to the campaign objective of Servia, and unhinging the Allied defensive line. The eighth fight saw Col Klink lead the Panzer Battlegroup in a hard-fought victory that saw the Australian 2nd Battalion, 8th Infantry Regiment destroyed. Now we see Captain Freitag's 1st Schutzen Battlegroup attempting to fend off a spoiling attack by the British Rangers/9th King's Royal Rifle Corps, in an attempt to buy their comrades more time to withdraw from the German encirclement.

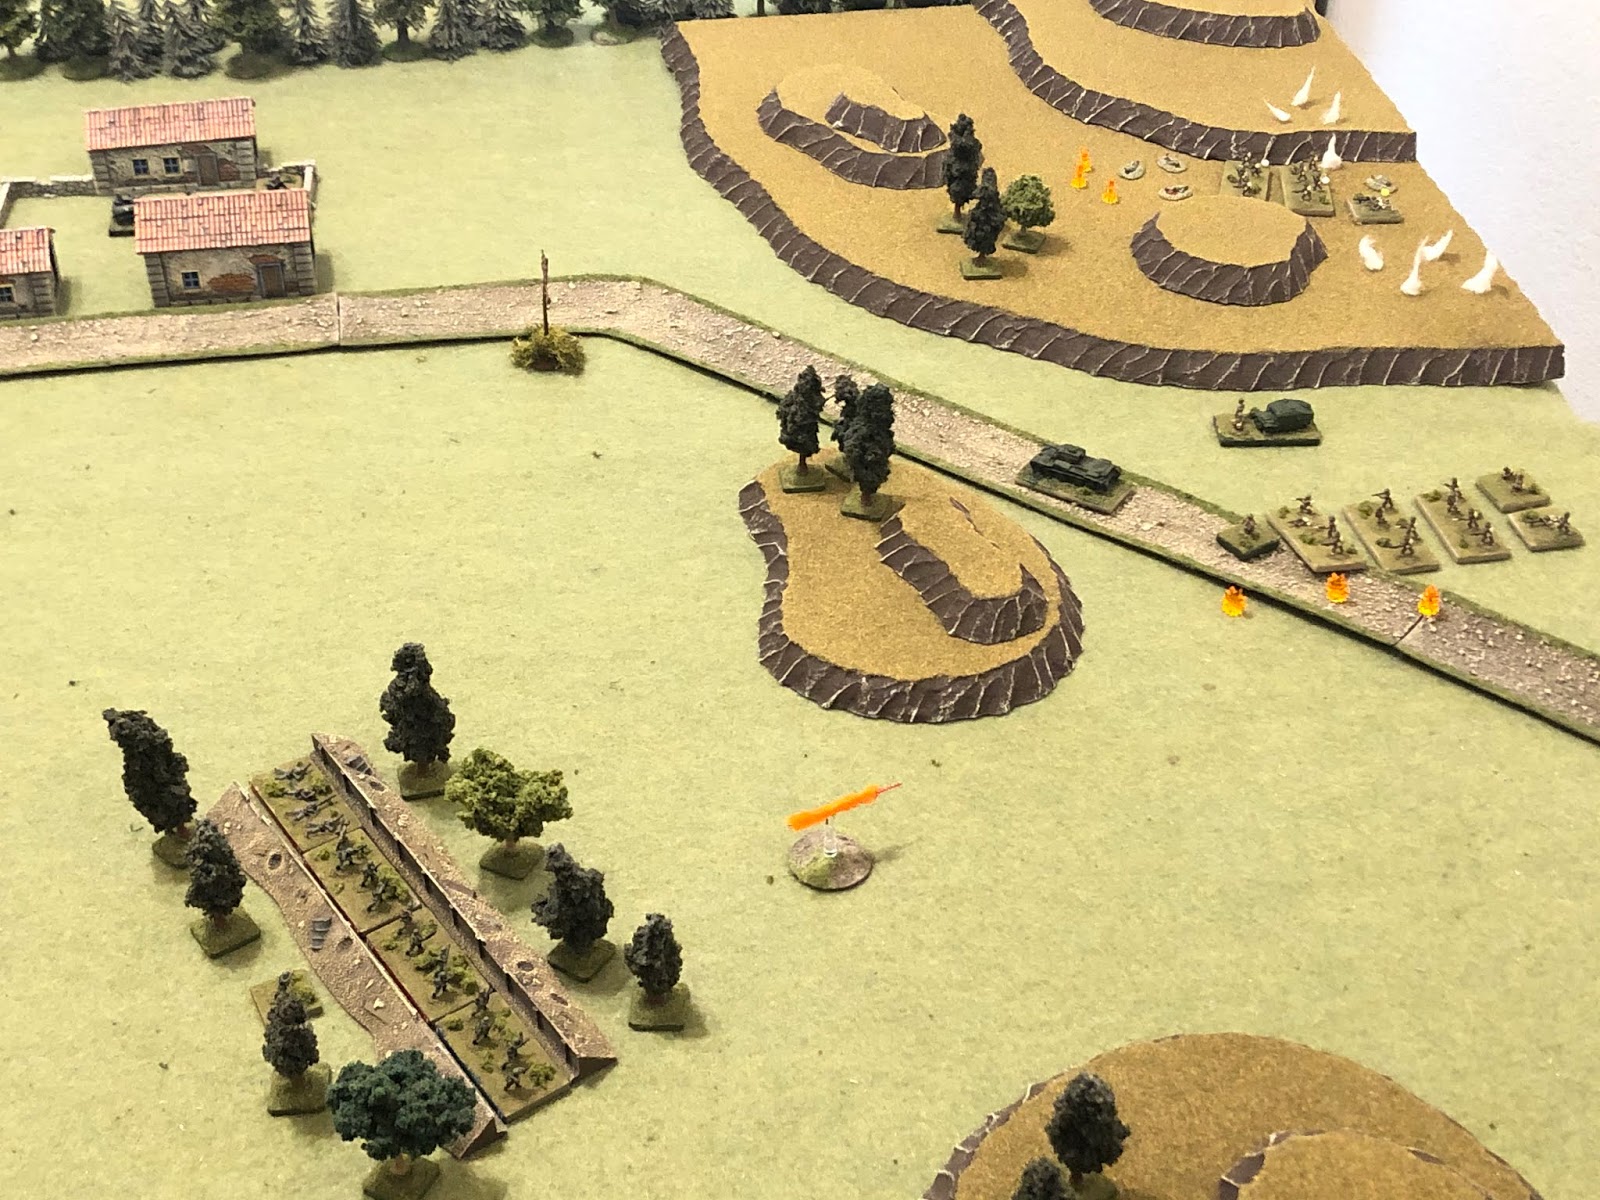
Overview, north is left. This is a Commonwealth attack, so the Germans will enter anywhere on the left side of the table, from the village at top center to the wooded knoll at bottom center, while the Allies will enter from the right table edge. The road is improved (at least in terms of 1941 Greece), there is a small hamlet consisting of three stone buildings at top center, and a few patches of trees scattered about, but the dominant terrain feature is the hilltops dotting the countryside (clockwise from left): Hill 242 (left), Hill 343 (top right), Hill 104N (right), Hill 104S (bottom right), and Hill 261 (bottom left).
I'm playing with very simple terrain so that I can lay it down and scrape it up as quickly as possible, to get in a lot of games as quickly as possible.
I'm playing solo using Too Fat Lardies' Chain of Command, modified a bit. I've bumped it up a level (using multi-based stands, not individual troops), I simplified fire and melee combat, and morale (5Core concepts, as always), as well as movement (I like dicing for movement, but it significantly slows things down for me). I changed the CoC Dice so that it represents indirect supporting fires from Higher HQ, and I did away with the Patrol Phase. I love the Patrol Phase, but it doesn't work for me playing solo, so what I do is designate an attacker and a defender; both sides start completely off table, using their Command Dice to deploy on table (as normal), but where it differs is that I basically give the defender a deployment area of half the table, and he can deploy anywhere in that area, even dug in, so long as it's at least 6" from any attacker.
If you're now wondering, then, why do I still call these rules "Chain of Command," it's because the entire game revolves around the use of Chain of Command's brilliant activation system (command roll/Command Dice), the use of leaders' command initiative, and the 'Force Morale' concept of declining Command Dice and morale to breaking. To me, that's the heart of the system, and it makes for a fun game.

The opposing forces, with Germans on the left and Commonwealth on the right.
I'm playing these games in 10mm using figures from Pendraken and Minifigs UK, roads from Fat Frank, hills from Warzone, buildings from Crescent Root, rivers from Wargamers Terrain, and trees from Gunner at Signifer.

Battlegroup Freitag (AKA, 1st Schutzen): consists of the CO stand (far left), two rifle platoons (a Platoon Commander and four rifle squads, each), a weapons platoon (Platoon Commander, two MG-34s, and two 80mm mortars), and a platoon of three Stug-IIIs.
Captain Freitag (Iron Cross 2nd Class)
1st Grenadier Platoon - 1st Lt Tausch (IC1 and 2)
1st Rifle Squad - LCpl Kroner
2nd Rifle Squad - SSgt Aust
3rd Rifle Squad - Sgt Lutz
4th Rifle Squad - LCpl Steinmetz
2nd Grenadier Platoon - 1st Lt Klugmann (IC1 and 2)
1st Rifle Squad - Cpl Reiswitz
2nd Rifle Squad - Cpl Junker
3rd Rifle Squad - Sgt Lehmkuhl
4th Rifle Squad - Cpl Orel
Weapons Platoon - Sgt Creuzburg
MG1 - Cpl Steinkamp
MG2 - LCpl Moen
Mtr1 - LCpl Hager
Mtr2 - LCpl Schiff
MG1 - Cpl Steinkamp
MG2 - LCpl Moen
Mtr1 - LCpl Hager
Mtr2 - LCpl Schiff
Assault Gun Platoon - Officer Cadet Hinkle
V2 - Cpl Holdstaat
V3 - Sgt Wagner

The Commonwealth force:
British Rangers and 9th Kings Royal Rifle Corps
Commanding Officer: Captain Ralston*
2 x Rifle Platoon (Platoon Commander, three Rifle Sections, a 2" mortar, and a Boyes Anti-Tank Rifle, each. I actually forgot to put the 2" mortars and ATR teams in the photo, but they're in the game)
Tank Platoon (1 x A10 Cruiser that missed the previous battle due to mechanical issues. Quite fortunate, really, as all armor in the previous fight was knocked out.)
*This is essentially a replay of Fight #5, in which Battlegroup Freitag mounted a successful defense to see off the combined British Rangers/9KRRC and Royal Engineers/New Zealand Cavalry battlegroups. This attack is much weaker than the previous attempt, but doesn't have much choice, with the whole Commonwealth force threatened to be cut off by significant mechanized forces in its rear (KG Klink's Panzer and Recce battlegroups). Also, Major Digsby led the previous attack, but he was killed in action, so his deputy, Captain Ralston, has assumed command.

*I've given the Brits high Force Morale and (relatively) a lot of Command Dice (5), as I figure they're tough and motivated, despite being small, underpowered, tired, and hungry. But it's kinda hard to come up with a good plan with so little to work with, not to mention the objective of demonstrating to tie up German forces/halt their pursuit.
For those with weak stomachs, please avert your eyes. You should be able to tell that this is not going to go well for the good guys...


*The funny thing is that the German machine guns did all that except for one suppression. Just imagine if the mortars were doing anything useful...
*Total miss on troops in the open with 3K 4S!!!


*What the hell is going on here? The mortars have completely missed twice, the rifle platoon has completely missed twice, and two of four Stug shots have completely missed. Maybe the Brits will okay after all.
But you're probably noticing there's a lot of action on the German side, and not much on the British side. The Germans have rolled an astounding four phases in a row! They just can't shoot for @#$%...


*I don't get what's going on with these shooting dice, with the German command rolls being so good, this should be over already.


*That's it, on 6K and 9S!!! This has got to be some sort of record. Having said that, I shouldn't have given the Stugs 2K 3S each, now that 2nd Rifle Platoon has reached cover.


Well, sorry folks, that wasn't much of a fight. But that's sort of how it's going: the Commonwealth are in a really bad situation, their line cracked, then outflanked, then crumbling, and now devolving into a full-on flight covered by troops that don't really have much hope (or weapons, equipment, and ammunition) to slow down the German blitzkrieg. As you can see from the map above, this campaign is drawing to a close, and I'm not the odds will look any better for the Commonwealth troops in future fights. Just think: if the Germans didn't have world record bad shooting dice, that thing could have been over in about ten minutes. Having said that, if it wasn't for their equally world record command dice rolls, maybe the British could have gotten some maneuvering in that changed the complexion of the fight. C'est la guerre!
Casualties:
German losses: 5 casualties
Commonwealth losses: 35 casualties, 60 captured, one Cruiser A10 destroyed
Characters:
None
Awards:
None, though Officer Cadet Hinkle got his first tank kill of the war
None, though Officer Cadet Hinkle got his first tank kill of the war
Next up we witness Colonel Klink leading the Panzer Battlegroup in an attack on the lightly armed Wellington Force, a hodge-podge of cooks, bakers, and candlestick makers hastily thrown together. A victory here for the Germans will likely see the Wellington Force destroyed and the gate shut behind the retreating Commonwealth forces.
V/R,
Jack
Great stuff! Despite rotten marksmanship by the Germans, Freitag still manages to badly maul the CW formation. I wish I could muster such a string of victories on the gaming table.
ReplyDeleteJonathan,
DeleteHey, it's easy to win like this when you're playing solo ;)
Like I said, you're namesake did quite a bit of the heavy lifting in this campaign, gets promoted for it, too ;)
V/R,
Jack
Another great AAR Jack. It does show why the Allied force was in full retreat at this point as their armour was pretty poor, assuming it could move (their tracks kept breaking). One thing in CoC that bugs me (IIRC) is that you can't seem to correct mortar fire, to take into account the earlier misses.
ReplyDeleteSteve,
DeleteThank you, Sir! Yeah, at this point, everything has fallen apart for the Allies and they're just working to see if any of their units can escape the bag; with the Panzer BG moving on Wellington Force, it's not looking promising...
I can't blame the mortar fire on Chain of Command; the barrage was adjudged 'on target,' just the shooting dice were total crap, twice!
V/R,
Jack