All,
Morning, 11 April 1941
Here we are, continuing Kampfgruppe Klink's campaign in Greece. The first battle saw Captain Freitag's 1st Schutzen Battlegroup take a key mountain crossroads manned by members of the British Royal Engineers supported by Armored Cavalry from New Zealand. The fight saw the Germans infantry nearly eliminate the Commonwealth battlegroup, which fell back in disarray. Captain Freitag pressed his advantage, immediately pursuing south down, where it ran into defensive positions manned by the remnants of the New Zealand 21st Infantry Battalion. 1st Schutzen then evicted the NZ 21st Inf Bn from its positions, forcing them to fall back. Now we have 1st Lt Ginter's 2nd Schutzen moving to secure a crossing over the D3 bridge, defended by the 27th MG Battalion.*
*For the record, I screwed up: it's supposed to be 2nd Recce's fight, not 2nd Schutzen's fight, but I transposed them, so this is what you get, sorry!
*For the record, I screwed up: it's supposed to be 2nd Recce's fight, not 2nd Schutzen's fight, but I transposed them, so this is what you get, sorry!
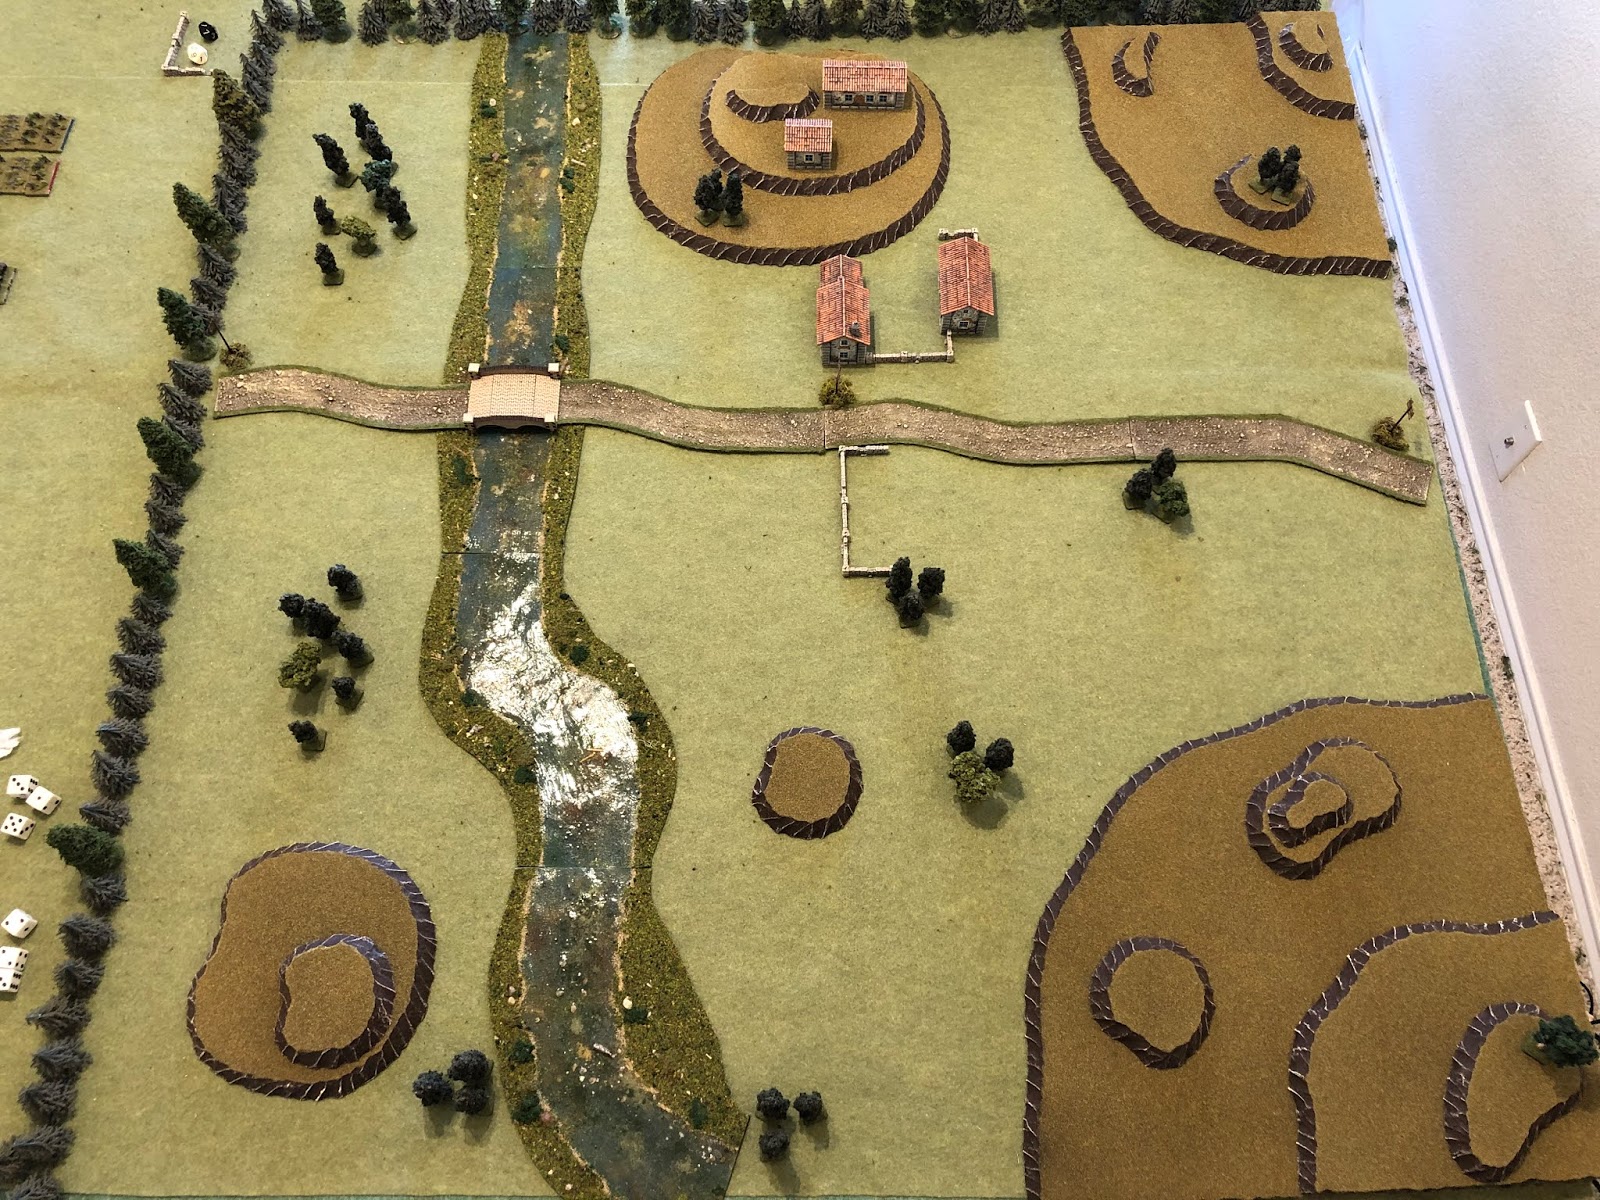
Overview, north is left. The Germans will be entering from the north and attacking south, where the Commonwealth forces will be defending, able to emplace anywhere from their baseline up to the line of buildings at top center to the patch of trees at bottom center, just right of the river. The road is improved (at least in terms of 1941 Greece), there is a small hamlet consisting of four stone buildings at top center, a few patches of trees scattered about, but the dominant terrain feature is the hilltops dotting the countryside (clockwise from left): Hill 110 (bottom left), Hill 218 (top center), Hill 225 (top right), and Hill 310 (bottom right).
I'm playing with very simple terrain so that I can lay it down and scrape it up as quickly as possible, to get in a lot of games as quickly as possible.
I'm playing with very simple terrain so that I can lay it down and scrape it up as quickly as possible, to get in a lot of games as quickly as possible.
I'm playing solo using Too Fat Lardies' Chain of Command, modified a bit. I've bumped it up a level (using multi-based stands, not individual troops), I simplified fire and melee combat, and morale (5Core concepts, as always), as well as movement (I like dicing for movement, but it significantly slows things down for me). I changed the CoC Dice so that it represents indirect supporting fires from Higher HQ, and I did away with the Patrol Phase. I love the Patrol Phase, but it doesn't work for me playing solo, so what I do is designate an attacker and a defender; both sides start completely off table, using their Command Dice to deploy on table (as normal), but where it differs is that I basically give the defender a deployment area of half the table, and he can deploy anywhere in that area, even dug in, so long as it's at least 6" from any attacker.
If you're now wondering, then, why do I still call these rules "Chain of Command," it's because the entire game revolves around the use of Chain of Command's brilliant activation system (command roll/Command Dice), the use of leaders' command initiative, and the 'Force Morale' concept of declining Command Dice and morale to breaking. To me, that's the heart of the system, and it makes for a fun game.

The opposing forces, with Germans on the left and Commonwealth on the right.
I'm playing these games in 10mm using figures from Pendraken and Minifigs UK, roads from Fat Frank, hills from Warzone, buildings from Crescent Root, rivers from Wargamers Terrain, and trees from Gunner at Signifer.

Battlegroup Ginter (AKA, 2nd Schutzen): consists of the CO stand (far left), two rifle platoons (a Platoon Commander and four rifle squads, each), a weapons platoon (Platoon Commander, two MG-34s, and two 80mm mortars), and a platoon of five Panzer IVs.
1st Lieutenant Ginter (new to the Kampfgruppe, seeing his first action)
1st Lieutenant Ginter (new to the Kampfgruppe, seeing his first action)
3rd Grenadier Platoon - 1st Lt Ost
1st Rifle Squad - Sgt Nader
2nd Rifle Squad - Sgt Arndt (Iron Cross 2nd Class)
3rd Rifle Squad - Cpl Coulver
4th Rifle Squad - Cpl Rishel
4th Grenadier Platoon - Officer Cadet Haas (IC2)
1st Rifle Squad - Sgt Kandler (IC2)
2nd Rifle Squad - Sgt Imhofe (IC2)
3rd Rifle Squad - Sgt Axthelm
4th Rifle Squad - Cpl Hackl
Weapons Platoon - Sgt Osswald
MG1 - LCpl Jorgensen
MG2 - LCpl Grun
Mtr1 - Cpl Vigerte
Mtr2 - LCpl Sondland
MG1 - LCpl Jorgensen
MG2 - LCpl Grun
Mtr1 - Cpl Vigerte
Mtr2 - LCpl Sondland
4th Panzer Platoon - SSgt Mangold
Vehicle Two - Cpl Rausch
Vehicle Three - Sgt Graebner (IC1 and 2)
Vehicle Four - Sgt Kapp
Vehicle Five - Cpl Progen

The Commonwealth force: 27th New Zealand Machine Gun Battalion
Commanding Officer: Major Saunders
Commanding Officer: Major Saunders
1 x Machine Gun Platoon (Platoon Commander, 4 x Vickers MGs)
1 x Bren Gun Platoon (Platoon Commader, 4 x Bren Section)
Mortar Platoon (Platoon Commander, 2 x 3" mortars)
Mortar Platoon (Platoon Commander, 2 x 3" mortars)
Anti-Tank Platoon (Platoon Commander, 2 x 2-pdr ATG)


*I didn't roll to see where they would fall; as I said, I only do that for the attacker, figuring the defender has already stake it out. No, instead I rolled regular firepower dice (2K, 3S, in this case), but they all missed!


*It occurs to me the Kiwis are suffering from not having many defenders on the board as of yet, which is allowing the Germans to concentrate their firepower. My apologies, they've just had some pretty terrible command rolls. After only a few games, I've ascertained that the worst Command Dice roll you can have is 6 (only one, which is wasted) and five 4s (only being able to use one of them because I only have one Senior Leader, the CO).


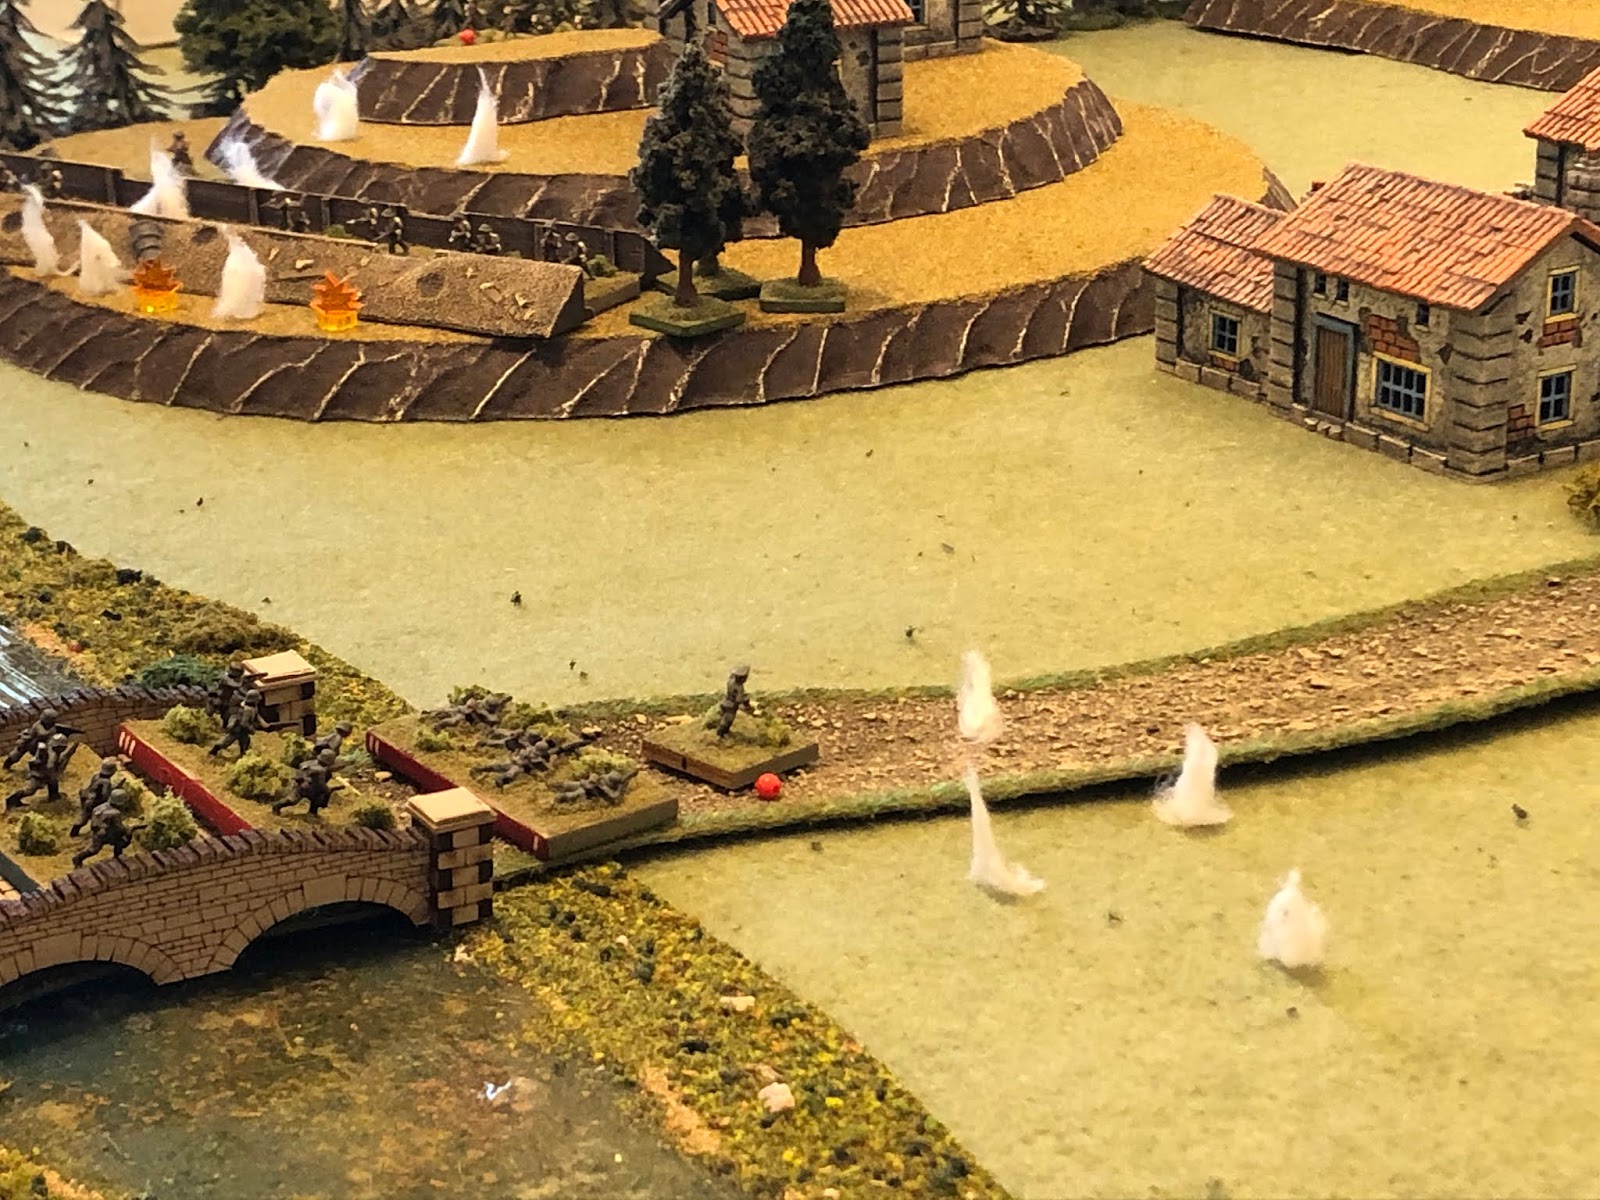


*3rd Gren Plt has been under very heavy fire from the Kiwi mortars and Bren Platoon, and Lt Ginter has been doing an absolutely amazing job of keeping them going, getting to the bridge, over the bridge, and now towards Hill 218. Very impressive on the young commander.


*This is quite significant: they've done no or negligible damage four rounds in a row, and that's highly unusual, with mortars having a pretty damn good shot at absolutely wrecking infantry platoons in the open. Pure bad luck on the command and shooting rolls for the New Zealanders so far.

*Brought to you by the poor marksmanship of the 27th MG Battalion's mortarmen! ;)


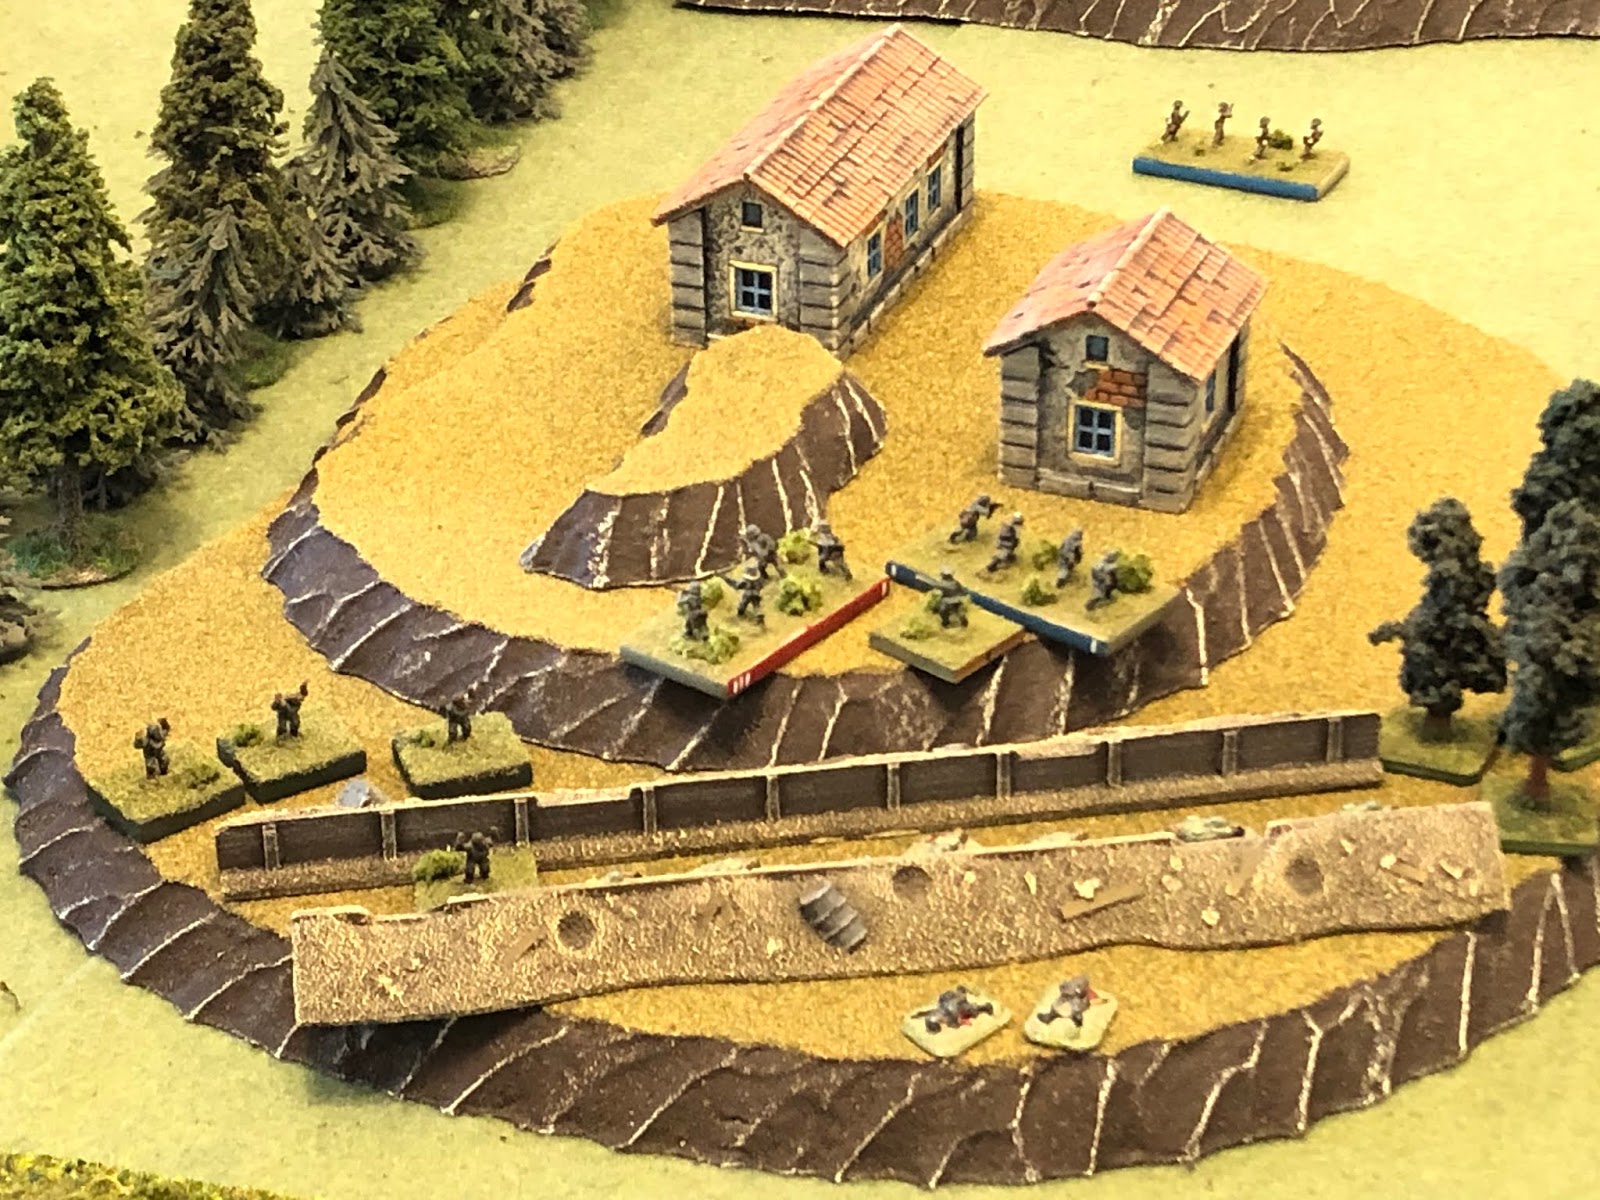
A short, sharp fight, mostly revolving around the Germans CO's seemingly being able to be everywhere all the time, and the NZ mortarmen being completely and utterly inept, with good work by Lt Ost in wresting Hill 218 from the NZ Bren Platoon. Quick and lots of fun.
Casualties:
German losses: 25 casualties, 1 Pz IV knocked out
Commonwealth losses: 35 casualties, 20 captured
Characters:
Cpl Rausch, a veteran of France and Greece, WIA and out for the remainder of the campaign
Awards:
1st Lt Ginter, the Battlegroup Commander, is awarded the Iron Cross, 2nd Class, for gallantry and leadership under fire.
1st Lt Ost, 3rd Grenadier Platoon Commander, is awarded the Iron Cross, 2nd Class, for valor in leading the assault on Hill 218.
Next up, gotta do the Turn 4 map moves so we can see what the next fight(s) is.
V/R,
Jack
Jack, you continue to provide riveting narrative accounts of these actions coupled with great game photos. Great fun for the reader!
ReplyDeleteThank you Jonathan, I really appreciate it, you're too kind.
DeleteV/R,
Jack
Enjoying the actions, still hoping the Allies win one yet.
ReplyDeleteGrin!
Thanks Joseph, and I understand. Don't worry, it's a long war ;)
DeleteV/R,
Jack
An enjoyable action report as your campaign progresses.
ReplyDeleteThank you, Peter, I appreciate it. My campaign is the two-brain cell version of yours ;)
DeleteV/R,
Jack
Hello Jack,
ReplyDeleteI think the fact the Germans got over the bridge so early did mean it was likely they were going to win. As you say though, the New Zealander's rolled poor Command Dice and so just did not have enough units deployed on the table to stop them.
Hey buddy! Certainly letting them across the bridge made life a lot more difficult for the Kiwis, but I was getting worried that those 2-pdr ATGs were gonna make some real hay.
DeleteV/R,
Jack