All,
Morning, 12 April 1941
Here we are, continuing Kampfgruppe Klink's campaign in Greece. The first battle saw Captain Freitag's 1st Schutzen Battlegroup take a key mountain crossroads manned by members of the British Royal Engineers supported by Armored Cavalry from New Zealand. The fight saw the Germans infantry nearly eliminate the Commonwealth battlegroup, which fell back in disarray. Captain Freitag pressed his advantage, immediately pursuing south down, where it ran into defensive positions manned by the remnants of the New Zealand 21st Infantry Battalion. 1st Schutzen then evicted the NZ 21st Inf Bn from its positions, forcing them to fall back. The third fight saw 1st Lt Ginter's 2nd Schutzen moving secure a crossing over the D3 bridge, forcing the 27th MG Battalion back. The fourth fight saw Major Bohm's 2nd Recce Battlegroup push back the Australian 2nd Battalion, 8th Infantry Regiment after some fierce fighting. The fifth battle saw Captain Freitag's beleaguered 1st Schutzen Battlegroup defend the B3 bridgehead against attacks by the British Rangers/9th King's Royal Rifle Corps, and the Royal Engineers/New Zealand Cavalry, pushing the former back and destroying the latter! Now we turn to Battlegroup Wehner (1st Recce) attacking the Lee Force/Australian 2nd Battalion, 7th Infantry Regiment, in order to keep them from interfering in the battle further south between Lt Loeb's Panzers and the Allies' 4th Hussars.

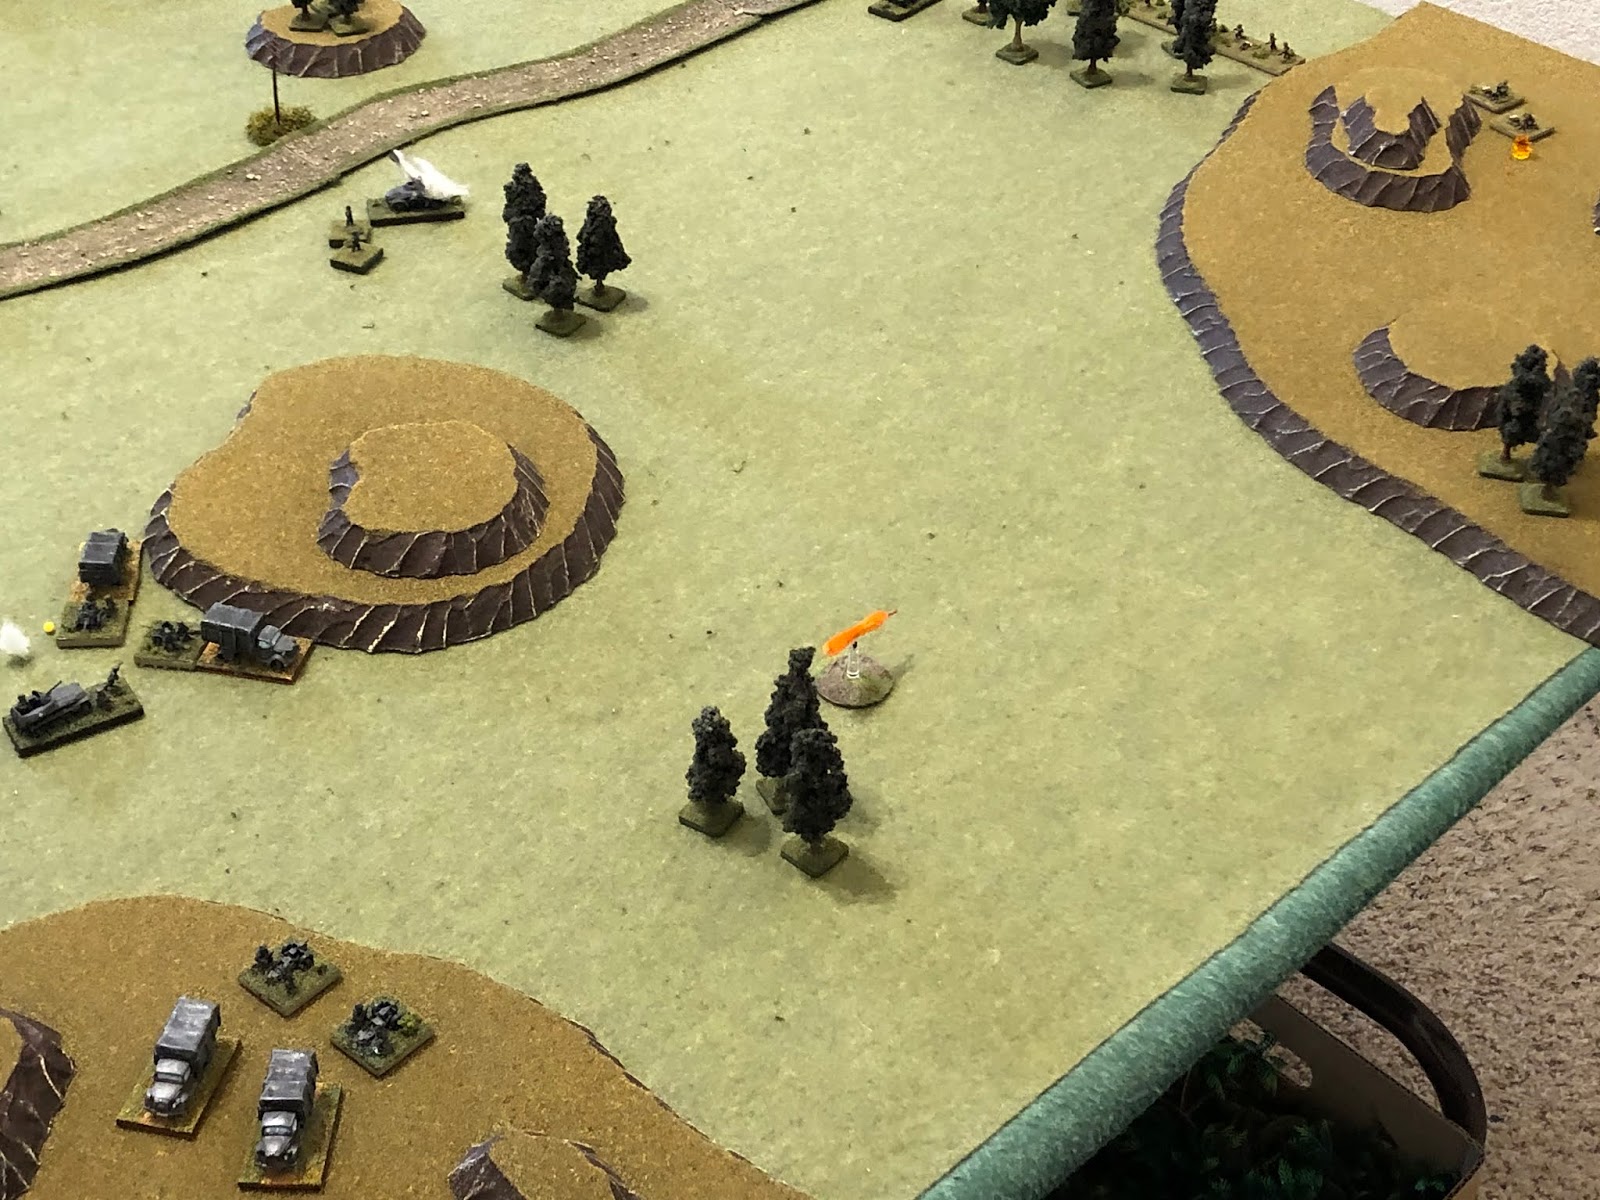
Overview, north is left. This is a meeting engagement, so the Germans will enter from the north and the Allies from the south, with both sides entering on their own table edge. The road is improved (at least in terms of 1941 Greece), there is a small hamlet consisting of three stone buildings at top left, a few patches of trees scattered about, and a piece of a river that cannot be crossed, but the dominant terrain feature is the hilltops dotting the countryside (clockwise from bottom left): Hill 275 (bottom left), Hill 319 (top left), Hill 112 (top right), Hill 450 (bottom right), and Hill 136 (center bottom).
I'm playing with very simple terrain so that I can lay it down and scrape it up as quickly as possible, to get in a lot of games as quickly as possible.
I'm playing solo using Too Fat Lardies' Chain of Command, modified a bit. I've bumped it up a level (using multi-based stands, not individual troops), I simplified fire and melee combat, and morale (5Core concepts, as always), as well as movement (I like dicing for movement, but it significantly slows things down for me). I changed the CoC Dice so that it represents indirect supporting fires from Higher HQ, and I did away with the Patrol Phase. I love the Patrol Phase, but it doesn't work for me playing solo, so what I do is designate an attacker and a defender; both sides start completely off table, using their Command Dice to deploy on table (as normal), but where it differs is that I basically give the defender a deployment area of half the table, and he can deploy anywhere in that area, even dug in, so long as it's at least 6" from any attacker.
If you're now wondering, then, why do I still call these rules "Chain of Command," it's because the entire game revolves around the use of Chain of Command's brilliant activation system (command roll/Command Dice), the use of leaders' command initiative, and the 'Force Morale' concept of declining Command Dice and morale to breaking. To me, that's the heart of the system, and it makes for a fun game.

The opposing forces, with Germans on the left and Commonwealth on the right.
I'm playing these games in 10mm using figures from Pendraken and Minifigs UK, roads from Fat Frank, hills from Warzone, buildings from Crescent Root, rivers from Wargamers Terrain, and trees from Gunner at Signifer.

Battlegroup Wehner (AKA, 1st Recce): consists of the CO stand (far left), one motorcycle rifle platoons (a Platoon Commander and four rifle squads), a weapons platoon (Platoon Commander, two 7.5cm Infantry Guns, and two Pak-36 anti-tank guns), a platoon of two armored cars, and a platoon of three tanks (two Panzer IIs and one Pz I).
*Screwed up there, should have been three Pz IIs, not two Pz IIs and one Pz I...
*Screwed up there, should have been three Pz IIs, not two Pz IIs and one Pz I...
1st Lt Wehner (veteran of Poland, France, and now Greece, winner of the Iron Cross 2nd Class)
2nd Motorcycle Platoon - SSgt Gradl (IC1 and 2)
1st Motorcycle Squad - SSgt Behrendt (IC2)
2nd Motorcycle Squad - Sgt Eisen
3rd Motorcycle Squad - Cpl Obst
4th Motorcycle Squad - Cpl Klostermann
Weapons Platoon - Sgt Oberlander (IC2)
IG1 - LCpl Groen
IG2 - LCpl Graehme
PaK1 - Cpl Drexler (IC2)
PaK2 - LCpl Boxleitner
IG1 - LCpl Groen
IG2 - LCpl Graehme
PaK1 - Cpl Drexler (IC2)
PaK2 - LCpl Boxleitner
Armored Reconnaissance Platoon - 2nd Lt Weider
3rd Armored Reconnaissance Vehicle - Sgt Pichler (IC2)
1st Panzer Platoon - Sgt Keck (IC2)
Vehicle Two - Cpl Gruden
Vehicle Three - Cpl Neuer

The Commonwealth force: Lee Force and Australian 2nd Battalion, 7th Infantry Regiment
Commanding Officer: Major Darby
Rifle Platoon (Platoon Commander, three Rifle Sections, a 2" mortar, and a Boyes Anti-Tank Rifle)
Tank Platoon (1 x A10 Cruiser, 2 x Matilda I)
Weapons Platoon (Platoon Commander, two Vickers MGs, and two 3" mortars)


*Seriously impacting the Allies' potential deployment zone, though also leaving the armored cars very vulnerable.


*The Allies are already losing Command Dice and Force Morale. The Germans are also living the easy life, taking three phases in a row!


*I accidentally cheated for the Allies, shouldn't have let the PC rally the tubes while being pinned, supposed to clear himself first...


*German Command Dice and Force Morale take a hit with SSgt Gradl going down.


*Things are looking bleak for the Germans: they have lost all their mobile firepower (two armored cars and three tanks), two Platoon Commanders, and two of their four rifle squads. They are seriously hampered in terms of Command Dice, and they are on the verge of breaking. I am seriously considering having them fall back but the Allies really don't have anything left, either, and they're about to break, too.
The big problem at this point is that the Allies are on a run of getting three straight phases, and they are whooping up on the Germans.


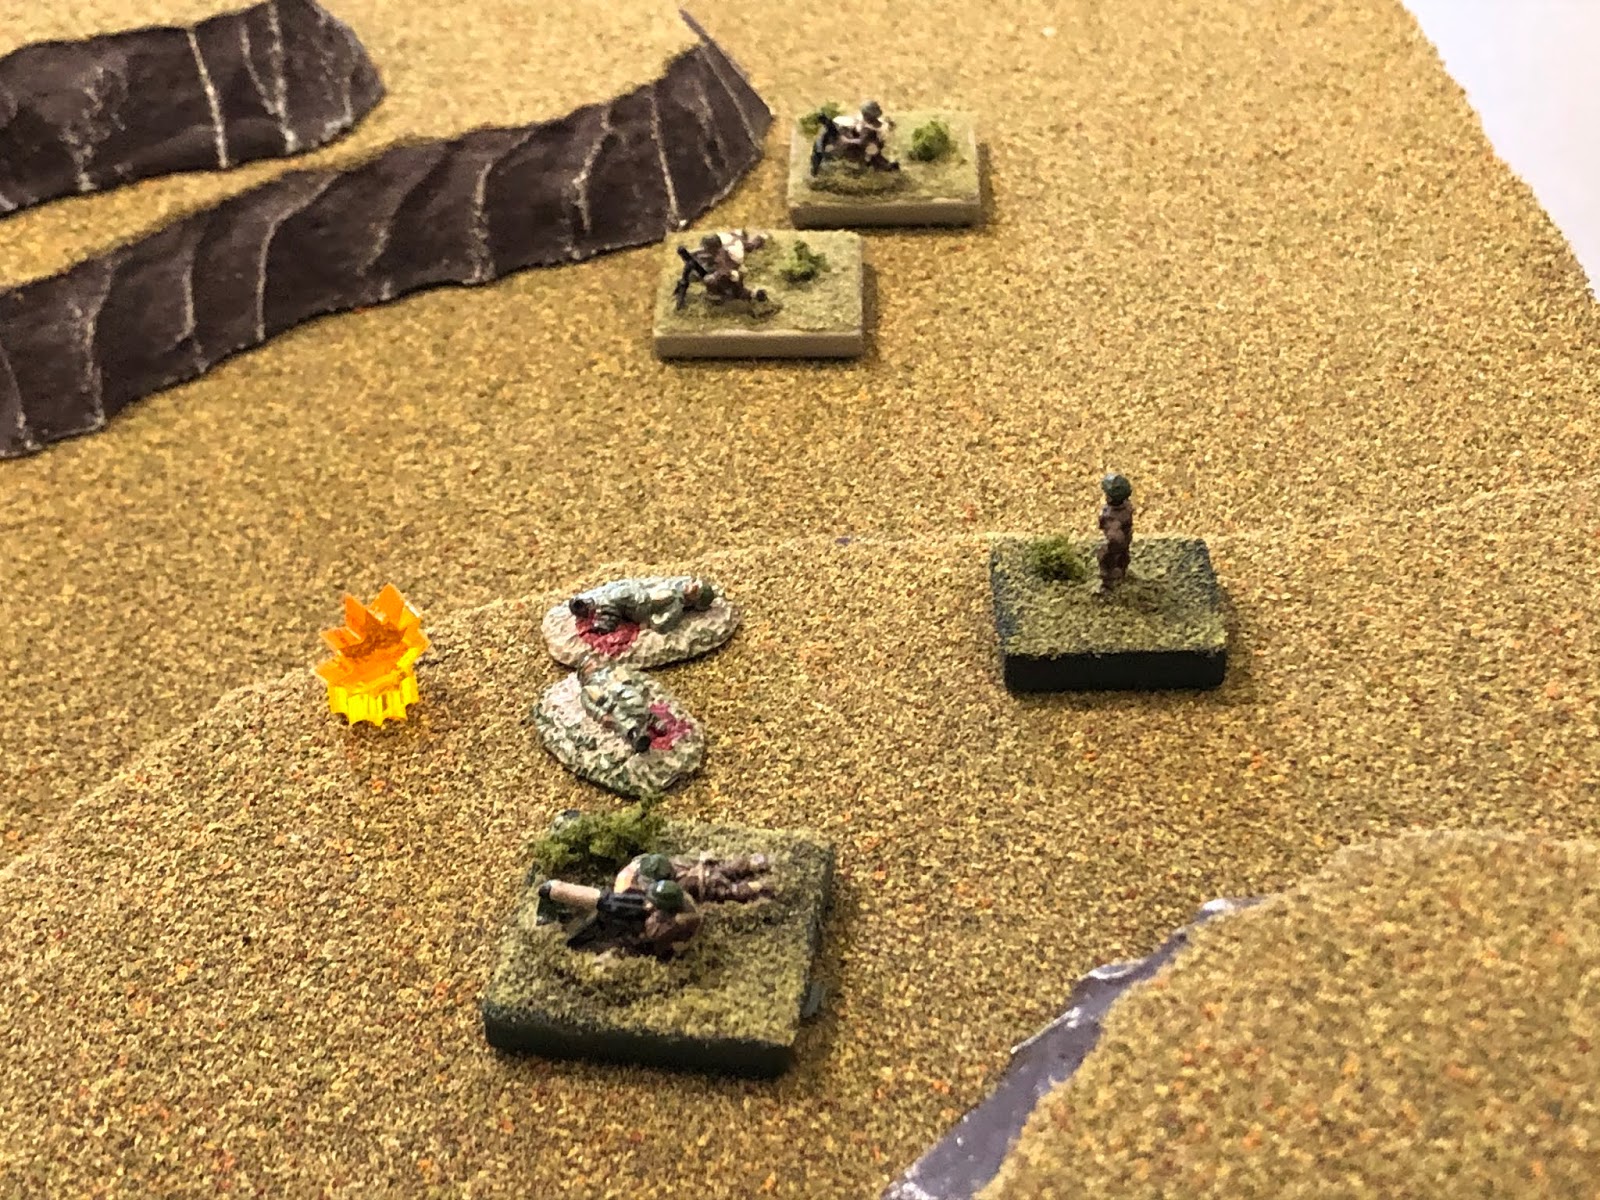
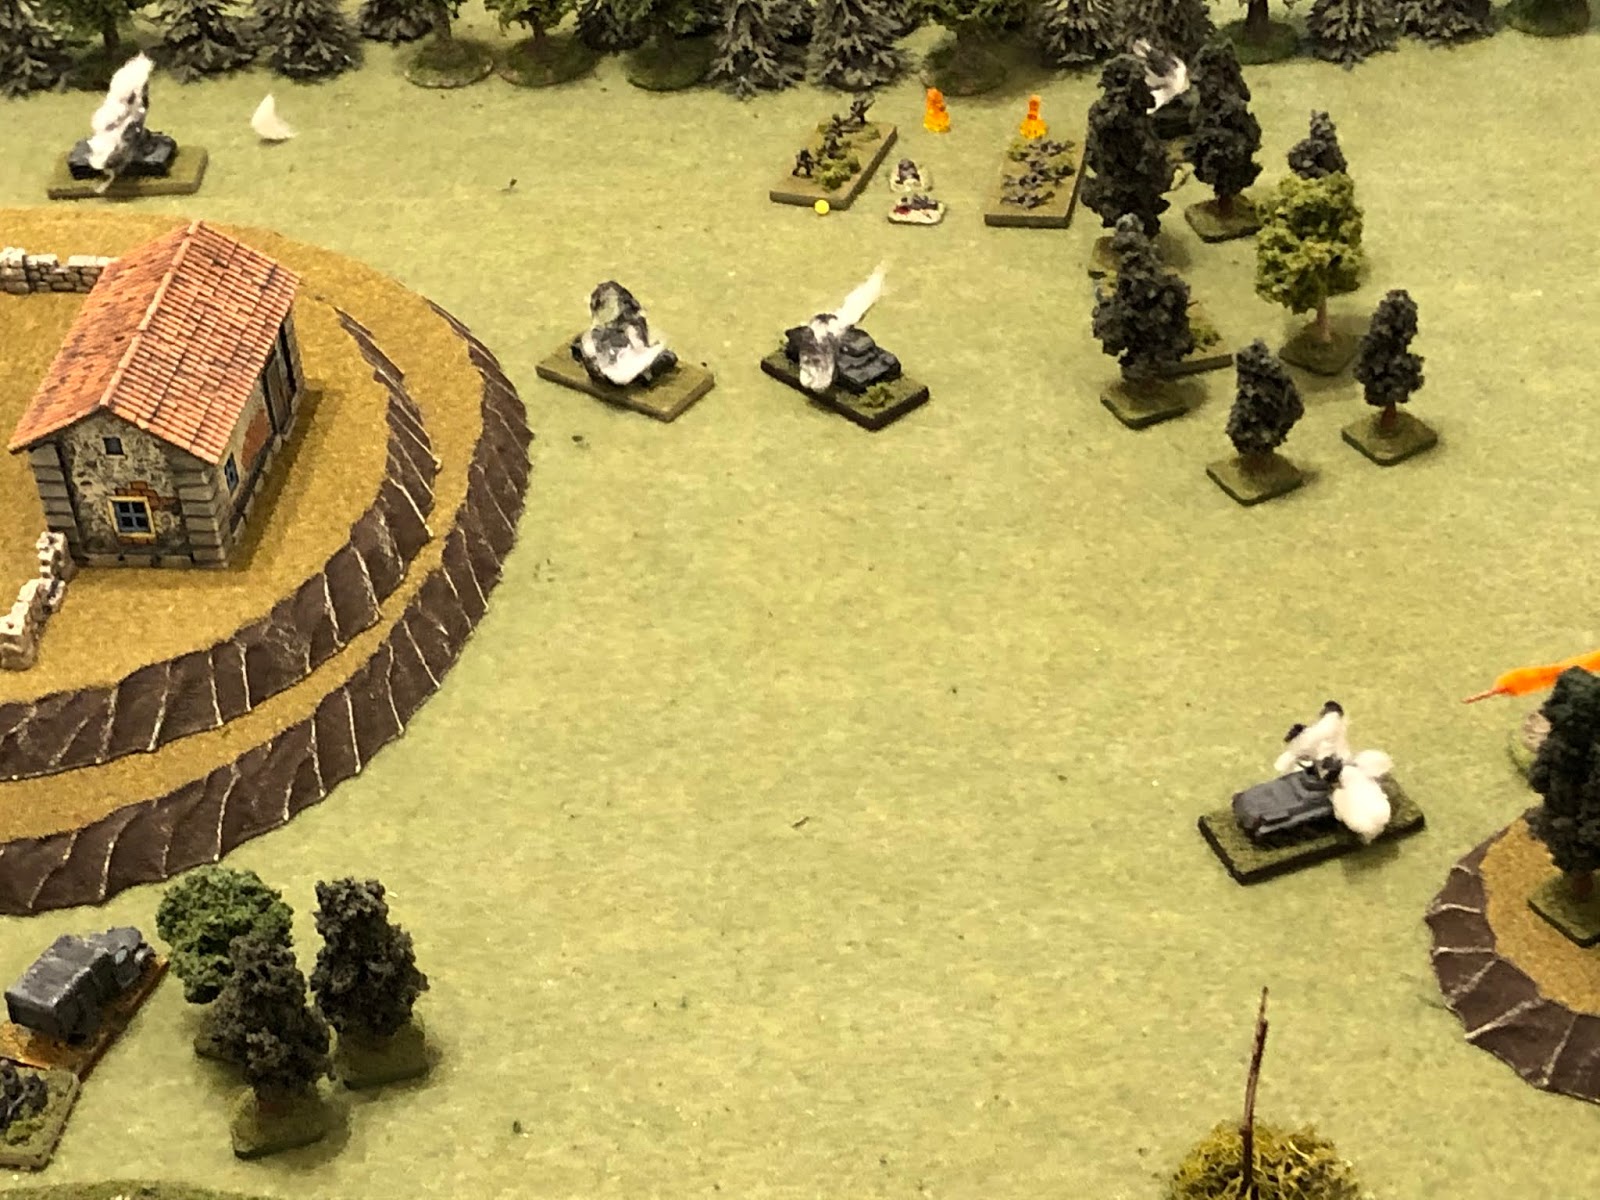
The Germans called in arty on the Aussie Rifle Platoon's position in the woods...


Man, that was a helluva fight, between two heavy hitters. Neither side had a large force, and certainly not much in the way of infantry, but they both had lot of hitting power, and boy did they use it, literally knocking the hell out of each other! As usual, the fight came down to one key moment where one side has to make a risky move, and if it works they win, if it doesn't they lose. This time it was the Commonwealth force, where they had to push the Aussie Diggers out into the open in order to try to keep the German Motorcycle Platoon off of their last remaining tank; they moved, fired, and failed, which allowed the Matilda to be destroyed by swarming German infantry, and then they got roughed up a bit themselves when the Germans caught them in the open. But we did have a first; several times we've seen German soldiers decorated for valor, but this fight saw the British produce a man worthy of decoration as well. Sergeant R.E. Gulliver, commander of the Lee Force tank platoon, was posthumously awarded the Victoria Cross for conspicuous gallery, specifically in that his tank knocked out three German panzers, one armored car, and then fought to the death in close combat after his disabled tank was assaulted by German infantry.
Casualties:
German losses: 35 casualties and 3 Panzer IIs, two armored cars, one 7.5cm infantry gun, and one 3.7cm anti-tank gun knocked out. Both guns and one Panzer II were completely destroyed.
Commonwealth losses: 30 casualties, 15 captured, and two Matilda Is and one A10 Cruiser destroyed
Characters:
Sgt Eisen, veteran of Poland, France, and Greece, KIA
SSgt Gradl, veteran of Poland, France, and Greece, receives his 3rd Wound Badge as he is injured badly enough to require evacuation and will miss the remainder of the campaign in Greece
Cpl Gruden, veteran of France and Greece, was wounded and is out for the remainder of the campaign
Cpl Neuer was lightly wounded
Sgt Pichler received his 2nd Wound Badge when he was lightly wounded
Sgt Keck received his 2nd Wound Badge when he was lightly wounded
Awards:
2nd Lt Weider was awarded the Iron Cross 2nd Class for disabling two tanks, his second and third of the war. I foresee a transfer to the panzers in his future.
SSgt Behrendt was awarded the Iron Cross 1st Class and Tank Killer Badge for saving the 2nd Motorcycle Platoon by knocking out a British tank
Cpl Klostermann was awarded the Iron Cross 2nd Class and Tank Killer Badge for knocking out a British tank that had single-handedly eliminated a platoon of panzers
Next up we witness Lt Loeb's Panzer battlegroup take on the 4th Hussars.
V/R,
Jack
Wow! That was a helluva fight! Great action and an engaging narrative. You had me on the edge of my seat throughout the action. Very bloody and a last ditch effort to save the day for the Fatherland.
ReplyDeleteGreat stuff, Jack!
Jonathan,
DeleteYeah man, it was a lot of fun, really could have gone either way. And thanks, I appreciate the kind words and enthusiasm!
V/R,
Jack
Great stuff Jack! A minor point, but I don't think Matilda I's served in Greece, but could be wrong. IIRC it was only Vicker's Light tanks and some Cruisers, diverted from North Africa.
ReplyDeleteSteve,
DeleteThanks man, and I really don't know, I didn't do much in the way of researching the vehicles. This was more of a 'gaming with what I've got" issue, in terms of vehicles (the armored cars I've been using for the New Zealand Cavalry are wrong, too!).
V/R,
Jack
I'm too a 'gaming with what I've got man', so no problems. I use counts as frequently otherwise I'd have way too many variants of various vehicles etc.
DeleteYes, indeed, particularly trying to play out the whole damn war, with all the major players! ;)
DeleteV/R,
Jack
I am thoroughly enjoying your narrative of the games, and how characters emerge to lead the units.
ReplyDeletePeter,
DeleteThanks, I'm glad to hear it. And yes, my wargaming is all about the characters, I couldn't imagine myself doing it any other way.
V/R,
Jack
Wonderful report, lovely units and terrain (I do like your hills!) and nice write up...
ReplyDeleteThanks, Phil, I appreciate it!
DeleteV/R,
Jack
"Could have gone either way."
ReplyDeleteI could swear that is looks like the Germans had the edge in firepower. But that is me just looking for excuses for my side.
Shaun,
DeleteYou are correct, the Germans have the advantage in firepower in all of these fights, if not always in terms of raw manpower. The Germans are of better quality and firepower; I did this as what I got from reading was that the Commonwealth troops were committed piecemeal, beaten up, then fought the rest of the campaign as beaten up and/or slapped together units missing a lot of their heavy weapons.
So no excuses, this was done on purpose. The only good news is that it won't always be like that! ;)
V/R,
Jack