All,
Morning, 13 April 1941
Here we are, continuing Kampfgruppe Klink's campaign in Greece. The first battle saw Captain Freitag's 1st Schutzen Battlegroup take a key mountain crossroads manned by members of the British Royal Engineers supported by Armored Cavalry from New Zealand. The fight saw the Germans infantry nearly eliminate the Commonwealth battlegroup, which fell back in disarray. Captain Freitag pressed his advantage, immediately pursuing south down, where it ran into defensive positions manned by the remnants of the New Zealand 21st Infantry Battalion. 1st Schutzen then evicted the NZ 21st Inf Bn from its positions, forcing them to fall back. The third fight saw 1st Lt Ginter's 2nd Schutzen moving secure a crossing over the D3 bridge, forcing the 27th MG Battalion back. The fourth fight saw Major Bohm's 2nd Recce Battlegroup push back the Australian 2nd Battalion, 8th Infantry Regiment after some fierce fighting. The fifth battle saw Captain Freitag's beleaguered 1st Schutzen Battlegroup defend the B3 bridgehead against attacks by the British Rangers/9th King's Royal Rifle Corps, and the Royal Engineers/New Zealand Cavalry, pushing the former back and destroying the latter! The sixth battle saw Battlegroup Wehner (1st Recce) attack and destroy the Lee Force/Australian 2nd Battalion, 7th Infantry Regiment, though they suffered so many casualties they were in then combined with the 2nd Recce battlegroup. The seventh fight saw Lt Loeb's Panzers absolutely shellack the Allies' 4th Hussars, seeing the final defeat of Allied armored reserves, opening the road to the campaign objective of Servia, and unhinging the Allied defensive line. For the next fight we are back with Lt Loeb's panzers, looking to complete the destruction of the Australian 2nd Battalion, 8th Infantry Regiment as they attempt to escape the German encirclement.

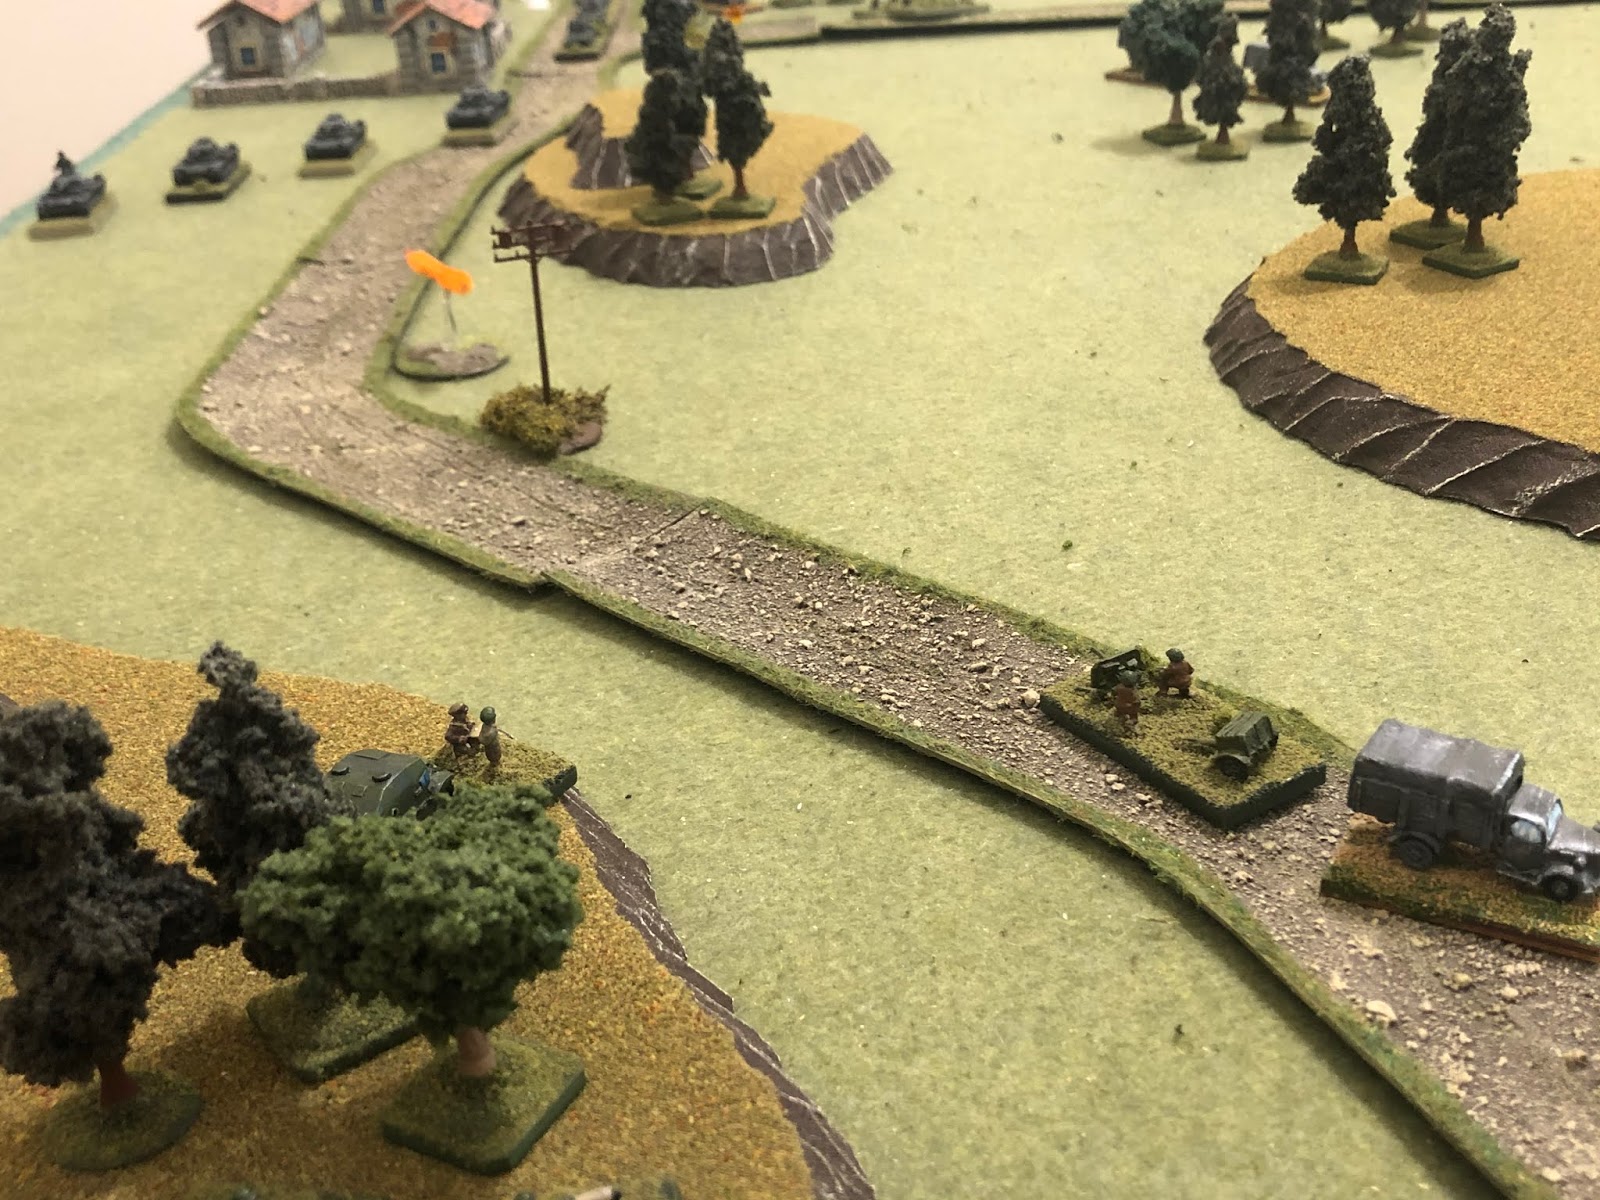
Overview, north is down. This is a Commonwealth withdrawal, so the Germans will enter from the east table edge (far left) and the Allies will enter at bottom right, working to get their troops off table at top right. The road is improved (at least in terms of 1941 Greece), there is a small hamlet consisting of three stone buildings at bottom left, and a few patches of trees scattered about, but the dominant terrain feature is the hilltops dotting the countryside (clockwise from top left): Hill 124 (top left), Hill 372 (top right), Hill 219 (right), Hill 205 (bottom right), and Hill 162 (center bottom).
I'm playing with very simple terrain so that I can lay it down and scrape it up as quickly as possible, to get in a lot of games as quickly as possible.
I'm playing solo using Too Fat Lardies' Chain of Command, modified a bit. I've bumped it up a level (using multi-based stands, not individual troops), I simplified fire and melee combat, and morale (5Core concepts, as always), as well as movement (I like dicing for movement, but it significantly slows things down for me). I changed the CoC Dice so that it represents indirect supporting fires from Higher HQ, and I did away with the Patrol Phase. I love the Patrol Phase, but it doesn't work for me playing solo, so what I do is designate an attacker and a defender; both sides start completely off table, using their Command Dice to deploy on table (as normal), but where it differs is that I basically give the defender a deployment area of half the table, and he can deploy anywhere in that area, even dug in, so long as it's at least 6" from any attacker.
If you're now wondering, then, why do I still call these rules "Chain of Command," it's because the entire game revolves around the use of Chain of Command's brilliant activation system (command roll/Command Dice), the use of leaders' command initiative, and the 'Force Morale' concept of declining Command Dice and morale to breaking. To me, that's the heart of the system, and it makes for a fun game.

The opposing forces, with Germans on the left and Commonwealth on the right.
I'm playing these games in 10mm using figures from Pendraken and Minifigs UK, roads from Fat Frank, hills from Warzone, buildings from Crescent Root, rivers from Wargamers Terrain, and trees from Gunner at Signifer.

Battlegroup Loeb (AKA, Panzer): consists of the CO stand (far left), one platoon of Combat Engineers in trucks, two platoons of Panzer Mk IIIs led by their company commander, and one platoon of Panzerjaeger Is.
*This battlegroup is actually being personally led by Colonel Klink, represented by the CO stand, while the battlegroup commander, Lt Loeb, is the single Panzer IV at top left.
1st Lt Loeb (veteran of Poland, France, and now Greece, with five tank kills to his credit, winner of the Iron Cross 1st Class and 2nd Class)
2nd Panzer Platoon - Officer Cadet Fahrmann (2 tank kills)
Vehicle Two - Sgt Fittzbaum (1 tank kill)
Vehicle Three - Sgt Mayer (1 tank kill)
Vehicle Four - Cpl Peske
Vehicle Five - Sgt Mettner
3rd Panzer Platoon - Sgt 1st Class Friessler (4 tank kills)
Vehicle Two - Sgt Jurgens
Vehicle Three - Sgt Zedler
Vehicle Four - Sgt Harms
Vehicle Five - Cpl Geiger (1 tank kill)
Panzerjaeger Platoon -Sgt Dittrich (IC2, 2 tank kills)
2nd Anti-Tank Vehicle - Cpl Hamburg
3rd Anti-Tank Vehicle - Cpl Halstenburg
Assault Engineer Platoon - 2nd Lt Orstens
1st Engineer Squad - Sgt Barkstrom (IC2)
2nd Engineer Squad - Sgt Klivens
3rd Engineer Squad - Sgt Hafl (IC2)
4th Engineer Squad - Cpl Dilbertt

The Commonwealth force: Australian 2nd Battalion, 8th Infantry Regiment
Commanding Officer: Major Hogan
1 x Carrier Platoon (Platoon Commander, 3 x Rifle Section, 1 x 2" Mortar, 1 x Boyes anti-tank rifle, 6 x Universal Carrier)
1 x Rifle Platoon (Platoon Commander, 3 x Rifle Section, 1 x 2" Mortar, 1 x Boyes anti-tank rifle)
1 x Weapons Platoon (Platoon Commander, 2 x Vickers MGs, 2 x 3" mortars)
Anti-Tank Platoon (Platoon Commander, 2 x 2-pdr ATG)
I've got a bad feeling for the Aussies; it was hard enough for the defenders to stop the German attackers when they got to do 'ambush' deployment, but now these guys are going to be on the move, having to withdraw to the southwest. Even that would/could be interesting against an infantry battlegroup, but these are the German panzers! Quite the tall order; I guess that's why you're not supposed to let tanks get in behind you ;)


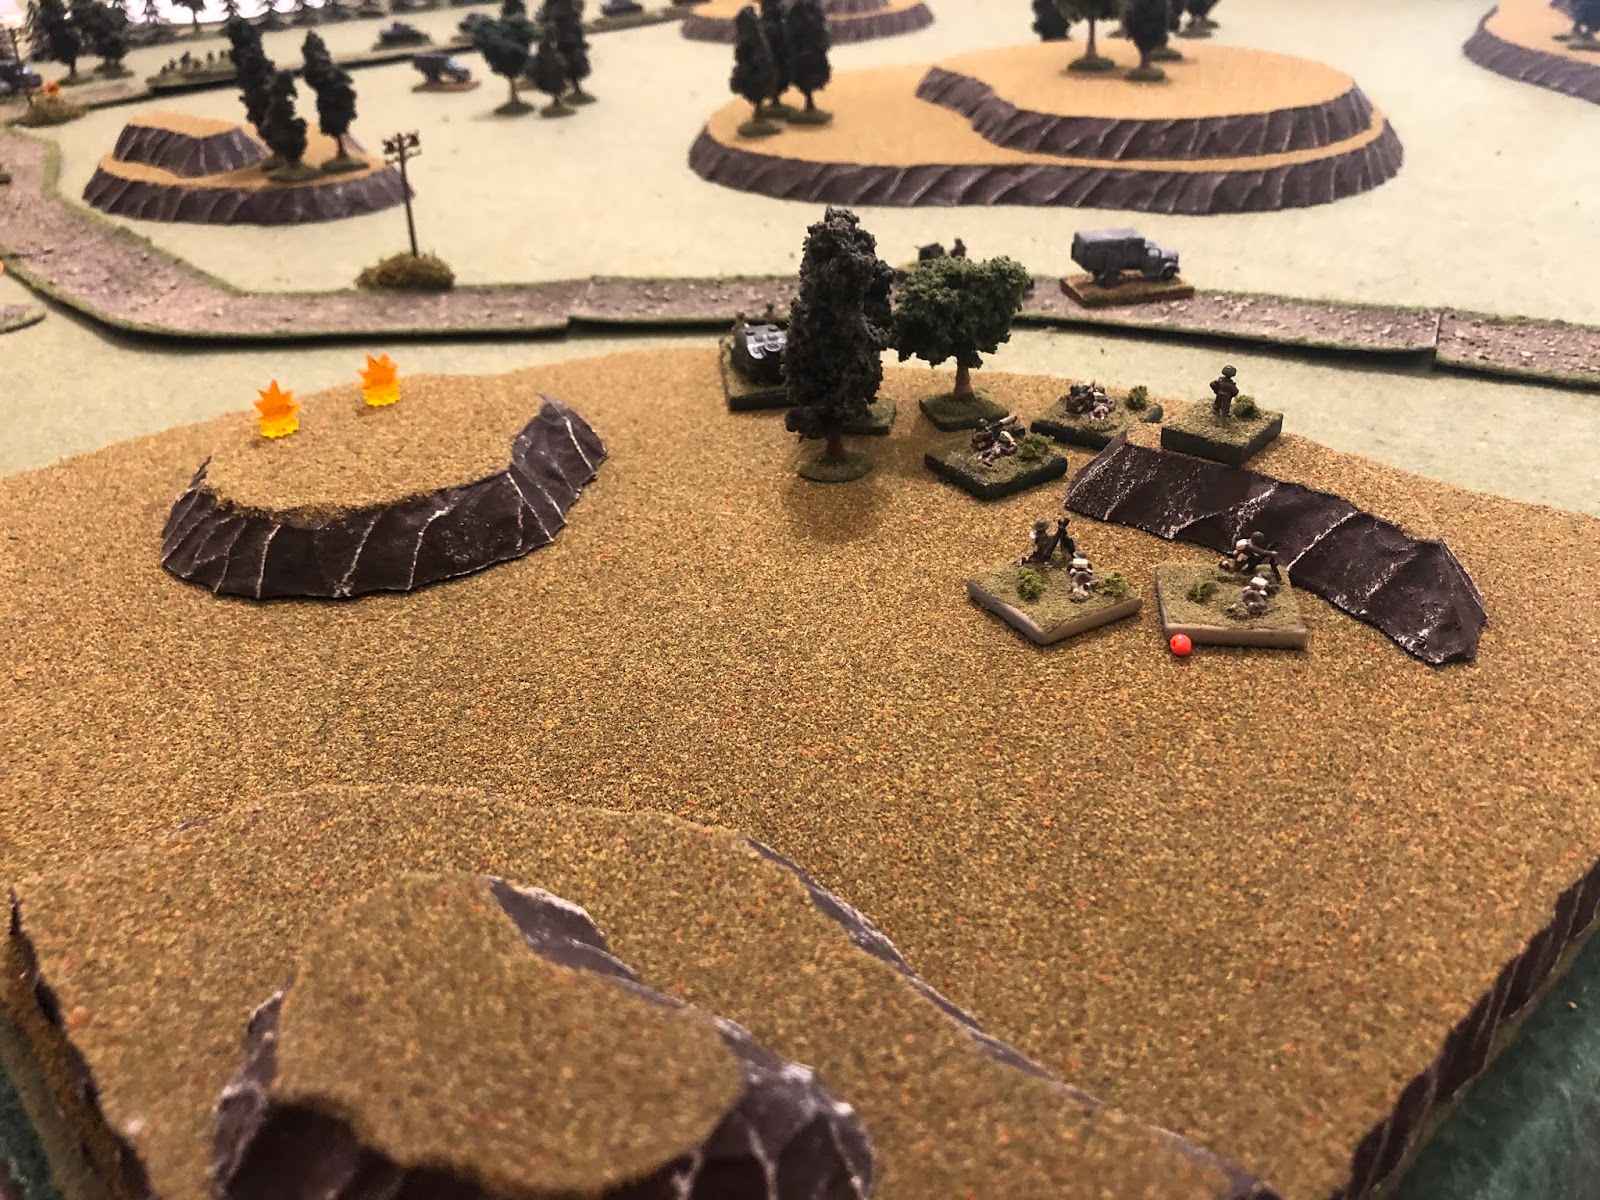


*I am cheating a bit for the Aussies (you can thank my affection for Shaun and Jimmi for that), allowing their suppressed mortar team to move with them as they're falling back. Normally suppressed teams are not allowed to voluntarily do anything except attempt to rally, but I figure it makes sense to allow panicking troops to keep moving back if that's what the rest of their unit is doing.


*I can't believe how many times ATG1 has been missed by the Germans at this point.


*It wasn't actually long, they just rolled like crap, getting one '6' on 3K 4S dice. That really let the Aussies down...


*Wow, neither sides' supporting fires did much of anything...


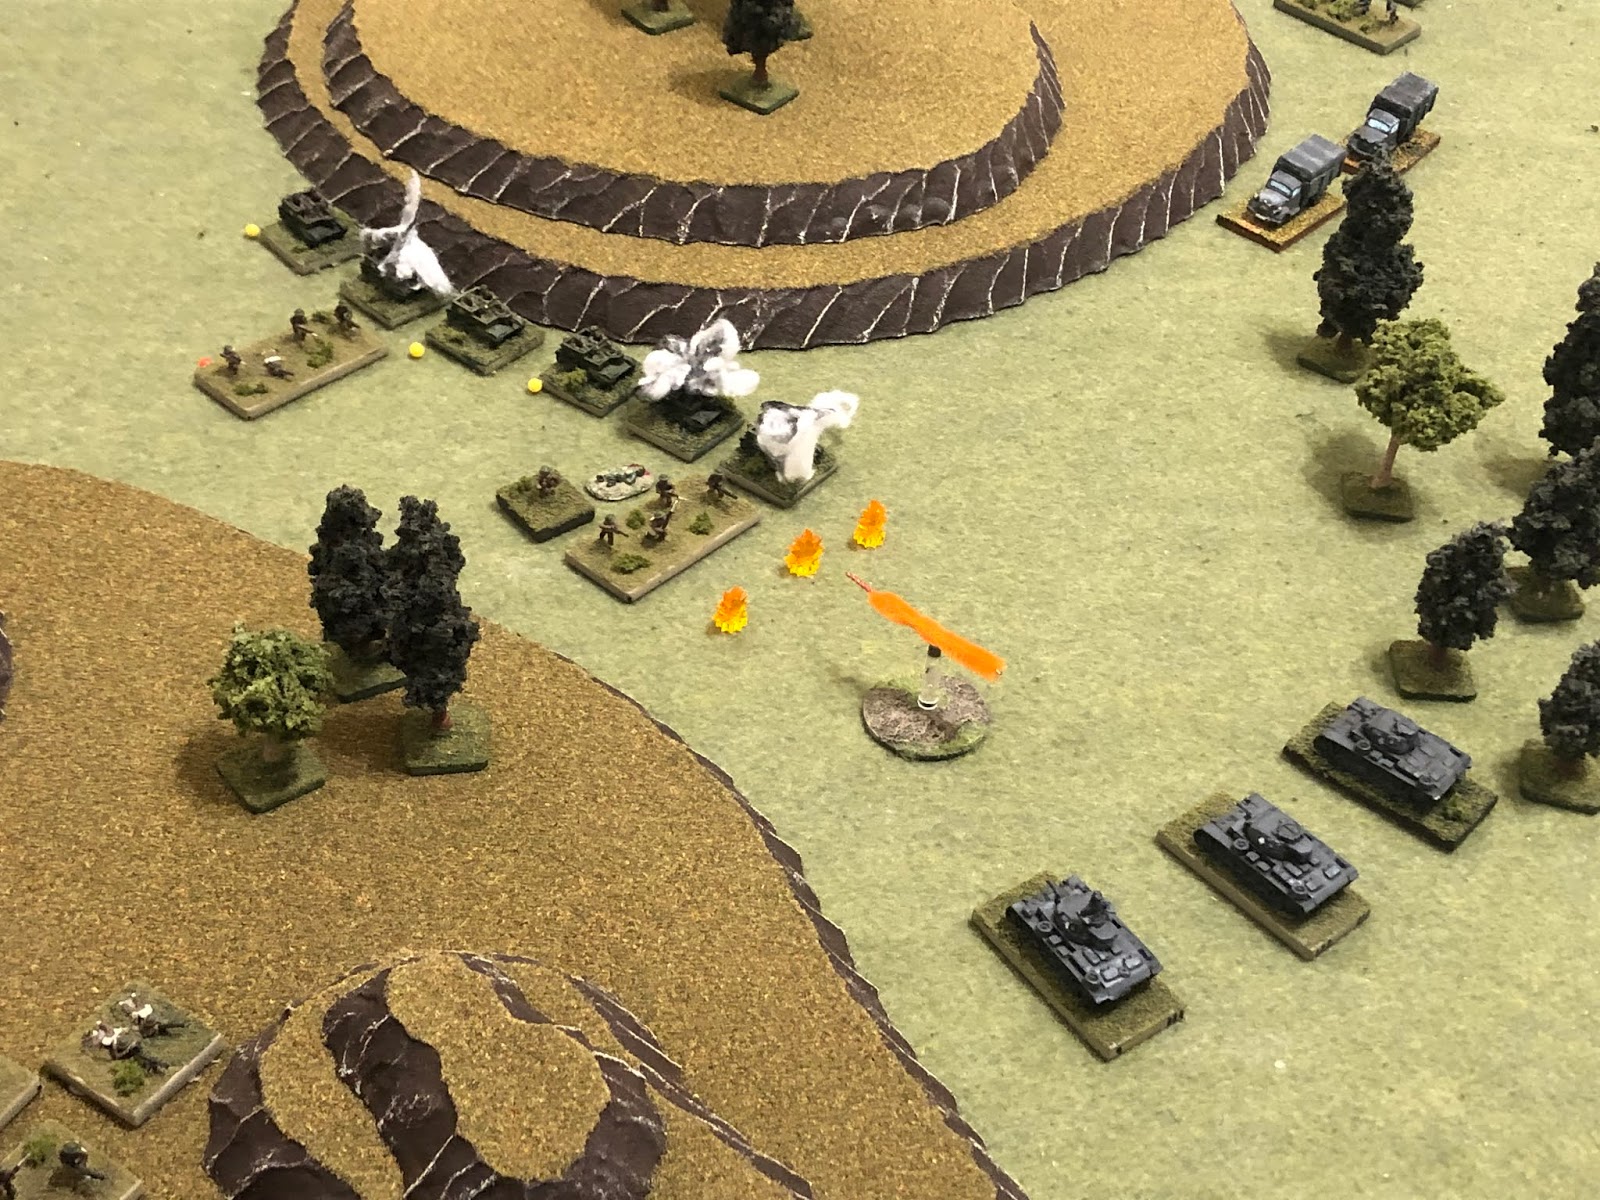


Well, that was a much harder fight than I expected!!! I was expecting a bit of a pushover, German tanks overrunning Commonwealth troops withdrawing on foot, but that's not how it played out at all. Sure, the Aussies got really lucky with ATG1 getting four kills on four shots, but they got screwed on the bad fire mission, which didn't do anything to slow down 3rd Panzer Platoon, which allowed 3rd Pz Plt to jump in and catch the Carrier Platoon in the open and rip them a new one. The Aussies were really counting on the Carrier Platoon using its mobility to get in close to 3rd Pz Plt, dismount, and really get in amongst them, tying them down and allowing the rest of the battlegroup to get off the map. 'Twas not to be...
Casualties:
German losses: 20 casualties and 3 tanks knocked out (two Panzer IIIs and one Panzer IV, though one Panzer III was immobilized and able to be salvaged
Commonwealth losses: 30 casualties, 100 captured, with four Universal Carriers destroyed and two more captured
Characters:
1st Lt Loeb, Panzer Company Commander, was badly wounded and will miss the remainder of the campaign in Greece. He receives his third Wound Badge, and now has one for Poland, France, and Greece
Sergeant Mettner, tank commander with one tank kill to his credit and veteran of Poland, France, and Greece, was killed in action
Cpl Peske, tank commander and veteran of France and Greece, was killed in action
Cpl Peske, tank commander and veteran of France and Greece, was killed in action
Awards:
Lt Colonel Klink, Kampfgruppe Commander, was awarded the Iron Cross, 1st Class, for intrepid gallantry in personally braving intense enemy fire to rally members of 2nd Panzer Platoon and Engineer Platoon, then advance them in a daring envelopment that cut off and destroyed the Australian 2nd Battalion, 8th Infantry Regiment
Lt Colonel Klink, Kampfgruppe Commander, was awarded the Iron Cross, 1st Class, for intrepid gallantry in personally braving intense enemy fire to rally members of 2nd Panzer Platoon and Engineer Platoon, then advance them in a daring envelopment that cut off and destroyed the Australian 2nd Battalion, 8th Infantry Regiment
Sergeant Fittzbaum, commander of Panzer 2, 2nd Panzer Platoon, was awarded the Iron Cross, 2nd Class, for close assaulting the deadly enemy anti-tank position that cost the battlegroup four tanks, knocking out both guns and capturing the enemy commander
And it goes without saying that that damn Aussie anti-tank gun crew won the Victoria Cross.
And it goes without saying that that damn Aussie anti-tank gun crew won the Victoria Cross.
Next up we witness Captain Freitag's 1st Schutzen battlegroup again defend against a Commonwealth attack, this time by the British Rangers/9th King's Royal Rifle Corps conducting a spoiling attack in an attempt to buy their comrades more time to withdraw from the German encirclement.
V/R,
Jack
Great report! This campaign has helped me understand how bren carriers were used.
ReplyDeleteThanks Chris, but I wouldn't put too much into my 'doctrine,' I'm just using the Carrier Platoon as a basic mobile reserve, I really don't know true Commonwealth doctrine for their intended use...
DeleteV/R,
Jack
Another superb battle report, Jack! The CW put up a much better fight than I expected.
ReplyDeleteThanks Jonathan, and yeah, it definitely got interesting, didn't it?
DeleteV/R,
Jack
Yes, very interesting!
DeleteThoroughly enjoying the game reports and your campaign is moving along nicely.
ReplyDeleteThanks, Peter, I appreciate it! Two more fights to post in this campaign, and I just finished up another one that went for a whopping 30 fights! I'll be posting that one on the heels of this one, though it's my modern 'alt-universe' blog so I doubt it will garner much attention ;)
DeleteV/R,
Jack
Great AAR and the 2pdr ATGs really put up a good fight. Initially I thought it would be much easier for the Germans with all that armour, but one of the joys of wargaming is you never know what is going to happen.
ReplyDeleteThanks, Steve! I'm with you, I thought the German armor would easily cut off and bag the withdrawing Australians, but it turned into quite a fun fight.
DeleteV/R,
Jack
Hey Jack!
ReplyDeleteReally enjoying campaign reports! Keep up the wonderful work!
Hey man, will do, and good to see you're still around!
DeleteV/R,
Jack
Superb stuff.
ReplyDeleteLoving the map and the developing story here.
Great campaign narrative.
Darren,
DeleteThanks man, and yes, the campaign map really helps visually depict the campaign's tactical situation and progress.
V/R,
Jack
Hello Jack
ReplyDeleteA little late to the reading of the report but I was a bit like you - thought it would be a pushover but turned out harder than it looked. I do not know about how carrier platoons were used either but I use them usually like you - a fast mobile reserve And thank you for thinking of Jimmi and I but it did not seem to help very much :-( When the Aussies are involved, I am happy for you to use your magic dice with them.
Shaun,
DeleteNo sweat man. Yeah, I'm just guessing as to how Carrier Platoons were actually used, I have no idea about what the actual doctrine was. And sorry, I hadn't thought about the 'magic dice' ;)
V/R,
Jack