All,
It's 1700, 17 Sept 1939, and the kampfgruppe has lost contact with the 4th Panzer Division's 35th Panzer Regiment on its right flank. LtCol Klink immediately dispatches a task group under 1st Lt Freitag, consisting of his 3rd and 4th Grenadier Platoons and a couple tanks from 2nd Panzer Platoon, to reestablish contact there. They are moving quickly in the failing light, hoping to meet friendly forces before the sun goes down. Unbeknownst to the Germans, the Poles have moved quickly to exploit the gap, and a small force of harried, exhausted Poles sit astride Lt Freitag's route. Unfortunately for the Polish defenders, one of its anti-tank riflemen is a bit overeager, and so a single 14.5mm shot rings out, alerting the now-veteran German troops to the pending danger.
The opposing forces: a small force of infantry supported by two tanks each. Aside from the Polish anti-tank rifles, neither side has any heavy weapons.
The Germans: CO, 1st Lt Freitag, Cpl Mayer and LCpl Otjen's Pz Mk II tanks, 2nd Lt Tausch's 3rd Plt (Sgt Schlessinger, Cpl Nader, and Cpl Hauer), and Office Cadet Vetter's 4th Plt (Sgt Mader, wearer of the Iron Cross 2nd Class, Sgt Lehmkuhl, and Cpl Imhofe).
The Poles: CO, two Tankettes with 20mm anti-tank rifles, and five rifle squads, two with ATRs attached.
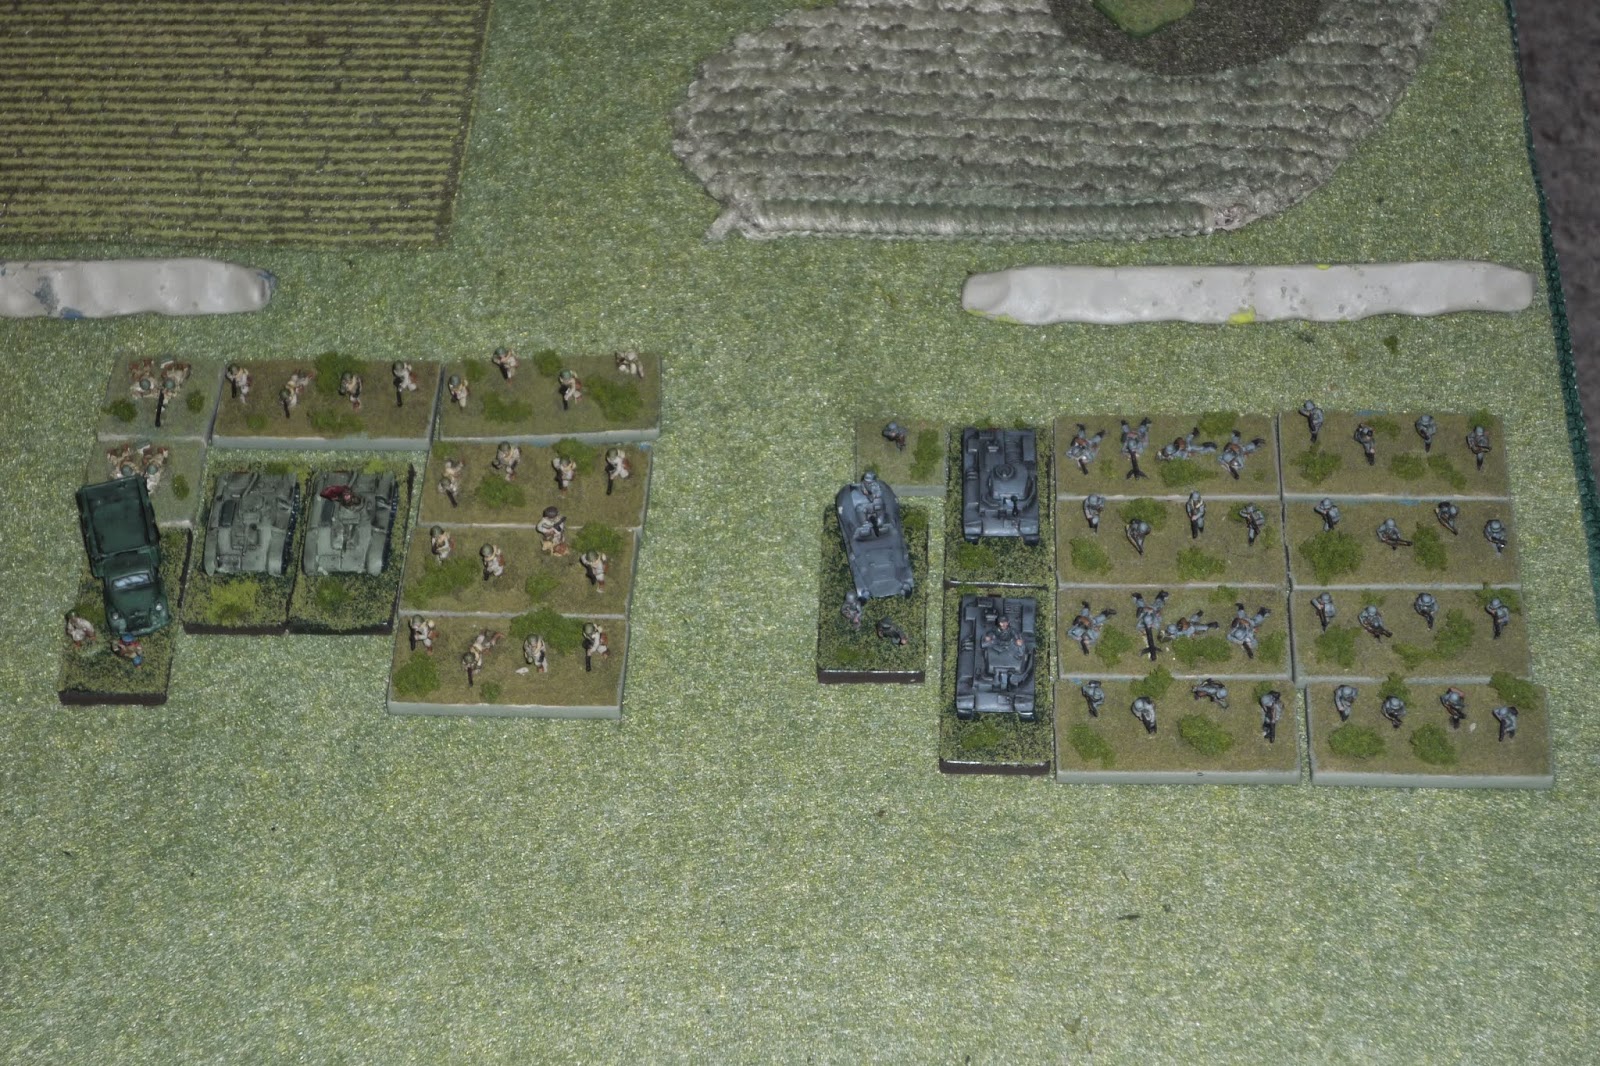
Overview, north is up, Germans are in column on the road from center to bottom right, Poles are still on blinds.
The Germans, with the two panzers leading, then the CO, followed by 3rd and 4th Grenadier Platoons.
Polish defenders west of the road: the CO, a tank, and two rifle squads, one with ATR. German lead tank at far right.
Poles east of the road: three rifle squads, one with ATR (center, bottom center, and far right), and one tankette. German 2nd vehicle at bottom left.
So the fight starts, and the Germans roll up a firefight, which is actually incredibly fortuitous. Cpl Mayer's Pz II (far left) fires at the enemy tank and misses, and return fire pins Mayer and his crew, and an enemy ATR (off camera to left) takes a shot at Mayer's tank also, but misses also. Meanwhile, Lt Tausch's 3rd Plt (center) turns and fires to the north, getting 'man down' on two Pole rifle squads. Officer Cadet Vetter's 4th Plt (bottom right) also fires to the north, knocking out an enemy squad (center right, casualty figure).
LCpl Otjen's Pz II (bottom right) fires on the the enemy tank in the west (far left, where the white puff is), and forces a 'fall back' on the enemy tank (he actually moves forward into cover to break LOS, top center). The Polish CO quickly rallied him, however...
And he moved up (top left) and fired on Cpl Mayer's Pz II, no effect (pinned again, which prevented Mayer's crew from returning fire). The enemy tank in the northeast (center right) moved up and helped recover the enemy rifle squad (from man down), and Mayer's gunner snap fired, but missed, but the enemy tank's fire missed also.
The CO (off camera to left), Lt Freitag, moves over and rallies Cpl Mayer's tank, and Mayer orders the tank forward. The enemy ATR at center snap fires and misses, so Mayer's tank fires on the enemy tank (was at center, white puff), getting a fall back (top right). Meanwhile, things heat up for the Landser as Cpl Hauer's 3rd Squad (bottom left) moved into contact with an enemy squad that was already pretty roughed up ('man down'), and quickly dispatched them.
So Hauer pushes his luck, and moves into contact with (dodging snap fire) the other enemy rifle squad (the one just rallied by the enemy tank), and he leads his men to another victory!
Cpl Hauer's squad is at top right. His victories cleared the way for LCpl Otjen to pivot, then gun the engine of his Pz II to charge ahead, pivot left, and take a shot at the other enemy tank (far left, their CO at bottom left), LCpl Otjen's tank fires, forcing the enemy tank to fall back (which takes it to the bottom left, right next to its CO).
The enemy CO rallies that tank, and the two vehicles move up (CO at top left), and LCpl Otjen's Pz II (far right, with Cpl Mayer's just below them) snap fires and knocks the enemy tank out of the fight! But the damned enemy ATR at bottom left fires on Cpl Mayer's tank, and pins it for a third time...
The Germans roll another firefight: Cpl Mayer rallies his tank (top center), while 3rd Plt (bottom right) fires on the enemy ATR (far left), and gets a pin. Right after rallying, the enemy ATR fires on Cpl Mayer's tank and pins the crew for a fourth time...
Then the Poles roll a firefight, which really sucks for them as they really need to get their CO (off camera to top left) over to rally their over tank (off camera to top center). The Polish ATR fires on Mayer's panzer again, but misses, as does return fire from 3rd Plt.
So, this really sucked: the other enemy tank got away! First off, the German CO moved over and rallied Cpl Mayer's Pz II, while LCpl Otjen maneuvered his tank (top right) over to shoot the enemy tank, which he did (the white puff at center top, behind two trees on the right), forcing the enemy tank to fall back (far left, with red bead behind the trees). Cpl Mayer moves his tank (bottom left, next to the knocked out enemy tank) forward to get a shot on the remaining enemy tank. They take the shot, but roll another damn fall back, and the enemy tank departs the battlefield...
Cpl Hauer, who so recently led his squad into two victorious close combats (far right, with CO) moved up and fired at the enemy squad at bottom center, but missed. The enemy's return fire put Hauer's squad out of the fight, my only casualties of the day... The enemy CO (center left) tries to rally the enemy ATR, but fails and they fall back.
Lt Tausch moves his HQ section up (far right) and fires on the enemy rifle squad, knocking them out (bottom center, casualty figure next to the bushes), then Sgt Schlessinger moves his squad up in the south (bottom right) while Cpl Mayer loops his tank around from the north (top left), bagging the enemy CO and one rifle squad (with ATR), game over.
Notes:
-Cpl Hauer (3rd Squad, 3rd Gren Plt), Wound Badge, Infantry Assault Badge, recommended for Iron Cross 2nd Class for leading close assaults which eliminated to enemy squads.
-LCpl Otjen (V5, 2nd Pz Plt) scored one tank kill.
-Lost ~10 WIA/KIA.
-Caused ~50 WIA/KIA, captured approximately 20, and destroyed one enemy light tank.
Quick and easy, I'll take the win any way I can get it! The decisive action, of course, was Cpl Hauer's string of successful close combats which eliminated the enemy infantry east of the road, and this happened very early, which really seemed to win momentum over for the Germans. This is also the first time that I really got "Firefight" activation rolls when I needed them, though I'm really aggravated that I let one of those enemy tanks get away; just kept rolling "Fall Back."
I've got two more to write up, then more to play this coming weekend.
V/R,
Jack


As I read through the report I was thinking you must have changed the dice you had been using. If you didn't the certainly came through for you this game! Excellent report as always.
ReplyDeleteYeah, things went alright, didn't they? Except letting that other enemy tank escape, that really burned my ass!
ReplyDeleteThe 'firefight' to start the game put everything on the right foot, but that set of close combats in the center really had me puckered up. I was thinking, things are going great, slow down, don't get too crazy, but I did it anyway and it worked out.
I will admit to a certain amount of Hollywood in my games,that is, I will sometimes not make the best tactical decision, I will sometimes make the best storyline decision; if it works, we're in the presence of heroes! If it doesn't work, we're either 1) still in the presence of heroes, who valiantly sacrificed themselves, or 2) they were heroes betrayed by the stupidity of their commander (me)!
Makes for fun games, a great campaign (I really get attached to the little guys, want them to do well), and hopefully reports that are fun to follow.
V/R,
Jack
I know the feeling - you get a bit cocky with a few good dice rolls and then start taking risks. And it may or may not go well but regardless it certainly makes for a great gaming experience. Actually, it seems you are the same as me and it does not even take a few good dice rolls, just a " I reckon the have a chance to cross that gap in the open and take out that MG nest from the rear". Sometimes it even works! When it goes bad, I have sometimes been known to re-roll the die roll but the gods always seem to roll the same number! It was obviously meant to be. I rarely re-roll these days, unless to convince myself that it was supposed to happen that way (I take the first roll but the second is the "what-if").
ReplyDeleteI might as well be daring, I'm looking for quick games. It's gonna be over one way or another ;)
DeleteAnd it's funny because I really didn't have a lot of confidence in this set of charges, there was really nothing going in Cpl Hauer's favor, just sort of a 'right place at the right time,' and I was really looking at it as 'what am I going to do after this squad gets mowed down?' But it worked out.
But I never re-roll, ya cheating @#$%!!! But, hypothetically speaking, there could be nothing worse than rolling the die, getting the absolute worst result possible, rolling again -same, then rolling one more time, just 'cause you're pissed, and getting the same again. It could even make one want to throw things, I hear ;)
V/R,
Jack