All,
It's now 2030 on 17 July 2002, fourteen days since the last fight, and the Royal Marines have caught a break in their search for their "Black Friday" assailants of 24 May 2002. Having discovered the death of the her husband, the Merchant's wife stumbled into one of 27 Commando's patrol bases. Distraught and incoherent at times, she spilled her guts to the Royal Marines; her motivation was the fact the Taliban had killed her beloved husband, and no one present had a mind to disavow her of that notion. But she provided information not only on who the leader was, but where he was currently located, and what he was doing, which just happened to be a meeting with his senior Lieutenants to hash out plans to strike hard against the Royal Marines of 27 Commando prior to their redeployment home.
The entire platoon was dispatched, with two Sections taking up blocking positions to isolate the objective, while our Section was the assault force. But isolating the objective would prove quite problematic: the meeting of the Taliban commanders was happening in an urban area, a house on the outskirts of Kabul. The mission needs to take place right away; SIGINT and other HUMINT reporting has indicated the meeting will end at 2130 and the leaders will split up and return to their home bases. The reason for only a single platoon assigned to the task is partially one of transport; there is not enough lift available. Royal Marine Chinooks could carry more men, but are ill suited for the mission; for such a precise insertion the Royal Marines will be using three MH-60s from JSOTF (Joint Special Operations Task Force) at Bagram, of which only six are available for the mission.
So the two Sections taking up blocking positions will have a very difficult time blocking blocking to the west, where the target compound abuts the rest the city proper; necessarily the blocking Sections will be more concerned with keeping Taliban in Kabul from rushing to, reinforcing, the target compound, and less focus will be put on blocking escape from the target compound, where there are simply too many routes to cover. But the Platoon is ready; broken into sticks, they mount the helicopters and begin winging south to Kabul.
On an admin note, this will be the last fight for this campaign, "Royals in Parwan." I've figured out that eight is about how many fights I can do before my interest turns to something else, so this is it for now. But I'm not leaving them forever; I plan on doing further blocks of eight games, following these guys to Operation Iraqi Freedom in 2003, Back to Basra in maybe 2005 or 2006, Afghanistan in probably 2008 or 2009, over to Libya in 2011, maybe to Syria after that. We'll see; in any case, stand by for a helluva fight!
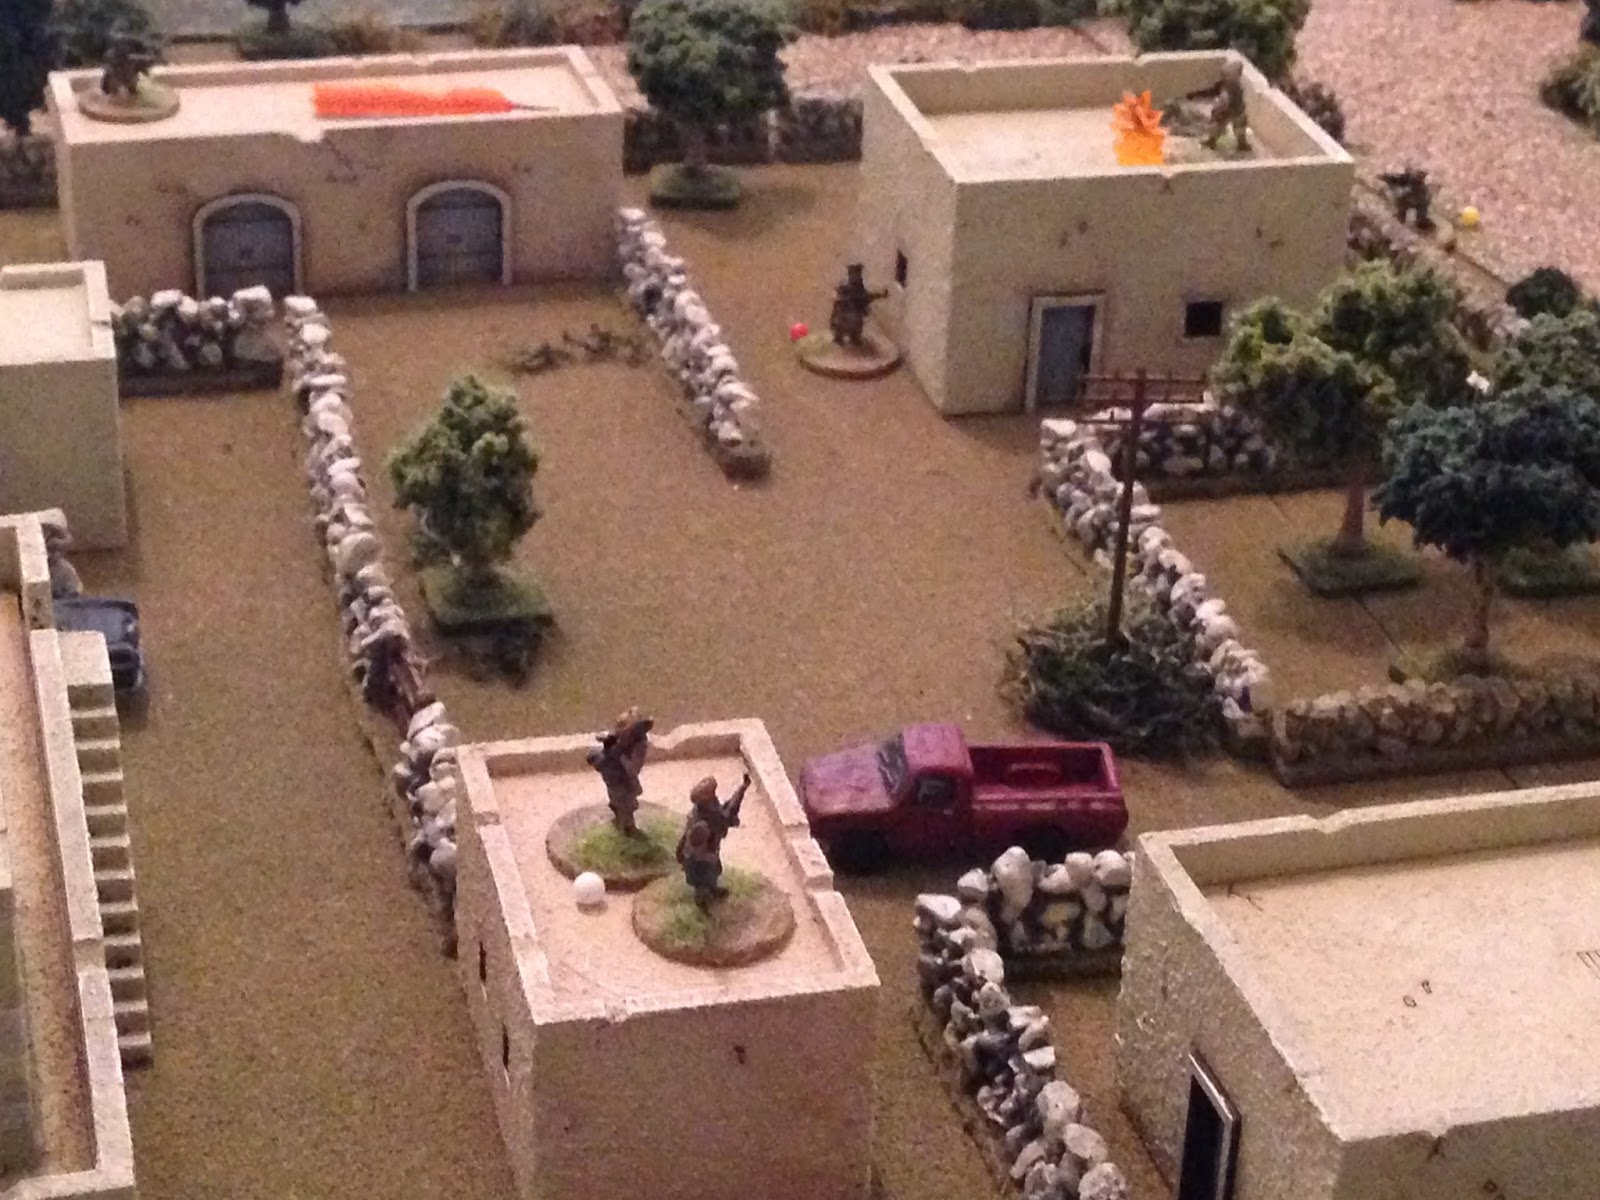
Overview, north is up. The target compound is spread across the bottom left side of the board; in there is where the Taliban leaders will be meeting. The RMs will look to kill or capture everyone located here, but the top commander, the man that planned and led the Black Friday ambush, is the prize. The Marines must keep him from exiting the left (west) edge of the board, where he can simply disappear into the sprawl of Kabul.
I am running a die-driven clock to determine when the Taliban leader will begin his run for the board edge, and I am using a blind method to figure out which building he will start his run from.
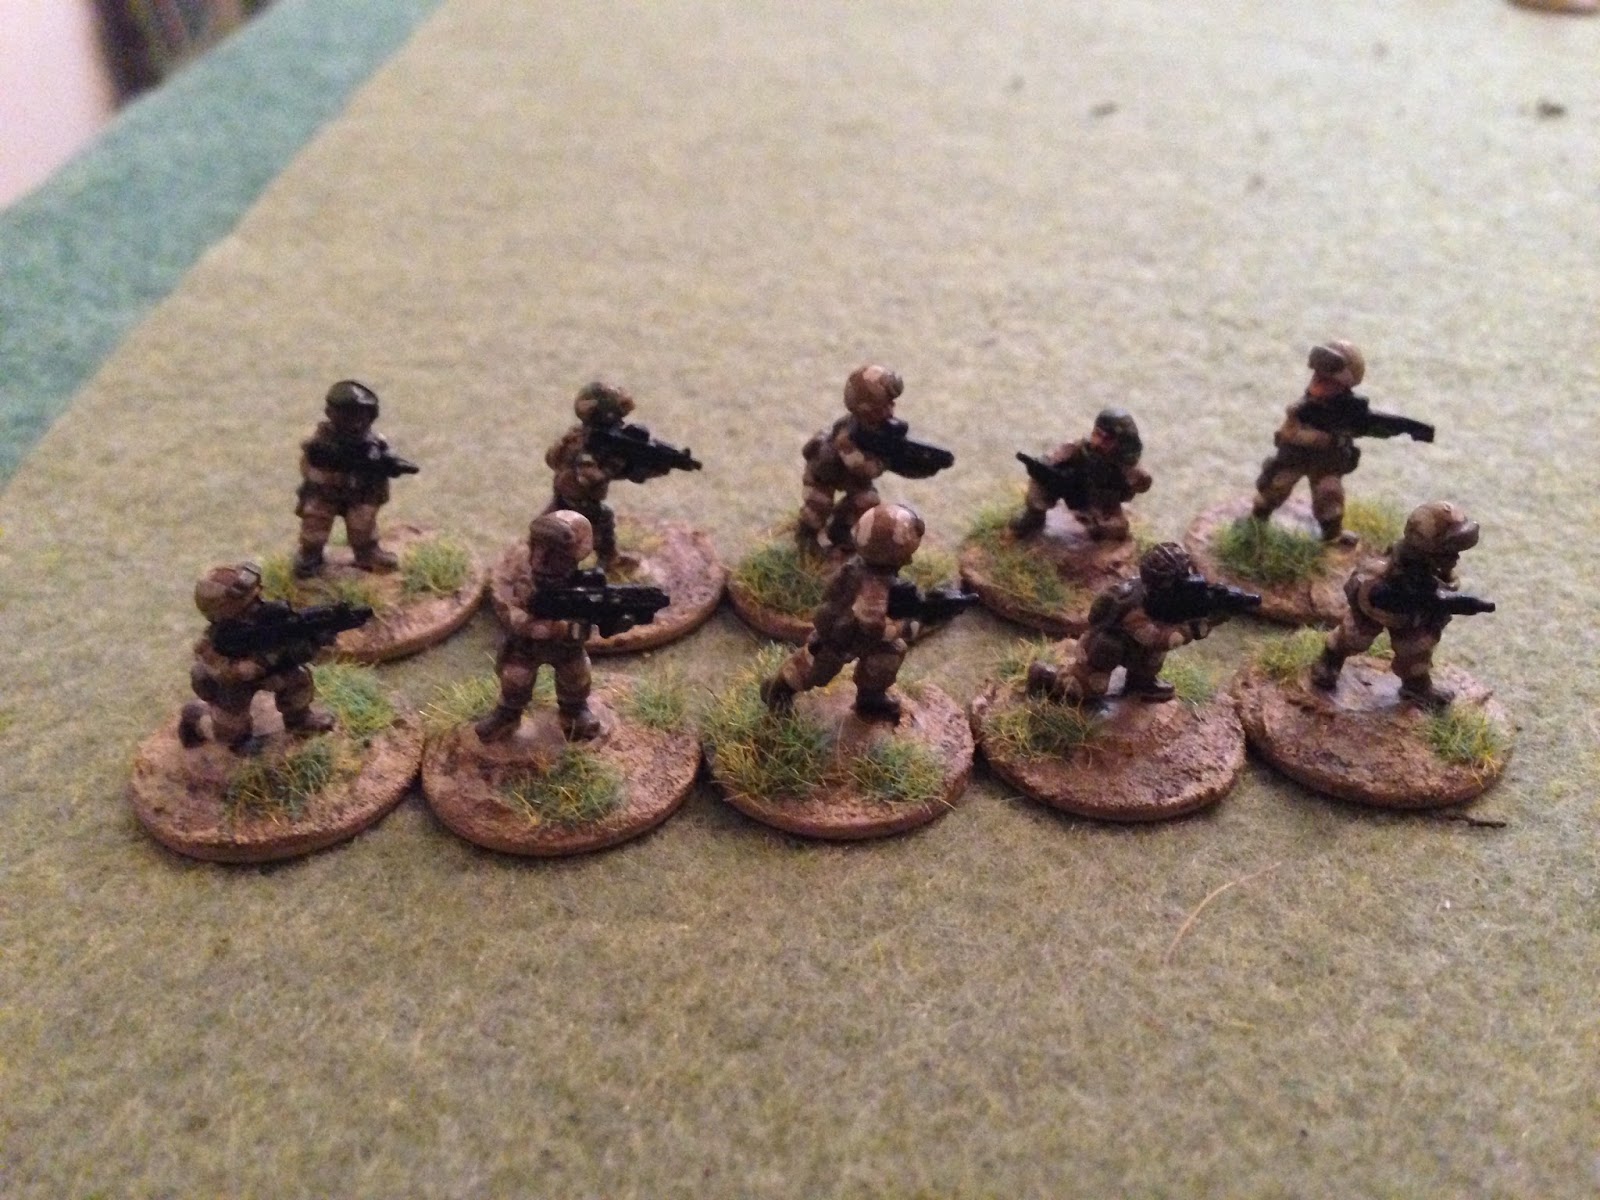
The opposing forces, even up at ten apiece.
The Section, with one new guy, a replacement for Wali.
Top left: Sherlock, Gimlet, Rip, Sparks, and the new guy, Marine "Belly" Gastro.
Bottom left: Knocker, Conk, True, and Able.
The Section is broken up into two sticks, each in a separate helo; the troops are shown in their sticks, one led by Sherlock and one led by Knocker.
The Taliban, ten men with eight AKs and two RPGs. The leader is a separate man that starts the game hiding in one of the buildings.
Looking west to east.
North to south.
East to west.
Southeast to northwest.
And it's time to get this party started. The 'whup-whup-whup' of helicopter blades are heard in the distance, getting louder...
Two Blackhawks laden with Royal Marines shoot in, just over the rooftops of Kabul.
They flare as lines are tossed out and Marine begin fast roping to the deck.
Their cargoes disgorged, the helos dip their noses and egress to the east. Sherlock's stick is at bottom left, Knocker's at top center, moving towards the target building.
Drawn from their meetings by the commotion, the Taliban pop out all over the place, ten of them! Starting at bottom center, there's one under the building there, there are two at bottom left, one at far left (black sedan), one on the building above him, two more to the right of him, one atop the building to their right (dead center), one in the field at top center left, and one, behind the Marines, at top right.
Another look, west to east, from behind the Marines.
North to south.
And west to east.
Sorry for so many photos, but I'm really happy with how my table has slowly but surely getting better looking.
"Contact!!!!" The fight starts in the northeast, where True (on road at center) spots the terrorist behind them (top right) and fires...
One Tango out of the fight!
Geeves opens fire...
Knocking the terrorist on the roof (center right, white bead) down. Geeves then moves to the wall (far right), but drawing react fire (far left, rooftop).
Which forces him to fall back (red bead at bottom right, from explosion at center).
Knocker moves up to the wall (bottom center, with Conk at right) and fires...
Knocker (far right) misses the bad guy at bottom left, but the terrorist at top left returns fire...
On a side note, I can't help but notice, after eight games, that Knocker doesn't hit shit, no matter how many dice I give him...
Pinning Knocker (far right). Conk moves up (center) to get at the guy that just shot at Knocker (top left), but the bad guy at bottom left spots him and opens fire...
Conk falls (bottom left), and True (top right) is pinned.
Able rushes to True to rally him (top right), opening fire on the guy that just shot Conk (bottom left)...
Forcing the bad guy back (red bead at far left, from explosion at bottom right)...
But True is spooked by Conk falling, and he falls back too (red bead at far right, from True at far left).
On the Marine left, Rip begins creeping forward (center right), intent on getting at the bad guy on the roof at far left. But as he move up he spots movement out of the corner of his eye: it's an RPG gunner (bottom right)! Rip flops prone behind the wall.
With Rip up ahead of him (green bead at center), Belly (bottom center, with Sparks and Sherlock at bottom left) opens fire on the guy Rip was initially going after (top left)...
The terrorist (top left) is pinned, and Belly moves up to the wall (top right, with Rip at center and enemy RPG at bottom center).
Seeing that Belly (center right) only pinned the guy, Sparks moves over (bottom left, with Rip above him) and fires at the same target (top left)...
Knocking the insurgent down (white bead) and forcing another to seek cover and hide (bottom center right, from red bead).
On the Marine far left flank, Gimlet and Sherlock hop the wall.
The bad guys punch back: a Talib (bottom center) fires at Able (top center)...
Pinning him. Then the terrorist hops down off the roof and moves to his buddy, rallying him.
But he's not having it, and falls back, hopping the wall (bottom left, from red bead). However, the Tango manages to successfully self rally.
Another insurgent (bottom center) fires on Knocker (top center)...
Keeping him pinned down (yellow bead at center). Then the terrorist hops down and moves up to the next building (bottom center), intent on getting to the roof to check on his knocked down buddy (white bead).
A Talib (bottom left) fires on Sparks, missing.
But in the north, on the Marine right, a Talib moves up (bottom left) and fires on Able (top right)...
Putting him out of the fight (with Conk out of the fight at bottom left).
On the Marine left, the RPG gunner tosses a grenade over the wall at Rip (blue bead), who is lying prone...
Then the Tango sprints to the wall, but Sparks spots him and opens fire...
Rip doesn't spot the grenade (top center), and as the Tango hops the wall and goes prone (bottom left), the grenade detonates...
No one is hurt, but Rip falls back (red bead, from white puff) and Sparks is pinned (yellow bead, with Sherlock on other side of the wall, at left).
This hunkering terrorist (red bead) successfully self rallies, then begins pondering how he's going to get up on the roof to check on his buddy (white bead).
Back on the right, Knocker (behind wall at center right, with Belly at bottom right) fires on the bad guy (top left) that just shot Able.
The terrorist drops.
Belly hops the wall and climbs atop the roof...
Finishing off the Talib there.
On the Marine far left, Sherlock moves to the roof (top right), but draws react fire (far left)...
Which pins him. Gimlet moves up next to him, then fires on the prone RPG gunner (bottom left), the guy that threw the grenade at Rip.
Outing him.
Below them, Sparks (yellow bead) and Rip (red bead) both successfully self rally.
And then, on the right, Geeves (bottom center, with Knocker at far left) and True (top right) rally too.
True is good, but Geeves falls back again (red bead, from truck at left).
If he falls back again he'll leave the damn map. Maybe he's not okay...
That damn Talib behind the black sedan (bottom center) has really been a pain in my ass. He opens fire again, shooting at Sherlock and Gimlet atop the building at top right)...
Gimlet is knocked down (left), and Sherlock falls back (right).
In the center, a recently rallied bad guy (bottom left) spots Belly atop the building and fires..
Knocking him down. Seeing this, the bad guy at bottom left...
Climbs up and closes the distance...
But Belly (right) comes to, and fights him off, sending him back down to hunker (red bead at bottom left)!!!
The Taliban was +3 in that D6 opposed die roll, by the way.
But another terrorist (bottom left) hoists himself up on the roof and fires at Belly (top right), knocking him down again.
With that firefight happening across the top of the photo, and Sherlock and Gimlet in no position to interfere (off camera to right), the bad guy in the southwest corner (bottom center) hops up and checks on his buddy (the other RPG gunner), and he's okay.
On the Marine far left, Rip climbs up to Sherlock (center right) to rally him...
But he's not feeling so hot and hops down (bottom right). He self rallies, but only gets up to pinned...
Despite the problems with Sherlock and Gimlet, Sparks (bottom center) hangs in there, opening fire on the two bad guys at top center.
The RPG gunner is put out of the fight, while his buddy is knocked down (white bead).
Sparks has turned into quite the little marksman. This is the third time I recall him hitting multiple targets with a single burst.
Geeves (bottom left) and Knocker (top left) both successfully rally, as True (far right) looks on...
Then dashes into the street (top right), drawing react fire....
He runs between the rain drops and takes cover behind a tree (center right) before returning fire, pinning the bad guy.
But the bad guy returns fire (bottom left) himself, pinning True (top center).
This wasn't a mistake, I didn't let the bad guy return fire twice. It was the Marines' turn, so True moved up, drawing react fire. Then it became the Taliban's turn, and the guy that just react fired at True activated first for them,
The bad guy at bottom right successfully self rallies.
The insurgent behind the black sedan (bottom left) sprints forward (bottom center), trying to get to the knocked down terrorist atop the building (white bead). But Sparks (top right, at ground level) sees him and fires...
Of course, after I just complimented him on his marksmanship, he misses. The terrorist gets to the wall and returns fire (bottom center)...
Forcing Sparks back...
A recently rallied insurgent (top left) climbs up on a roof; Rip (bottom right) spots him and fires...
He misses, and the bad guy returns fire...
Putting Rip out (center), This building really hasn't worked out for me. Rip is out, Gimlet is down, and Sherlock was driven off and is still hiding at bottom right...
In the center, Geeves (far right) sprints ahead, drawing react fire (from far left)...
But the rounds miss, and Geeves makes the cover of the trees (bottom center), where he takes a knee and returns fire.
Forcing the bad guy (red bead at bottom left) to fall back.
Still in the center, Knocker climbs up the roof and fires, knocking down a bad guy (top center), then checking Belly (bottom center), who's okay, back in the fight.
Sparks (red bead) self rallies, but only gets up to pinned, while Sherlock hauls his ass back up on the roof (yellow bead), intent on getting to Gimlet, who's been knocked down for quite awhile now...
The Tango at bottom left fires on Knocker and Belly atop their house, as the guy that Belly kicked off the roof shelters below them (top center left).
The bad guy (bottom left) misses, and Belly (top right) returns fire, knocking him down.
The bad guys on the Marine left are finally in bad shape, with two guys knocked down, and no one reasonably close enough to go check on them and get them back in the fight.
On the Marines' far right (this is a little screwy, looking south to north at the top of the table), True is trying to make something happen. He darts up the right flank (top center), but somehow the bad guy below Knocker and Belly (bottom center) spots him and opens fire...
Forcing True to fall back (right, from explosion at far left, with Conk at bottom left and Able at far right)...
And then that same Talib tossed a grenade (blue bead) at Belly and Knocker.
The insurgent runs, but Belly opens fire...
And the terrorist is gunned down (top right). He was trying to get to these two guys, both knocked down.
But then the grenade goes off, putting Belly out of the fight and pinning Knocker.
At bottom left, the Talib there successfully self rallies.
And finally the Target breaks cover (right).
Geeves sprints up (bottom left) as Knocker (atop building at left) and True both successfully rally.
Sparks (far right) again tries to self rally, while Sherlock moves up to check on Gimlet (far left)...
Gimlet is okay, but Sparks falls back (red bead at bottom center, from yellow bead at center right).
A terrorist (bottom left) fires on Sherlock and Gimlet (far right), laying down cover fire as the Target sprints left (bottom center, at ground level, just left of the guy knocked down with white bead. He started to the right of the building).
Time is growing short; the Target is trying to run off map, into the urban maze of Kabul.
The terrorist's fire forces Sherlock back yet again, where he joins Sparks (bottom right).
Gimlet (bottom center) returns fire (top center) pinning the Tango. The Target is just visible to the left of the black sedan.
With the Target at far left, Geeves (bottom center right) and Knocker (bottom right) both move up. Knocker yells, "don't shoot him, get him alive!"
With Knocker and Geeves at far left, True sprints ahead on the right (far right).
The Target gets closer to his goal (bottom center), as his buddy (yellow bead) fires on Geeves...
The bad guy misses, but so does Geeves (bottom right). The Target is at top left, almost gone...
Gimlet (bottom center) fires on the bad guy soldier, as Knocker and Geeves (center) ponder how to get the damn Target...
The terrorist falls back into cover (red bead, with Target at bottom right).
Knocker (bottom right), very cautiously fires on the Target (top left), trying to scare him into going prone, as Geeves moves up to the wall (center, just under the orange tracer).
But it doesn't work, and the Target rounds the corner (bottom center), then becomes lost in the city of Kabul...
DAMMIT!!!!!!!!! Wow, what a fight, but this is a bit frustrating. Last fight, I was on the cusp of victory, about to take The Merchant alive, when Conk accidentally guns him down, and this fight, when Geeves is right there, getting to the other side of the wall, almost in striking distance, and Knocker takes the 'scare' shot, but misses...
Having said that, it works wonders for the campaign narrative. Despite the fact the next to campaigns will be in Iraq, the Royals shall return to Afghanistan, and guess who their nemesis will be? Yeah, this guy, the one that got away, The Target. And guess what else? In the post mission debrief, Knocker speaks up: "mates, I've got something for you. I got a good look at him, at the Target, and we know him." "What???" "Yeah mate, we know that bloke. Quite well actually." "Well, come off it Knocker, who in bloody 'ell was it?" "It was Pasha Gul." "You must be joking mate." "I'm not. I've... we've spent plenty of time with that bastard, and I'm telling you, it was Pasha Gul."
The fight itself was quite bloody, with the Taliban scoring a lot of hits. Must've been some highly trained foreign fighters or something ;) While the bad guys suffered another nine KIA, the Section was, once again, pretty beat up:
Rip - KIA
Able - Lost his left arm, being returned to the UK and medically retired.
Conk - WIA, but not too bad, out of action for a week or so of convalescence.
Belly - Suffered a concussion, but otherwise he's good to go.
Here's the campaign tally:
Taliban: 49 KIA, 3 captured
Royal Marines: 3 KIA, 4 WIA and medically discharged/retired, 1 WIA and retained for service but not fit for combat duty, and four other WIA that were able to stay with the unit.
The Section was getting ready for redeployment home, no longer required to go outside the wire, but they volunteered for one more presence patrol, one that took them back to Khowt Gin, home of Pasha Gul. But he was gone; it had been a day since the raid on the outskirts of Kabul, but he'd already grabbed his wife, cleaned out the home, and departed the area. "We'll see you again, Pasha."
Little did they know they're next deployment would not be to Afghanistan, but to Iraq...
V/R,
Jack


Brilliant! A very near thing.
ReplyDeleteSomehow along the way I missed what rules you are using. What are they?
DSG,
ReplyDeleteThanks man, and yeah, it was super close. I'm using Ivan Sorensen's "Five Men at Kursk," modified a bit to make it a bit more modern (at least in my eyes). Forgive me, I'm not sure where I put them, but I wrote my mods into one of the batreps. One of the earlier ones, if I recall correctly.
V/R,
Jack
Just looked it up, it's fight #4.
Deletehttp://blackhawkhet.blogspot.com/2016/07/royals-in-parwan-fight-4.html
V/R,
Jack
Ah yes, thank you! Missed that one. Ivan's got some great stuff! Played his 6mm SF game a few times, great fun!
DeleteNo sweat man. And 5Core is definitely the activation and combat system for me!
DeleteV/R,
Jack
Great report again- I think that was the most attractive game board you have set up yet.
ReplyDeleteCheers,
Pete.
Thanks Pete, and I'm doing my best to make a decent looking table!
DeleteV/R,
Jack