All,
And then the wheels came off... If you recall, after a stiff fight yesterday to flank the NVA bunker line holding up 2nd then 3rd Battalion moving up Hill 475, all US forces pulled back and dug into company-sized NDPs. The squad had been resupplied and even received a couple FNGs as replacements.
Overview of table, north is up, NVA baseline at top, US baseline at bottom. The squad is dug-in in three bunkers, from left to right, bunker 1, 2, and 3. The NVA is coming in force from Hill 475 (north), entering their base edge and trying to get off the southern base edge. Everyone starts unspotted (violet beads).
NVA in the northeast, a leader, an RPG, and three riflemen.
In the center, a leader and three riflemen.
On the right, a leader, an RPG, and three riflemen.
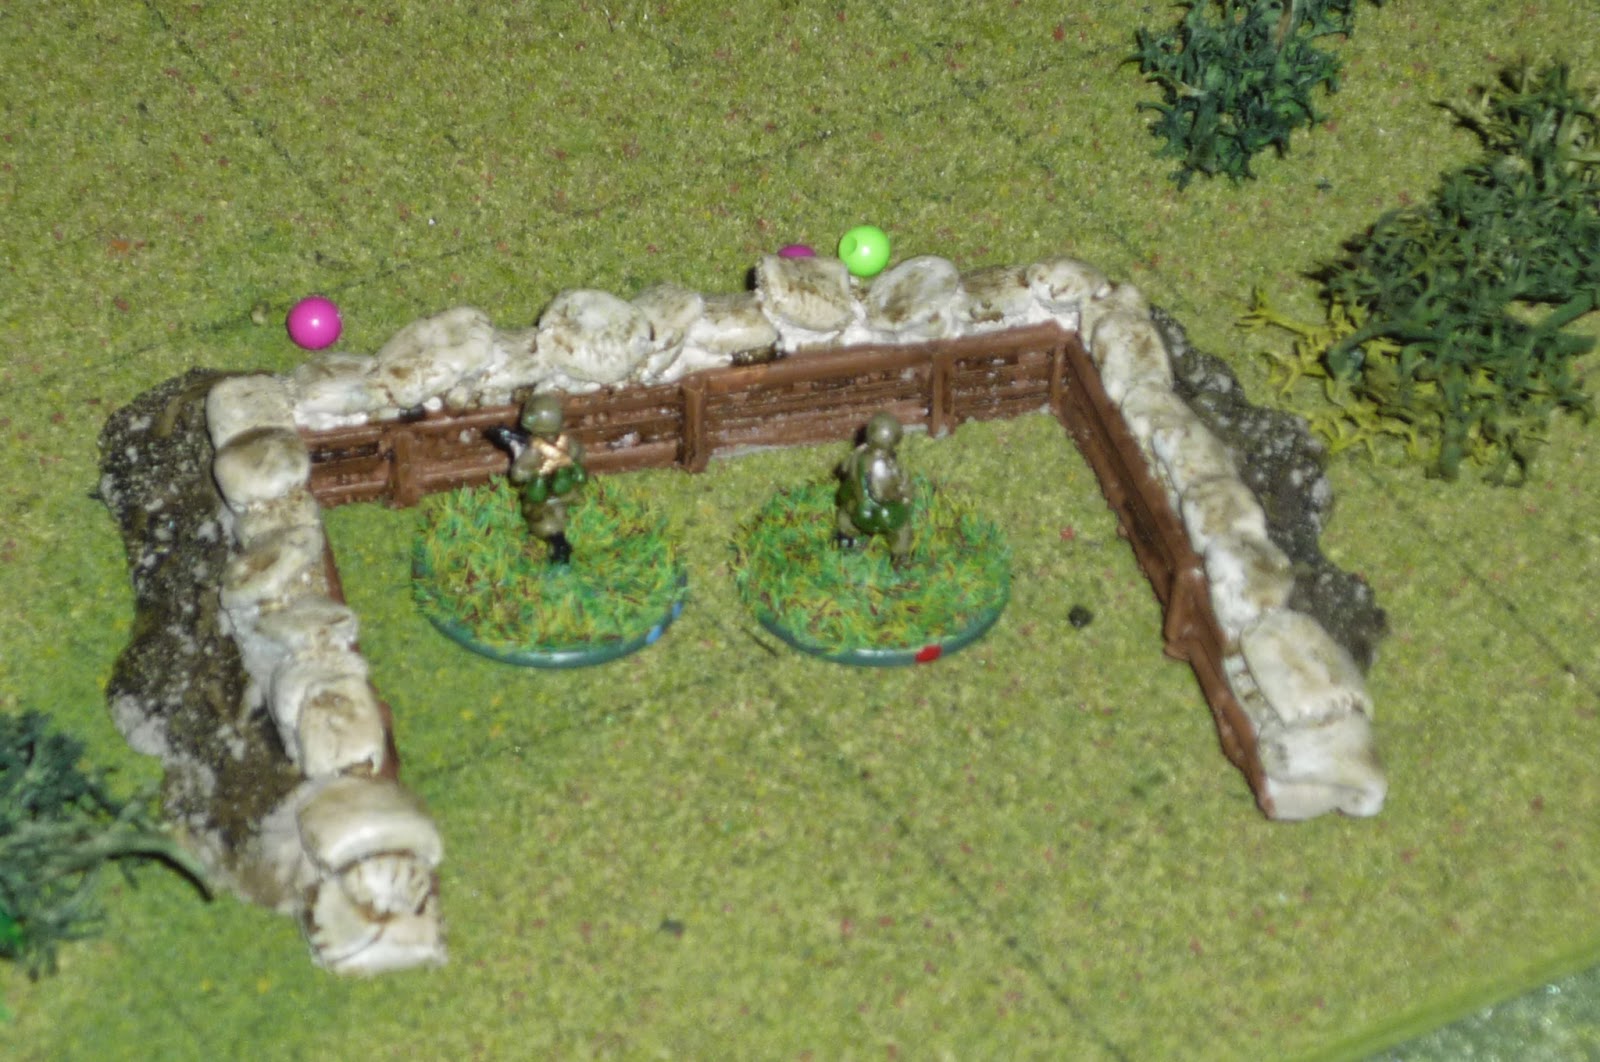
Bunker 1 (left), manned by Webster (new guy with M-79) and Doc White.
Bunker 2 (center), manned by Sgt Banaszak and Stallworth, carrying the M-60.
Bunker 3, with Swann and Ham (other grenadier). Each bunker is starting the game at 50% (one man on watch, one man sleeping).
Looking from behind Bunker 2 (bottom right), you can see the squad laid concertina wire, four claymores (aqua beads), and put out an LP/OP (center top, Holmes and Fuqua).
It's pitch black, and both Holmes and Fuqua are awake on LP/OP, when fleeting, specter like shapes and sounds suddenly crystallize in Holmes' mind: @#$%, how'd they get so close? "Echo 5 Bravo this is Echo 2 Hotel, we've got beaucoup Charlie out here, we're coming in" Holmes whispered into the field phone. "Come on Fuqua," as the two men crawl back two actions, both reserving one for overwatch.
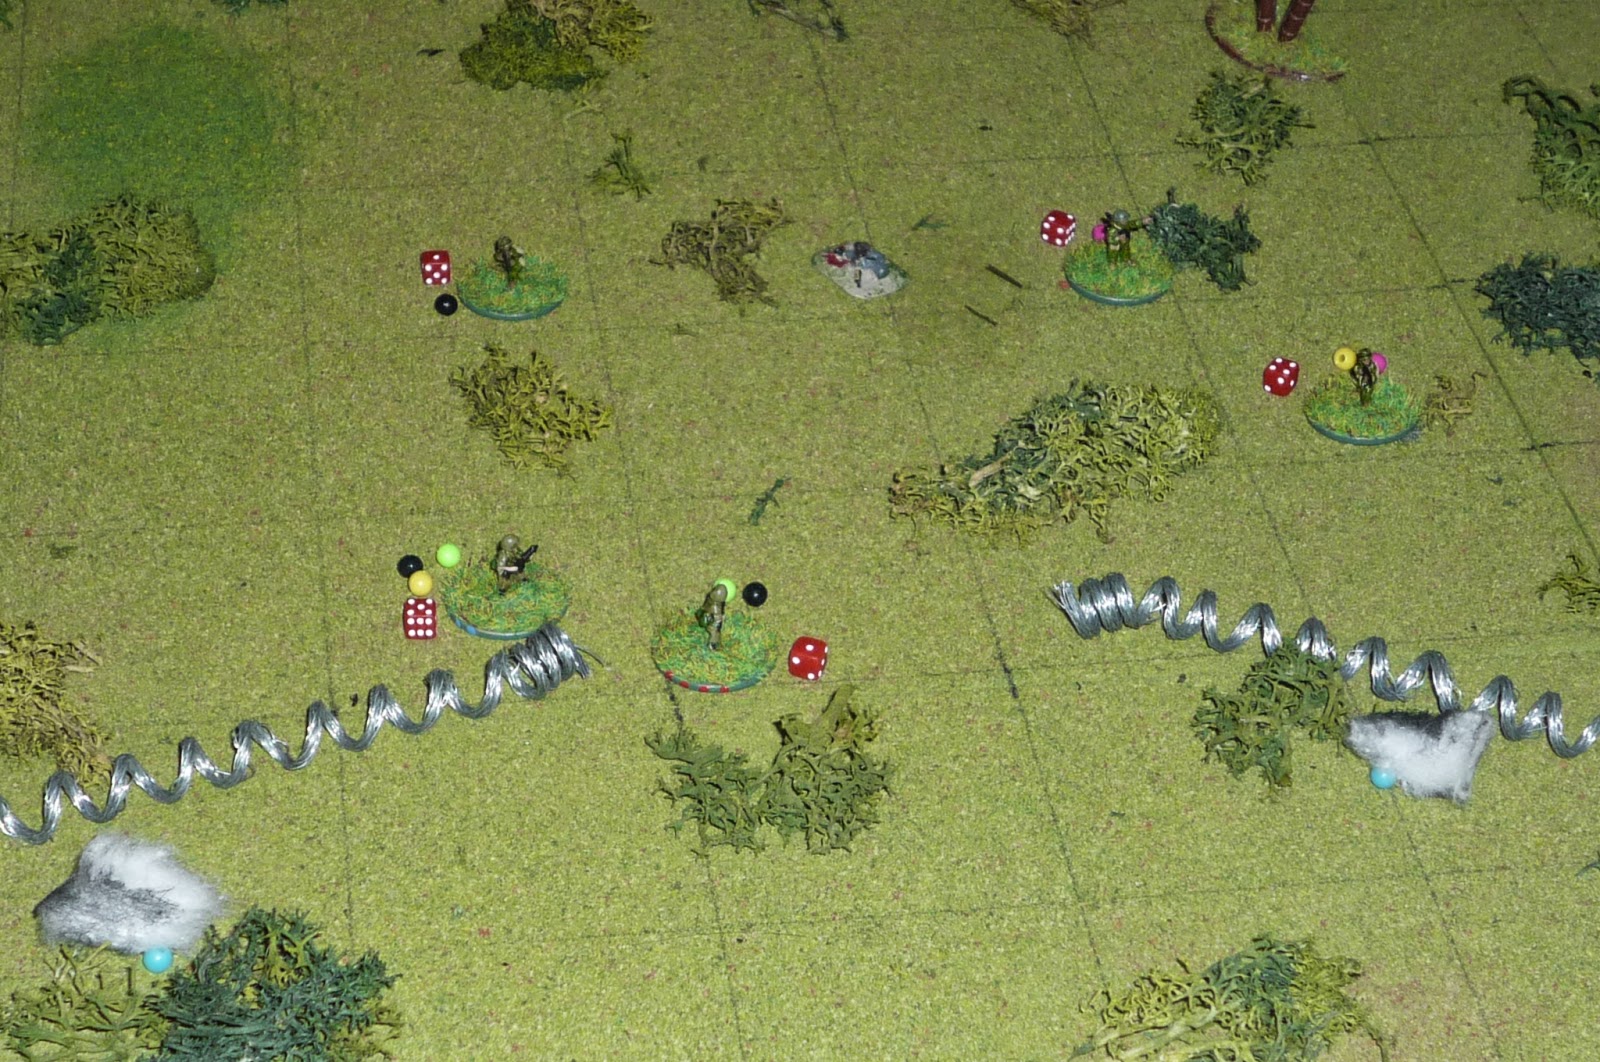
NVA move up on left...
In center...
And on right...
Then the damn new guy has some gear catch on the wire (bottom center left), and the NVA are alerted to their presence! Holmes begins to turn just as the NVA at far left opens up, giving Fuqua a light wound. Holmes empties a mag in the NVA's general direction, missing, but then Fuqua ripped off a burst and put an enemy soldier on his back. Banaszak is beside himself; the new guy screws up and now his friend's life is on the line, so he does the only thing he can: "Ernie (Holmes), get down!!!" he screams, and Holmes pulls Fuqua down as Banaszak blows the squad's four Claymore mines.
On the left, claymore blows (cotton puff), putting one NVA down, lightly wounding one, and putting stress on the other three.
In the center, Claymore 2 (bottom left) doesn't hit anyone, but is a bit too close for comfort and puts some stress on Fuqua (center left, at wire), while Claymore 3 (far right) blows, getting only a light wound on one NVA and some stress on another.
On far right, one NVA is seriously wounded and two lightly wounded, with stress accumulating on all. All NVA hit the deck, and I run through the morale tests just to keep things simple for myself: RPG on left runs, WIA rifleman that shot Fuqua runs, NVA leader in center runs, rifle on right runs, and I removed the two seriously wounded NVA, counting them as escaped. You'll see why I did this in a moment.
Fuqua, caught on the wire a second ago, has to test morale, and fails miserably. He takes off running, and Holmes (center, next to wire) exposes himself trying to stop him, but he makes it almost to Bunker 2 when an NVA rifleman (top left) pops up and shoots Fuqua, seriously wounding him (bottom left). Having shot down Fugua, the NVA rifleman then pivots left and fires at Holmes, putting him down! (Rolled 18 and 20 'to hit,' rolled 13 and 19 for casualty roll).
Stallworth (in Bunker 2, bottom center) opens up with the M-60, lightly wounding the NVA that shot Fuqua and Holmes (top center left), then went on overwatch. Due to the M-60 fire, I count Bunker 2 as spotted.
The RPG on right (top center left) pops to a knee, spends an action aiming, then fires at Bunker 2 (bottom left, Bunker 3 at bottom right), but misses (cotton puff at bottom center), putting some stress on Stallworth and Banaszak. Stallworth reacts on overwatch, and puts the RPG gunner out of the fight.
Banaszak passes his test, crawls out of Bunker 2 (far right), then sprints up and flops prone next to Holmes' battered body (far left). NVA on far left (off camera to bottom) takes a knee and spots Banaszak (takes two tries).
In Bunker 1 (bottom right), Webster takes all three actions to spot one NVA (top left), and Doc opens up, hitting him once, light wound, hitting him again, serious wound, then spotting another NVA at top center. NVA spot Bunker 1.
Swan, in Bunker 3 (bottom center), takes two tries but spots NVA at top left, shoots and misses. Ham spots NVA at top center and fires his M-79, missing pretty badly (top right cotton puff), then reloads. NVA spot Bunker 3.
All the NVA that have been downed, seriously wounded, or have run off get 'recycled,' and here comes the NVA's second wave...
Far left, three NVA come on table, move up, and open up. Webster takes a bunch of stress, and Doc White is down!!! (You gotta be @#$%-ing me!!! Holmes AND Doc are down!!??).
More NVA come on in the center, and an RPG fires at Bunker 2 (bottom center), but is grossly short, while riflemen open up and hit Stallworth, seriously wounding him!!!
RPG on right fires at Bunker 3, missing about 8 inches long (off camera to bottom), while his two companions fire their rifles but don't hit anyone. Thank goodness...
Banaszak passes his morale test and uses all three actions to crawl, dragging Holmes behind him, which allows him to go unspotted again.
Now it's time for some cheating (clearly I haven't been so far, or I wouldn't have Doc and Holmes down, and Stallworth and Fuqua seriously wounded), so I'm changing some stuff on the fly. This is rapidly turning into a 'last stand' type situation, so I'm changing a couple things: first, normally a seriously wounded man can only crawl away, nothing else. Since this is my Alamo, I'm going to play it that US seriously wounded can crawl, or, if they can prop themselves up against something, they can have one action to fire their weapon. Second, I haven't been playing the rules as written for morale tests; in addition to having uninjured friendlies and cover give you positive modifiers, you're also supposed to add the troop's S&D rating, but I don't do that because I like seeing guys run or drop prone without acting. Since this is a last stand situation, I'm going to add S&D for the positive modifiers as well, to represent a little stiffening of the backbone. As you'll see, this won't make a huge difference...
So Stallworth, despite being seriously wounded, is allowed to shoot because he's manning the M-60 in Bunker 2. He props himself up and fires at the NVA's center RPG, and puts him down (top center)!
However, Webster, in Bunker 1, fails his test and drops prone, which allows four NVA to move up and cross the concertina wire on the left side... Only four because the fifth failed his test and ran.
Fuqua (bottom left) crawls towards Bunker 2, while 3 NVA move up in the center, firing at Stallworth, missing but adding stress.
In Bunker 3, Swan passes his test and fires at the right hand RPG: miss, then hit, seriously wounding him, then moves to next guy, hits him, light wound. Ham fires his M-79, misses off table to right, reloads and firs again. This round misses left, but lands on the seriously wounded RPG gunner, killing him. The three remaining NVA test: two drop prone while one runs, and another seriously wounded NVA exits the table.
Fuqua crawls into Bunker 2, propping himself against the front wall, while Banaszak hops up, drags Holmes into the bunker, then fires at an NVA coming through the gap in the wire, putting him down. Stallworth can't pass his test, needs a breather because of this wounds, can't see, having a hard time to breath, but he see Banaszak bring Holmes in. "How is he?" Banaszak looks out towards the enemy. "How is he?" "I think he's gone man."
Webster, staring at Doc White's profusely bleeding body, stands up and fires a flechette round at the NVA in the wire. He doesn't hit anyone, but puts stress on three of them. The first NVA (far left) fires at Webster, missing. One NVA fails his test and drops prone, while the other two move up, drop prone, and fire at Webster, but miss.
NVA rifleman on right crawls forward and fires at Swan, missing. Swan passes his test and returns fire, missing, then hit-light wound, then miss again. The NVA leader fires three times at Swan, missing all three times, while Ham puts a grenade right in his pocket, seriously wounding him. Amazingly, Ham reloads, fires again at the NVA rifleman, and puts a serious wound on him too, effectively eliminating all opposition on the right.
Banaszak sprints left and hops in Bunker 1 with Webster, then opens up, putting a light wound on one of the NVA. Despite the squad leader's presence, Webster fails and drops prone, leaving Banaszak as the only viable target. All the four NVA pass their morale tests (inconceivable!!!), and a few actions are 'wasted' crawling around, Banaszak suffers a total of nine shots by the enemy, but not one hits him! However, you can see he's racked up quite a bit of stress...

In Bunker 2 (far left), Stallworth manages to prop himself up again and take shot to the left, putting one man down, while Fuqua misses (firing off camera at top left). The remaining NVA in the center (top center) fires at Stallworth, missing twice. Swan passes his test in Bunker 3 (bottom right), fires at NVA in center (top center) misses three times. Ham fires, misses 9 inches right, reloads, fires again, misses 6 inches short (see the two puffs?). Not very inspiring marksmanship... Two seriously wounded NVA on right (off camera at top right) crawl back towards their baseline.

Banaszak tests, and doesn't do well. Already belieiving Holmes to be dead, he looks down at Doc, covered in his own blood on the floor of the bunker. "Not you too, Doc, I'm not letting you go," and with that Banaszak gingerly scooped up his friend and carried him to the rear, looking for the aid station. Webster once again all alone, once again pops to his feet and fires a canister round. The first NVA is missed, but the other two suffer light wounds. The first NVA, already lightly wounded and prone, digs his body further into the soil, while his two companions run for the hills!
Meanwhile, in Bunker 2, Stallworth doesn't do well on his test, either. He's been seriously wounded for several turns now, feels himself close to passing his. "I'm sorry man," he croaks to Fuqua as he drags himself out the bunker towards the aid station. Fuqua replies, "It's okay," then fires a burst in the last NVA in the center, killing him.
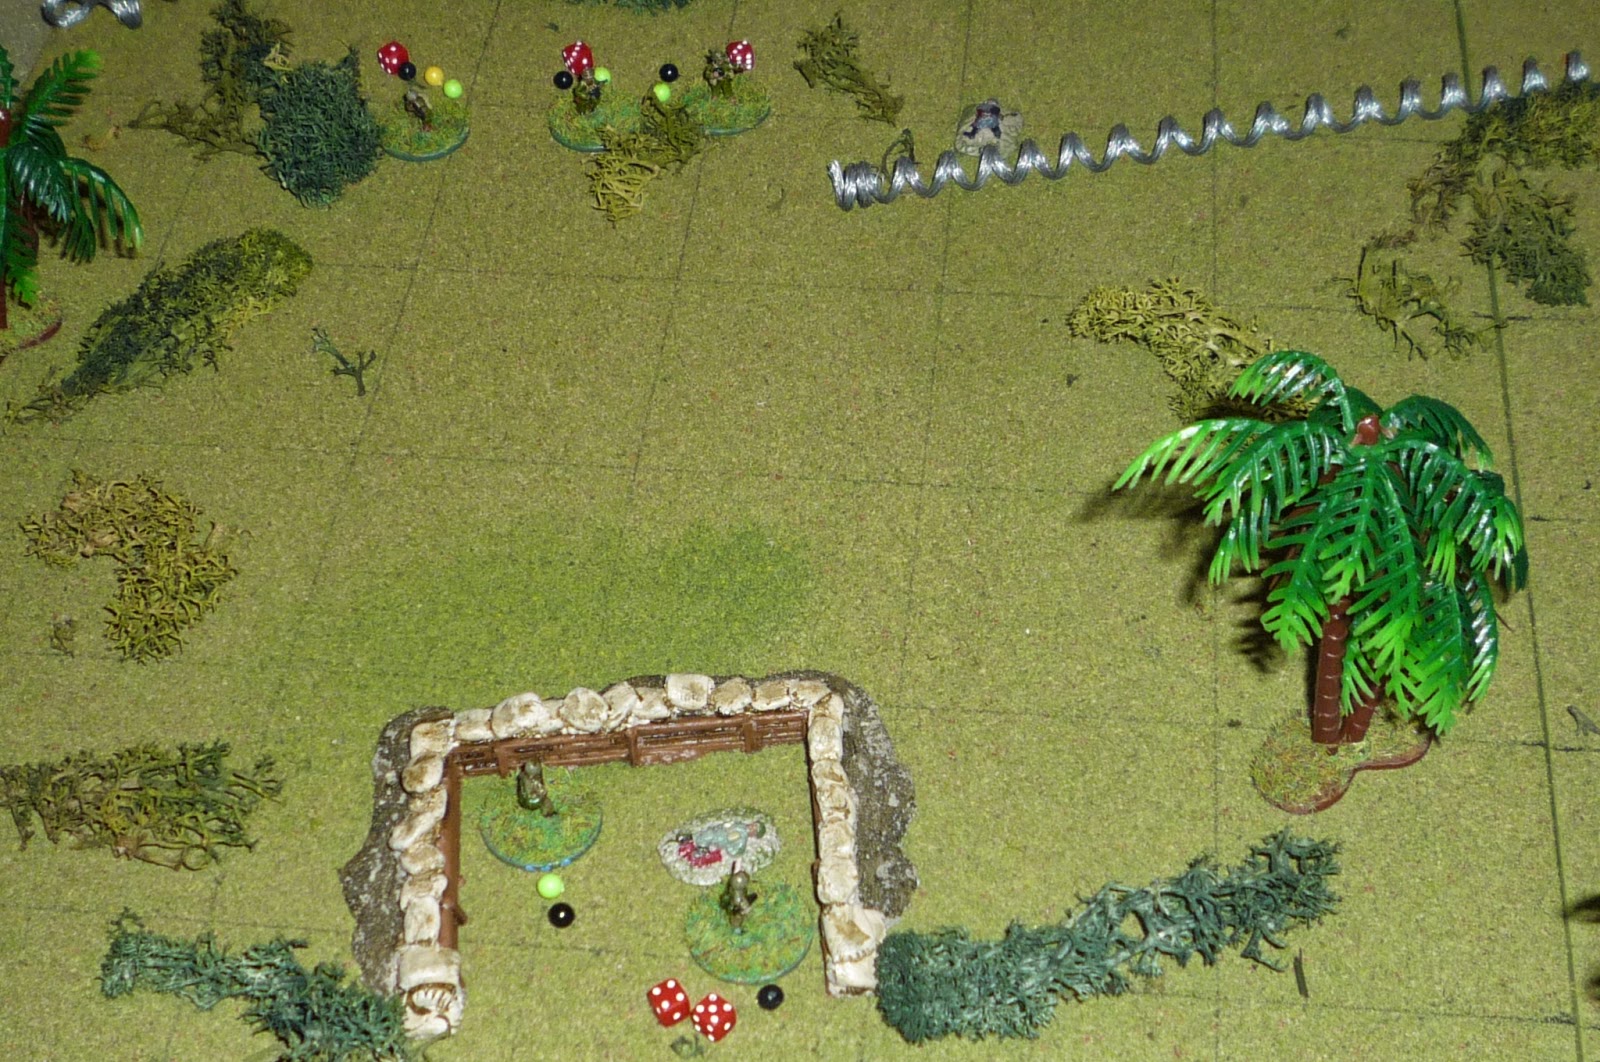
Swan and Ham see the NVA go down in front of Bunker 2, and with that they realize no one's been shooting at them from their own sector for a minute now. Ham says, "Let's Go!," and they both hop out of their bunker.
Swan goes left (center right, with Bunker 2 at center left and Bunker 1 at top left), moving up and firing on the NVA at far left (top left center), but missing.
While Ham moves up, clearing the area to their front and capturing two seriously wounded NVA.
Then I get a bit froggy, but it all works out. Ham, feeling his oats, hops out of the bunker, moves right up to the remaining, lightly wounded NVA, and fires his last canister round, which MISSES!!! The Fuqua takes a shot from Bunker 2, and MISSES! There is no way Webster is going to survive this, but the NVA tests and fails miserably, so he surrenders! 'Bout damned time something went my way...
So, what did we accomplish? The squad held off a platoon-sized attack (I think 26 total NVA saw action on the table at one point or another), and they lost 8 KIA, 3 captured (2 seriously wounded and 1 lightly wounded), and another four seriously wounded that were able to drag their butts off table.
The squad was very hard-pressed, but did not allow the enemy to breach the company's perimeter. Here's the casualties:
PFC Earnest Holmes, Killed in Action
PFC "Doc" White, hit by 7.62mm rounds in throat and chest, evacuated to Okinawa, return 24 Dec 1967.
Pvt John Fuqua, hit by a 7.62mm round in abdomen, evacuated to China Beach, return 12 Nov 1967.
Spec4 John Stallworth, hit by 7.62mm round in head. Lots of blood and a concussion, but not all that bad. BAS has been moved IVO Hill 475, so he's been sent there for a couple days (return 26 Oct 1967).
The squad is down to: Sgt Banaszak, Ham (carrying M-60), Swan, and Webster with M-79, but Stallworth will be back on 26 Oct and Russell on 31 Oct. If this fight is as bad as everyone expects, it's likely to go on for a bit and Brigade will likely send more replacements.
Morale is not too hot in the squad at this point... "What the hell do you mean they're not pulling us out of the field! Look at this mess, this isn't a squad anymore! And him, I swear if I see that @#$% Fuqua again, I'll kill him!"
Good Lord, I don't want to do this anymore, though Banaszak. "Shut your mouth, Swan. I told you, Operation Apple Cobbler, this fight for Hill 475, is big, the whole brigade's out here, and nobody goin' nowhere. And shut your trap about Fuqua; Holmes was my friend, too, and messing with Fuqua ain't gonna bring him back. Fuqua just made a rookie mistake that's all. Surely you, of all people, know what's it like to not be at your best under fire, Swan..."
-Banaszak is being recommended for the Silver Star for running out, dragging Holmes back, then rushing to Bunker 1 to bolster the flagging left flank.
-Stallworth is being recommended for the Bronze Star (w/V) for keeping the squad machine gun in action for the bulk of the fight, despite being shot in the head.
-FNG Webster is being recommended for the Bronze Star (w/V) for single-handedly holding off the enemy attack on Bunker 1, then charging out and capturing an enemy soldier to finish the engagement.
Ouch, this one hurt...
V/R,
Jack


I think your last line summed this up perfectly: Ouch.
ReplyDeleteExcellent report as always. Fuqua is dead meat if he comes back. And I, like you, cannot believe Holmes has gone.
Yeah, it was good from a game standpoint, but it really sucked.
ReplyDeleteHey, check out my post "For My Buddies," I put a bunch of pics in there.
V/R,
Jack