All,
Ten days of furious patrolling but no contact. Then, on 22 Oct 1967, 2nd Battalion gets itself into a sh!t sandwich up at Hill 475, northwest of Dak To. By mid-afternoon 2nd Bn was spent, and 3rd was lifted out there and conducted a relief in place, facing NVA on the east face of the hill. Brigade is concerned it's bitten off more than it can chew, and the next morning, 23 Oct 1967, it commits Bravo Company, 1st Bn, who helos out and approaches from the SE but rapidly runs into a buzzsaw, an NVA bunker complex. Alpha Company is called to the rescue; Bravo identified the right (southern) flank of the NVA bunker line, but can't get there themselves. Alpha helos out, with 1st Squad, 1st Platoon in the lead, bustin' brush in a hurry to relieve the pressure on Bravo, and, in turn, 3rd Battalion. The squad must find and eliminate the enemy bunker anchoring its defensive line on at the base of Hill 475.
Overview, north is up. The blob at top left/top center is the base of Hill 475, with the enemy bunker at top right. The squad is strung out in column from the bottom up towards the bunker, moving pretty (too?) quickly.
The enemy bunker, with three NVA troops in it. B/1st Bn is off table in this direction (NE), fighting and pinned down by the rest of bunker line extending to the NE. The squad is to take this position, then consolidate here with the remainder of its platoon (1st), while 2nd and 3rd continue NE, rolling up the enemy bunkers from the flank. The bunker is starting as 'spotted' because the three guys in there are firing up a storm at Bravo Company, off table.
And here is the squad, hauling ass to get to that bunker as soon as possible. From left to right, Stallworth is tail-end Charlie (bottom left), then Ham (M-79 grenadier), Doc White, Sgt Banaszak, Swan, Greenwood (carrying the M-60 since Harris was MEDEVAC'ed, or, for my good friend Panda-John, "humping the Pig")., and Holmes (top right), in his usual spot as pointman. Everyone can hear the firing from the bunker, and Holmes can actually see it. The squad is starting out unspotted (violet beads) as they are coming from an unexpected direction; funny, the NVA have no flank security out. They're usually better than that.
SSgt Bleier, Sgt Russell, and Spec4 Harris are all convalescing, while Blount finished his stay with the medics, but is not present in the field. This is because he decided to exercise his option due to the '3-time Loser' rule. That is, any man that's received three Purple Hearts can request a transfer out of the field, so PFC Blount is now working at the Brigade laundry, but the squad has not yet received a replacement...
Well, there's no flank security because every swingin' Richard that can be spared from the bunker line has been pulled back, given fresh ammo and grenades, and is being sent around the NVA right flank to go roll up Bravo Company's left flank. There are eight of them in the initial wave. I'm playing this that the enemy will receive reinforcements in the counterattack if they are doing well, if not no reinforcements will come, the idea being that, if their counterattack fails/stalls, they will 'go firm' with a minimally manned defensive line (in this case the bunker line and a light skirmish line to the south to refuse their flank) to buy time for the bulk of their force to withdraw to another defensive line further up Hill 475, or out of the area altogether.
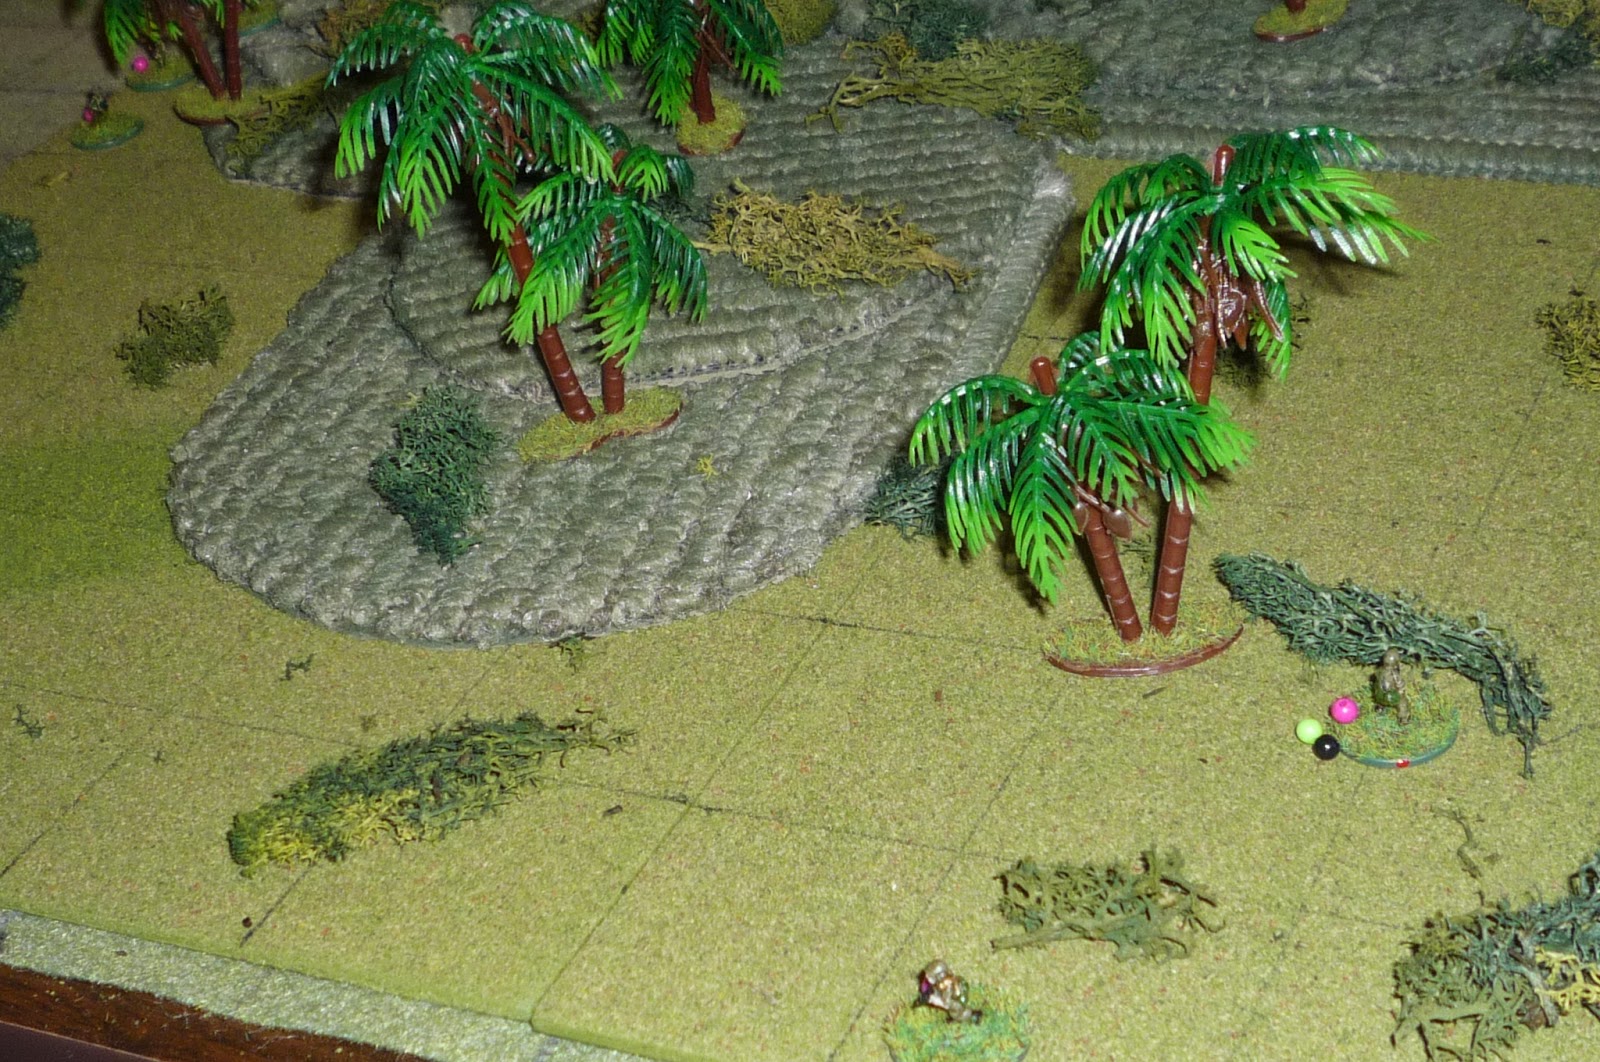
Let's get it on! Holmes (bottom right) has the squad moving up much to fast for his taste, and as he crests the rise he can see the enemy bunker (off camera at top right). However, his 'Spidey-sense is bothering him, he's noticed movement to his left out of his peripheral vision. He drops prone (remaining unspotted), and spots three NVA up on Hill 475 (top left; he had two successful spotting actions, but, because of their close proximity to each other, I allowed all three to be spotted).
The three NVA just spotted by Holmes (NVA can be seen in the trees at top left, Holmes is at far right) move down the hill and spot the M-60 team. The NVA open up a torrent of fire; Greenwood takes a full burst to his chest and drops, seriously wounded. He's still breathing, but it's bad. Swan, whom the NVA missed with two bursts, has racked up quite a bit of stress, and fails his test miserably. He scoots back on his butt in horror, away from his badly injured friend, then turns and bolts into the jungle to the south...
Ham drops prone, then lands a strike with his M-79, devastating the NVA team that just lit up Greenwood and Swan. The round hits right on the center NVA, seriously wounding him and the NVA on the right, while the NVA on the left is lightly wounded, but has quite a bit of stress to contend with. Ham calmly reloads his Blooper, still not spotted by the enemy.
Greenwood, barely hanging on to life, manages to drag himself backwards with one arm. Doc White rushes up to him, drags him the rest of the way into cover behind some bushes, then does his thing (start the breathing, stop the bleeding, protect the wound, treat for shock).
The NVA in the bunker try to spot Holmes, but fail three times. I only gave each of the three NVA in the bunker one action against the squad as they should be focusing on Bravo Company, off table, and hadn't yet actually seen the squad. Once they see the squad they will devote more attention to their right flank.
They haven't really seen anyone yet, but they heard the firing and saw their comrades go down from Ham's M-79 round, so they know Yankees are somewhere up ahead. The NVA leader and RPG on Hill 475 (top left), still unspotted, move carefully to their right, can't spot Holmes (bottom center).
While the other three NVA on Hill 475 (all riflemen, top left), move to their right, but don't spot Stallworth or Ham (bottom center right).
Stallworth (bottom left, with Ham at far right) spots two of the three NVA (top left, one action because they're right next to each in LOS), creeps up, and drops prone.
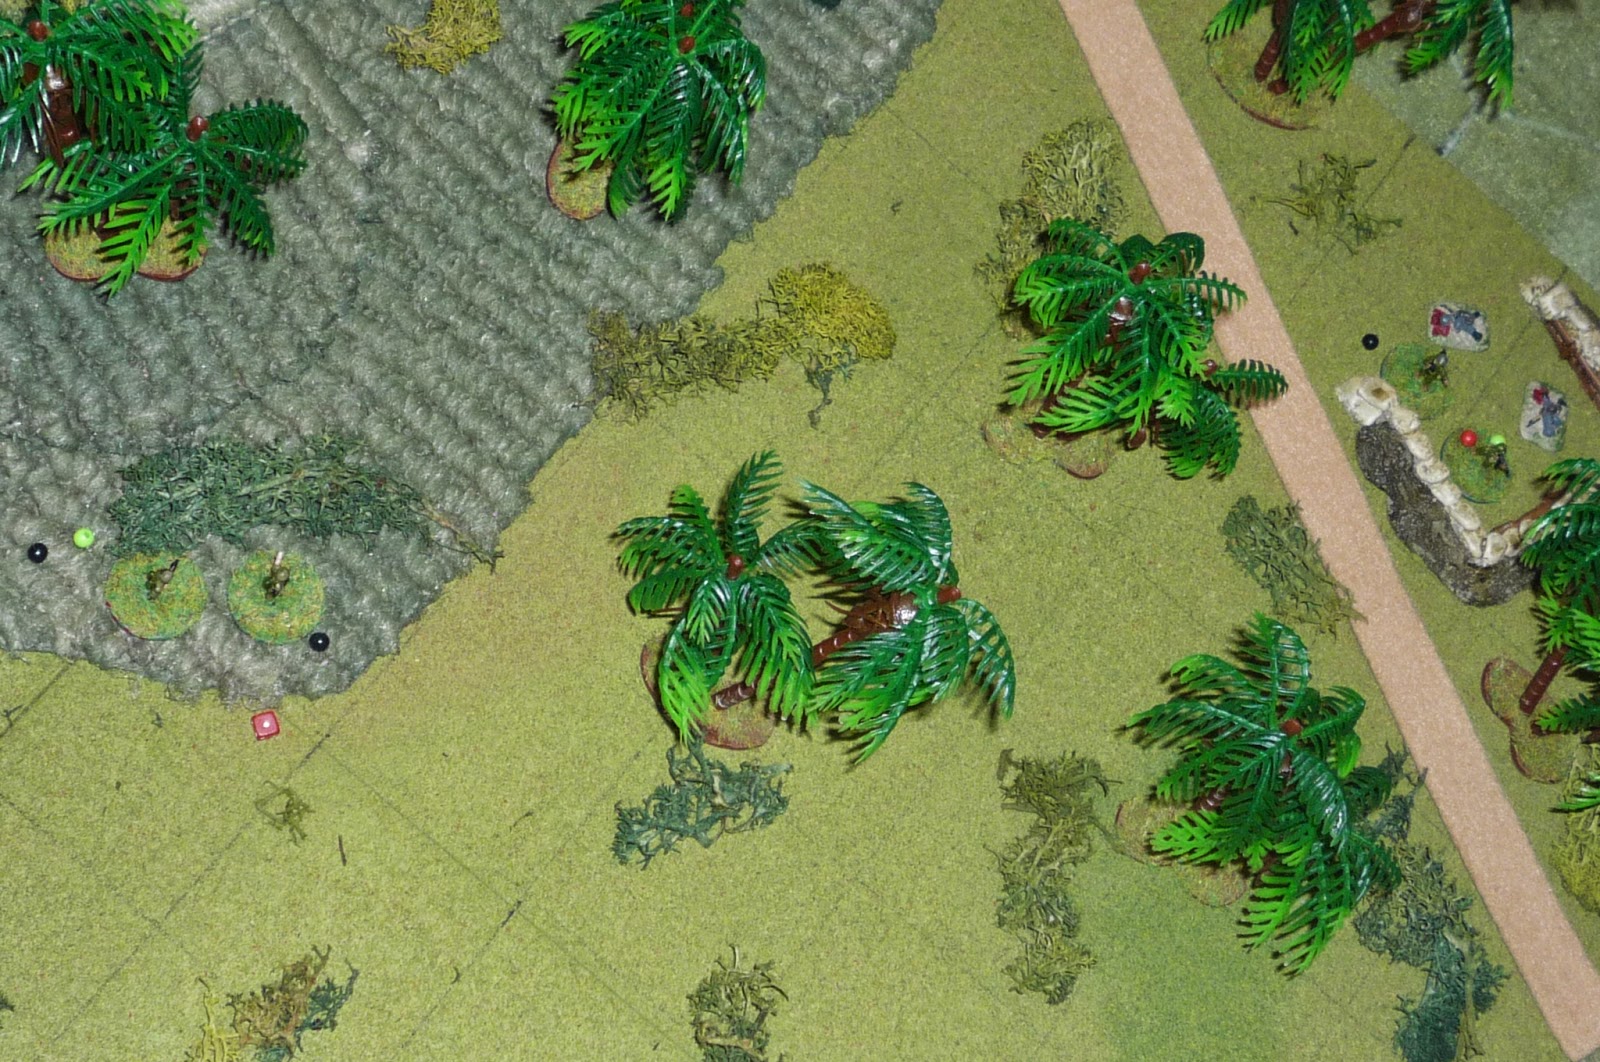
Sgt Banaszak (far right, with Doc at bottom left, and Holmes at dead center, blocked by the trees, though you can just see his violet bead) can't spot the NVA leader and RPG (top left, also hidden by trees, but you can just see one of their violet beads), so he sprints right and fires at the bunker (top right), but misses.
Holmes spots the NVA leader and RPG, and opens up, but misses both. NVA bunker is just to right, but because Holmes is prone and behind the bushes, I didn't have him 'auto-spotted,' though it should be easy to spot him with an activation as he's been firing.
Sgt Banaszak (bottom right) opens up on the NVA leader and RPG (bottom left), putting a light wound on the RPG but missing the leader. Bunker is at top left and Holmes is at bottom center.
The NVA in the bunker passes his morale test and spots Holmes (bottom center). Then he spots Banaszak (far right) and takes a shot, miss. The other guys in the bunker open up on Holmes, missing him three times. Doc (off camera to bottom right), grabs Greenwood's M-60 and opens up, hitting the NVA RPG gunner (bottom right), giving him a serious wound, then missing the NVA leader next to him. I count Doc as spotted after opening up with the M-60.
Real quick note regarding Banaszak and Holmes. Those two have been solid, so I bumped their "Skills and Drills" rating up from 3 to 4. Everyone else in the game, enemy and friendly, is S&D 3. Technically speaking this means Banaszak and Holmes can activate first, before everyone else. I don't know if I'm playing this right, but I'm playing it where, because of their superior S&D, they can activate anytime they want. They can't interrupt someone's activation, but sometimes (hell, in these jungle games, a lot of times) you want the enemy to activate first, then you can move up, spot them, and take a shot. so that's how I'm playing this game. Those two are superior troopies and so it makes sense to me that they use their better S&D to their advantage.
One of the NVA riflemen on the far left of Hill 475 activates. Normally when someone is facing an unspotted enemy I give them one activation to try to spot, and if they fail they spend their other two activations moving ahead as if nothing were wrong. I cheated a little bit for the bad guys here; because of all the firing that had happened already, I figured this NVA would be a little more cautious. He (bottom left) tried to spot Stallworth (bottom right, with Ham at center right, and Doc and Greenwood at top right) but failed. I had the NVA sit tight and try again: fail. Okay, one more time: fail (Stallworth hasn't fired and is lying prone behind some heave brush). With that, Stallworth opens up on full auto: miss, miss, hit-down!
Then the first unbelievable thing happened: both the fallen NVA's buddies took some stress because of the guy going down, and had to test morale. They both ran! Left flank secure!
Back in the center, the lightly wounded NVA rifleman (bottom left) tests and drops prone, as does the NVA leader (far right). The three severely wounded NVA on Hill 175 (spread across top) all crawl back towards the northern baseline.
Ham (bottom center) fired his M-79 uphill again, missing 4" at five o'clock (rolled a '1' to hit, you can see the NVA's yellow bead at top center.
Then the other totally ridiculous thing happened: Ham (off camera at bottom left) reloaded, then fired at the NVA leader (top center left), missing horrendously (rolled another '1' to hit), but scatter was 8" at 2 o'clock. It hit the damned bunker (top right)!!!
And it didn't just hit; on the casualty rolls I got a 20, 19, and 20, so two down and one seriously wounded, even with each hit at -4 because it was just within 2". Bunker cleared! What the hell is going on??? I swear to the Good Lord I wasn't cheating!!!
Banaszak, who previously had taken some fire from the NVA bunker, passes his test, sprints up to Holmes, then fires up at the NVA leader on Hill 475 (top center), missing twice. Holmes had also taken some fire and needed to test, and, well, he took a breather for a moment...
Doc (bottom right), opens up with the Pig uphill at the lightly wounded NVA rifleman, missing three times but adding some serious stress (you can see the red dice in a clump of trees at top center). Ham is to Doc's left, with Stallworth at far left.
The NVA leader passes his morale test, sprints right to the bunker, then fires at Banaszak (far left) missing.
Ham reloads and fires at the lightly wounded NVA on Hill 475 (bottom left). The round technically misses, but the scatter roll lands it only 1" away, and the enemy riflemen is seriously wounded. In other news, the other four seriously wounded NVA manage to crawl off table, successfully escaping.
Stallworth (bottom left) pops up and sprints up the hill to the seriously wounded NVA, who is barely hanging on with a sucking chest wound...
Banaszak passes his morale test, sprints right (bottom right), and fires twice at the NVA leader in the bunker, seriously wounding him. Holmes moves up to the bunker, capturing the badly wounded NVA leader, while Stallworth (far left) fires a white star cluster to let Bravo Company know to shift fire, the bunker is in US possession.
Banaszak asked Stallworth, "what'd ya see up there on the hill?" Stallworth replied, "there was one NVA up there, real bad off, so I finished him. Also saw a few blood trails leading north." Banaszak: "Doc, prep Greenwood for MEDEVAC, I'll call it in. Ham, do me a favor, go find Swan..."
The NVA suffered four KIA, four WIA that escaped, and one WIA that was captured (NVA leader). Two others ran off into the jungle. The squad only had one man hit, Pvt Greenwood, is real bad off. Three 7.62mm rounds to the chest did tremendous damage; he was MEDEVAC'ed immediately out to the Hospital Ship "Comfort," then to Okinawa, then back to the World. His tour in 'Nam is over.
But the squad still has work to do. Banaszak and the troops sat tight the rest of the day with no contact while the remainder of Alpha Company rolled up the NVA's flank, which started out tough at first but then got real easy due to the enemy falling back, up the mountain. Bravo had remained in place, primarily working on evacuating their casualties and running resupply, while Charlie had remained in reserve. With the bunker complex emptied out, the battalion fell back a few hundred meters south of Hill 475 and dug into company-sized night defense positions. It would really suck if the NVA reoccupied the bunkers during the night...
When the resupply birds came out to the NDP with water and ammo they also brought two FNGs as replacements for Blount and Greenwood: Privates Fuqua and Webster were brought into the fold.
The LT had spoken with the Company CO and took care of some admin issues. First off, he busted Swann back to Private for running away today (at least Harris had grabbed a wounded man). Then he converted Ham from a Specialist to a 'hard-stripe' Corporal (still an E-4). Stallworth was promoted to Spec4, while White and Holmes were promoted to PFC, all paperwork official for 1 Nov 1967. Also, Doc White was recommended for a Bronze Star for sprinting ahead under fire to pull Greenwood to safety, patching him up, then manning the M-60.
So far Doc is the only one to be recommended for an award, and it's happened three times! From a gameplay standpoint, it's kinda cool and kinda strange, all at the same time. He really is Johnny on the spot, just pure luck that he's always the one closest to a wounded guy to pull him in, and always passes his morale tests (without me cheating!). To be fair, he's usually well back in the formation, so he doesn't generally take a lot of stress, certainly not as much as guys up front. The M-60 team, regardless of who's in it, has been a magnet for fire, and has suffered tremendously: Harris hit once, Swan hit once, and Greenwood (carrying the Pig in Harris' absence) hit twice, with Harris and Swan both running away under fire as well.
I really was thinking that Holmes and Banaszak would have a chance to do something cool/heroic this fight, but the NVA center (Hill 475) melted away under M-79 and M-60 fire, while Ham's errant grenade cleared the NVA left (bunker)...
If you notice, the guys have been doing real well, and I keep ramping up the bad guys, giving them more and more people each fight. Once again I thought this would be a pretty ugly fight, with Greenwood going down and Swan running away right off the bat, but the NVA had some real bad luck with casualty rolls and morale tests, and it was almost kind of a walkover in the end. Still fun though ;)
This fight for Hill 475 is now being referred to as Operation Apple Cobbler. 2nd Bn is back at Dak To refitting, word is they'll be back out here tomorrow by noon.
V/R,
Jack
Friday, May 9, 2014
Thursday, May 8, 2014
"In Country" Game 5 (13 Oct 1967)
All,
On the last patrol the squad moved to the downed UH-1 Huey, destroyed equipment, and recovered the friendlies, also managing to give the NVA a bloody nose in their first contact with regular forces. While performing their recovery mission, Sgt Banaszak noticed numerous large holes in the aircraft, the kind made by a 12.7mm heavy machine gun. The Brigade focused the bulk of its patrols west for a few days, hoping to find and fix the NVA, or at least eliminate the HMG(s), but no luck, no contact by anyone.
It's 13 October 1967. The squad has been out all night on night ambush, again no contact. They had been set up just north of the village of Con Quan 9, southeast of Dak To, about a klick north of the village, overlooking a major north-south trail network. The squad was just packing it up for the hump back to base when Battalion came on the horn: seems the S-2 just got word the Regional VC tax collector was in Con Quan. The squad was ordered to move south and see what they could see. The squad is down Bleier (Okinawa) and Blount (China Beach).
Overview of map, north is 'up.' Hill 105 at top left, village of Con Quan at bottom left, and Hill 75 at top right. US baseline is left, VC is right. The squad is in and around the ville, having just marched south (off map) around Hill 105 then turning east into the ville.
Hill 75 (top right corner). The four VC (top right, off map) will enter at the end of the first turn (assuming shooting occurs), either via the trail at left or the trail at right, depending on a die roll.
While the US apparently has informers in Con Quan, so does Victor Charles. These three (rifle, LMG, and 50mm mortar) are in the treeline at bottom right, looking at the ville. They were sleeping in the ville when a comrade burst in and let them know Yankees were coming down the trail. They searched for the tax collector, but he was nowhere to be found, so they hauled ass across the paddy into the treeline, surprised the taxman wasn't there.
The squad: Sgt Banaszak is at far left, speaking with the village honcho, with Greenwood, Harris, and Swan at the wall. Doc White is just outside the north wall, giving medical attention to a little girl, while Sgt Russell is standing on the trail aggravated with Ham and Stallworth, who are in the treeline on Hill 105 (top center), smoking and joking instead of pulling security like they should be. Holmes, always steady, is at far right, where he has taken up a prone position to keep look out to the east.
Another look north of the trail, with Russell at bottom left, Stallworth and Ham center left, and Holmes at top right. Holmes starts the fight as the only American not spotted.
The ville, with Banaszak talking to the villager, (l to r) Swan, Harris, and Greenwood at the wall, and Doc White just outside the north wall with the mama and baby-san. Sgt Russell is up on the trail, with several civvies around.
If you look closely, between Banaszak, Doc, and Russell is a very suspicious looking individual, who has just approached from the left. He's shocked and bewildered to find Yankees in the village, but he stays cool. He's further shocked and bewildered that he can't find his three travelling companions; perhaps he should have told them he was staying with a friend last night... He's really, REALLY shocked and bewildered when the village chief, talking to what looks to be the American leader, spots him and his eyes bulge almost out of their sockets. The tax man has been made, and stumbles back a couple steps, almost running into another American. Crap!
As the village chief swings his arm up to point and the American leader turns to take a look, the tax man takes off running into the rice paddy, heading for the treeline! Spec4 Harris, with the M-60, hops the wall to give chase.
The squad is caught completely on the wrong foot, and the tax man (bottom left) is able to sprint across the trail. Just then he spots his three companions, hidden in the treeline (top right). He drops prone and crawls east.
Harris continues to give chase, and opens up with a long burst, lightly wounding the tax man (roll of 20 followed by roll of 1!).
Swan thinks, Harris, what the hell are you doing? But he hops the wall and follows. Boomp, boomp, boomp! Swan: "Oh sh...." Three mortar rounds pump out of the treeline up ahead...
The blue beads are their intended impact points, all in the ville (one for Banaszak, one for Greenwood, and one between Doc and Russell).
At the same time, the VC LMG in the treeline (top) opens up, Harris (center, just below trail, with tax man center above trail) dropping as slugs rip through his body, giving him a serious wound. The LMG then turns on Swan, missing him with two bursts (somehow), but leaving him with 6 stress (bottom).
Greenwood, correctly figuring the mortar rounds are destined for the ville, hops the wall, moves up to the paddy dike, and goes prone (center right), while Sgt Banaszak grabs the Honcho and moves right, where both go prone (bottom left).
The third VC in the treeline, this one with an old French MAS-36, fires at Sgt Russell (bottom left), Stallworth, and Ham (top right). Stallworth and Ham take some stress, but Rusell is knocked on his back, hurt bad. As the mortar fired three times, the LMG fired three times, and the rifle fired three times, I'm counting the treeline as spotted at this point.
Doc tests and passes (stress from Russell going down): he gets the mom and kid to lie down, then sprints over to the trail and drags Russell into the paddy and goes prone (bottom center). Ham fails and drops prone, while Stallworth passes. He drops prone and fires at the treeline, putting a serious wound on the VC LMG.
Holmes calmly realigns his body for a good shooting position to his right, then takes three shots at the VC mortar man; three misses... Looking at the VC treeline, the rifleman on the left has a couple stress, the LMG in the center is seriously wounded, and the mortar on right has a decent amount of stress.
Then the mortar rounds start landing. The first hits inside the wall, the second misses off-table, and the third hits outside the wall. No one is hit, but Banaszak took some stress (bottom center), while he and Greenwood pretty much were forced to waste their turn by running away and going prone.
Over on Hill 75, four VC (left to right, rifle, SMG, LMG, and rifle) arrive on the east-edge trail.
Looking east from behind Holmes (foreground, behind bush under tree), straight down the trail where the four VC just arrived, with the VC treeline at top right. The VC pointman moves up the knoll to his left, goes prone, but can't spot Holmes lying prone in the bushes (VC is top center, just to right of trail you can see his green 'prone' bead next to the bushes his hiding in). Holmes shifts his shooting position back left and opens up straight down the trail, making a mess of the VC: SMG receives a light wound and LMG a serious wound, with the SMG and remaining rifleman on the trail racking up a goodly amount of stress (you can see all the red dice on the trail). I count Holmes as spotted now.
Greenwood (bottom right), previously lying prone behind the paddy dike, pops up to a kneeling positino and opens up on the VC rifleman in the treeline (top right), missing with the first burst, delivering a serious wound with the second. The VC in the treeline are having a rough time: the mortar man tests and drops prone, while the LMG and rifleman, both seriously wounded, drag their butts off table.
Meanwhile, Swan tests and drops prone; I was expecting worse, he had six stress and was standing all alone (don't count seriously wounded Harris) in a rice paddy, while Harris drags himself back a couple inches. Taxman still sitting at top right.
Ham (off camera to left at base of Hill 105) pops up to a knee and fires a grenade, which lands disgustingly short (aimed for center VC at far right, missed, direction was 5 o'clock, and rolled a 19 for scatter so it landed 8" short)... Ham reloads his M-79. The VC rifleman on the trail (far right) tests and decides to head for the hills, while the seriously wounded LMG gunner crawls off table. Then the lightly wounded SMG gunner (on trail with yellow bead) fails his test and runs too! That leaves only the pointman on the knoll (bottom right).
To tell you the truth, this sequence of events changed the dynamic of the game. Once the Yanks got Harris and Russell downed I started looking to make an exit before things got really out of hand. But then the mortar rounds didn't hit anyone, and my guys, if not passing their morale tests with flying colors, at least managed to just drop prone, nobody ran. Even after a couple lucky hits roughed up both the VC in the treeline and the VC on the trail, my intent was still to bring on more about five more VC on the northern trail, to which the only real option would be to grab the wounded and fall back and call in air/arty. But then the VC suffered some terrible morale rolls and three healthy guys ran for the hills, so it made more sense narratively for the VC to give ground, rather than the Americans.
Stallworth (bottom left, and dammit, I forgot to remove Ham's terrible grenade shot at top left!) opens up on the VC mortar man in the treeline (top right): miss, hit-light wound, miss, so four stress total. Then Doc (bottom center, behind paddy dike with wounded Sgt Russell) opens up on the VC pointman on the knoll (you can see the green bead at top center): miss, miss, hit and he's down!
I figure I'm pretty comfortable with the tax man (top right), surely he's going to assume a fetal position from all the combat stress... but he passes like a champion: he hops up, he uses both actions to crawl towards the civvies so the Yankees can't shoot at him. Swan and Harris (seriously wounded) are lying in the paddy, while Banaszak (bottom left) passes his test (from the mortar fire), stands up, hops the wall, and sprints ahead, determined to catch that damned VC tax collector!
That's the end of the turn, and the VC win the initiative for the next turn, meaning the tax man activates first. He hops up and sprints into the jungle, he got away, mission failed...
The VC mortar man, nearby in the treeline, would have gotten away too but he failed his morale roll and dropped prone. Greenwood moved up to help Harris while Banaszak and Swan moved up and captured the wounded VC mortar man.
Banaszak is pissed; we secured the village, but hell, we're not staying, so as soon as we walk away it'll be back in VC hands. Not only did we let the tax collector get away, but we only captured one old man with an ancient, WWII Japanese mortar, we only got one confirmed kill and few blood trails, and we got Harris and Russell both shot up pretty bad! Not a good day!
The only good news is that the squad continues to account itself well under fire, though losing Russell in particular hurts. Banaszak asked Harris what the hell he was thinking, taking off after the tax collector: "Sarge, you just reamed me for running away from the enemy, now you're reaming me for running at them? I was trying to make up for the way I acted on Lamyai Ridge." Damn...
Ultimately, the VC lost one KIA, one captured, had three seriously wounded, and two lightly wounded. The squad had:
Spec4 Harris: two rounds hit him in the right arm, breaking it. He was evacuated to the hospital at China Beach, will return in two months.
Sgt Russell: took a round in the thigh, sent to MASH at Dak To, will return in 18 days.
Sgt Banaszak recommended Doc White for a Bronze Star for getting those civvies into cover, then rushing out into the exposed, fireswept trail to drag Sgt Russell to safety. He also wants to recommend Holmes for an award, but the Lt's giving him flak about it. The Lt's right, Holmes hasn't done anything particularly heroic, that is, not a single event or action displaying extraordinary bravery; having said that, he's the most dependable member of the squad, just solid, and a fantastic pointman. His talents as a pointman have saved the squad twice, allowing them to get into superior position to whack the enemy, and, just like this last fight, he's always in the right place at the right time, delivering timely and accurate fire.
Because Banaszak and Holmes have been so steady, I'm upgrading their S&D ratings to 4, while everyone else in the squad, as well as the enemy, remains at 3.
Pretty cool, yes? I'm having a really good time, can't wait to play again. I wish I had better terrain for Vietnam, particularly houses and rice paddies, but I don't want to sink a bunch of money into this, I have too many other projects on my plate and/or planned ;)
V/R,
Jack
On the last patrol the squad moved to the downed UH-1 Huey, destroyed equipment, and recovered the friendlies, also managing to give the NVA a bloody nose in their first contact with regular forces. While performing their recovery mission, Sgt Banaszak noticed numerous large holes in the aircraft, the kind made by a 12.7mm heavy machine gun. The Brigade focused the bulk of its patrols west for a few days, hoping to find and fix the NVA, or at least eliminate the HMG(s), but no luck, no contact by anyone.
It's 13 October 1967. The squad has been out all night on night ambush, again no contact. They had been set up just north of the village of Con Quan 9, southeast of Dak To, about a klick north of the village, overlooking a major north-south trail network. The squad was just packing it up for the hump back to base when Battalion came on the horn: seems the S-2 just got word the Regional VC tax collector was in Con Quan. The squad was ordered to move south and see what they could see. The squad is down Bleier (Okinawa) and Blount (China Beach).
Overview of map, north is 'up.' Hill 105 at top left, village of Con Quan at bottom left, and Hill 75 at top right. US baseline is left, VC is right. The squad is in and around the ville, having just marched south (off map) around Hill 105 then turning east into the ville.
Hill 75 (top right corner). The four VC (top right, off map) will enter at the end of the first turn (assuming shooting occurs), either via the trail at left or the trail at right, depending on a die roll.
While the US apparently has informers in Con Quan, so does Victor Charles. These three (rifle, LMG, and 50mm mortar) are in the treeline at bottom right, looking at the ville. They were sleeping in the ville when a comrade burst in and let them know Yankees were coming down the trail. They searched for the tax collector, but he was nowhere to be found, so they hauled ass across the paddy into the treeline, surprised the taxman wasn't there.
The squad: Sgt Banaszak is at far left, speaking with the village honcho, with Greenwood, Harris, and Swan at the wall. Doc White is just outside the north wall, giving medical attention to a little girl, while Sgt Russell is standing on the trail aggravated with Ham and Stallworth, who are in the treeline on Hill 105 (top center), smoking and joking instead of pulling security like they should be. Holmes, always steady, is at far right, where he has taken up a prone position to keep look out to the east.
Another look north of the trail, with Russell at bottom left, Stallworth and Ham center left, and Holmes at top right. Holmes starts the fight as the only American not spotted.
The ville, with Banaszak talking to the villager, (l to r) Swan, Harris, and Greenwood at the wall, and Doc White just outside the north wall with the mama and baby-san. Sgt Russell is up on the trail, with several civvies around.
If you look closely, between Banaszak, Doc, and Russell is a very suspicious looking individual, who has just approached from the left. He's shocked and bewildered to find Yankees in the village, but he stays cool. He's further shocked and bewildered that he can't find his three travelling companions; perhaps he should have told them he was staying with a friend last night... He's really, REALLY shocked and bewildered when the village chief, talking to what looks to be the American leader, spots him and his eyes bulge almost out of their sockets. The tax man has been made, and stumbles back a couple steps, almost running into another American. Crap!
As the village chief swings his arm up to point and the American leader turns to take a look, the tax man takes off running into the rice paddy, heading for the treeline! Spec4 Harris, with the M-60, hops the wall to give chase.
The squad is caught completely on the wrong foot, and the tax man (bottom left) is able to sprint across the trail. Just then he spots his three companions, hidden in the treeline (top right). He drops prone and crawls east.
Harris continues to give chase, and opens up with a long burst, lightly wounding the tax man (roll of 20 followed by roll of 1!).
Swan thinks, Harris, what the hell are you doing? But he hops the wall and follows. Boomp, boomp, boomp! Swan: "Oh sh...." Three mortar rounds pump out of the treeline up ahead...
The blue beads are their intended impact points, all in the ville (one for Banaszak, one for Greenwood, and one between Doc and Russell).
At the same time, the VC LMG in the treeline (top) opens up, Harris (center, just below trail, with tax man center above trail) dropping as slugs rip through his body, giving him a serious wound. The LMG then turns on Swan, missing him with two bursts (somehow), but leaving him with 6 stress (bottom).
Greenwood, correctly figuring the mortar rounds are destined for the ville, hops the wall, moves up to the paddy dike, and goes prone (center right), while Sgt Banaszak grabs the Honcho and moves right, where both go prone (bottom left).
The third VC in the treeline, this one with an old French MAS-36, fires at Sgt Russell (bottom left), Stallworth, and Ham (top right). Stallworth and Ham take some stress, but Rusell is knocked on his back, hurt bad. As the mortar fired three times, the LMG fired three times, and the rifle fired three times, I'm counting the treeline as spotted at this point.
Doc tests and passes (stress from Russell going down): he gets the mom and kid to lie down, then sprints over to the trail and drags Russell into the paddy and goes prone (bottom center). Ham fails and drops prone, while Stallworth passes. He drops prone and fires at the treeline, putting a serious wound on the VC LMG.
Holmes calmly realigns his body for a good shooting position to his right, then takes three shots at the VC mortar man; three misses... Looking at the VC treeline, the rifleman on the left has a couple stress, the LMG in the center is seriously wounded, and the mortar on right has a decent amount of stress.
Then the mortar rounds start landing. The first hits inside the wall, the second misses off-table, and the third hits outside the wall. No one is hit, but Banaszak took some stress (bottom center), while he and Greenwood pretty much were forced to waste their turn by running away and going prone.
Over on Hill 75, four VC (left to right, rifle, SMG, LMG, and rifle) arrive on the east-edge trail.
Looking east from behind Holmes (foreground, behind bush under tree), straight down the trail where the four VC just arrived, with the VC treeline at top right. The VC pointman moves up the knoll to his left, goes prone, but can't spot Holmes lying prone in the bushes (VC is top center, just to right of trail you can see his green 'prone' bead next to the bushes his hiding in). Holmes shifts his shooting position back left and opens up straight down the trail, making a mess of the VC: SMG receives a light wound and LMG a serious wound, with the SMG and remaining rifleman on the trail racking up a goodly amount of stress (you can see all the red dice on the trail). I count Holmes as spotted now.
Greenwood (bottom right), previously lying prone behind the paddy dike, pops up to a kneeling positino and opens up on the VC rifleman in the treeline (top right), missing with the first burst, delivering a serious wound with the second. The VC in the treeline are having a rough time: the mortar man tests and drops prone, while the LMG and rifleman, both seriously wounded, drag their butts off table.
Meanwhile, Swan tests and drops prone; I was expecting worse, he had six stress and was standing all alone (don't count seriously wounded Harris) in a rice paddy, while Harris drags himself back a couple inches. Taxman still sitting at top right.
Ham (off camera to left at base of Hill 105) pops up to a knee and fires a grenade, which lands disgustingly short (aimed for center VC at far right, missed, direction was 5 o'clock, and rolled a 19 for scatter so it landed 8" short)... Ham reloads his M-79. The VC rifleman on the trail (far right) tests and decides to head for the hills, while the seriously wounded LMG gunner crawls off table. Then the lightly wounded SMG gunner (on trail with yellow bead) fails his test and runs too! That leaves only the pointman on the knoll (bottom right).
To tell you the truth, this sequence of events changed the dynamic of the game. Once the Yanks got Harris and Russell downed I started looking to make an exit before things got really out of hand. But then the mortar rounds didn't hit anyone, and my guys, if not passing their morale tests with flying colors, at least managed to just drop prone, nobody ran. Even after a couple lucky hits roughed up both the VC in the treeline and the VC on the trail, my intent was still to bring on more about five more VC on the northern trail, to which the only real option would be to grab the wounded and fall back and call in air/arty. But then the VC suffered some terrible morale rolls and three healthy guys ran for the hills, so it made more sense narratively for the VC to give ground, rather than the Americans.
Stallworth (bottom left, and dammit, I forgot to remove Ham's terrible grenade shot at top left!) opens up on the VC mortar man in the treeline (top right): miss, hit-light wound, miss, so four stress total. Then Doc (bottom center, behind paddy dike with wounded Sgt Russell) opens up on the VC pointman on the knoll (you can see the green bead at top center): miss, miss, hit and he's down!
I figure I'm pretty comfortable with the tax man (top right), surely he's going to assume a fetal position from all the combat stress... but he passes like a champion: he hops up, he uses both actions to crawl towards the civvies so the Yankees can't shoot at him. Swan and Harris (seriously wounded) are lying in the paddy, while Banaszak (bottom left) passes his test (from the mortar fire), stands up, hops the wall, and sprints ahead, determined to catch that damned VC tax collector!
That's the end of the turn, and the VC win the initiative for the next turn, meaning the tax man activates first. He hops up and sprints into the jungle, he got away, mission failed...
The VC mortar man, nearby in the treeline, would have gotten away too but he failed his morale roll and dropped prone. Greenwood moved up to help Harris while Banaszak and Swan moved up and captured the wounded VC mortar man.
Banaszak is pissed; we secured the village, but hell, we're not staying, so as soon as we walk away it'll be back in VC hands. Not only did we let the tax collector get away, but we only captured one old man with an ancient, WWII Japanese mortar, we only got one confirmed kill and few blood trails, and we got Harris and Russell both shot up pretty bad! Not a good day!
The only good news is that the squad continues to account itself well under fire, though losing Russell in particular hurts. Banaszak asked Harris what the hell he was thinking, taking off after the tax collector: "Sarge, you just reamed me for running away from the enemy, now you're reaming me for running at them? I was trying to make up for the way I acted on Lamyai Ridge." Damn...
Ultimately, the VC lost one KIA, one captured, had three seriously wounded, and two lightly wounded. The squad had:
Spec4 Harris: two rounds hit him in the right arm, breaking it. He was evacuated to the hospital at China Beach, will return in two months.
Sgt Russell: took a round in the thigh, sent to MASH at Dak To, will return in 18 days.
Sgt Banaszak recommended Doc White for a Bronze Star for getting those civvies into cover, then rushing out into the exposed, fireswept trail to drag Sgt Russell to safety. He also wants to recommend Holmes for an award, but the Lt's giving him flak about it. The Lt's right, Holmes hasn't done anything particularly heroic, that is, not a single event or action displaying extraordinary bravery; having said that, he's the most dependable member of the squad, just solid, and a fantastic pointman. His talents as a pointman have saved the squad twice, allowing them to get into superior position to whack the enemy, and, just like this last fight, he's always in the right place at the right time, delivering timely and accurate fire.
Because Banaszak and Holmes have been so steady, I'm upgrading their S&D ratings to 4, while everyone else in the squad, as well as the enemy, remains at 3.
Pretty cool, yes? I'm having a really good time, can't wait to play again. I wish I had better terrain for Vietnam, particularly houses and rice paddies, but I don't want to sink a bunch of money into this, I have too many other projects on my plate and/or planned ;)
V/R,
Jack
Subscribe to:
Posts (Atom)