All,
Here's the next fight, our first action against NVA regulars in the hill country near the Cambodian border. Here's the situation: following the fight at Nam Pla 6, the battalion continued to focus most of its attention north of Dak To, seeking out the Viet Cong. It's October 9, 1967, and the squad (minus SSgt Bleier, who's recovering in Okinawa, and Pvt Greenwood, still at BAS) is scheduled to conduct another patrol to the north, trying to figure out where the VC went after being run out of Ap Bac and Nam Pla. However, Brigade called out with a FragO and the squad was diverted west. It seems one of the Division's Hueys went down about 6 klicks away, near Hill 98. A Bird Dog in the area gave it a look, doesn't look like there are any survivors, so the squad is just going out to destroy equipment and recover our folks.
The platoon had followed the trail network west and then north, and was now in the process of cutting back east to search the area around Hill 98.
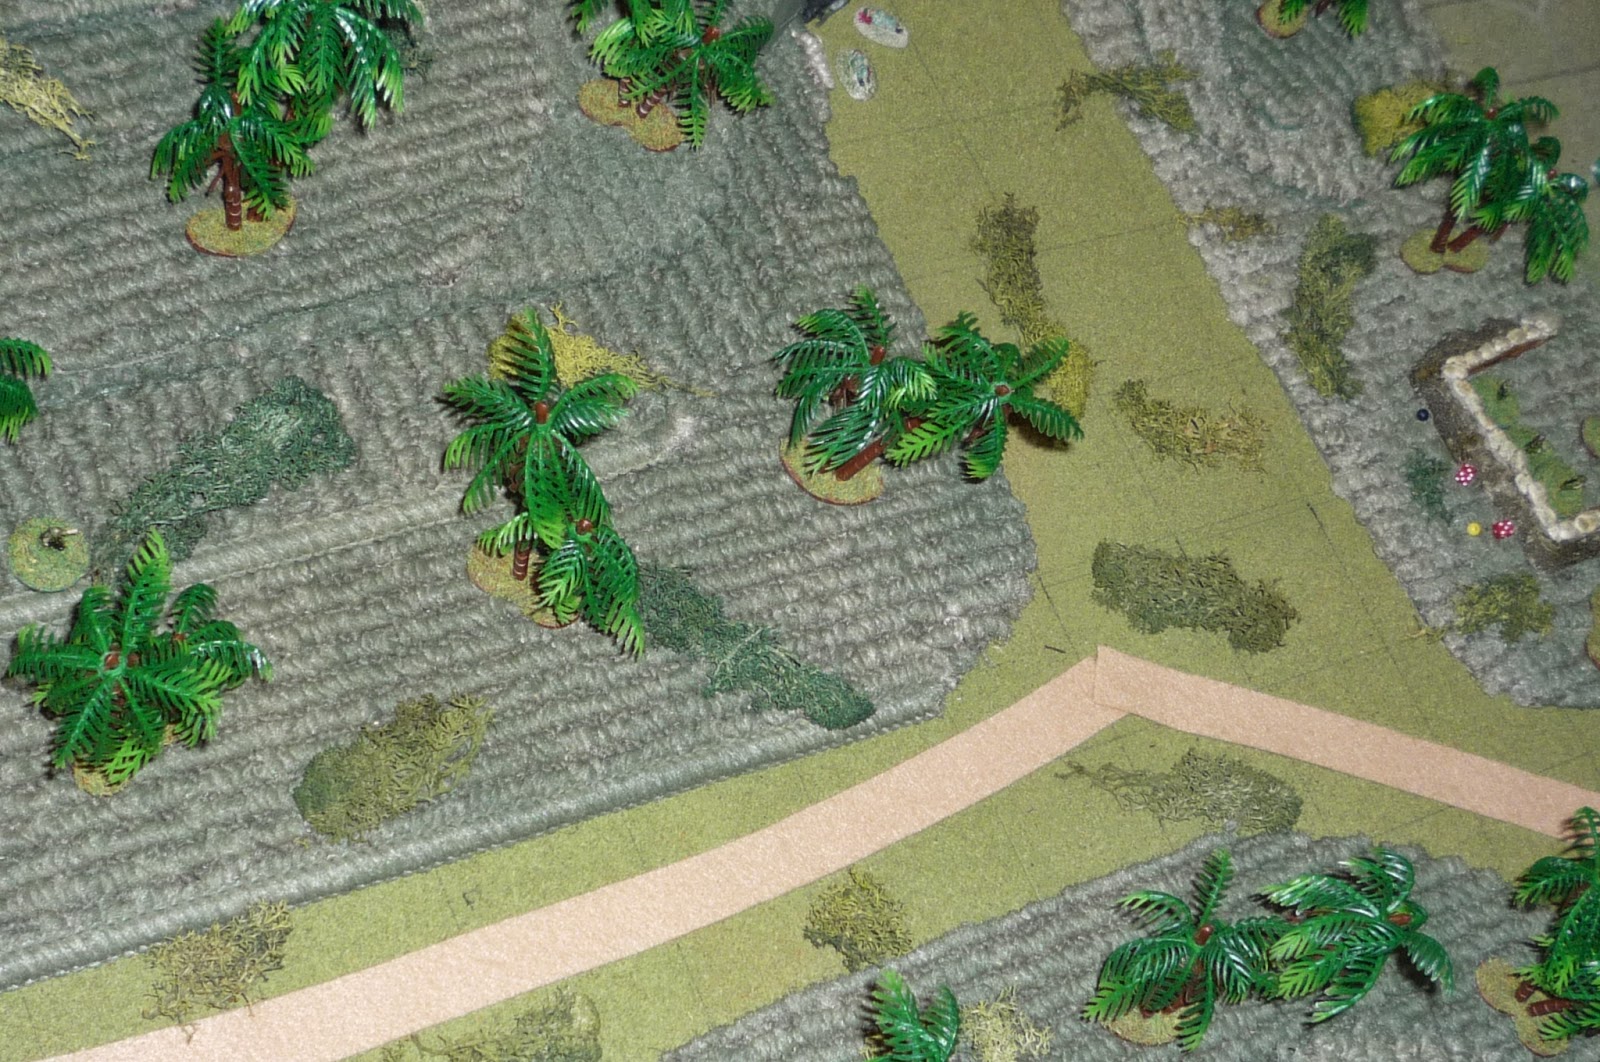
Overview, north is up. Left is US baseline, atop Lamyai Ridge. Top center is Hill 98, far right is Hill 50. You can see the helo wreck at top right. Bottom center is Hill 72. The enemy has a bunker at far right on Hill 50.
The downed Huey. The enemy has pulled the three crew out to search for intelligence information (violet beads means 'unspotted).
There are three enemy riflemen in the bunker at the east end of the trail. Their not all that alert, however, as no one was expecting trouble, especially from the west.
A waterbull and minder.
Looking west at US baseline, here's the US squad. What's happened so far is that the squad had just crested Lamyai Ridge when the pointman, Pvt Holmes, called a security halt. The acting squad leader, Sgt Banaszak, moved up to Holmes while the squad fanned out.
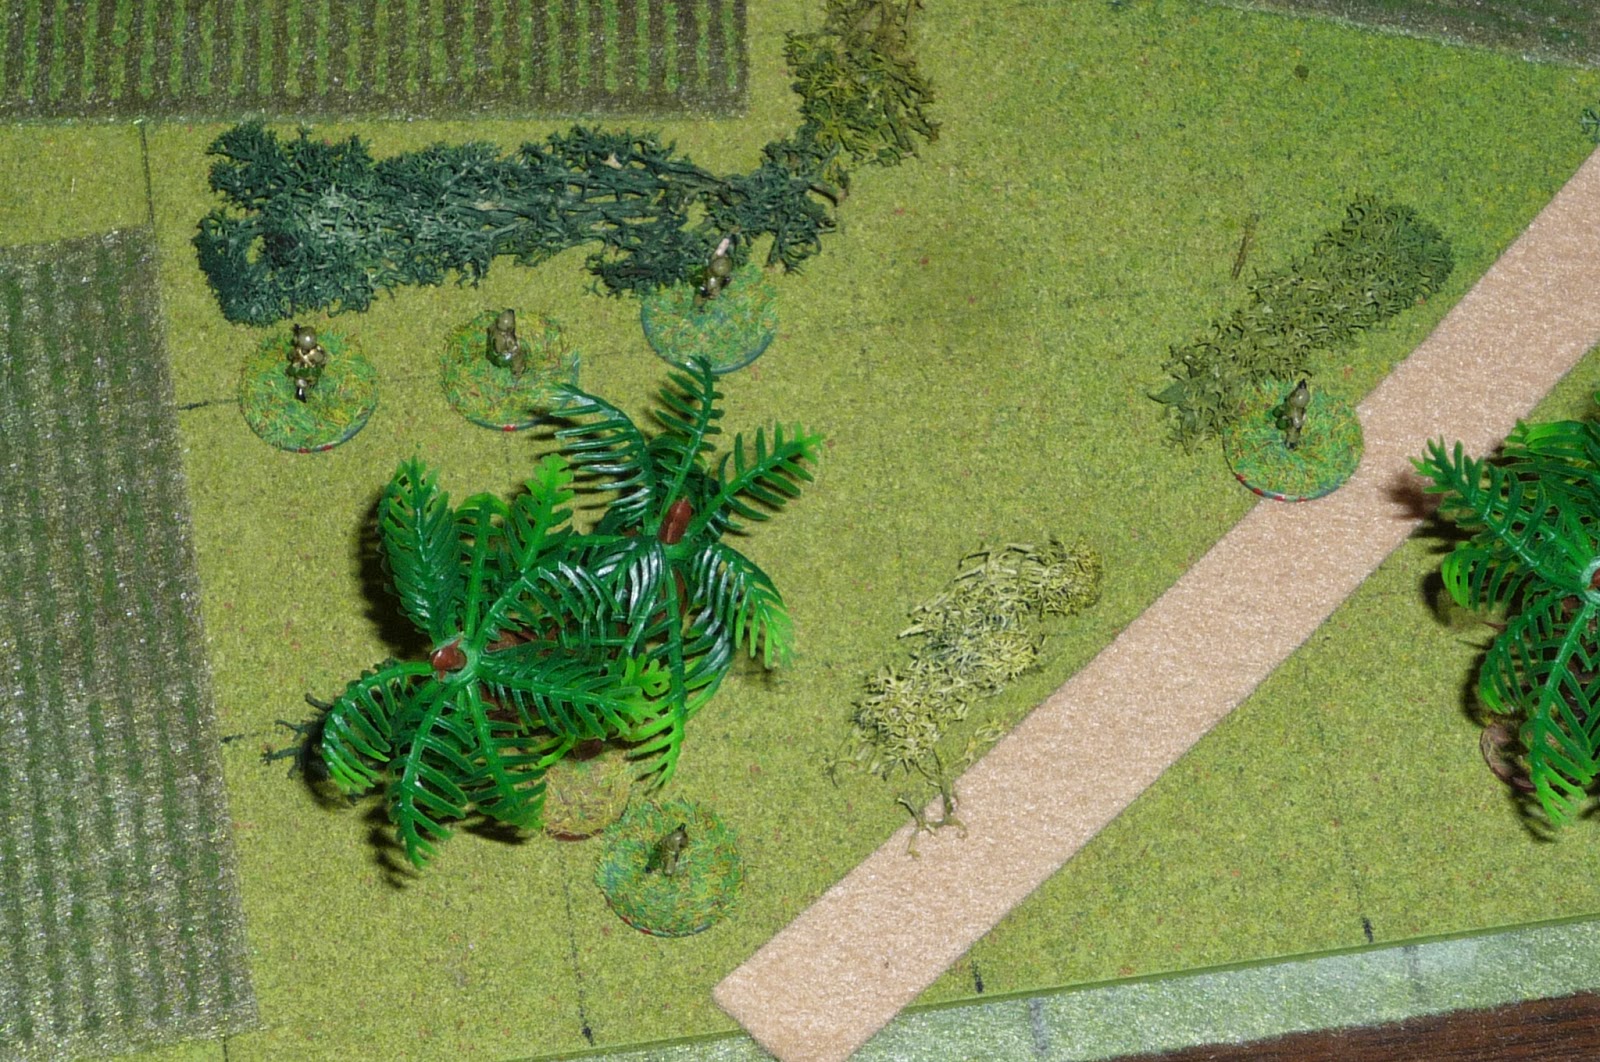
North of the trail, at far left is the M-60, Spec4 Harris, and his A-gunner, Swan. To their right (east) is Ham, a grenadier, and Doc White. To their right (far right) is Sgt Banaszak conferring with Holmes.
Looking southwest at the south side of the trail: at far left is Stallworth, center left is Sgt Russell, and at far right, up on the ridge, is Blount, the other grenadier.
So Holmes (bottom left) calls a security halt, and Banaszak comes up. "What's up, Holmes?" "Sarge, look up there, about 10 o'clock, you can see smoke coming up through the trees. I think we found our downed chopper." Movement to the right catches Holmes' eye. "Hey, what's a water buffalo doing way the hell out here? Holy crap!" Holmes shoulders his M-16 and fires twice at the enemy trooper (top right, behind the water bull), seriously wounding him. At the sound of the gunfire the water bull starts running east.
The three enemy troops in the bunker drop their rice bowls and cigarettes. "What the hell was that? Who's shooting?" Very quickly Holmes, Blount, Harris,Swan, and Russell are spotted (took two guys' activations to do so). The third enemy trooper goes on overwatch (the bunker is off camera to top, Holmes and Banaszak are at bottom left, wounded enemy troop is at top right).
Sgt Russell (bottom center left, above knoll) signals Stallworth (bottom center left, below knoll) to move up.
And he dashes up the right side (far right, near wounded enemy trooper, with Russell at far left). Stallworth calls out to Russell, "Hey Sarge, this cat's NVA!!!" "Whaaaaat? No way." Well, that explains the helo getting downed...
The three enemy troops at the downed helo scamper up Hill 98, taking up positions and going on overwatch. There are two AKs and an RPG (top left).
Rusell pops to a knee (top center, left of trail with red dice and green bead), which draws a near miss from the NVA in the bunker (foreground). Russell flops back down prone, but didn't see where the fire came from.
Blount, sitting to the left of the trail on Lamyai Ridge, here's the AK fire and goes prone, which draws overwatch fire from the NVA on Hill 98, which puts Blount out of the fight (you can see his body just left of the trail at top of pic). I let the the NVA go again (tested 4 x S&D -4 for second shot, rolled a 7), he fired at the machine gunner, Harris, but missed (top, just right of the trail, you can see the red 'stress' dice. NVA on Hill 98 are in foreground).
Harris (foreground, just left of trail, with Swan next to him) tests morale, passes, and lights into the bunker, hitting nothing, but adding a bunch of stress (top center, you can see the red dice. Banaszak and Holmes are down in front of Harris).
Harris' M-60 fire draws the attention of the NVA RPG gunner (bottom right center), who fires a rocket at the MG team. It hits just left of the trail (I put a cotton puff to show where it hit); nobody hurt, but some stress added to Harris.
Harris' assistant, Swan, takes all three actions but spots the two NVA atop Hill 98 (the RPG and leader, with a rifleman off camera to bottom right). Ham fires his M-79 at the NVA on the hilltop, but it lands short (bottom left cotton puff). Ham quickly reloads, then bloops another frag up the hill. He was aiming to hit between the two NVA and missed, but the grenade lands right at the NVA leader's feet (center cotton puff), putting him out of the fight and giving the RPG a light wound.
Banaszak (bottom left) goes prone, crawls forward, and spots the enemy rifleman on Hill 98 (far right, with RPG at top right). Banaszak is still unspotted.
Doc White (bottom center left) dropped prone and fired uphill at the RPG gunner (top right), missing twice but adding stress. Just to Doc's right is Holmes (base of tree), just to his right is Banaszak. Ham is somewhere in the top left (damn trees!). NVA rifleman is just off screen at right center (behind the yellow bush at right pic edge).
The jungle is filled with the sound of automatic weapons fire and RPG and grenade explosions. The bull is pissed and scared, and with my luck he turns left and charges northwest, getting very close to Doc White and Ham.
Doc hops up, sprints forward, and flops prone again (bottom center right, behind trees), while Ham (bottom center left, behind bush) moves up, fires uphill, and reloads. The grenade lands right on top of the RPG gunner (top center, cotton), putting him down!
The NVA rifleman on Hill 98 suddenly finds himself alone... He sprays AK fire at Doc and Ham (far left), then books it back past the helo (top right).
Spec4 Harris, the M-60 gunner, had taken a bit of fire, plus a near miss by the RPG (before the gunner's demise), so he has to take a morale test. Well, he doesn't do well at all, and decides it's time to leave town. Once again I cheat a little bit, and so I allow Harris to run forward and grab Blount (center right), and take the wounded man with him. Stallworth is more than a little hot at his partner leaving...
One of the rifleman in the bunker opens up, spraying wildly with his AK, putting stress on Holmes (top right), Russell (bottom right), and Stallworth (top left).
Banaszak (far left center) creeps up behind cover, then opens up on the bunker (far right), putting a light wound on one of them. The center NVA fails his morale test and runs for the hills, while the guy that just took the light wound drops prone.
Stallworth, alone on the far right, finishes the seriously wounded NVA (the one that was walking the waterbull) with his knife, then sprints up the right side (bottom center, with bunker at top center. Stallworth lines up a shot on the fleeing NVA rifleman (top left, near helo), and pops him, but manages only a light wound.
Russell (center right) opens up on the bunker, three misses, while Holmes (center left) and Swan both decide to drop prone and sit tight for a moment (see, forcing those morale tests works!).
The waterbull runs off the NW corner, never to be heard from again.
Holmes (far left, just above the trail) unloads on the bunker, forcing an NVA to test, which causes him to depart the game early. Russell (bottom left) opens up, putting down the last guy in the bunker. Suddenly it's quiet, and Russell cautiously gets up ("kneel, search and assess, stand, search and assess").
The last remaining NVA, lightly wounded up near the downed UH-1, passes his test and runs off his base edge. The NVA lost four men (and a water buffalo), while three got away, though one was lightly wounded.
Banaszak and Homes (bottom left) mosey up the middle...
While Stallworth, Ham, and Doc White check out Hill 98...
And Russell and Stallworth circle right (Holmes and Banaszak at top left, bunker at center right).
Security is set while the helo is rigged for demolition and Doc gets the bodies ready for extraction. Banaszak calls it in, and within minutes a Chinook is on the way.
The fight went very well, the squad is performing like a well-oiled machine and conducting itself (mostly, not counting Harris) as seasoned vets that have 'grown up' very quickly under fire. They accomplished their mission and gave the NVA, heretofore not known to be operating on this side of the border, a quick bloody nose. But Banaszak can't help but ponder on how lucky they were: once again, Holmes proves his worth as a pointman, but if that knucklhead with the buffalo hadn't stumbled into us, how might things have gone? Or if the NVA in the bunker had been a bit more vigilant (AKA, rolled better spotting dice), or if that RPG had put the M-60 team down, instead of missing by a couple yards?
Speaking of the M-60 team, someone needs to talk to Harris about his yellow streak... Blount took a round through his trap and will be spending the next 12 days in the hospital at China Beach.
Hope you had a good time, I sure did.
V/R,
Jack
Wednesday, May 7, 2014
Tuesday, May 6, 2014
"In Country," Game 3 (4 Oct 1967)
All,
It's 3 Oct 1967, four days later and we're in the sh!t again... First off, a few days ago a Sergeant named Banaszak was transferred in from the 199th Infantry to replace Sgt Greene, and everyone is back on full duty except Spec4 Harris, so the squad is out beating the bush with ten strong backs.
The battalion has continued to spend time looking west around Ap Bac14, but no contact has been made since the squad eviscerated that VC supply train. The battalion has shifted north, and 2nd Platoon has squads patrolling north of the hamlet called Nam Pla 6, while the squad is patrolling south. The squad actually had moved southeast about a klick past Nam Pla when 2nd Platoon past a sitrep stating they were in contact on the north shoulder of Nam Pla. They hadn't hit anything in the nearby jungle, but as soon as they turned in towards the ville all hell broke loose, and Alpha-6 believes Nam Pla is the VC's base of operations. 2nd Plt confirms this with reports that the VC are putting up a pretty stout defense to the north, trying to hold open a hole for numerous teams of porters to escape to the west with all their food, weapons, and ammunition.
SSgt Bleier gets the squad turned around, but can't link up with the rest of 1st Platoon in the dense vegetation; from the chatter on the radio, it sounds like the other two squads are totally disoriented. The Lt orders all three squad leaders to make their own way to blocking positions on the east side of Nam Pla to halt the VC evacuation. Bleier gets his squad moving, but they have their own troubles with the terrain, a series of razorback ridges and dense forest. When the squad finally hits the flatland and is close enough to hear the firing, they are in the treeline directly south of Nam Pla, with token enemy forces swinging about to cover the retreat of their comrades carrying heavy loads west towards salvation...
Overview, north is up. The eastern edge of Nam Pla is at top left; the VC MLR, in contact with 2nd Platoon, is off camera at top left. There are a few VC fighters in the ville, while five porter teams can be seen departing the village, and a few more fighters are in the top right (NE) corner on Hill 45. The US squad is at bottom left and bottom center.
Nam Pla, with three riflemen at the wall covering the porter teams making their way west, hoping to escape between the US forces.
The VC on Hill 45: a SMG, an LMG, and a 50mm mortar.
Fireteam 1 on the US left, with SSgt Bleier at far right. Tm1 is down one man.
Fireteam 2, on US right. Directly off camera to top are the VC porters, while Hill 45 is off camera to top right.
Tm 2's grenadier, Spec4 Ham (center of the guys on left, flanked by Sgt Russell on right and PFC Stallworth on left) spots the VC in Nam Pla and fires a 40mm frag their way. Not even close, maybe not even in the same province. Hope it didn't hit 2nd Platoon. Good Lord... He reloads as the VC 50mm mortar on Hill 45 pops out three rounds (aqua beads). Gulp...
Sgt Russell sprints right (near trail intersection), goes prone, and fires (miss) at the LMG on Hill 45 (top right). The LMG goes prone and returns fire at Russell and Pvt Holmes (bottom left, on trail), missing both. The VC SMG gunner on Hill 45 opens up on Ham and Stallworth (behind bushes at far left), missing both.
Holmes tests morale and passes like a champion (he's been very reliable in all three fights so far). He sprints ahead up to the intersection (bottom center, with Sgt Russell on other side of trail), using the palm trees at right to screen him from fire coming from Hill 45. Holmes knows they need to stop the VC porters (top), so he sights in a fires twice, missing both times, but adding stress.
VC at the wall (top left) opened up, getting a light wound on SSgt Bleier (dammit, I missed him! He's just off camera behind the bushes at bottom center, you can see the red dice for stress and the yellow bead for light wound). The VC then fires at Stallworth (left hand guy behind bushes at center right), but miss. This does help him fail his morale test though, and Stallworth drops prone.
PFC Blount, Tm1's grenadier (left center) sprints forward, drops prone, and fires a grenade at Nam Pla (top right), missing horrendously (what is with my grenadiers?). VC at the wall return fire, getting a light wound on him (wow, that's two men hit, two light wounds, pretty damned lucky). Greenwood (top left) sprints forward, goes prone, fires at the VC at the wall, missing. The last VC at the wall activates, returning fire and getting a(nother) light wound, this time on Greenwood. PFC Swan sprints up (top left, 2nd man in), goes prone, and fires at the VC behind the wall, but missed. Sgt Banaszak sprints forward (top center), goes prone, and tosses a grenade: the aqua bead is where I wanted it to land. I roll to hit, it misses, and the scatter roll is a 8 (17), so somehow our dear Sergeant tossed it into a different zip code...
Meanwhile, the first Porter Team tests morale and fails horribly: they drop their stuff and head for the hills. One team down! SSgt Bleier tests morale and passes. He fires three rounds at the porters, missing with the first two but putting a serious wound on one of the teams.
Two more Porter teams have to test, but, of course, they both pass, so they and the last Porter team move up.
Then the mortar rounds start landing... The first one (far left) misses, hits nobody but causes some stress. Then I realize Doc White (bottom left) didn't act yet... Second round falls short (top right), nearer to Sgt Russell, but nobody hit. The third (center) hits where it was supposed to, but nobody's there anymore.
I let Doc White take his move: he moves up, goes prone (bottom center, on crater), and fires at the LMG on Hill 45 (top center), but misses.
One of the VC in Nam Pla (left) opens fire on Sgt Banaszak (center), missing three times but causing three stress. Swan (right center) returns fire, putting the center guy down.
Back in the NW on Hill 45, the VC machine gunner tests morale and runs! SSgt Bleier activates, targeting the VC mortar man on Hill 45, and pops him, putting him out of the fight. He sends a few rounds the SMG gunner's way, but misses.
Another successful morale test sees Sgt Russell (left of intersection) pass and fire three times at the SMG on Hill 45 (top right), missing all three times. The SMG gunner tests morale, and I really hope he's going to run like the LMG gunner did, but he does okay and just drops prone. Holmes sprints into the thicket (dead center, you've really got to look close to see him) and fires twice at the SMG gunner, misses twice.
The first Porter team moves ahead (top), while Blount (bottom left) tests and passes. He fires a grenade and eliminates one of the Porter teams, putting stress on the other. Of the five Porter teams, one fled, one is eliminated, one is seriously wounded, one if moving in good order (top right), and one has a whopping eight stress on it (meaning it's not likely to be useful next time it activates).
And that's what happens. They fail their test, but don't run, just drop prone next to the dead and the dying (red bead).
Back in the ville, the stress is starting to tell, and one of the VC riflemen (top right) fails and splits town. Similarly, Sgt Banaszak (center) fails his test and curls up in the fetal position. Greenwood passes, and lights up the VC at the wall; no hits, but +6 stress, for a total of 10 on the remaining VC rifleman in the village.
Ham and Stallworth (bottom left) both fail their morale tests and drop prone. Doc White (bottom right) passes, opens up on the far right Porter team (top center), getting a light wound. The seriously injured Porter team crawls forward (top left).
Now I'm absolutely sure that the SMG gunner on Hill 45 (far right) is gonna fail his test and run away screaming like a little girl (he has about a dozen stress; okay, not that much, but a lot!). But he passes. He opens up, firing at and missing Pvt Holmes (in the thicket at center, you can see the red dice for stress); then he fires at Sgt Russell (just left of intersection), and hits him, seriously wounding him, before taking a shot at Ham (top left), missing. Doc White (far left, almost on the trail) returns fire and puts the SMG gunner on his ass.
Doc then calmly assumes a kneeling position (bottom center) and fires at one of the Porter teams, but missed.
The last VC rifleman in the ville tests and fails, and runs off, so Sgt Banaszak (bottom left) hops up and sprints to the wall while Swan, Greenwood, and Blount (bottom center) all move up.
On the right, Stallworth and Holmes move up. The enemy's fighting capability is depleted, and the two pincers meet up to take prisoner the porter teams.
VC losses:
5 down KIA
6 captured (2 seriously wounded and two lightly wounded)
5 others survived by running from Bleier's trained killers
US losses:
PFC Blount was hit in the arm but is immediately available for duty.
Sgt Russell was hit in the calf but is also immediately available for duty.
Pvt Greenwood was hit in shoulder and was evacuated to BAS for 9 days.
SSgt Bleier stayed in the fight, but it was actually a lot worse than they first thought. He thought he'd had a round bounce off his ribcage, but it turns out the round came apart and he's suffering pretty bad internal injuries. Bleier is being evacuated to Japan and will be gone for the next couple months.
The games are rolling off the assembly line, having a great time. Probably a couple more games against VC, then time to go up against the NVA. Don't misunderstand, I'm not going to mess around with troop ratings ("Skills and Drills"), but it will change the mission profiles/scenario options quite a bit. Can't wait, hope you guys are enjoying it.
I'm a little worried. I've been a terrible husband/father, but next weekend is Mother's Day, so I'm not sure what, if anything, will get accomplished here. Hang in, I'll definitely be back.
V/R,
Jack
It's 3 Oct 1967, four days later and we're in the sh!t again... First off, a few days ago a Sergeant named Banaszak was transferred in from the 199th Infantry to replace Sgt Greene, and everyone is back on full duty except Spec4 Harris, so the squad is out beating the bush with ten strong backs.
The battalion has continued to spend time looking west around Ap Bac14, but no contact has been made since the squad eviscerated that VC supply train. The battalion has shifted north, and 2nd Platoon has squads patrolling north of the hamlet called Nam Pla 6, while the squad is patrolling south. The squad actually had moved southeast about a klick past Nam Pla when 2nd Platoon past a sitrep stating they were in contact on the north shoulder of Nam Pla. They hadn't hit anything in the nearby jungle, but as soon as they turned in towards the ville all hell broke loose, and Alpha-6 believes Nam Pla is the VC's base of operations. 2nd Plt confirms this with reports that the VC are putting up a pretty stout defense to the north, trying to hold open a hole for numerous teams of porters to escape to the west with all their food, weapons, and ammunition.
SSgt Bleier gets the squad turned around, but can't link up with the rest of 1st Platoon in the dense vegetation; from the chatter on the radio, it sounds like the other two squads are totally disoriented. The Lt orders all three squad leaders to make their own way to blocking positions on the east side of Nam Pla to halt the VC evacuation. Bleier gets his squad moving, but they have their own troubles with the terrain, a series of razorback ridges and dense forest. When the squad finally hits the flatland and is close enough to hear the firing, they are in the treeline directly south of Nam Pla, with token enemy forces swinging about to cover the retreat of their comrades carrying heavy loads west towards salvation...
Overview, north is up. The eastern edge of Nam Pla is at top left; the VC MLR, in contact with 2nd Platoon, is off camera at top left. There are a few VC fighters in the ville, while five porter teams can be seen departing the village, and a few more fighters are in the top right (NE) corner on Hill 45. The US squad is at bottom left and bottom center.
Nam Pla, with three riflemen at the wall covering the porter teams making their way west, hoping to escape between the US forces.
The VC on Hill 45: a SMG, an LMG, and a 50mm mortar.
Fireteam 1 on the US left, with SSgt Bleier at far right. Tm1 is down one man.
Fireteam 2, on US right. Directly off camera to top are the VC porters, while Hill 45 is off camera to top right.
Tm 2's grenadier, Spec4 Ham (center of the guys on left, flanked by Sgt Russell on right and PFC Stallworth on left) spots the VC in Nam Pla and fires a 40mm frag their way. Not even close, maybe not even in the same province. Hope it didn't hit 2nd Platoon. Good Lord... He reloads as the VC 50mm mortar on Hill 45 pops out three rounds (aqua beads). Gulp...
Sgt Russell sprints right (near trail intersection), goes prone, and fires (miss) at the LMG on Hill 45 (top right). The LMG goes prone and returns fire at Russell and Pvt Holmes (bottom left, on trail), missing both. The VC SMG gunner on Hill 45 opens up on Ham and Stallworth (behind bushes at far left), missing both.
Holmes tests morale and passes like a champion (he's been very reliable in all three fights so far). He sprints ahead up to the intersection (bottom center, with Sgt Russell on other side of trail), using the palm trees at right to screen him from fire coming from Hill 45. Holmes knows they need to stop the VC porters (top), so he sights in a fires twice, missing both times, but adding stress.
VC at the wall (top left) opened up, getting a light wound on SSgt Bleier (dammit, I missed him! He's just off camera behind the bushes at bottom center, you can see the red dice for stress and the yellow bead for light wound). The VC then fires at Stallworth (left hand guy behind bushes at center right), but miss. This does help him fail his morale test though, and Stallworth drops prone.
PFC Blount, Tm1's grenadier (left center) sprints forward, drops prone, and fires a grenade at Nam Pla (top right), missing horrendously (what is with my grenadiers?). VC at the wall return fire, getting a light wound on him (wow, that's two men hit, two light wounds, pretty damned lucky). Greenwood (top left) sprints forward, goes prone, fires at the VC at the wall, missing. The last VC at the wall activates, returning fire and getting a(nother) light wound, this time on Greenwood. PFC Swan sprints up (top left, 2nd man in), goes prone, and fires at the VC behind the wall, but missed. Sgt Banaszak sprints forward (top center), goes prone, and tosses a grenade: the aqua bead is where I wanted it to land. I roll to hit, it misses, and the scatter roll is a 8 (17), so somehow our dear Sergeant tossed it into a different zip code...
Meanwhile, the first Porter Team tests morale and fails horribly: they drop their stuff and head for the hills. One team down! SSgt Bleier tests morale and passes. He fires three rounds at the porters, missing with the first two but putting a serious wound on one of the teams.
Two more Porter teams have to test, but, of course, they both pass, so they and the last Porter team move up.
Then the mortar rounds start landing... The first one (far left) misses, hits nobody but causes some stress. Then I realize Doc White (bottom left) didn't act yet... Second round falls short (top right), nearer to Sgt Russell, but nobody hit. The third (center) hits where it was supposed to, but nobody's there anymore.
I let Doc White take his move: he moves up, goes prone (bottom center, on crater), and fires at the LMG on Hill 45 (top center), but misses.
One of the VC in Nam Pla (left) opens fire on Sgt Banaszak (center), missing three times but causing three stress. Swan (right center) returns fire, putting the center guy down.
Back in the NW on Hill 45, the VC machine gunner tests morale and runs! SSgt Bleier activates, targeting the VC mortar man on Hill 45, and pops him, putting him out of the fight. He sends a few rounds the SMG gunner's way, but misses.
Another successful morale test sees Sgt Russell (left of intersection) pass and fire three times at the SMG on Hill 45 (top right), missing all three times. The SMG gunner tests morale, and I really hope he's going to run like the LMG gunner did, but he does okay and just drops prone. Holmes sprints into the thicket (dead center, you've really got to look close to see him) and fires twice at the SMG gunner, misses twice.
The first Porter team moves ahead (top), while Blount (bottom left) tests and passes. He fires a grenade and eliminates one of the Porter teams, putting stress on the other. Of the five Porter teams, one fled, one is eliminated, one is seriously wounded, one if moving in good order (top right), and one has a whopping eight stress on it (meaning it's not likely to be useful next time it activates).
And that's what happens. They fail their test, but don't run, just drop prone next to the dead and the dying (red bead).
Back in the ville, the stress is starting to tell, and one of the VC riflemen (top right) fails and splits town. Similarly, Sgt Banaszak (center) fails his test and curls up in the fetal position. Greenwood passes, and lights up the VC at the wall; no hits, but +6 stress, for a total of 10 on the remaining VC rifleman in the village.
Ham and Stallworth (bottom left) both fail their morale tests and drop prone. Doc White (bottom right) passes, opens up on the far right Porter team (top center), getting a light wound. The seriously injured Porter team crawls forward (top left).
Now I'm absolutely sure that the SMG gunner on Hill 45 (far right) is gonna fail his test and run away screaming like a little girl (he has about a dozen stress; okay, not that much, but a lot!). But he passes. He opens up, firing at and missing Pvt Holmes (in the thicket at center, you can see the red dice for stress); then he fires at Sgt Russell (just left of intersection), and hits him, seriously wounding him, before taking a shot at Ham (top left), missing. Doc White (far left, almost on the trail) returns fire and puts the SMG gunner on his ass.
Doc then calmly assumes a kneeling position (bottom center) and fires at one of the Porter teams, but missed.
The last VC rifleman in the ville tests and fails, and runs off, so Sgt Banaszak (bottom left) hops up and sprints to the wall while Swan, Greenwood, and Blount (bottom center) all move up.
On the right, Stallworth and Holmes move up. The enemy's fighting capability is depleted, and the two pincers meet up to take prisoner the porter teams.
VC losses:
5 down KIA
6 captured (2 seriously wounded and two lightly wounded)
5 others survived by running from Bleier's trained killers
US losses:
PFC Blount was hit in the arm but is immediately available for duty.
Sgt Russell was hit in the calf but is also immediately available for duty.
Pvt Greenwood was hit in shoulder and was evacuated to BAS for 9 days.
SSgt Bleier stayed in the fight, but it was actually a lot worse than they first thought. He thought he'd had a round bounce off his ribcage, but it turns out the round came apart and he's suffering pretty bad internal injuries. Bleier is being evacuated to Japan and will be gone for the next couple months.
The games are rolling off the assembly line, having a great time. Probably a couple more games against VC, then time to go up against the NVA. Don't misunderstand, I'm not going to mess around with troop ratings ("Skills and Drills"), but it will change the mission profiles/scenario options quite a bit. Can't wait, hope you guys are enjoying it.
I'm a little worried. I've been a terrible husband/father, but next weekend is Mother's Day, so I'm not sure what, if anything, will get accomplished here. Hang in, I'll definitely be back.
V/R,
Jack
Monday, May 5, 2014
"In Country," Game 2 (29 Sept 1967)
All,
It's 29 Sept 1968, four days after the squad got its butt whooped IVO Ap Bac 14. This morning the squad (minus) is on patrol to the northeast of Ap Bac; two days ago battalion sent a company-strength patrol into Ap Bac and found no trace of the enemy. Today the squad is out looking to see where they may have gone...
All of 1st Fireteam is still out, except Pvt Greenwood, who is humping the M-60. All of 2nd Fireteam is present. The squad is following a trail southwest, when the point man signals 'freeze.'
Overview, north is up. US squad is at top left on either side of the trail, VC are at bottom right, diddy-bopping down the trail like it's cool.
The squad, consisting of seven men.
The VC, with two two-man porter teams, an LMG, and a rifleman (just visible under the tree at top right).
Picking up when the US pointman (left)sees the VC pointman (right), who's smoking and joking with the guy behind him.
Pvt Holmes is on point (center, just right of the trail). He sees movement, signals freeze, spots the VC point man (bottom right), signals contact-hasty ambush front, then dives behind the bushes to his left. Sgt Russell moves over next to him, spotting the rest of the VC on the trail. Pvt Greenwood, humping the Pig, moves to his right (behind the palm trees just right of the trail at center left), getting the M-60 into position to fire straight down the trail. The VC pointman doesn't spot anyone and keeps diddy-bopping up the trail. SSgt Bleier calmly and quietly circles around to the left flank (top right), while the VC LMG gunner fails to spot and moves up the trail. Stallworth moves right and goes prone atop the knoll at center left, while the first Porter team can't spot and moves up, followed by the second Porter team. Ham moves left next to SSgt Bleier while Doc White sprints right, behind the Stallworth (far left).
And then the squad unleashes hell on the hapless Viet Cong. Sgt Russell (bottom left) signals Greenwood (bottom right), who cuts loose with a fresh belt straight down the trail into the VC (I switched up the 'hit all' rule just bit due to the uniqueness of firing straight down the enemy's file). Needless to say, the VC pointman was received a light wound, the LMG some stress, the 1st Porter some stress, and the 2nd Porter was seriously wounded. The 2nd Porter team received some stress.
Then the pointman, Holmes (far left), opened up and put the VC pointman down (center right). The VC machine gunner tests morale and... bolts for the hills!
Stallworth (on knoll, bottom center) opens up, puts a serious wound on the 1st Porter (both porters of the 1st Porter team are now seriously wounded).
Sgt Russell (far left) crawls forward to get a better view, pops 1st porter in 2nd Porter team. The only VC left standing (2nd porter from 2nd Porter team) fails his morale test and drops prone.
Doc White (left center) sprints right while SSgt Bleier and Spec4 Ham (right) sprint up the left side, capturing the stunned VC porter (bottom center). Chieu Hoi, Chieu Hoi!!!
Bleier couldn't be more proud of his squad. Holmes did a fantastic job as pointman, noting the contact, passing it on, and recommending the hasty ambush. The rest of the fellas executed the ambush flawlessly on the fly, with Greenwood's use of the Pig really making the action a foregone conclusion. The VC suffered a KIA and three captured, two of which were WIA. The squad suffered Z-E-R-O casualties!
I suppose I cheated just a little bit, but I really wanted retribution ;) Don't worry, I didn't cheat that much, though. I rolled straight up (VC dice vs US dice) to see who would act first, then rolled to spot as normal. US went first and Holmes spotted the VC pointman, got into cover, and went prone. The US kept winning the activation war, so to speak, and getting guys off the trail and into cover. Now, if I was playing straight up, I should have let the VC test to see the US guys at the end of the column still on the trail, but instead I made the VC take a moderately difficult test to spot based on the fact that once Holmes spotted the bad guys and signaled 'hasty ambush front' everyone would have immediately gotten off the trail, as opposed to waiting around to get spotted by VC that rounded the bend. Don't worry, I don't foresee too many more of these types of one-sided fights.
V/R,
Jack
It's 29 Sept 1968, four days after the squad got its butt whooped IVO Ap Bac 14. This morning the squad (minus) is on patrol to the northeast of Ap Bac; two days ago battalion sent a company-strength patrol into Ap Bac and found no trace of the enemy. Today the squad is out looking to see where they may have gone...
All of 1st Fireteam is still out, except Pvt Greenwood, who is humping the M-60. All of 2nd Fireteam is present. The squad is following a trail southwest, when the point man signals 'freeze.'
Overview, north is up. US squad is at top left on either side of the trail, VC are at bottom right, diddy-bopping down the trail like it's cool.
The squad, consisting of seven men.
The VC, with two two-man porter teams, an LMG, and a rifleman (just visible under the tree at top right).
Picking up when the US pointman (left)sees the VC pointman (right), who's smoking and joking with the guy behind him.
Pvt Holmes is on point (center, just right of the trail). He sees movement, signals freeze, spots the VC point man (bottom right), signals contact-hasty ambush front, then dives behind the bushes to his left. Sgt Russell moves over next to him, spotting the rest of the VC on the trail. Pvt Greenwood, humping the Pig, moves to his right (behind the palm trees just right of the trail at center left), getting the M-60 into position to fire straight down the trail. The VC pointman doesn't spot anyone and keeps diddy-bopping up the trail. SSgt Bleier calmly and quietly circles around to the left flank (top right), while the VC LMG gunner fails to spot and moves up the trail. Stallworth moves right and goes prone atop the knoll at center left, while the first Porter team can't spot and moves up, followed by the second Porter team. Ham moves left next to SSgt Bleier while Doc White sprints right, behind the Stallworth (far left).
And then the squad unleashes hell on the hapless Viet Cong. Sgt Russell (bottom left) signals Greenwood (bottom right), who cuts loose with a fresh belt straight down the trail into the VC (I switched up the 'hit all' rule just bit due to the uniqueness of firing straight down the enemy's file). Needless to say, the VC pointman was received a light wound, the LMG some stress, the 1st Porter some stress, and the 2nd Porter was seriously wounded. The 2nd Porter team received some stress.
Then the pointman, Holmes (far left), opened up and put the VC pointman down (center right). The VC machine gunner tests morale and... bolts for the hills!
Stallworth (on knoll, bottom center) opens up, puts a serious wound on the 1st Porter (both porters of the 1st Porter team are now seriously wounded).
Sgt Russell (far left) crawls forward to get a better view, pops 1st porter in 2nd Porter team. The only VC left standing (2nd porter from 2nd Porter team) fails his morale test and drops prone.
Doc White (left center) sprints right while SSgt Bleier and Spec4 Ham (right) sprint up the left side, capturing the stunned VC porter (bottom center). Chieu Hoi, Chieu Hoi!!!
Bleier couldn't be more proud of his squad. Holmes did a fantastic job as pointman, noting the contact, passing it on, and recommending the hasty ambush. The rest of the fellas executed the ambush flawlessly on the fly, with Greenwood's use of the Pig really making the action a foregone conclusion. The VC suffered a KIA and three captured, two of which were WIA. The squad suffered Z-E-R-O casualties!
I suppose I cheated just a little bit, but I really wanted retribution ;) Don't worry, I didn't cheat that much, though. I rolled straight up (VC dice vs US dice) to see who would act first, then rolled to spot as normal. US went first and Holmes spotted the VC pointman, got into cover, and went prone. The US kept winning the activation war, so to speak, and getting guys off the trail and into cover. Now, if I was playing straight up, I should have let the VC test to see the US guys at the end of the column still on the trail, but instead I made the VC take a moderately difficult test to spot based on the fact that once Holmes spotted the bad guys and signaled 'hasty ambush front' everyone would have immediately gotten off the trail, as opposed to waiting around to get spotted by VC that rounded the bend. Don't worry, I don't foresee too many more of these types of one-sided fights.
V/R,
Jack
Subscribe to:
Posts (Atom)