All,
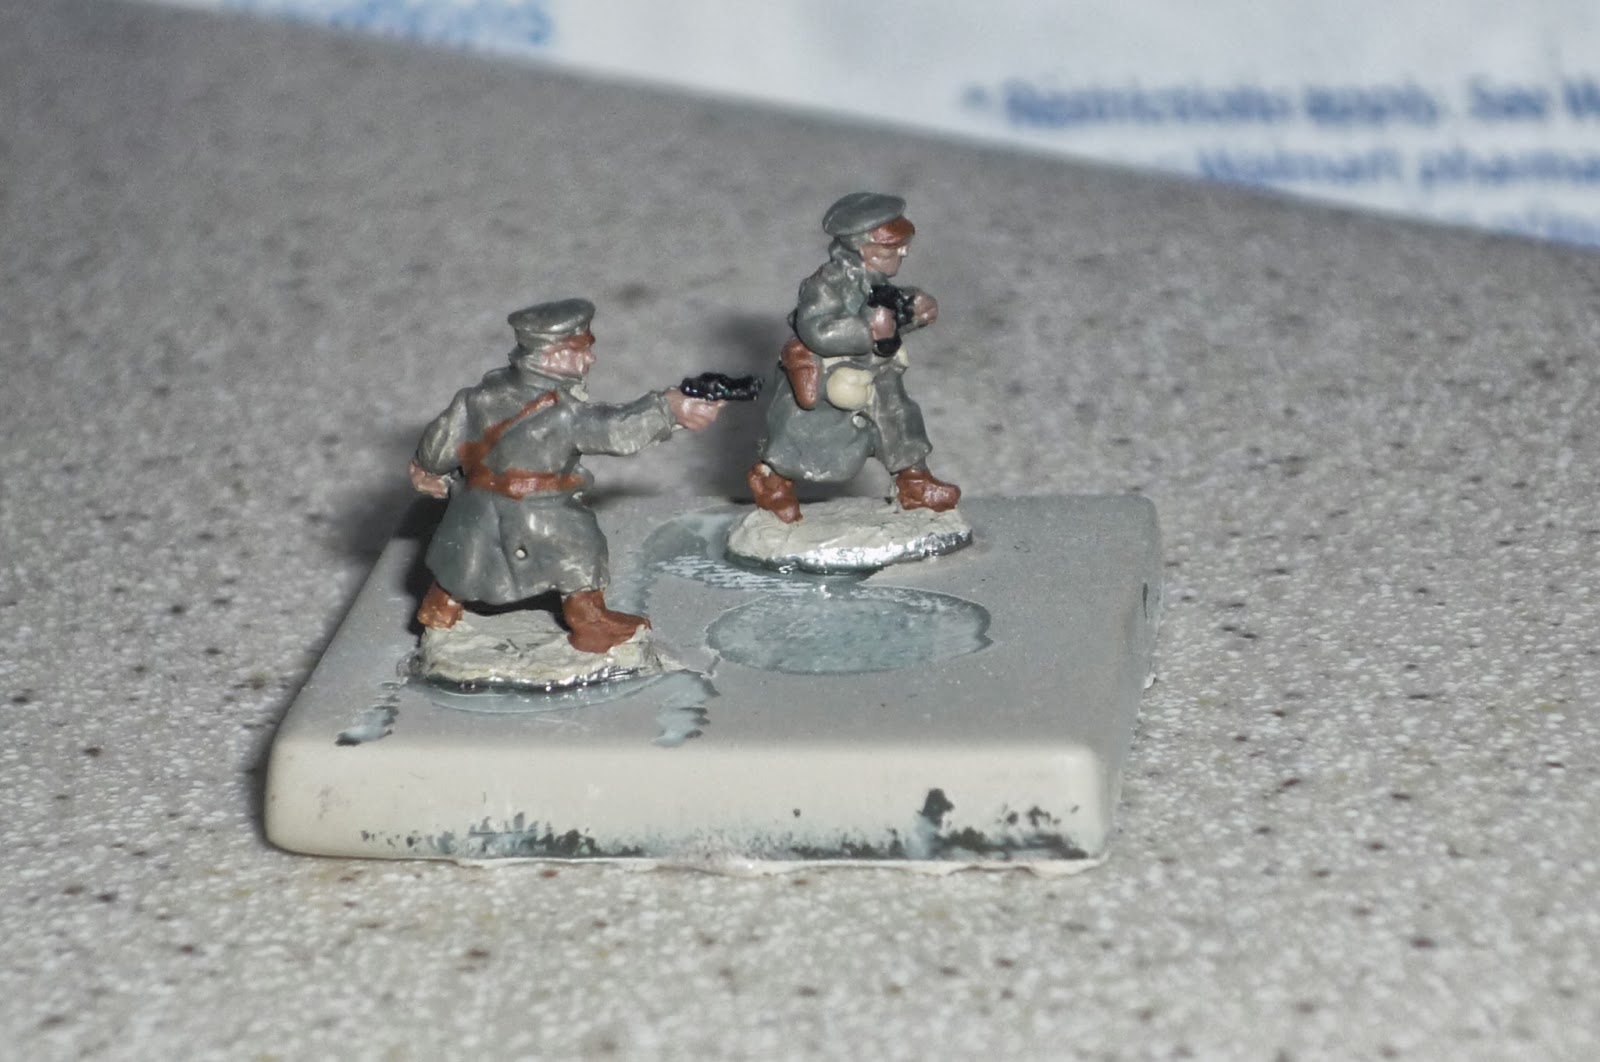
No, this isn't a new project. Actually, it's a very old, un-completed project. In any case, over on the Pendraken forum there were some questions about US WWI infantry, so I said I'd post some pics, and here they are. I beg you to please ignore the unfinished bases.
US Infantry pack (minus the excellent Officer figure) and US LMG (Chauchat) pack.
Reverse.
The two poses of the US officer pack.
Reverse.
Thursday, October 3, 2013
Wednesday, October 2, 2013
And Now, for Something a Little Different
All,
For all of you bored with my WWII battle reports, today I managed to get into something different. Off we go to the stinking jungles of Guadalcanal in the Solomon Islands, October 1943. Coastwatchers report a couple Betty's with 4 Zeros in escort coming down the Slot, so the raggedy-a$$ Marine aviators scramble six of the rugged F4F Wildcats to intercept them and keep them off their ground-pounding brethren.
The opposing forces: The Japanese have two G4M "Betty" Bombers (callsigns G1 and G2), and four A6M "Zeroes" (callsigns JR1, JR2, JR3, and JR4). The Marines put up six Wildcats against them: AB 1 through 3 and AR1 through 3. Don't ask me why I have the Japanese operating in pairs and the Marines operating in threes; I was in a hurry and just wanted to test out the rules.
A closer look at the Marine Wildcats. All callsigns are based on the base color and, if you look closely on the back edge of the base, you can see a number. It works for me.
The Japanese Zeroes. I did not listen to Mr. Dom (of Dom's Decals) and paid for it. He says in his directions that you need to put a sealant on the models after putting on the decals; I didn't, and not being careful, I rubbed one of the danged meatballs off (not pictured).
Gray 1 and Gray 2, the point of this whole endeavor. The Japanese mission is to exit these two bad boys off the Marine baseline, and the Marines' mission is to stop them.
Initial set up, with Japanese on the left and Marines on the right. The bombers are starting off at altitude 4, while all the fighters are higher.
The Japanese start positions. The red dice show altitude. Yes, my playing surface is nasty (a blue sheet with a Sharpie grid put on by yours truly).
The US baseline.
Tally Ho! Both sides are starting the fight as spotted. The two bombers are in formation but still have the lowest initiative and so they have to move first. They both decide to head for the deck to make it harder for the US fighters to get to them, as well as to pick up speed. The overall plan is to have the Betty's haul butt for the exit and let the Zeroes try to hold the Wildcats off.
JR3, on the right, dives a level and sprints ahead. His partner JR4 does the same, but holds at alt 4. Opposite them, AR1 and AR3 dive a level, cut left, then turn back straight, jockeying for position on the Japanese fighters. AR2, in the center, heads straight at the bombers, staying at alt 5 to keep up his initiative. AB3, also in the center, does the same. On the US right, AB1 and AB2 stay at alt 6, cutting out to the right a bit before squaring off. On the Japanese left, JR1 and JR2 hold straight and level, looking to cut between AB1 and 2 (on the one hand) and AB3 and AR2 (on the other).
Behind Japanese after Turn 1.
Behind US after Turn 1.
A good time to explain a little bit about the rules. The turn starts with an admin phase to add up each aircraft's initiative to see what order they will move. Then all aircraft move; there is no pre-plotted movement, so the later you move the better as you get to see where the enemy went and go where you want to go. Once all aircraft have moved, all aircraft that are eligible fire. This is considered simultaneous, so that even aircraft that get destroyed in this phase get to fire before being removed.
The rules are home-made, borrowing mostly from the Lardies' "Bag the Hun."
Here's how the initiative/admin phase works. I use a wipeboard as it needs to be done each turn. On the left you have the callsigned. Then the following factors are taken into account: the pilot's skill (rookie, regular, veteran, Jr Ace, Top Ace), the type of aircraft (multi-engine, torp bomber, dive bomber, fighter), altitude (1-6), +3 if 'tailing' an enemy (0 if not), +3 if in a formation (0 if not), and -1 for each point of damage (each type of aircraft can take 'x' points of damage; the Zero 4, the Wildcat 5, the Betty 8). You add all those up, then rack and stack them, with the lowest point total going first and the highest last. What this means is the bomber with the regular pilot in formation at alt 4 will be force to move before the fighter with the regular pilot in formation at alt 4 (in this case, the fighter is worth 4 points for initiative while the bomber is worth 0). A multi-engine bomber will find it almost impossible move after a fighter; maybe if the fighter is damaged and at low altitude. However, between fighters the margin is razor thin.
This probably seems pretty complex/time consuming for the self-proclaimed King of Simple Rules, but it's really not that big a deal and only takes a minute. The reason I like it is it seems to me the best way to model the characteristics that determine initiative in WWII fighter combat (as I understand them). If you look, it's all the same concepts as Bag the Hun, just without the randomness (that so many people love, but I find a bit too random).
Turn 2: The Betty's are up first again (of course), and drop all the way to the deck, charging ahead. JR3 cuts right, drops to alt 2 (the bombers are at 1 and the Wildcats will have be at the same alt to attack them), then darts back in to the center to set up to get on the tail of the Wildcats he knows will soon be coming for the bombers. JR4 follows the same pattern, but only drops to alt 3 (and might get caught out of position. Being higher helps with initiative, but will there be time/space to drop two levels to get at the US fighters?). AR2 cuts left, drops from alt 5 to alt 1, then cuts right back towards the bombers. It's setting him up for a long shot at G2, but also is exposing his tail to JR3 and 4 (though neither will be able to engage this turn because of the alt difference). AB3 follows suit, also lining up a long shot, though a bit better than AR2's.
On the far left, AR3 pulls a great maneuver to get behind JR3, lining up for a shot. JR1 drops down and tries to jockey in behind AR3 but can't get a shot lined up. JR2 also drops down and crosses the nose of the bombers, but is unable to get lined up for a shot this turn. AB1 drops to alt 2, looks to get on JR1's tail next turn. AB2 stays to the right, holding a little higher to keep initiative in order to jump on G1 next turn.
Now the shooting: AR2 took it's long shot with poor deflection angle (only two firing dice) and got no hits. AB3 also fired on G2, but head-on (not a great shot, but better than AR2's being on the nose quarter) and racked up 3 hits on the bomber (these will effect initiative, slow movement, and negatively impact shooting). AR3 had a short range shot from the rear quarter and got 3 hits on JR3, seriously damaging it (1 more will do it).
Overview after Turn 2.
G1 and G2 on left (the green dice is hits/damage received), with AB3 in the head-on position and JR2 maneuvering but unable to get a shot in this turn.
Bottom right is AR3 firing up JR3. JR4, at left, as predicted, couldn't engage as it got caught too high (alt 3 while AR2 is at alt 1).
Turn 3: G2 plowed straight ahead (not getting all that far with its damage), while G1 turns 45 deg left to try to get away from the furball. The Zero JR3 is all shot up and so is next in the initiative line; it turns left as hard as it can, trying to make for home. JR2 climbed and moved into position to try to cover JR3's escape. AR2 slid easily over behind G1, while AB2 found itself overshooting the action and banking to come back around. JR1 pulled around but could only manage to line up a very poor shot on AR2, while AR3 stuck with JR3, intent on finishing the job.
AB2 made a great move to kick around behind the bombers, but had to settle for a poorly lined up shot in order to not mask his buddy, AR2. AB1 fell easily onto the tail of JR1, intent on putting him out of business, but JR4 managed to dive and pounce right on AR2's tail. Lastly, AR1 managed only to line up a shot on G1's flank (bad deflection shot).
The shooting: Both bombers got their tail gunners into action, with G1 getting a hit on AB2 but G2 missing AR2. Meanwhile, AR2 took it's bad deflection shot on G1 and got only one hit, though AB2 took a similar shot at G1 and got 4 hits. JR1 looked to smite AR2 from the sky, but a twitchy trigger finger (bad dice rolling) meant only 2 hits. This was particularly bad for the Japanese as immediately following this AR3 spit a long burst at JR3 that finished him off. Splash one for the good guys. AB1 then lined up JR1 and put three hits on him. But the Japanese struck back when JR4 added 4 more hits to the 2 JR2 already had, splashing him.
A look after Turn 3. It seems we're missing a couple airplanes... (1 each, so far)
Turn 4: The Japanese are down a fighter, another is badly damaged, and the bombers are racking up hits as well, but they had a good initiative roll (when the score is tied and all other factors are equal it's settled by die roll), which should help.
The bombers claw their way forward, both belching smoke. The crippled JR1 turns right, trying to drag AB1 in front of his buddies guns. AR2 nurses his damaged aircraft in behind G1, lining up for a pretty solid shot. AR1 swings his plane around, looking to get back in the fight (but not helped by having to move so early in the round). JR4 does too, and lines up a real long-range shot on AR2, while AR1 stays hot on JR1's tail to finish the job. AB3 pulls around and tails G2, looking to put her out of business, while JR2 does the same to AB3. There's no way AB1 can get there to save AB3, so he lines up a head-on (quarter) pass on JR4.
The shooting: Both bombers again open up on US fighters, but the damage they've taken really gives them almost no chance to hit anything. So AR2 lights into G1, getting another 4 hits and sending it down into the swells of the Pacific. JR4 takes its long shot on AR2, but only manages one hit. Immediately following this the Marines clean their clocks, with AR3 finishing JR1 (with a whopping 5 more hits!) and AB3 getting five hits on the helpless G2, splashing it. JR2 managed to put 4 hits on AB3, crippling it, but AB1 turned right around and put 3 hits on JR4.
Look at the action after Turn 4. The Japanese have lost both bombers (the key to the fight) and two fighters, and have another one pretty beat up (JR4 at top right), while the Marines lost only 1 fighter, but AR2 (top right) has three hits and AB3 (bottom right) has 4 hits.
I don't have a Force Morale mechanism yet, but I figured this was a good spot for each side to decide to break off the action without further loss.
I'm pretty happy with the rules. Still room to make a few tweaks, but it went good, it went quick, and could probably handle another 3 or 4 aircraft per side.
V/R,
Jack
For all of you bored with my WWII battle reports, today I managed to get into something different. Off we go to the stinking jungles of Guadalcanal in the Solomon Islands, October 1943. Coastwatchers report a couple Betty's with 4 Zeros in escort coming down the Slot, so the raggedy-a$$ Marine aviators scramble six of the rugged F4F Wildcats to intercept them and keep them off their ground-pounding brethren.
The opposing forces: The Japanese have two G4M "Betty" Bombers (callsigns G1 and G2), and four A6M "Zeroes" (callsigns JR1, JR2, JR3, and JR4). The Marines put up six Wildcats against them: AB 1 through 3 and AR1 through 3. Don't ask me why I have the Japanese operating in pairs and the Marines operating in threes; I was in a hurry and just wanted to test out the rules.
A closer look at the Marine Wildcats. All callsigns are based on the base color and, if you look closely on the back edge of the base, you can see a number. It works for me.
The Japanese Zeroes. I did not listen to Mr. Dom (of Dom's Decals) and paid for it. He says in his directions that you need to put a sealant on the models after putting on the decals; I didn't, and not being careful, I rubbed one of the danged meatballs off (not pictured).
Gray 1 and Gray 2, the point of this whole endeavor. The Japanese mission is to exit these two bad boys off the Marine baseline, and the Marines' mission is to stop them.
Initial set up, with Japanese on the left and Marines on the right. The bombers are starting off at altitude 4, while all the fighters are higher.
The Japanese start positions. The red dice show altitude. Yes, my playing surface is nasty (a blue sheet with a Sharpie grid put on by yours truly).
The US baseline.
Tally Ho! Both sides are starting the fight as spotted. The two bombers are in formation but still have the lowest initiative and so they have to move first. They both decide to head for the deck to make it harder for the US fighters to get to them, as well as to pick up speed. The overall plan is to have the Betty's haul butt for the exit and let the Zeroes try to hold the Wildcats off.
JR3, on the right, dives a level and sprints ahead. His partner JR4 does the same, but holds at alt 4. Opposite them, AR1 and AR3 dive a level, cut left, then turn back straight, jockeying for position on the Japanese fighters. AR2, in the center, heads straight at the bombers, staying at alt 5 to keep up his initiative. AB3, also in the center, does the same. On the US right, AB1 and AB2 stay at alt 6, cutting out to the right a bit before squaring off. On the Japanese left, JR1 and JR2 hold straight and level, looking to cut between AB1 and 2 (on the one hand) and AB3 and AR2 (on the other).
Behind Japanese after Turn 1.
Behind US after Turn 1.
A good time to explain a little bit about the rules. The turn starts with an admin phase to add up each aircraft's initiative to see what order they will move. Then all aircraft move; there is no pre-plotted movement, so the later you move the better as you get to see where the enemy went and go where you want to go. Once all aircraft have moved, all aircraft that are eligible fire. This is considered simultaneous, so that even aircraft that get destroyed in this phase get to fire before being removed.
The rules are home-made, borrowing mostly from the Lardies' "Bag the Hun."
Here's how the initiative/admin phase works. I use a wipeboard as it needs to be done each turn. On the left you have the callsigned. Then the following factors are taken into account: the pilot's skill (rookie, regular, veteran, Jr Ace, Top Ace), the type of aircraft (multi-engine, torp bomber, dive bomber, fighter), altitude (1-6), +3 if 'tailing' an enemy (0 if not), +3 if in a formation (0 if not), and -1 for each point of damage (each type of aircraft can take 'x' points of damage; the Zero 4, the Wildcat 5, the Betty 8). You add all those up, then rack and stack them, with the lowest point total going first and the highest last. What this means is the bomber with the regular pilot in formation at alt 4 will be force to move before the fighter with the regular pilot in formation at alt 4 (in this case, the fighter is worth 4 points for initiative while the bomber is worth 0). A multi-engine bomber will find it almost impossible move after a fighter; maybe if the fighter is damaged and at low altitude. However, between fighters the margin is razor thin.
This probably seems pretty complex/time consuming for the self-proclaimed King of Simple Rules, but it's really not that big a deal and only takes a minute. The reason I like it is it seems to me the best way to model the characteristics that determine initiative in WWII fighter combat (as I understand them). If you look, it's all the same concepts as Bag the Hun, just without the randomness (that so many people love, but I find a bit too random).
Turn 2: The Betty's are up first again (of course), and drop all the way to the deck, charging ahead. JR3 cuts right, drops to alt 2 (the bombers are at 1 and the Wildcats will have be at the same alt to attack them), then darts back in to the center to set up to get on the tail of the Wildcats he knows will soon be coming for the bombers. JR4 follows the same pattern, but only drops to alt 3 (and might get caught out of position. Being higher helps with initiative, but will there be time/space to drop two levels to get at the US fighters?). AR2 cuts left, drops from alt 5 to alt 1, then cuts right back towards the bombers. It's setting him up for a long shot at G2, but also is exposing his tail to JR3 and 4 (though neither will be able to engage this turn because of the alt difference). AB3 follows suit, also lining up a long shot, though a bit better than AR2's.
On the far left, AR3 pulls a great maneuver to get behind JR3, lining up for a shot. JR1 drops down and tries to jockey in behind AR3 but can't get a shot lined up. JR2 also drops down and crosses the nose of the bombers, but is unable to get lined up for a shot this turn. AB1 drops to alt 2, looks to get on JR1's tail next turn. AB2 stays to the right, holding a little higher to keep initiative in order to jump on G1 next turn.
Now the shooting: AR2 took it's long shot with poor deflection angle (only two firing dice) and got no hits. AB3 also fired on G2, but head-on (not a great shot, but better than AR2's being on the nose quarter) and racked up 3 hits on the bomber (these will effect initiative, slow movement, and negatively impact shooting). AR3 had a short range shot from the rear quarter and got 3 hits on JR3, seriously damaging it (1 more will do it).
Overview after Turn 2.
G1 and G2 on left (the green dice is hits/damage received), with AB3 in the head-on position and JR2 maneuvering but unable to get a shot in this turn.
Bottom right is AR3 firing up JR3. JR4, at left, as predicted, couldn't engage as it got caught too high (alt 3 while AR2 is at alt 1).
Turn 3: G2 plowed straight ahead (not getting all that far with its damage), while G1 turns 45 deg left to try to get away from the furball. The Zero JR3 is all shot up and so is next in the initiative line; it turns left as hard as it can, trying to make for home. JR2 climbed and moved into position to try to cover JR3's escape. AR2 slid easily over behind G1, while AB2 found itself overshooting the action and banking to come back around. JR1 pulled around but could only manage to line up a very poor shot on AR2, while AR3 stuck with JR3, intent on finishing the job.
AB2 made a great move to kick around behind the bombers, but had to settle for a poorly lined up shot in order to not mask his buddy, AR2. AB1 fell easily onto the tail of JR1, intent on putting him out of business, but JR4 managed to dive and pounce right on AR2's tail. Lastly, AR1 managed only to line up a shot on G1's flank (bad deflection shot).
The shooting: Both bombers got their tail gunners into action, with G1 getting a hit on AB2 but G2 missing AR2. Meanwhile, AR2 took it's bad deflection shot on G1 and got only one hit, though AB2 took a similar shot at G1 and got 4 hits. JR1 looked to smite AR2 from the sky, but a twitchy trigger finger (bad dice rolling) meant only 2 hits. This was particularly bad for the Japanese as immediately following this AR3 spit a long burst at JR3 that finished him off. Splash one for the good guys. AB1 then lined up JR1 and put three hits on him. But the Japanese struck back when JR4 added 4 more hits to the 2 JR2 already had, splashing him.
A look after Turn 3. It seems we're missing a couple airplanes... (1 each, so far)
Turn 4: The Japanese are down a fighter, another is badly damaged, and the bombers are racking up hits as well, but they had a good initiative roll (when the score is tied and all other factors are equal it's settled by die roll), which should help.
The bombers claw their way forward, both belching smoke. The crippled JR1 turns right, trying to drag AB1 in front of his buddies guns. AR2 nurses his damaged aircraft in behind G1, lining up for a pretty solid shot. AR1 swings his plane around, looking to get back in the fight (but not helped by having to move so early in the round). JR4 does too, and lines up a real long-range shot on AR2, while AR1 stays hot on JR1's tail to finish the job. AB3 pulls around and tails G2, looking to put her out of business, while JR2 does the same to AB3. There's no way AB1 can get there to save AB3, so he lines up a head-on (quarter) pass on JR4.
The shooting: Both bombers again open up on US fighters, but the damage they've taken really gives them almost no chance to hit anything. So AR2 lights into G1, getting another 4 hits and sending it down into the swells of the Pacific. JR4 takes its long shot on AR2, but only manages one hit. Immediately following this the Marines clean their clocks, with AR3 finishing JR1 (with a whopping 5 more hits!) and AB3 getting five hits on the helpless G2, splashing it. JR2 managed to put 4 hits on AB3, crippling it, but AB1 turned right around and put 3 hits on JR4.
Look at the action after Turn 4. The Japanese have lost both bombers (the key to the fight) and two fighters, and have another one pretty beat up (JR4 at top right), while the Marines lost only 1 fighter, but AR2 (top right) has three hits and AB3 (bottom right) has 4 hits.
I don't have a Force Morale mechanism yet, but I figured this was a good spot for each side to decide to break off the action without further loss.
I'm pretty happy with the rules. Still room to make a few tweaks, but it went good, it went quick, and could probably handle another 3 or 4 aircraft per side.
V/R,
Jack
All Americans, non-battle day (11 July 43)
All,
After accomplishing every objective put to them, and suffering quite a few casualties in the process, the Company Commander decided to pull the platoon out of the line, keeping it in local reserve for 11 July 1943. The division as a whole has suffered a goodly number of casualties, so 11 July saw a day of reorganization for the whole battalion. The linkup has not yet been made with the sea-landed forces, so there are no replacements to be had. What this means is the division has turned to stripping men from support roles and even cannibalization (breaking up line units to provide replacements for other line units).
I rolled up my free-form event (I'm not very creative with this sort of thing), and our illustrious bazooka gunner, Cpl Carlyle, has been meritoriously promoted to Sgt by the Company commander. The Company commander has been slowly losing his aggravation towards Lt Shepherd (particularly after hearing of Shepherd leading a close assault in the last battle), but Carlyle's promotion has caused a bit of friction. Shepherd figured the new Sgt should take over 3rd Squad following Sgt Dawson's WIA/evac home; SFC Ford vehemently disagreed, stating the value of Carlyle as a proven tank killer far outweighed the benefits of having him as a squad leader. Not only did Ford disagree, he did it with the Company Commander standing there, who sided with Ford. So Shepherd is a bit disgruntled with his Platoon Sergeant (for having this conversation in front of the Co Cdr) and with the Co Cdr for siding with the Plt Sgt in front of the men.
Then I rolled up my two fixed events, and my good luck holds. First, I rolled reinforcements again, and got a 4, meaning full-strength. Some of these men will be cooks/bakers/candlestick makers, and some will be vets from other rifle companies. One of them will have have to fill the 3rd Squad Leader position (if only Cpl Pace was back from the battalion aid station!), so here's to hoping it's a rifle company guy and not a battalion admin clerk... The other event was "Manpower," in which you stand a real good chance of losing a squad or team for a short period of time, but I again rolled a 4, which was 'no-effect,' so the platoon will be full-strength heading into its next mission on 12 July 43.
A few quick notes about the replacements. First, the battalion has made the choice, despite the casualty situation, to up the platoon's T/O by three riflemen, all to serve as platoon runners in the HQ element. In the platoon's case, all three of these came from rear echelon positions, as did the bulk of the replacements the platoon received. Having said that, the platoon will still be down three men as the battalion's policy is that locally evacuated wounded are not replaced. The positions are held open for the men to return to their old platoon as the Bn CO believes this is better for unit cohesion.
The platoon received two NCOs, both of which are causing a bit of consternation. First, Sgt Glenn, an outstanding young parachute infantry NCO, was assigned to 2nd Squad as its A/SL. This has really upset Sgt Hurley, who feels it is a direct threat to him. Please recall that Hurley is currently depressed from losing so many men in the first three battles, and was recently wounded himself. He sees this as a sign the Lt has lost faith in him and that the Plt Sgt no longer has his back. This was not the PC's intent; there were only two 'open' NCO slots to fill, and Glenn had to go in this one. Which brings us to the bigger problem...
SSgt Miles just became the squad leader for 3rd Squad. In summary, the Lt and Plt Sgt are not happy with this as SSgt Miles is a giant POS. Miles was an NCO in the Divisional Supply Battalion, but the division recently stripped as many men as it could out of the support elements to fill the holes in the line battalions, so here he is. He doesn't want to be here, and no one wants him in a leadership position, but he's a Staff Sergeant (thus, the third highest ranking member of the platoon), and so there was no way to place a Sgt in an SL position over him. I rolled up "Addict," "Position," and "Cautious" for the good SSgt. What I'm taking this to mean is, Miles was perfectly intent in life to be a Supply NCO with his subordinates busting their tails and him taking the credit (position), and he will do anything to get back to that spot. He's a raging alcoholic and was known to disappear for a couple hours each day from his old unit (their 1st Sgt warned SFC Ford about this), returning in a less than optimal mental state (addict). Regarding combat temperament, he's not trained for it, is a terrible soldier and a worse leader, has never been in combat (which is forgivable), and has no desire to be! In short, he's a coward ("cautious").
Well, we'll see how this works out for the platoon...
V/R,
Jack
After accomplishing every objective put to them, and suffering quite a few casualties in the process, the Company Commander decided to pull the platoon out of the line, keeping it in local reserve for 11 July 1943. The division as a whole has suffered a goodly number of casualties, so 11 July saw a day of reorganization for the whole battalion. The linkup has not yet been made with the sea-landed forces, so there are no replacements to be had. What this means is the division has turned to stripping men from support roles and even cannibalization (breaking up line units to provide replacements for other line units).
I rolled up my free-form event (I'm not very creative with this sort of thing), and our illustrious bazooka gunner, Cpl Carlyle, has been meritoriously promoted to Sgt by the Company commander. The Company commander has been slowly losing his aggravation towards Lt Shepherd (particularly after hearing of Shepherd leading a close assault in the last battle), but Carlyle's promotion has caused a bit of friction. Shepherd figured the new Sgt should take over 3rd Squad following Sgt Dawson's WIA/evac home; SFC Ford vehemently disagreed, stating the value of Carlyle as a proven tank killer far outweighed the benefits of having him as a squad leader. Not only did Ford disagree, he did it with the Company Commander standing there, who sided with Ford. So Shepherd is a bit disgruntled with his Platoon Sergeant (for having this conversation in front of the Co Cdr) and with the Co Cdr for siding with the Plt Sgt in front of the men.
Then I rolled up my two fixed events, and my good luck holds. First, I rolled reinforcements again, and got a 4, meaning full-strength. Some of these men will be cooks/bakers/candlestick makers, and some will be vets from other rifle companies. One of them will have have to fill the 3rd Squad Leader position (if only Cpl Pace was back from the battalion aid station!), so here's to hoping it's a rifle company guy and not a battalion admin clerk... The other event was "Manpower," in which you stand a real good chance of losing a squad or team for a short period of time, but I again rolled a 4, which was 'no-effect,' so the platoon will be full-strength heading into its next mission on 12 July 43.
A few quick notes about the replacements. First, the battalion has made the choice, despite the casualty situation, to up the platoon's T/O by three riflemen, all to serve as platoon runners in the HQ element. In the platoon's case, all three of these came from rear echelon positions, as did the bulk of the replacements the platoon received. Having said that, the platoon will still be down three men as the battalion's policy is that locally evacuated wounded are not replaced. The positions are held open for the men to return to their old platoon as the Bn CO believes this is better for unit cohesion.
The platoon received two NCOs, both of which are causing a bit of consternation. First, Sgt Glenn, an outstanding young parachute infantry NCO, was assigned to 2nd Squad as its A/SL. This has really upset Sgt Hurley, who feels it is a direct threat to him. Please recall that Hurley is currently depressed from losing so many men in the first three battles, and was recently wounded himself. He sees this as a sign the Lt has lost faith in him and that the Plt Sgt no longer has his back. This was not the PC's intent; there were only two 'open' NCO slots to fill, and Glenn had to go in this one. Which brings us to the bigger problem...
SSgt Miles just became the squad leader for 3rd Squad. In summary, the Lt and Plt Sgt are not happy with this as SSgt Miles is a giant POS. Miles was an NCO in the Divisional Supply Battalion, but the division recently stripped as many men as it could out of the support elements to fill the holes in the line battalions, so here he is. He doesn't want to be here, and no one wants him in a leadership position, but he's a Staff Sergeant (thus, the third highest ranking member of the platoon), and so there was no way to place a Sgt in an SL position over him. I rolled up "Addict," "Position," and "Cautious" for the good SSgt. What I'm taking this to mean is, Miles was perfectly intent in life to be a Supply NCO with his subordinates busting their tails and him taking the credit (position), and he will do anything to get back to that spot. He's a raging alcoholic and was known to disappear for a couple hours each day from his old unit (their 1st Sgt warned SFC Ford about this), returning in a less than optimal mental state (addict). Regarding combat temperament, he's not trained for it, is a terrible soldier and a worse leader, has never been in combat (which is forgivable), and has no desire to be! In short, he's a coward ("cautious").
Well, we'll see how this works out for the platoon...
V/R,
Jack
Saturday, September 28, 2013
Operation Husky Platoon Roster
Sorry guys, this one is just for me to try to keep it straight (you're welcome to look).
Unit:
1st Platoon, Dog Company, 1st Battalion, 499th Parachute Infantry Regiment, 82nd Airborne Division
Operation Husky Roster
HQ Element: Personality Motivation Temp Backgr Level
Platoon Commander - 2Lt Jack Shepherd Conformist Family Even Average III
*Submitted for Bronze Star (3); Submitted for Bronze Star (5); shot in arm, Purple Heart (7);
Platoon Sergeant - SSgt Sawyer Ford Fanatic Hedonism Reckless III
*Submitted for Silver Star (1); meritoriously promoted to E-7 by Bn CO (2/3); Submitted for Bronze Star (3); Submitted for Silver Star (5); reduced to SSgt by Bn CO (6/7);
Radio/Telephone Operator - Sgt Gamble
*Transfer from 2nd Platoon (9/10);
Bazooka Gunner - Cpl Ignacio
*Repl (2/3); Shot in thigh, Purple Heart (3); Promoted to PFC by Lt (6/7); Submitted for Bronze Star (8); became gunner (8/9); promoted by the PC to Cpl (9/10);
Bazooka Assistant (stand Garand) - PFC Fitzgerald
*Transfer from 2nd Platoon (9/10);
1st Squad, Rifle Team:
Squad Leader - Sgt Bettis I
*Transfer from 2nd Platoon (9/10);
Rifleman (kneel SMG) - Cpl Lake
*Transfer from 2nd Platoon (9/10);
Rifleman (stand carbine) - Pvt Calhoun
*Repl (6/7); WIA, locally evacuated, return 26 July 43, Purple Heart (7);
Rifleman (port Garand) - Pvt Swenson
*Transfer from 2nd Platoon (9/10);
Rifleman (rush Garand) - Pvt Chisholm
*Transfer from 2nd Platoon (9/10);
1st Squad, BAR Team:
Assistant Squad Leader - Cpl John Locke II
*became a Tier II leader.
Automatic Rifleman - Cpl Fox
*Promoted to Corporal by PC (9/10);
Rifleman (crouch carbine) - Pvt Grant
*Repl (6/7);
Rifleman (fire Garand) - Pvt Hughes
*Repl (6/7);
Rifleman (kneel Garand) - Pvt Ivers
*Repl (6/7);
2nd Squad, Rifle Team:
Squad Leader - Cpl Keepers I
*Transfer from 3rd Bn (6/7); made 2nd Squad SL (9/10);
Rifleman (kneel Mohawk) - PFC Alston
*Repl (2/3); Shot in calf, Purple Heart (5); Promoted to PFC by Lt (6/7); Submitted for Bronze Star (9);
Automatic Rifleman - PFC India
*Shot in calf, Purple Heart (2); Transferred from 1st Squad (4/5); Promoted to PFC by Lt (6/7); shot in thigh, Purple Heart (7);
Rifleman (crouching carbine) - Pvt Edge
*Repl (6/7); shot in jaw, Purple Heart (7); transferred from 1st Squad (7/8);
Rifleman (port Garand) - PFC Danson
*Repl (2/3); Promoted to PFC by Lt (6/7);
2nd Squad, BAR Team:
Assistant Squad Leader - Cpl Everson
*Transfer from 2nd Platoon (9/10);
Squad Machine Gun (gunner) - PFC Cahill
*Repl (2/3); shot in torso, locally evacuated and treated, return 16 July 43, Purple Heart (3); Promoted to PFC by Lt (6/7);
Squad Machine Gun (asst gunner) - Pvt Jackson
*Repl (6/7): shot in hand, Purple Heart (7);
Rifleman (fire Garand) - Pvt Longwood
*Repl (6/7)
Rifleman (port Garand) - Pvt Girardo
*Repl (2/3); Ran in the face of the enemy (4); Shot in face, Purple Heart (5); shot in thigh, locally evacuated and treated, return 20 July 43, Purple Heart (6); Transferred from 3rd Squad (7/8);
3rd Squad, Rifle Team:
Squad Leader - Sgt Glenn Conformist Religion Bold II
*Repl from E Co, 2nd Bn (3/4); Ran in the face of the enemy (4); Transferred from 2nd Squad to 3rd Squad (4/5); Submitted for Distinguished Service Cross (5); shot in neck, Purple Heart (6); shot in arm, Purple Heart (8);
Rifleman (stand Mohawk) - PFC Ertz (3rd Squad) *Repl (3/4); Transferred from 1st Squad (5/6); shot in groin, locally evacuated and treated, return 18 July 43, Purple Heart (6); Promoted to PFC by Lt (6/7); shot in calf, locally evacuated and treated, return 26 July 43, Purple Heart (8);
Rifleman (stand SMG) - Pvt Xavier
*shot in foot, walking wounded, Purple Heart (2); Ran in the face of the enemy (4); Transferred from 3rd Squad (4/5); Transferred back to 3rd Squad (5/6);
Rifleman (stand carbine) - Pvt Anders
*Transfer from 2nd Platoon (9/10);
Rifleman (port Garand) - Pvt Johnson (2nd Squad) *Repl (3/4); Shot in thigh, Purple Heart (5); WIA, locally evacuated, return 26 July 43, Purple Heart (7); transferred from 2nd Squad (9/10);
3rd Squad, BAR Team:
Assistant Squad Leader - Cpl Charley Pace I
*Shot in torso, locally evacuated and treated, return 24 July 43, Purple Heart (2); shot in calf, locally evacuated, return 24 July 43, Purple Heart (7);
Automatic Rifleman - Cpl Timmons
*Transfer from 2nd Platoon (9/10);
Rifleman (rush Garand) - PFC Leshore
*Transfer from 2nd Platoon (9/10);
Rifleman (crouch carbine) - Pvt O'Rourke
*Transfer from 2nd Platoon (9/10);
Rifleman (port Garand) - Pvt Kleen
*Transfer from 2nd Platoon (9/10);
Weapons Platoon Support:
Medium Machine Gun Team:
Gunner - PFC Clue *Shot in hip, Purple Heart (5); (6); (7); shot in shoulder, Purple Heart (8);
A-Gunner - Pvt Dederick
Ammo Carrier - Pvt House
Ammo Carrier - Pvt Molsby
60mm Mortar Team:
Gunner - Cpl Richard Alpert *(2); (3);
A-Gunner - Pvt Black *(2); (3);
Ammo Carrier - Pvt Delby *(3)
Ammo Carrier - Pvt Stadler *Repl (3/4);
Combat Engineer NCO:
NCO - Sgt Cade Austen *(2)
Engineer (rush Garand) - Pvt Teague
Engineer (flamethrower) - Pvt Overbay
Engineer (bangalore) - Pvt Kuhalski
Engineer (pole charge) - Pvt Bliss
Regimental Support:
57mm Anti-Tank Gun (single, section, platoon)
NCO - Sgt "Penny" Widmore *(4); Shot in head, Purple Heart (5);
Gunner - Pvt Peel *Repl (6/7);
Gunner - Pvt Pippen *(4); Shot in groin, Purple Heart (5);
Gunner - Pvt Vinson *(4); Shot in arm, Purple Heart (5);
Divisional Support
M4 Sherman (single, section, platoon)
Tank Commander - SSgt Leclaire Littleton
M3 Stuart (single, section, platoon)
Tank Commander - SSgt Sonny Moon (7);
Inactive:
Pvt Able (HQ Element) *KIA (1)
Cpl Daniel Farraday (HQ Element) *KIA (3); Submitted for posthumous Bronze Star (3)
Pvt Durango (HQ Element) *Repl (2/3); KIA (3)
Pvt Alcee (HQ Element) *Repl (3/4); WIA, evacuated, Purple Heart (7)
Sgt Boone Carlyle (HQ Element) I *Submitted for Bronze Star (1); Submitted for Bronze Star (3); Promoted to Sgt by Comp Cmdr (3/4); Submitted for Distinguished Service Cross (5); WIA, evacuated, Purple Heart (8);
Pvt Delta (1st Squad) *WIA, evacuated, Purple Heart (1)
Pvt George (1st Squad) *KIA (5)
Pvt Hotel (1st Squad) *WIA, evacuated, Purple Heart (5)
Pvt Charleston (1st Squad) *Shot in neck, Purple Heart (1); KIA (6)
Pvt Echo (1st Squad) *WIA, evacuated, Purple Heart (6)
Sgt Desmond Hume (1st Squad SL) *Shot in foot, Purple Heart (1); Shot in bicep, Purple Heart (4); 1st Sgt of Wpns Co has a positive view (4/5); KIA (7)
Cpl Baker (1st Squad) *Shot in forearm, Purple Heart (1); Promoted to Cpl by Lt (6/7); KIA (7)
Pvt Dodge (1st Squad) *Repl (6/7); WIA, evacuated, Purple Heart (7)
Pvt Lima (2nd Squad) *WIA, evacuated, Purple Heart (1)
Pvt Quebec (2rd Squad) *KIA (1)
PFC Juliet (2nd Squad) *WIA, evacuated, Purple Heart (2)
Pvt King (2nd Squad) *WIA, evacuated, Purple Heart (2)
Pvt Mike (2nd Squad) *KIA (2)
Pvt Papa (2nd Squad) *KIA (2)
Cpl Sam Jarrah (2nd Squad A/SL) *WIA, evacuated, Purple Heart (3)
Pvt Oscar (2nd Squad) *shot in shoulder, walking wounded, Purple Heart (1); shot in hand, walking wounded, Purple Heart (2); shot in chest, evacuated, Purple Heart (3)
Pvt Edson (2nd Squad) *Repl (2/3); KIA (3)
Pvt Fenner (2nd Squad) *Repl (2/3); KIA (3)
Pvt Beetle (2nd Squad) *Repl (2/3); WIA, evacuated, Purple Heart (5)
Cpl Nancy (2nd Squad) *Meritoriously promoted to Cpl by PC (3/4); WIA, evacuated, Purple Heart (5)
Pvt Hubler (2nd Squad) *Repl (3/4); KIA (5)
PFC Whiskey (2nd Squad) *shot in hand, walking wounded, Purple Heart (2); Meritoriously promoted to E-3 by Plt Cmdr, named Acting A/SL; Ran in the face of the enemy (4); Transferred from 3rd Squad (4/5); WIA, evacuated, Purple Heart (5)
PFC Farr (2nd Squad) *Repl (3/4); Shot in shoulder, Purple Heart (4); Shot in foot, Purple Heart (5); Promoted to PFC by Lt (6/7); WIA, evacuated, Purple Heart (7);
Sgt Hurley Reyes (2nd Squad) *Negative Morale Event (casualties) (2/3); Shot in head, Purple Heart (3); Submitted for Bronze Star (5); Positive Morale Event (personal and unit performance, friendship with Sgt Hume) (6/7); Negative Morale Event, downgraded to Level I leader (death of Hume) (7/8); KIA (9)
Pvt Zander (3rd Squad) *KIA (1)
PFC Victor (3rd Squad) *WIA, evacuated, Purple Heart (2)
Sgt Michael Dawson (3rd Squad SL) *WIA, evacuated (3)
SSgt Miles (3rd Squad SL) *Repl from Supply Bn (3/4); WIA, Purple Heart (4)
PFC Romeo (3rd Squad) *KIA (4)
Pvt Sierra (3rd Squad) *shot in thigh, walking wounded, Purple Heart (2); KIA (5)
Pvt Tango (3rd Squad) *Submitted for Bronze Star (4); Shot in shoulder, Purple Heart (5); KIA (6)
Pvt Mickelson (3rd Squad) *Repl (6/7); WIA, evacuated (7);
Pvt Oliver (3rd Squad) *Repl (6/7); WIA, evacuated, Purple Heart (7);
PFC Herby (3rd Squad) *Repl (2/3); shot in groin, locally evacuated and treated, return 14 July 43, Purple Heart (3); Promoted to PFC by Lt (6/7); KIA (7)
Pvt Noonan (3rd Squad) *Repl (6/7); shot in neck, Purple Heart (7); WIA, evacuated, Purple Heart (8);
PFC Uniform (3rd Squad) *Submitted for Bronze Star (4): shot in jaw, Purple Heart (6); Promoted to PFC by Lt (6/7); KIA (9)
Pvt Effel (Wpns Plt/Mortars) *KIA (3)
Pvt Ackerman (Wpns Plt/ATG) *(4); KIA (5)
Pvt Bautista (Wpns Plt/MMG) *(5); KIA (6)
Pvt Apple (Wpns Plt/MMG) *(2); (3); (5); (6); WIA, evacuated, (7);
Pvt Ronson (Wpns Plt/MMG) *Repl (6/7); KIA (7)
Sgt Frank Lapidus (Wpns Plt/MMG) *(2); (3); (5); (6); shot in shoulder, Purple Heart (7); KIA (8)
Non-Player Characters:
Battalion Commander - Colonel Charles Whitmore
*Favorable opinion of SSgt Ford (Plt Sgt, based off of actions in 1); Neutral opinion of Ford (6/7);
Company Commander - Captain Ben Linus
*Unfavorable opinion of 2Lt Shepherd (for missing 1); Coming around on 2Lt Shepherd (3); Favorable opinion of Shepherd (6/7); Unfavorable opinion of Ford (6/7);
Weapons Company 1st Sgt *Favorable opinion of Sgt Hume (4);
Battalion Adjutant (S-1) *Favorable opinion of 2Lt Shepherd (4);
Enemy Casualties:
(1) 11 WIA/KIA, 7 POW, 1 captured Pak-40 ATG, 1 disabled Sdkfz 251 halftrack
(2) 21 WIA/KIA, 20 POW, 1 captured SP AA, 1 disabled Panzer Mk III
(3) 20 WIA/KIA, 3 POW, 1 disabled Sdkfz 222 armored car, 1 destroyed Panzer Mk III, 2 captured 80mm mortar tubes captured
(4) 19 WIA/KIA, 5 POW, 2 Tiger I tanks damaged (later destroyed with thermite grenades)
(5) 53 WIA/KIA, 1 Sdkfz 222 armored car damaged, 5 Panzer Mk III tanks damaged/destroyed
(6) 10 WIA/KIA, 9 POW
(7) 40 WIA/KIA, 7 POW, 1 Pz MkIII destroyed, 2 Sdkfz 222s destroyed, 1 Sdkfz 251/9 destroyed, 1 Sdkfz 251/1 destroyed
(8) 6 WIA/KIA, 8 POW
(9) 14 WIA/KIA, 5 POW, 2 80mm mortar tubes captured
Unit:
1st Platoon, Dog Company, 1st Battalion, 499th Parachute Infantry Regiment, 82nd Airborne Division
Operation Husky Roster
HQ Element: Personality Motivation Temp Backgr Level
Platoon Commander - 2Lt Jack Shepherd Conformist Family Even Average III
*Submitted for Bronze Star (3); Submitted for Bronze Star (5); shot in arm, Purple Heart (7);
Platoon Sergeant - SSgt Sawyer Ford Fanatic Hedonism Reckless III
*Submitted for Silver Star (1); meritoriously promoted to E-7 by Bn CO (2/3); Submitted for Bronze Star (3); Submitted for Silver Star (5); reduced to SSgt by Bn CO (6/7);
Radio/Telephone Operator - Sgt Gamble
*Transfer from 2nd Platoon (9/10);
Bazooka Gunner - Cpl Ignacio
*Repl (2/3); Shot in thigh, Purple Heart (3); Promoted to PFC by Lt (6/7); Submitted for Bronze Star (8); became gunner (8/9); promoted by the PC to Cpl (9/10);
Bazooka Assistant (stand Garand) - PFC Fitzgerald
*Transfer from 2nd Platoon (9/10);
1st Squad, Rifle Team:
Squad Leader - Sgt Bettis I
*Transfer from 2nd Platoon (9/10);
Rifleman (kneel SMG) - Cpl Lake
*Transfer from 2nd Platoon (9/10);
Rifleman (stand carbine) - Pvt Calhoun
*Repl (6/7); WIA, locally evacuated, return 26 July 43, Purple Heart (7);
Rifleman (port Garand) - Pvt Swenson
*Transfer from 2nd Platoon (9/10);
Rifleman (rush Garand) - Pvt Chisholm
*Transfer from 2nd Platoon (9/10);
1st Squad, BAR Team:
Assistant Squad Leader - Cpl John Locke II
*became a Tier II leader.
Automatic Rifleman - Cpl Fox
*Promoted to Corporal by PC (9/10);
Rifleman (crouch carbine) - Pvt Grant
*Repl (6/7);
Rifleman (fire Garand) - Pvt Hughes
*Repl (6/7);
Rifleman (kneel Garand) - Pvt Ivers
*Repl (6/7);
2nd Squad, Rifle Team:
Squad Leader - Cpl Keepers I
*Transfer from 3rd Bn (6/7); made 2nd Squad SL (9/10);
Rifleman (kneel Mohawk) - PFC Alston
*Repl (2/3); Shot in calf, Purple Heart (5); Promoted to PFC by Lt (6/7); Submitted for Bronze Star (9);
Automatic Rifleman - PFC India
*Shot in calf, Purple Heart (2); Transferred from 1st Squad (4/5); Promoted to PFC by Lt (6/7); shot in thigh, Purple Heart (7);
Rifleman (crouching carbine) - Pvt Edge
*Repl (6/7); shot in jaw, Purple Heart (7); transferred from 1st Squad (7/8);
Rifleman (port Garand) - PFC Danson
*Repl (2/3); Promoted to PFC by Lt (6/7);
2nd Squad, BAR Team:
Assistant Squad Leader - Cpl Everson
*Transfer from 2nd Platoon (9/10);
Squad Machine Gun (gunner) - PFC Cahill
*Repl (2/3); shot in torso, locally evacuated and treated, return 16 July 43, Purple Heart (3); Promoted to PFC by Lt (6/7);
Squad Machine Gun (asst gunner) - Pvt Jackson
*Repl (6/7): shot in hand, Purple Heart (7);
Rifleman (fire Garand) - Pvt Longwood
*Repl (6/7)
Rifleman (port Garand) - Pvt Girardo
*Repl (2/3); Ran in the face of the enemy (4); Shot in face, Purple Heart (5); shot in thigh, locally evacuated and treated, return 20 July 43, Purple Heart (6); Transferred from 3rd Squad (7/8);
3rd Squad, Rifle Team:
Squad Leader - Sgt Glenn Conformist Religion Bold II
*Repl from E Co, 2nd Bn (3/4); Ran in the face of the enemy (4); Transferred from 2nd Squad to 3rd Squad (4/5); Submitted for Distinguished Service Cross (5); shot in neck, Purple Heart (6); shot in arm, Purple Heart (8);
Rifleman (stand Mohawk) - PFC Ertz (3rd Squad) *Repl (3/4); Transferred from 1st Squad (5/6); shot in groin, locally evacuated and treated, return 18 July 43, Purple Heart (6); Promoted to PFC by Lt (6/7); shot in calf, locally evacuated and treated, return 26 July 43, Purple Heart (8);
Rifleman (stand SMG) - Pvt Xavier
*shot in foot, walking wounded, Purple Heart (2); Ran in the face of the enemy (4); Transferred from 3rd Squad (4/5); Transferred back to 3rd Squad (5/6);
Rifleman (stand carbine) - Pvt Anders
*Transfer from 2nd Platoon (9/10);
Rifleman (port Garand) - Pvt Johnson (2nd Squad) *Repl (3/4); Shot in thigh, Purple Heart (5); WIA, locally evacuated, return 26 July 43, Purple Heart (7); transferred from 2nd Squad (9/10);
3rd Squad, BAR Team:
Assistant Squad Leader - Cpl Charley Pace I
*Shot in torso, locally evacuated and treated, return 24 July 43, Purple Heart (2); shot in calf, locally evacuated, return 24 July 43, Purple Heart (7);
Automatic Rifleman - Cpl Timmons
*Transfer from 2nd Platoon (9/10);
Rifleman (rush Garand) - PFC Leshore
*Transfer from 2nd Platoon (9/10);
Rifleman (crouch carbine) - Pvt O'Rourke
*Transfer from 2nd Platoon (9/10);
Rifleman (port Garand) - Pvt Kleen
*Transfer from 2nd Platoon (9/10);
Weapons Platoon Support:
Medium Machine Gun Team:
Gunner - PFC Clue *Shot in hip, Purple Heart (5); (6); (7); shot in shoulder, Purple Heart (8);
A-Gunner - Pvt Dederick
Ammo Carrier - Pvt House
Ammo Carrier - Pvt Molsby
60mm Mortar Team:
Gunner - Cpl Richard Alpert *(2); (3);
A-Gunner - Pvt Black *(2); (3);
Ammo Carrier - Pvt Delby *(3)
Ammo Carrier - Pvt Stadler *Repl (3/4);
Combat Engineer NCO:
NCO - Sgt Cade Austen *(2)
Engineer (rush Garand) - Pvt Teague
Engineer (flamethrower) - Pvt Overbay
Engineer (bangalore) - Pvt Kuhalski
Engineer (pole charge) - Pvt Bliss
Regimental Support:
57mm Anti-Tank Gun (single, section, platoon)
NCO - Sgt "Penny" Widmore *(4); Shot in head, Purple Heart (5);
Gunner - Pvt Peel *Repl (6/7);
Gunner - Pvt Pippen *(4); Shot in groin, Purple Heart (5);
Gunner - Pvt Vinson *(4); Shot in arm, Purple Heart (5);
Divisional Support
M4 Sherman (single, section, platoon)
Tank Commander - SSgt Leclaire Littleton
M3 Stuart (single, section, platoon)
Tank Commander - SSgt Sonny Moon (7);
Inactive:
Pvt Able (HQ Element) *KIA (1)
Cpl Daniel Farraday (HQ Element) *KIA (3); Submitted for posthumous Bronze Star (3)
Pvt Durango (HQ Element) *Repl (2/3); KIA (3)
Pvt Alcee (HQ Element) *Repl (3/4); WIA, evacuated, Purple Heart (7)
Sgt Boone Carlyle (HQ Element) I *Submitted for Bronze Star (1); Submitted for Bronze Star (3); Promoted to Sgt by Comp Cmdr (3/4); Submitted for Distinguished Service Cross (5); WIA, evacuated, Purple Heart (8);
Pvt Delta (1st Squad) *WIA, evacuated, Purple Heart (1)
Pvt George (1st Squad) *KIA (5)
Pvt Hotel (1st Squad) *WIA, evacuated, Purple Heart (5)
Pvt Charleston (1st Squad) *Shot in neck, Purple Heart (1); KIA (6)
Pvt Echo (1st Squad) *WIA, evacuated, Purple Heart (6)
Sgt Desmond Hume (1st Squad SL) *Shot in foot, Purple Heart (1); Shot in bicep, Purple Heart (4); 1st Sgt of Wpns Co has a positive view (4/5); KIA (7)
Cpl Baker (1st Squad) *Shot in forearm, Purple Heart (1); Promoted to Cpl by Lt (6/7); KIA (7)
Pvt Dodge (1st Squad) *Repl (6/7); WIA, evacuated, Purple Heart (7)
Pvt Lima (2nd Squad) *WIA, evacuated, Purple Heart (1)
Pvt Quebec (2rd Squad) *KIA (1)
PFC Juliet (2nd Squad) *WIA, evacuated, Purple Heart (2)
Pvt King (2nd Squad) *WIA, evacuated, Purple Heart (2)
Pvt Mike (2nd Squad) *KIA (2)
Pvt Papa (2nd Squad) *KIA (2)
Cpl Sam Jarrah (2nd Squad A/SL) *WIA, evacuated, Purple Heart (3)
Pvt Oscar (2nd Squad) *shot in shoulder, walking wounded, Purple Heart (1); shot in hand, walking wounded, Purple Heart (2); shot in chest, evacuated, Purple Heart (3)
Pvt Edson (2nd Squad) *Repl (2/3); KIA (3)
Pvt Fenner (2nd Squad) *Repl (2/3); KIA (3)
Pvt Beetle (2nd Squad) *Repl (2/3); WIA, evacuated, Purple Heart (5)
Cpl Nancy (2nd Squad) *Meritoriously promoted to Cpl by PC (3/4); WIA, evacuated, Purple Heart (5)
Pvt Hubler (2nd Squad) *Repl (3/4); KIA (5)
PFC Whiskey (2nd Squad) *shot in hand, walking wounded, Purple Heart (2); Meritoriously promoted to E-3 by Plt Cmdr, named Acting A/SL; Ran in the face of the enemy (4); Transferred from 3rd Squad (4/5); WIA, evacuated, Purple Heart (5)
PFC Farr (2nd Squad) *Repl (3/4); Shot in shoulder, Purple Heart (4); Shot in foot, Purple Heart (5); Promoted to PFC by Lt (6/7); WIA, evacuated, Purple Heart (7);
Sgt Hurley Reyes (2nd Squad) *Negative Morale Event (casualties) (2/3); Shot in head, Purple Heart (3); Submitted for Bronze Star (5); Positive Morale Event (personal and unit performance, friendship with Sgt Hume) (6/7); Negative Morale Event, downgraded to Level I leader (death of Hume) (7/8); KIA (9)
Pvt Zander (3rd Squad) *KIA (1)
PFC Victor (3rd Squad) *WIA, evacuated, Purple Heart (2)
Sgt Michael Dawson (3rd Squad SL) *WIA, evacuated (3)
SSgt Miles (3rd Squad SL) *Repl from Supply Bn (3/4); WIA, Purple Heart (4)
PFC Romeo (3rd Squad) *KIA (4)
Pvt Sierra (3rd Squad) *shot in thigh, walking wounded, Purple Heart (2); KIA (5)
Pvt Tango (3rd Squad) *Submitted for Bronze Star (4); Shot in shoulder, Purple Heart (5); KIA (6)
Pvt Mickelson (3rd Squad) *Repl (6/7); WIA, evacuated (7);
Pvt Oliver (3rd Squad) *Repl (6/7); WIA, evacuated, Purple Heart (7);
PFC Herby (3rd Squad) *Repl (2/3); shot in groin, locally evacuated and treated, return 14 July 43, Purple Heart (3); Promoted to PFC by Lt (6/7); KIA (7)
Pvt Noonan (3rd Squad) *Repl (6/7); shot in neck, Purple Heart (7); WIA, evacuated, Purple Heart (8);
PFC Uniform (3rd Squad) *Submitted for Bronze Star (4): shot in jaw, Purple Heart (6); Promoted to PFC by Lt (6/7); KIA (9)
Pvt Effel (Wpns Plt/Mortars) *KIA (3)
Pvt Ackerman (Wpns Plt/ATG) *(4); KIA (5)
Pvt Bautista (Wpns Plt/MMG) *(5); KIA (6)
Pvt Apple (Wpns Plt/MMG) *(2); (3); (5); (6); WIA, evacuated, (7);
Pvt Ronson (Wpns Plt/MMG) *Repl (6/7); KIA (7)
Sgt Frank Lapidus (Wpns Plt/MMG) *(2); (3); (5); (6); shot in shoulder, Purple Heart (7); KIA (8)
Non-Player Characters:
Battalion Commander - Colonel Charles Whitmore
*Favorable opinion of SSgt Ford (Plt Sgt, based off of actions in 1); Neutral opinion of Ford (6/7);
Company Commander - Captain Ben Linus
*Unfavorable opinion of 2Lt Shepherd (for missing 1); Coming around on 2Lt Shepherd (3); Favorable opinion of Shepherd (6/7); Unfavorable opinion of Ford (6/7);
Weapons Company 1st Sgt *Favorable opinion of Sgt Hume (4);
Battalion Adjutant (S-1) *Favorable opinion of 2Lt Shepherd (4);
Enemy Casualties:
(1) 11 WIA/KIA, 7 POW, 1 captured Pak-40 ATG, 1 disabled Sdkfz 251 halftrack
(2) 21 WIA/KIA, 20 POW, 1 captured SP AA, 1 disabled Panzer Mk III
(3) 20 WIA/KIA, 3 POW, 1 disabled Sdkfz 222 armored car, 1 destroyed Panzer Mk III, 2 captured 80mm mortar tubes captured
(4) 19 WIA/KIA, 5 POW, 2 Tiger I tanks damaged (later destroyed with thermite grenades)
(5) 53 WIA/KIA, 1 Sdkfz 222 armored car damaged, 5 Panzer Mk III tanks damaged/destroyed
(6) 10 WIA/KIA, 9 POW
(7) 40 WIA/KIA, 7 POW, 1 Pz MkIII destroyed, 2 Sdkfz 222s destroyed, 1 Sdkfz 251/9 destroyed, 1 Sdkfz 251/1 destroyed
(8) 6 WIA/KIA, 8 POW
(9) 14 WIA/KIA, 5 POW, 2 80mm mortar tubes captured
Yet Another Project (82nd Airborne, Platoon Forward)
All,
So, it has been decided. I am moving ahead with a Platoon Forward campaign. I will label it "All American," and it will center on an airborne rifle platoon from 1943 to 1945 in the Mediterranean and Northwest European theaters. This will be done in 10mm with individually based figures (from Pendraken), using the modified KR-16 rules, and played solo in the context of Joe Legan's excellent "Platoon Forward" solo campaign system for troop and scenario development.
Here's the boys:
Here is the whole platoon, 39 red-blooded American boys looking to throw the Nazis out and come home to Sweet Suzy Rottencrotch. I am dealing with a dilemma though. I have a Platoon Commander, a Platoon Sergeant, a radio man, a two-man MMG team, a two-man 60mm mortar team, and a two-man bazooka team, and three 10-man rifle squads. My dilemma is whether to have the platoon as a PC, Plt Sgt, RTO, and 3 squads, with the MMG, mortar, and bazooka as company-level support that may or may not be attached (this would probably work better in Plt Fwd), or as I built them: a 39-man platoon (this gives me zero support options in Plt Fwd outside of vehicles).
I want to do the latter, but should probably do the former. My biggest concern is running into a tank and not having a bazooka, so maybe I'll do the former but with a bazooka as part of the HQ element. I think that's probably the way to go.
Assuming I go with what I just outlined, here is the HQ element with Wpns Plt support. Starting at bottom left and working clockwise: 2-man MMG team, two-man 60mm mortar team, 2-man bazooka team, RTO, PC, and Plt Sgt.
Same group from rear. PC has vertical stripe, Plt Sgt has horizontal stripe. Neither figure is carrying a weapon, but both will be handled as carrying an M-1 carbine.
1st Squad, with Squad Leader with rifle team on left, and Assistant Squad Leader and BAR team on the right. Both teams are a mix of Thompsons, M-1 Garands, and M-1 Carbines (plus the BAR in the BAR team).
2nd Squad, same way. I should mention that the majority of the figures are from Pendraken's US Airborne D-Day range, but I did use some guys from the US Airborne Ardennes range as well. I painted them all the same, but if you look closely you'll see a few greatcoats. Okay, I shouldn't have done it, but the D-Day range doesn't have any BARs or carbines, plus I wanted as many different poses as possible. You'll also see two different 'Mohawks' from the D-Day Pathfinders pack.
3rd Squad. Gold bases are senior leaders (PC and Plt Sgt), silver bases are junior leaders (Squad Ldrs), yellow bases are SMGs, red bases are MGs (I did the BAR and the M-1919 w/A-gunner), blue bases are rifles, and dark gray bases are various specialty figures (RTO, mortar team, bazooka team).
Unit:
1st Platoon, Dog Company, 1st Battalion, 499th Parachute Infantry Regiment, 82nd Airborne Division
Campaigns:
Operation Husky, the Invasion of Sicily, 10 July 1943 to 17 August 1943.
Operation Avalanche, the Landing at Salerno, 13 September 1943 to 4 January 1944.
Operation Shingle, the Landing at Anzio, 22 January 1944 to 23 March 1944.
Operation Overlord, the Invasion of Normandy, 6 June 1944 to 13 July 1944.
Operation Market-Garden, the Invasion of Holland, 17 September 1944 to 25 September 1944.
Operation Wacht Am Rhein/Unternehmen Herbstnebe, the Battle of the Bulge, 16 December 1944 to February 10, 1945.
Operation Varsity, the Push into the Ruhr, 24 March 1945 to May 2, 1945.
Order of Battle:
10 July 1943 (Sicily)
HQ Element: Personality Motivation Combat Temp Backgr
Platoon Commander - 2Lt Jack Shepherd Conformist Family Even Average
Platoon Sergeant - SSgt Sawyer Ford Fanatic Hedonism Reckless
Radio/Telephone Operator - Cpl Daniel Farraday
Bazooka Gunner - Cpl Boone Carlyle
Bazooka Assistant - Pvt Able
1st Squad, Rifle Team:
Squad Leader - Sgt Desmond Hume Idealistic Revenge Reckless
Rifleman (kneel SMG) - PFC Baker
Rifleman (stand carbine) - Pvt Charleston
Rifleman (port Garand) - Pvt Delta
Rifleman (rush Garand) - Pvt Echo
1st Squad, BAR Team:
Assistant Squad Leader - Cpl John Locke
Automatic Rifleman - PFC Fox
Rifleman (crouch carbine) - Pvt George
Rifleman (fire Garand) - Pvt Hotel
Rifleman (port Garand) - Pvt India
2nd Squad, Rifle Team:
Squad Leader - Sgt Hurley Reyes Fickle Wealth Even
Rifleman (kneel Mohawk) - PFC Juliet
Rifleman (stand carbine) - Pvt King
Rifleman (crouching carbine) - Pvt Lima
Rifleman (port Garand) - Pvt Mike
2nd Squad, BAR Team:
Assistant Squad Leader - Cpl Sam Jarrah
Automatic Rifleman - PFC Nancy
Rifleman (rush Garand) - Pvt Oscar
Rifleman (fire Garand) - Pvt Papa
Rifleman (port Garand) - Pvt Quebec
3rd Squad, Rifle Team:
Squad Leader - Sgt Michael Dawson Corrupt Avarice Bold Rifleman (stand Mohawk) - PFC Romeo
Rifleman (stand SMG) - Pvt Sierra
Rifleman (stand carbine) - Pvt Tango
Rifleman (port Garand) - Pvt Uniform
3rd Squad, BAR Team:
Assistant Squad Leader - Cpl Charley Pace
Automatic Rifleman - PFC Victor
Rifleman (rush Garand) - Pvt Whiskey
Rifleman (crouch carbine) - Pvt Xavier
Rifleman (port Garand) - Pvt Zander
Weapons Platoon Support:
Medium Machine Gun Team:
Gunner - Cpl Frank Lapidus
A-Gunner - Pvt Apple
60mm Mortar Team:
Gunner - Cpl Richard Alpert
A-Gunner - Pvt Black
Regimental Support:
57mm Anti-Tank Gun (single, section, platoon)
Divisional Support
M4 Sherman (single, section, platoon)
So, it has been decided. I am moving ahead with a Platoon Forward campaign. I will label it "All American," and it will center on an airborne rifle platoon from 1943 to 1945 in the Mediterranean and Northwest European theaters. This will be done in 10mm with individually based figures (from Pendraken), using the modified KR-16 rules, and played solo in the context of Joe Legan's excellent "Platoon Forward" solo campaign system for troop and scenario development.
Here's the boys:
Here is the whole platoon, 39 red-blooded American boys looking to throw the Nazis out and come home to Sweet Suzy Rottencrotch. I am dealing with a dilemma though. I have a Platoon Commander, a Platoon Sergeant, a radio man, a two-man MMG team, a two-man 60mm mortar team, and a two-man bazooka team, and three 10-man rifle squads. My dilemma is whether to have the platoon as a PC, Plt Sgt, RTO, and 3 squads, with the MMG, mortar, and bazooka as company-level support that may or may not be attached (this would probably work better in Plt Fwd), or as I built them: a 39-man platoon (this gives me zero support options in Plt Fwd outside of vehicles).
I want to do the latter, but should probably do the former. My biggest concern is running into a tank and not having a bazooka, so maybe I'll do the former but with a bazooka as part of the HQ element. I think that's probably the way to go.
Assuming I go with what I just outlined, here is the HQ element with Wpns Plt support. Starting at bottom left and working clockwise: 2-man MMG team, two-man 60mm mortar team, 2-man bazooka team, RTO, PC, and Plt Sgt.
Same group from rear. PC has vertical stripe, Plt Sgt has horizontal stripe. Neither figure is carrying a weapon, but both will be handled as carrying an M-1 carbine.
1st Squad, with Squad Leader with rifle team on left, and Assistant Squad Leader and BAR team on the right. Both teams are a mix of Thompsons, M-1 Garands, and M-1 Carbines (plus the BAR in the BAR team).
2nd Squad, same way. I should mention that the majority of the figures are from Pendraken's US Airborne D-Day range, but I did use some guys from the US Airborne Ardennes range as well. I painted them all the same, but if you look closely you'll see a few greatcoats. Okay, I shouldn't have done it, but the D-Day range doesn't have any BARs or carbines, plus I wanted as many different poses as possible. You'll also see two different 'Mohawks' from the D-Day Pathfinders pack.
3rd Squad. Gold bases are senior leaders (PC and Plt Sgt), silver bases are junior leaders (Squad Ldrs), yellow bases are SMGs, red bases are MGs (I did the BAR and the M-1919 w/A-gunner), blue bases are rifles, and dark gray bases are various specialty figures (RTO, mortar team, bazooka team).
Unit:
1st Platoon, Dog Company, 1st Battalion, 499th Parachute Infantry Regiment, 82nd Airborne Division
Campaigns:
Operation Husky, the Invasion of Sicily, 10 July 1943 to 17 August 1943.
Operation Avalanche, the Landing at Salerno, 13 September 1943 to 4 January 1944.
Operation Shingle, the Landing at Anzio, 22 January 1944 to 23 March 1944.
Operation Overlord, the Invasion of Normandy, 6 June 1944 to 13 July 1944.
Operation Market-Garden, the Invasion of Holland, 17 September 1944 to 25 September 1944.
Operation Wacht Am Rhein/Unternehmen Herbstnebe, the Battle of the Bulge, 16 December 1944 to February 10, 1945.
Operation Varsity, the Push into the Ruhr, 24 March 1945 to May 2, 1945.
10 July 1943 (Sicily)
HQ Element: Personality Motivation Combat Temp Backgr
Platoon Commander - 2Lt Jack Shepherd Conformist Family Even Average
Platoon Sergeant - SSgt Sawyer Ford Fanatic Hedonism Reckless
Radio/Telephone Operator - Cpl Daniel Farraday
Bazooka Gunner - Cpl Boone Carlyle
Bazooka Assistant - Pvt Able
1st Squad, Rifle Team:
Squad Leader - Sgt Desmond Hume Idealistic Revenge Reckless
Rifleman (kneel SMG) - PFC Baker
Rifleman (stand carbine) - Pvt Charleston
Rifleman (port Garand) - Pvt Delta
Rifleman (rush Garand) - Pvt Echo
1st Squad, BAR Team:
Assistant Squad Leader - Cpl John Locke
Automatic Rifleman - PFC Fox
Rifleman (crouch carbine) - Pvt George
Rifleman (fire Garand) - Pvt Hotel
Rifleman (port Garand) - Pvt India
2nd Squad, Rifle Team:
Squad Leader - Sgt Hurley Reyes Fickle Wealth Even
Rifleman (kneel Mohawk) - PFC Juliet
Rifleman (stand carbine) - Pvt King
Rifleman (crouching carbine) - Pvt Lima
Rifleman (port Garand) - Pvt Mike
2nd Squad, BAR Team:
Assistant Squad Leader - Cpl Sam Jarrah
Automatic Rifleman - PFC Nancy
Rifleman (rush Garand) - Pvt Oscar
Rifleman (fire Garand) - Pvt Papa
Rifleman (port Garand) - Pvt Quebec
3rd Squad, Rifle Team:
Squad Leader - Sgt Michael Dawson Corrupt Avarice Bold Rifleman (stand Mohawk) - PFC Romeo
Rifleman (stand SMG) - Pvt Sierra
Rifleman (stand carbine) - Pvt Tango
Rifleman (port Garand) - Pvt Uniform
3rd Squad, BAR Team:
Assistant Squad Leader - Cpl Charley Pace
Automatic Rifleman - PFC Victor
Rifleman (rush Garand) - Pvt Whiskey
Rifleman (crouch carbine) - Pvt Xavier
Rifleman (port Garand) - Pvt Zander
Weapons Platoon Support:
Medium Machine Gun Team:
Gunner - Cpl Frank Lapidus
A-Gunner - Pvt Apple
60mm Mortar Team:
Gunner - Cpl Richard Alpert
A-Gunner - Pvt Black
Regimental Support:
57mm Anti-Tank Gun (single, section, platoon)
Divisional Support
M4 Sherman (single, section, platoon)
Labels:
10mm,
AA OOB,
All American,
background,
Solo,
WW2
Some New Stuff
All,
I just wanted to get a few photos up of some new stuff.
I picked up three packs of the Hotzmat Felt Fields. This photo shows all of them. The three packs cover most of the 4' x 4' I have set up.
A close up.
Another.
I also picked up the Italian Village set (in 15mm) from Mr. Washburn's Paper Terrain. I think it looks pretty good for a decent price. It took me quite a while to get this done, but please understand that I'm not very handy/talented as a modeller. But I got them together, and this photo shows everything but the set of walls (which I haven't messed with yet).
Here's the set again, showing the damaged version of each building. The way it works is you build both versions and put them together. When a house gets damaged (or you want to show what's inside), simply remove the top. Pretty cool, eh?
I also bought the Rorke's Drift pack. It looks like it will be amazing, but it's pretty daunting looking and I haven't messed with it yet. But once it's together it looks like the hospital and commissary will be awesome (for any era) for some room clearing. I need to get some stiff cardstock (that's not too thick) in order to pull it off as nicely as possible.
V/R,
Jack
I just wanted to get a few photos up of some new stuff.
I picked up three packs of the Hotzmat Felt Fields. This photo shows all of them. The three packs cover most of the 4' x 4' I have set up.
A close up.
Another.
I also picked up the Italian Village set (in 15mm) from Mr. Washburn's Paper Terrain. I think it looks pretty good for a decent price. It took me quite a while to get this done, but please understand that I'm not very handy/talented as a modeller. But I got them together, and this photo shows everything but the set of walls (which I haven't messed with yet).
Here's the set again, showing the damaged version of each building. The way it works is you build both versions and put them together. When a house gets damaged (or you want to show what's inside), simply remove the top. Pretty cool, eh?
I also bought the Rorke's Drift pack. It looks like it will be amazing, but it's pretty daunting looking and I haven't messed with it yet. But once it's together it looks like the hospital and commissary will be awesome (for any era) for some room clearing. I need to get some stiff cardstock (that's not too thick) in order to pull it off as nicely as possible.
V/R,
Jack
Thursday, September 26, 2013
Tales of a Wargaming Butterfly
All,
Well, I've spent the past few days ignoring the eight thousand projects I already have going on (particularly, my Cuba Libre Imagi-Nation, my Platoon Forward campaign with modified KR-16, single games of Chain of Command, and working on 6mm Napoleonics) to resurrect something I bought and primed last year but hadn't done anything with since.
I've been chatting with Joe Legan on TMP and his blog, and on a whim I picked up his "Squadron Forward" from TFL. Well, I'd love to play an early war, Pacific campaign, so that's where my efforts have been the past few days and here are the fruits of my labor. Everything here is from PicoArmor, with Dom's Decals.
F4F Wildcats.
Closeup.
SBD Dauntlesses.
Closeup.
I put sand-colored dots in for the pilot and gunner.
TBD Devastators.
Closeup, again sand-colored dot for the gunner.
A6M Zeroes of the Imperial Japanese Navy. Nothing too historical here, just wanted some jazzy paint schemes.
Closeup.
D3A Val Dive Bombers.
Closeup.
B5N Kate Torpedo Bomber.
Closeup.
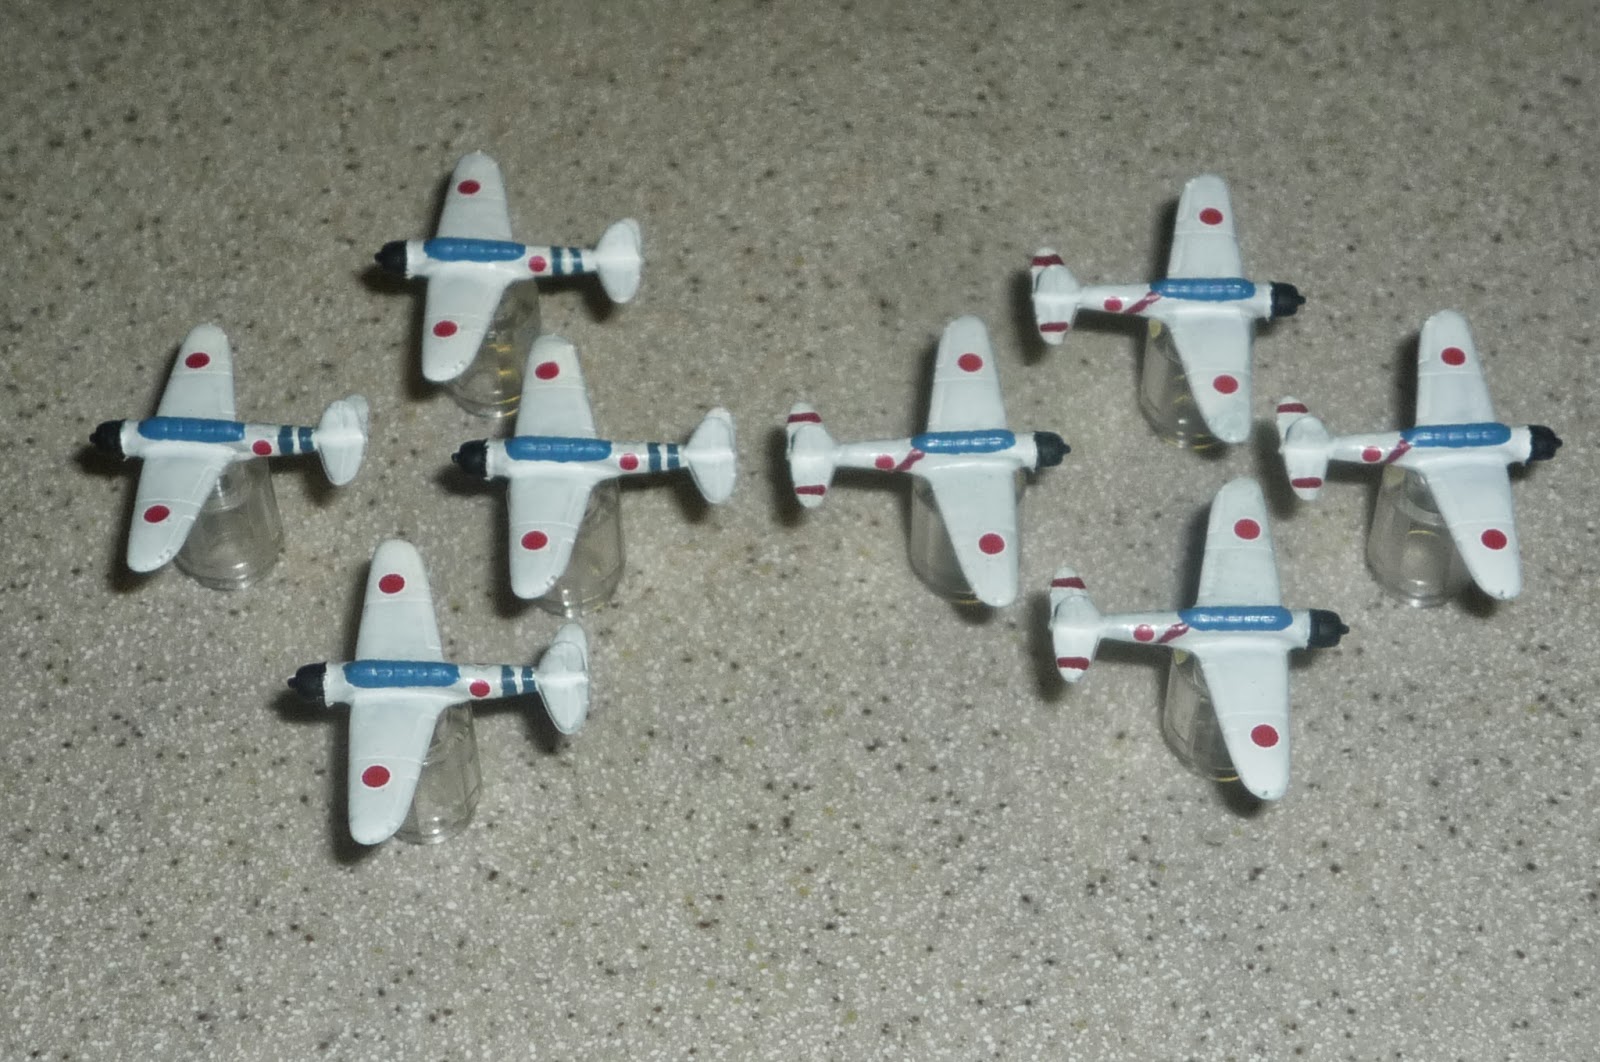
A6M Zeroes of the Imperial Japanese Army.
Closeup.
G4M Betty bombers.
So, I showed you my goodies. I've got enough aircraft to do what I want to do, and I've got a bunch of Axis and Allies War at Sea 1:1800ish minis (couple carriers, couple BBs, a few CAs, CLs, and a bunch of destroyers). What I don't have is a suitable playing surface; maybe a blue sheet with some hand-drawn squares/hexes? Whatever it's going to be, it's gotta be cheap, I've spent well more than my wargaming allowance lately...
In my dreams I'm playing an interconnected campaign for the Solomons in 1942/43, with Platoon Forward for USMC/IJA ground battles, Squadron Forward for air, and Flotilla Forward (which I don't yet own) for some PT Boat action. Also, maybe see if I could bump that up in echelon for some bona fide night-time surface action in The Slot. Each one of these would not just be interconnected, but impact each other. I have no idea how I'd ever pull that off...
So, more realistic, at least in the short run, is maybe a Squadron Forward campaign to follow a Carrier Air Group. Maybe a fictional carrier; I like doing fictional units, not because I'm scared of history/'real life,' but fictional allows me to see more action than guys did in real life. Stop the scoffing, what I mean is, in real life guys fight in one battle their whole life and its too much action, but for wargaming campaigns, you want non-stop action, you don't want the 6-month rest and refit that occurred in real life. So using a fake carrier, I could have it in action in late December 1941 for a fake relief of Wake/Philippines battle, then making the raids on the Gilberts, Marianas, Marshalls, supporting the Doolittle raid, the Aleutians in early 1942, present at Coral Sea and Midway, then super engaged in the Solomons campaign.
I'm not sure of the the totality of what I'm looking to do, but my intent is certainly to have a heavy amount of interaction with the entire Carrier Air Wing, which is why I did up fighters, dive bombers, and torpedo bombers. I need some Japanese float planes (Emilys maybe) and float fighters (Rufes). I'd like to have some a PBY or two as well, and maybe a Kingfisher. I need PicoArmor to produce later US carrier aircraft, particularly the Avenger.
So what do I name my aircraft carrier? I was trying to think of some famous Marine battles that hadn't been used. I'm not coming up with much... Chapultapec is one I've never heard (as a US ship name); Tripoli was a 60's to 90's helicopter carrier. I can't use anything from WWII as the point is to have the ship in service prior to December 7, 1941 so that I can get right into the fighting. I was considering USS Corregidor, but then I read it was a CVE later in the war... How would everyone feel about a USS Guantanomo (from the amphib landing during the Spanish-American War)? Maybe a USS Daly or Butler?
I dunno... It doesn't have to be Marine related, I suppose.
V/R,
Jack
Well, I've spent the past few days ignoring the eight thousand projects I already have going on (particularly, my Cuba Libre Imagi-Nation, my Platoon Forward campaign with modified KR-16, single games of Chain of Command, and working on 6mm Napoleonics) to resurrect something I bought and primed last year but hadn't done anything with since.
I've been chatting with Joe Legan on TMP and his blog, and on a whim I picked up his "Squadron Forward" from TFL. Well, I'd love to play an early war, Pacific campaign, so that's where my efforts have been the past few days and here are the fruits of my labor. Everything here is from PicoArmor, with Dom's Decals.
F4F Wildcats.
Closeup.
SBD Dauntlesses.
Closeup.
I put sand-colored dots in for the pilot and gunner.
TBD Devastators.
Closeup, again sand-colored dot for the gunner.
A6M Zeroes of the Imperial Japanese Navy. Nothing too historical here, just wanted some jazzy paint schemes.
Closeup.
D3A Val Dive Bombers.
Closeup.
B5N Kate Torpedo Bomber.
Closeup.
A6M Zeroes of the Imperial Japanese Army.
Closeup.
G4M Betty bombers.
So, I showed you my goodies. I've got enough aircraft to do what I want to do, and I've got a bunch of Axis and Allies War at Sea 1:1800ish minis (couple carriers, couple BBs, a few CAs, CLs, and a bunch of destroyers). What I don't have is a suitable playing surface; maybe a blue sheet with some hand-drawn squares/hexes? Whatever it's going to be, it's gotta be cheap, I've spent well more than my wargaming allowance lately...
In my dreams I'm playing an interconnected campaign for the Solomons in 1942/43, with Platoon Forward for USMC/IJA ground battles, Squadron Forward for air, and Flotilla Forward (which I don't yet own) for some PT Boat action. Also, maybe see if I could bump that up in echelon for some bona fide night-time surface action in The Slot. Each one of these would not just be interconnected, but impact each other. I have no idea how I'd ever pull that off...
So, more realistic, at least in the short run, is maybe a Squadron Forward campaign to follow a Carrier Air Group. Maybe a fictional carrier; I like doing fictional units, not because I'm scared of history/'real life,' but fictional allows me to see more action than guys did in real life. Stop the scoffing, what I mean is, in real life guys fight in one battle their whole life and its too much action, but for wargaming campaigns, you want non-stop action, you don't want the 6-month rest and refit that occurred in real life. So using a fake carrier, I could have it in action in late December 1941 for a fake relief of Wake/Philippines battle, then making the raids on the Gilberts, Marianas, Marshalls, supporting the Doolittle raid, the Aleutians in early 1942, present at Coral Sea and Midway, then super engaged in the Solomons campaign.
I'm not sure of the the totality of what I'm looking to do, but my intent is certainly to have a heavy amount of interaction with the entire Carrier Air Wing, which is why I did up fighters, dive bombers, and torpedo bombers. I need some Japanese float planes (Emilys maybe) and float fighters (Rufes). I'd like to have some a PBY or two as well, and maybe a Kingfisher. I need PicoArmor to produce later US carrier aircraft, particularly the Avenger.
So what do I name my aircraft carrier? I was trying to think of some famous Marine battles that hadn't been used. I'm not coming up with much... Chapultapec is one I've never heard (as a US ship name); Tripoli was a 60's to 90's helicopter carrier. I can't use anything from WWII as the point is to have the ship in service prior to December 7, 1941 so that I can get right into the fighting. I was considering USS Corregidor, but then I read it was a CVE later in the war... How would everyone feel about a USS Guantanomo (from the amphib landing during the Spanish-American War)? Maybe a USS Daly or Butler?
I dunno... It doesn't have to be Marine related, I suppose.
V/R,
Jack
Subscribe to:
Posts (Atom)