All,
German Counterattack on Shirokoye Bulotev
It's dawn on 10 July 1943 in western Russia, where the German II Battalion, 507th Infantry Regiment of the 292nd Infanterie Division, with support from II Battalion, 18th Panzer Regiment, 18th Panzer Division, is on the attack, looking to evict the Soviet 1019th Rifle Regiment, which has been whittled down to less than company strength! Shirokoye Bulotev itself is a bit shell-shocked, having changed hands several times, this is the sixth battle for this very ground in less than a week. It's tough to gauge who has the advantage in this fight; the Germans are veteran troops, and though they're understrength, they still have plenty of heavy weapons, and are buttressed by a platoon of Panzer Mk IIIs. Additionally, they're commander has commandeered three armored halftracks to give his infantry some added mobility. The Soviets are worn down conscripts, vastly understrength, but they've got quite a few heavy weapons themselves, and they recently took in three T-34 refugees from the fight in Kastenwald, plus the Germans have a lot of open ground to cover in order to take the ultimate objective, the Collective Farm.
I am playing this game because I have the good fortune of being buddies with Steve of the "Sound Officer's Call" blog (https://soundofficerscall.blogspot.com/2019/10/firestorm-ponyri-station-campaign-first.html), and he is running a "Firestorm Ponyri" campaign. He is playing some games with his local buddies, but was unable to play all of the games himself; rather than simply 'dice off' for results of campaign fights they were unable to play on the table top, Steve asked if anyone in the blogosphere wanted to help, so here I am.
It's been a little bit of an issue that I literally just sold off a bunch of German late war gear, so I'm a bit understrength, but Steve is working with me to make sure the fights I get match up with the forces I have. This is the first fight I've played, and I hope it wasn't too much a pain for him, I certainly want to keep going! First, I love to play games; second, it's been way too long since I've played any Eastern Front games (maybe eight years or so?); and lastly, I'm a solo gamer that still craves some comradery, so whenever I can help another wargamer out, I'm always quick to jump at it.

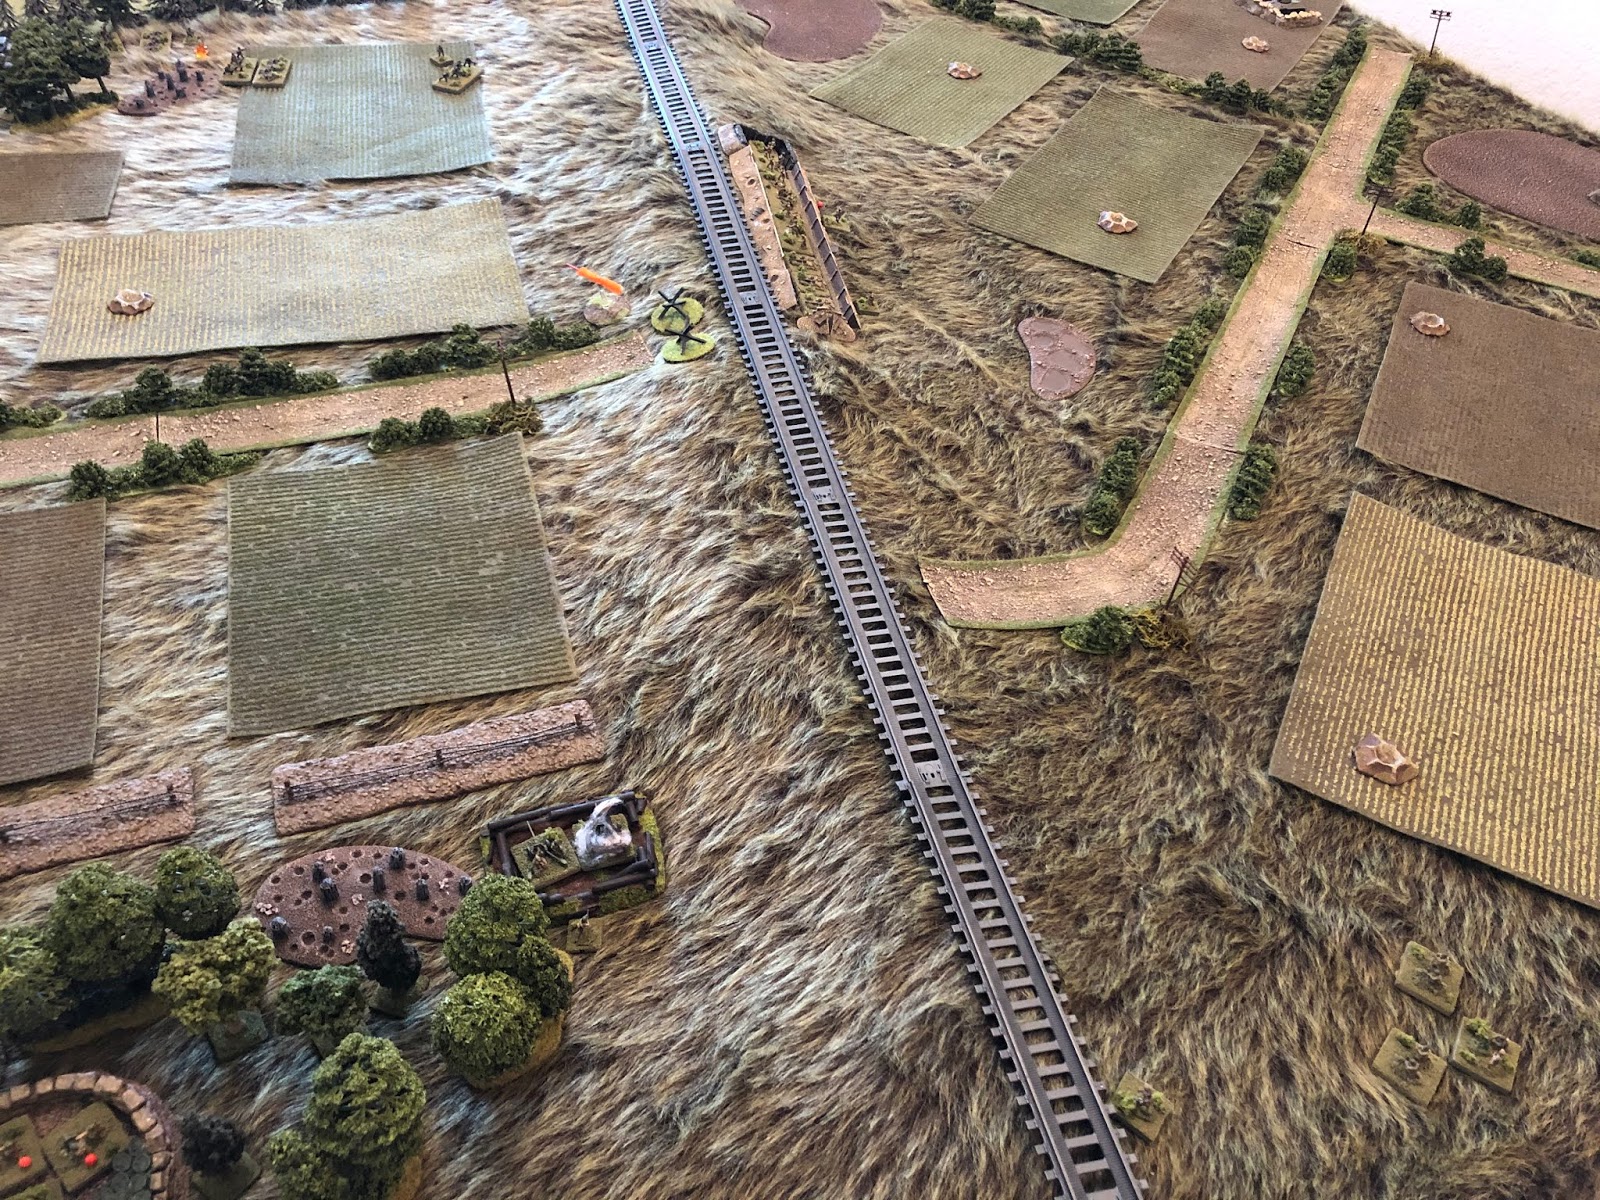
Overview, north is up. Running north-south in the center of the table is a significant piece of terrain in this fight, a railway on a raised embankment, which is high enough to mask the movement of tanks. The overall objective for each side is the Collective Farm, which is at bottom right. There are patches of woods in the northwest (top left) and southwest (bottom left), which will feature prominently in the upcoming fight. There are a couple dirt roads running up to the railway embankment, the eastern of which also branches in/around the Collective Farm, though they're pretty much here for decoration as pretty much the entire map consists of crop fields, i.e., drivable terrain. I've done what I can with craters and 'rough ground' patches I'm using to try and show burnt fields in order to reflect the fact this patch of ground has seen more than its fair share of fighting.
The orders of battle for this fight:
German
Commanding Officer
5 x Rifle Platoon
1 x MG Platoon (4 x MG-42)
1 x Mortar Platoon (4 x 8.0cm tube)
1 x Infantry Gun Platoon (2 x 7.5cm howitzer)
1 x Anti-Tank Gun Platoon (2 x PaK-38 5.0cm ATG, with prime mover)
1 x Armored Carrier Platoon (3 x Sdkfz 251 halftrack)
1 x Truck Platoon (3 x Opel Blitz)
1 x Panzer Platoon (5 x Pz Mk IIIJ)
Soviet
Commanding Officer
3 x Rifle Platoon
1 x Machine Gun Platoon (3 x Maxim .30-cal MG)
1 x Mortar Platoon (3 x 82mm tube)
1 x Anti-Tank Rifle Platoon (3 x PTRD)
1 x Anti-Tank Gun Platoon (2 x 45mm ATG)
1 x Tank Platoon (3 x T-34/76)
The railway embankment terrain feature essentially turns the fight for Shirokoye Bulotev into two separate fights. I actually deliberated long and hard on how best to reflect this, based what the Soviet defense would/should look like. The Germans are attacking from the northwest, so the patch of trees at top left will serve as both their base of fire for support elements, and their line of departure for assault elements. My initial inclination was to put the railway embankment at the far left edge of the table, and let that be the German start line, with the Germans having to skyline themselves, then cross an entire table consisting of crop fields, devoid of cover, with the Soviets dug-in at far right, even not occupying the Collective Farm (which would have been in about the same location as it is now, maybe a little further left), but prepared to counterattack it with their tank platoon, maybe even carrying a platoon of tank riders, should the German assault make it that far.
However, the Gamemaster informed me there needed to be a definite differentiation between the Veteran German force and the Conscript Soviet force. So, that made me consider not only how the German and Soviet forces would perform on the tabletop (in the event, the Germans had some real problems keeping their troops moving and getting their ample support weapons to perform effectively, despite this, and I probably let the Soviets get away with some actions that were probably a bit too crafty for beat-up conscripts), but also how they would deploy on the tabletop. So I decided that the 'skyline the Germans with the railway embankment' defense was too tactically advantageous for the beat-up Soviet conscripts, so I put them on this table and started them with the classic rookie mistake (and one I regularly make in wargames, anyway, just look what the Germans do!) of splitting their forces, no unity of effort, no concentration. Let's take a look.

The map again, this time with troops. All the Germans are in the northwest (top left), either set up and ready to support, or sitting tight, ready to advance. The Soviets are scattered across the table, trying to defend everything: the Soviet 1st Platoon is at bottom left, in the woods, with their Machine Gun Platoon and Anti-Tank Gun Platoon. The Soviet 2nd Platoon is dug in on the embankment (center) with their Anti-Tank Rifle Platoon. The Soviet 3rd Platoon is dug-in to the ruins of the Collective Farm (bottom right), and the Soviet Tank Platoon is dug-in at right/top right. That's right, another aspect of the 'conscript' classification is that the Soviets are not keeping their tanks for a mobile reserve, but are using them in static defensive positions. In their defense, the hull-down emplacements will make them very hard to detect and hit, and the German armor and infantry will have to skyline itself coming over the railway embankment, but the problems are that 1) once over, the Germans will be practically on top of them, and 2) the T-34s will not be a factor in the fighting west of the railway embankment.
I didn't get a separate picture of it, so I'll address it here: the Soviet Mortar Platoon is at bottom center, just right of the railway embankment, with their Platoon Commander sitting atop the railway embankment, acting as their forward observer.
So, the German plan, in order to make things easy for the Russkies, the Germans will split their efforts. The German 1st Rifle Company will clear the woods in the southwest (bottom left), then wheel left and push east for the objective, the Collective Farm. 1st Company has three rifle platoons: 1st Platoon is in the assault, 2nd Platoon is supporting from the wood, and 3rd Platoon is the reserve, loaded up in the halftracks. In the halftracks, yes, but not as battalion reserve, they are 1st Company's reserve; the German battalion commander knows he should probably just bypass the southwestern woods and sweep around to the north in order to reach the objective, but he is very much concerned with not leaving a Soviet force of unknown size and composition in his rear. Therefore, he has 1st Company's 3rd Platoon loaded up in the halftracks, ready to dive into the woods, and they'll be moving out on a hair trigger, he really wants those southwest woods as soon as possible. He then intends for the halftracks to double back to the woods to pick up the 1st Company's 2nd Platoon and rush them forward.
The German heavy weapons (MG Plt, Mortar Plt, and IG Plt) are all set in in the northwest woods (with 1st Company's 2nd Plt), looking to shoot in 1st Platoon's attack into the southwest woods. Once the southwest woods are secure, the MG and IG platoons will load up in the trucks and push up to the railway embankment to support the assault on the Collective Farm.
The two rifle platoons of 2nd Company and the Panzer Company will push straight east; the Germans have already spotted Soviet defensive positions atop the railway embankment, so one rifle platoon will handle those, while the other rifle platoon and the panzers will push straight over the railway embankment and look to envelop the Collective Farm from the east, isolating the objective.
The Germans don't have a reserve force to speak of; owing to 1) a necessity to press this attack home as quickly as possible, and 2) being severely understrength, all forces are committed either to the attack on the southwest woods or the railway embankment envelopment. Everybody but the German ATG Platoon, which is starting the game limbered up and will be waiting to see if and when any Soviet armor appears (the Germans are not aware of any Soviet armor in the area).
The Soviet strongpoint in the southwest woods, where they've got their 1st Platoon (bottom left), MG Platoon (center right), and ATG Platoon (top right).
The Soviet strongpoint on the railway embankment, where they've got their 2nd Rifle Platoon and their ATR Platoon (there's not room in the trenches so the platoon commanders are behind them).
The Soviet strongpoint at the Collective Farm, where they've got their 3rd Rifle Platoon.
And the Soviet Tank Platoon, dug in on the east side of the railway embankment.
The German startline, quite a crowded mess, which is okay, I guess, since neither side has any off-table indirect fire support ;) This is looking north to south, so the southwest woods are off camera to top center, and the railway embankment is off camera to top left. At far right we have 1st Company's assault element, 1st Platoon, ready to step off in column, Immediately left of them, 2nd Platoon, in support, is on line, while right behind them are the three halftracks carrying 3rd Platoon. Next to the left are the MG and Mortar Platoons, then the Infantry Gun Platoon. Then we reach the far left, where 2nd Company's two rifle platoons are ready to jump off, with the tank platoon behind them, and the ATG platoon limbered up and waiting at bottom center.
It's go time!
The German commander fires a green flare from his Very Pistol, signaling the start of the attack, with his Mortar Platoon commander in front of him in the craters, tanks and riflemen of 2nd Company behind him.
The CO and Mortar Plt commander (bottom left) glass the southwest woods (top right), easily picking out the Soviet positions. Apparently the enemy conscripts weren't willing to put in the work to camouflage their positions as well as they could have.
The German mortars go to work...
And it's on target, knocking out one of the Soviet 45mm anti-tank guns and suppressing the other!
The German machine guns (bottom left) begin raking the enemy positions in the southwest woods.
The Soviet infantry in the southwest woods reply.
And the Soviet infantry on the railway emplacement (bottom right) do, too.
And one of the German machine guns is knocked out!
On the far right, the German 1st Platoon, 1st Company, steps off (right, from bottom left, where you can see part of 2nd Plt, 1st Co).
And the Infantry Guns begin pounding the railway embankment.
Penalty flag! This is violating their rules of engagement! 1st Company's assault on the southwest woods was supposed to have priority of fire! This is what happens when you split your forces!
The Soviet machine gun platoon (bottom right) takes the German 1st Platoon (far left top) under fire...
And they (far right) are roughly handled: one squad is knocked out, while the rest of the platoon is suppressed, as 2nd Platoon (bottom left) continues laying down fire.
Meanwhile, on the east end of the southwest woods, the Soviet ATG platoon commander has rallied his gunners, and they (bottom center left) spot German tanks moving through a gap in the shell-torn woods (top center right)...
WHAM!!! The German CO nearly wets himself as the panzer immediately behind him is struck and bursts into flames!
The German machine guns (far left) continue laying into the Soviet positions in the southwest woods (top right)...
Knocking out a Soviet MG team and suppressing the other two!
On the German left, 2nd Platoon, 2nd Company gets moving, with their Platoon Commander grabbing his 1st Squad (left top) and pushing them forward, where they peer up to the lip of the railway embankment. They spot several helmets and open fire, but don't hit anything. 1st Plt, 2nd Co, is right behind them (bottom left).
But just then, the Soviet mortars get into the fight. Their Platoon Commander (bottom center right) is sitting up on the railway embankment, and he spots the German 2nd Company (top center left) advancing, so he orders his tubes (bottom right) into action.
82mm high explosive rounds drop on 2nd Company, and the barrage is devastating! One rifle squad is knocked out, and four other squads are suppressed!!!
Meanwhile, the German MGs (bottom left) continue raking the southwest woods as the German commander orders 1st Company's reserves forward: the halftracks push out of the woods (right center bottom), and then their Platoon Commander races his vehicle forward (far right)...
He spots the dug-in enemy infantry and opens fire with his MG-42.
The German Panzer Platoon Commander pushes his vehicle forward (bottom left) to support 2nd Company, and fires on the enemy railway embankment position (top right)...
The HE fire knocks out one enemy squad and forces another to fall back, suppressed.
As the German CO moves up to 2nd Company to try and rally them, but the mortar fire is so fierce even he can't get them moving again!
And it's the same story on the German right, where the 1st Company, raked by Soviet machine guns, just can't get going.
And things are getting critical when the Soviets' last remaining anti-tank gun (bottom right) cuts loose again towards the northwest woods (top center left)...
And peels open up a second panzer!!!
Unable to get their brothers from 1st Platoon, 1st Company (bottom center left, with 2nd Platoon at bottom left), moving, 3rd Platoon gets moving towards the southwest woods in their halftracks, with their PC getting through the gap in the wire (far right).
The Soviet MGs (bottom left) respond, cutting off the German 3rd Platoon commander (in halftrack at left, just above the shelled out stumps) from the rest of his platoon (top center, with 1st Plt behind them).
While on the German left, the Platoon Commander and 1st Squad (bottom right) of 2nd Plt, 2nd Co, get up on top of the railway embankment and begin pouring fire into the enemy trenches.
And the three remaining tanks of the German Panzer Platoon pull up in trace (the PC/1st Squad and Panzer PC are at top center left, the other two tanks are at far left, from bottom left).
The German Panzer PC (bottom left) and the Soviet ATR Platoon (top right) exchange fire ineffectually.
Bolstered by seeing their armor finally getting into action, the rest of the German 2nd Company finally, slowly, gets moving (bottom left).
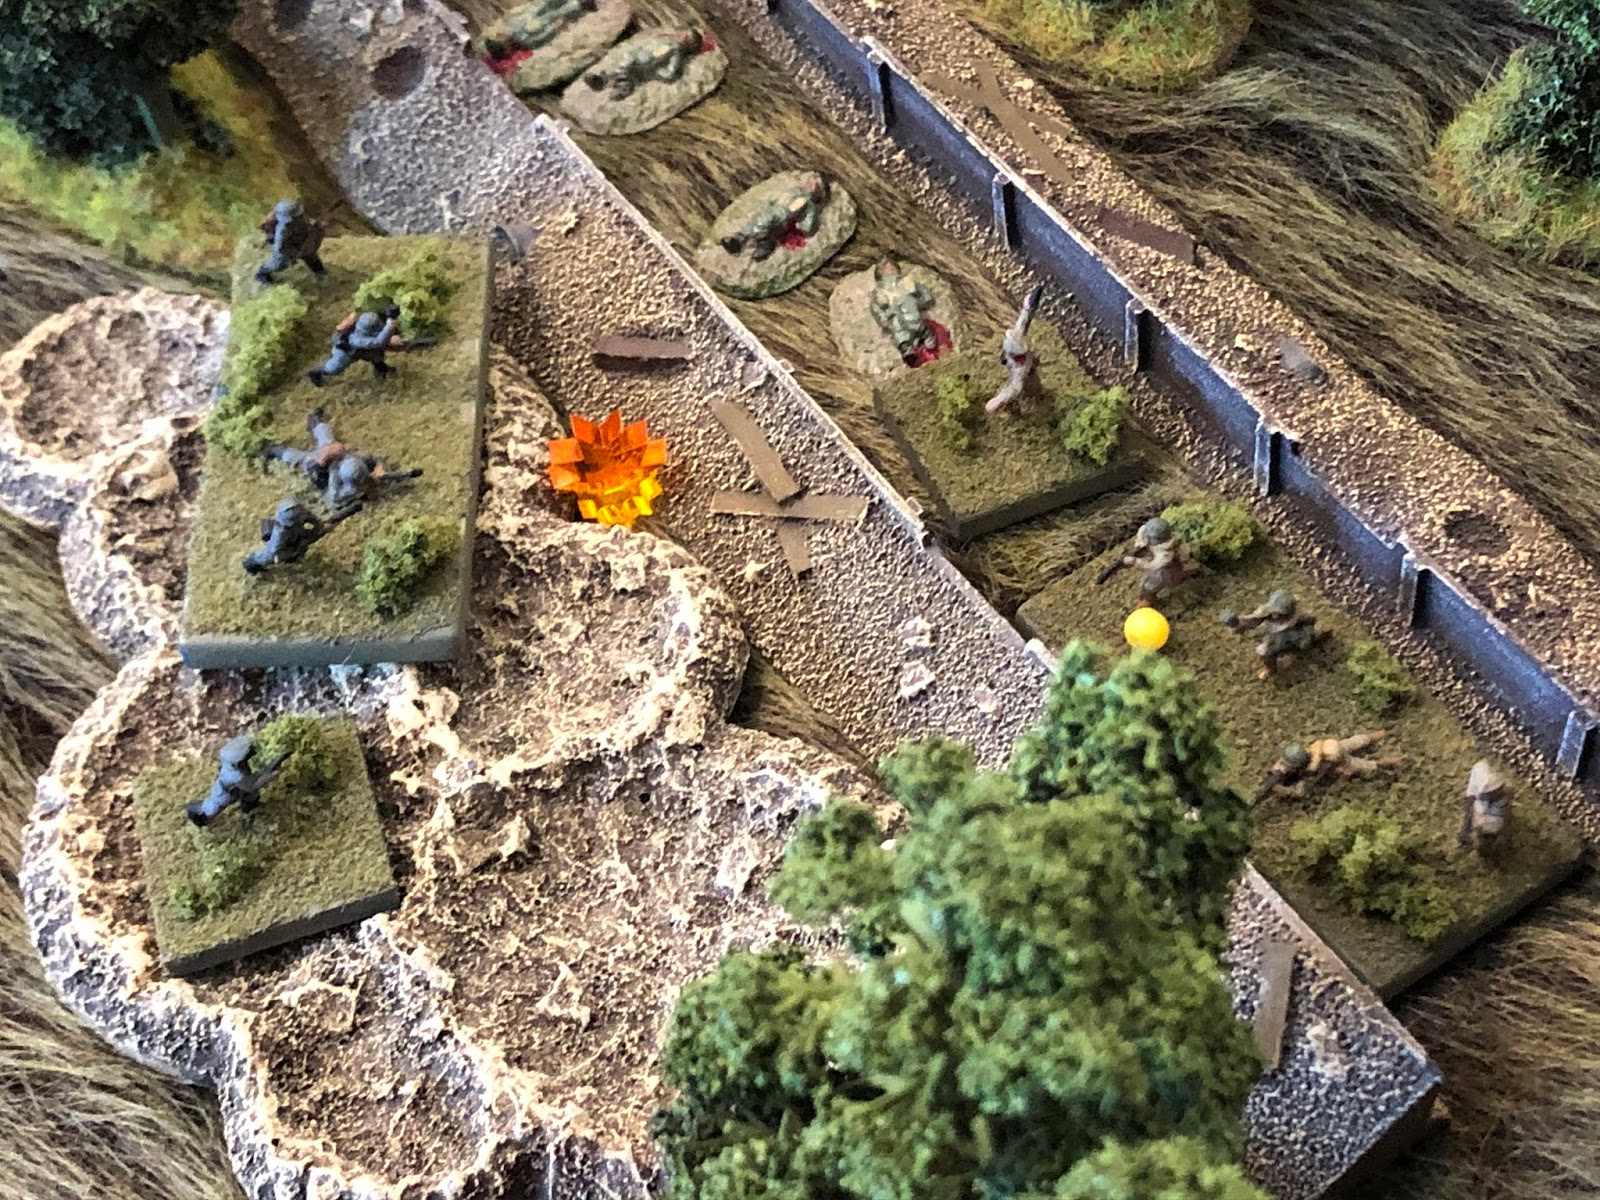
While back on the German right, the 3rd Plt, 1st Co, PC and 1st Squad dismount and charge the enemy trenches in the southwest woods!
They (left) knock out one Soviet rifle squad, but their PC and last rifle squad fight them to a standstill, and there is a lull as the Soviets catch their breath in the trench and the Germans catch their breath in the craters.
German mortars, MGs, and infantry guns (bottom) continue pounding the Soviet ATG position (top center right), but they just can't seem to knock the bastid out!
The rest of 3rd Platoon, 1st Company, dismounts, in support of their Platoon Commander (top right)...
Who makes another push to get into the Soviet trenchline...
But the Soviet PC and his last remaining squad (bottom right) repulse the Germans, who fall back, suppressed, behind the nearby halftrack (top left)!
On the German left, their CO exhorts 2nd Company to pick up the pace of the their attack, but they move as if mired in molasses...
*That's what happens when you split your forces! He should be on the right, making sure his men get into the southwest woods!
While at the railway embankment, the Soviet platoon commanders do their best to rally their men, with Germans (top left) literally on top of them. Needless to say, they're having a rough time.
*That's to be expected when you're conscript and have enemy troops on top of you.
Back at the southwest woods, the Soviet Platoon Commander seriously contemplates close assaulting the German halftrack and suppressed PC and squad. But he looks at his poor, conscripted boys, and decides it's probably a bit too much for them, so he orders them to make ready, and then they pop up and cut loose on the Fascist swine...
And the point-blank fire is ferocious, gunning down the PC and 1st Squad, and suppressing the halftrack crew!
The Soviet ATG (bottom left) continues hammering away at the German tanks (top center right), but he finally manages to miss!
And then Soviet mortars begin falling on the rest of the German 3rd Platoon, suppressing them!
*So much for the Germans getting into the southwest woods in a hurry... The Soviets are beat up, with only the PC and one squad left from the rifle platoon, two of three MGs knocked out, and one of two ATGs out of action, but they're hanging on, while the Germans have their 1st and 3rd Platoons (of the 1st Company) pinned down in the open, and their 2nd Platoon way back in the northwest woods.
German MGs and 2nd Plt, 1st Co (bottom left) keep up the pressure, firing on the east end of the southwest wood (top right)...
And the fire causes the ATG crew to fall back, abandoning their gun!
The 1st Plt, 1st Co, commander still cannot get his boys moving (bottom left), as he watches 3rd Platoon (far right) continue to get pounded by Soviet mortars.
But in the center, the German 2nd Platoon commander and his 1st Squad attack down the trench...
They knock out a rifle squad, but are halted in their tracks by the Soviet ATR Platoon!
The German halftracks begin falling back (left, from bottom right) to pick up 2nd Plt, 1st Company (in woods at far left).
After a quick breather and a smoke, the lead elements of the German 2nd Plt, 2nd Co, continue their attack down the trench...
They finish off the Soviet ATR Plt, compelling the PC and last squad of the Soviet 2nd Rifle Platoon to surrender!
On the German left, the rest of 2nd Company gets moving, with 2nd Plt almost up to their PC and 1st Squad (just off camera to right bottom) and 1st Plt almost up to the north end of the railway embankment (top center right). The Panzers are still kinda just hanging around, their PC suppressed (far right) by fire from the Soviet ATG in the southwest woods (off camera to bottom center right).
The German 1st Plt, 2nd Co, PC grabs a squad and moves them up the railway embankment...
And when they get there (bottom left) they hit the dirt, and peer over cautiously. "Uh-oh, T-34s..." the PC murmurs as he spies the enemy tank platoon, dug-in (top left and top right).
*If you're wondering why the Soviet tanks haven't done anything yet, well they really couldn't see much. Matter o'fact the only thing they've been able to see so far was the PC and 1st Sqd of 1st Plt, 2nd Co, when it popped up on the railway embankment, but they couldn't fire for fear of hitting their own men. Perhaps a more savvy unit could have worked out a signal for the infantry to duck down in their entrenchments and let the tankers 'scratch their backs.'
German mortar, MG, and IG fire (bottom center left) continues to pound the southwest woods (top right)...
Which compels the last Soviet MG team to fall back, out of their defensive positions, despite the Soviet CO being right there to steady them!
The German panzers advance, but, warned of dug-in enemy tanks on the other side by nearby Landser, they creep up to the railway embankment.
Two of the Pz IIIs move into hull-down positions atop the embankment.
The German PC (bottom center) spots the enemy tanks and opens fire, engaging T-34 #2 (top left, with T-34 PC at top right, T-34 #3 off camera to right), but he misses.
On the German right, the halftrack PC is finally able to rally. They pour lead into the Soviet trenchline, then disengage, falling back to northwest woods, passing the hapless 3rd and 1st Platoons, still being harried by the Soviet mortars.
But with the immediate threat gone, the Soviet 1st Rifle Platoon commander realizes the coast is clear. With only one squad left, he has no delusions of holding the trenchline (bottom left), so he grabs his men and falls back (bottom right), looking to link up with any other survivors (the last MG team is at far right, the last ATG crew is at top right, having abandoned their gun at top center right).
On the German right, the 1st Plt, 1st Co, commander finally gets his men rallied and moving up. They get up to the 3rd Platoon; his intent is, now that they're PC is dead, to rally them and bring them with his platoon to take the southwest wood (top right). But they're pretty beat up and pretty shell-shocked, and are not responding.
*So much for 'veteran troops,' eh? My rallying dice have been horrible...
Behind the Soviet southwest wood, the Soviet CO takes charge of the situation. "You," he screams, pointing at the ATG crew (top right), "get your asses back to your gun, and kill some Nazi tanks! The rest of you, head for the railway embankment! We will fall back and ambush the Fascists when they come over the tracks!"
The dug-in Soviet tanks (left) begin firing on the hull-down German tanks (far right), but score no hits.
On the German right, just as 1st Plt, 1st Co, was getting moving again, Soviet mortars resume pounding them, suppressing both 1st and 3rd Platoons, even knocking out one of 3rd Platoon's squads.
On the German left, the German CO gets involved, moving the ATG Platoon up to the railway embankment, even getting Gun #1 into position and unlimbered (right, with Gun #2 still on the move at top left).
The German infantry guns, mortars, and machine guns (bottom) continue pounding the Soviet anti-tank gun position (top right)...
The remains of the Soviet 1st Rifle Platoon (bottom left) look on as the Soviet ATG Platoon is finally knocked out (top right), having taken two panzers with them.
The Soviet 3rd Rifle Platoon, in the Collective Farm (bottom right) begins exchanging ineffectual fire with the German 2nd Platoon, 2nd Company, which has managed to occupy the former-Soviet trench on the railway embankment (top center).
Back in the southwest woods, the Soviet 1st Rifle Platoon remnants and MG Platoon remnants creep to the edge of the wood (center, from bottom left, where their CO is sitting), looking to get over the railway embankment without being noticed.
On the German right, 2nd Plt, 1st Co, mounts up in the halftracks.
As 1st and 3rd Platoons continue to be pounded mercilessly by the Soviet mortars.
On the German left, with the Soviet tanks (off camera to right) preoccupied with the German tanks (left), the 2nd Plt, 2nd Company, pushes down the east slope of the railway embankment (center top right, from top left).
The Soviet tanks continue to engage the hull-down panzers, to no avail.
The German Infantry Guns and mortars attempt to smoke two of the T-34 dugouts, but are only marginally successful.
*Neither smoke landed directly in front of the enemy emplacement, they both landed to about 10 o'clock...
The German MG Plt loads up in its truck, ready to displace forward, up to the railway embankment.
*Yes, the Germans have not yet actually taken the southwest woods, but even they cannot help but note that they have received no fire from those positions in the last ten minutes, and assume the Soviets have fallen back.
The other German ATG arrives atop the railway embankment (bottom left), as Gun #1 opens fire on the dug-in Soviet tanks. The Soviet mortars shift fire, attempting to paste the German ATGs, but the rounds fall long.
The German mortars play a little counterbattery fire, and it's relatively effective, pinning one team and suppressing another. But very soon after, the Soviet Mortar Plt PC (bottom left) dashed down the hill and rallied them.
The German halftracks carrying 2nd Plt, 1st Co, begin pushing for the railway embankment (center, from bottom left, heading to top right), passing the hapless 1st and 3rd Platoons (bottom center). Despite the Soviet mortars having finally shifted fire (to the ATG position, top left), they still can't get rallied and moving.
The German ATG Gun #1 (bottom center) continues banging away...
And the T-34 Platoon Commander is brewed up!
Back on the German right, the 1st Plt Commander is at his wit's end: "Look here, #$%#ers, if you don't get moving, I'm going to start shooting people, beginning with you 3rd Platoon #$%#ers."
Miraculously, the 3rd Platoon, 1st Company troops (down to a single squad now) are rallied.
As the remnants of the Soviet 1st Rifle and MG Platoons reach the top of the railway embankment.
The remaining two Soviet tanks (top center right and bottom right) continue pounding away at the German tanks and anti-tank guns (top left), but they're not hitting anything!
*This is partly because of conscript crews, partly because the Germans are hull-down, and partly just down to poor dice rolling.
With neither side able to hit anything, the German Panzer Platoon Commander grows tired of the stalemate, so he pushes his three remaining tanks down the east slope of the railway embankment (left, from far left, with 2nd Plt, 2nd Co, above them).
*I really did think that the veteran German crews would be able to do some damage from hull-down positions atop the railway embankment, but that has proven to not be the case, soooooo…. CHARGE!!!
All three German tanks focus their fire on T-34 #3, to the south (top right, with T-34 #2 off camera to left top), but all three miss.
*That is not good news; you broke cover to get closer so that you wouldn't miss, and you used all three tanks to go after one, just to be sure of a kill, and then you didn't get it???
In the center with the German halftracks, the Platoon Commander has spotted movement atop the railway embankment, so he orders the other two vehicles (bottom left) to halt while he pushes forwad to scout it out (right top)...
He (bottom left) spots the Soviet southwest woods' refugees (top right) and opens fire, but he doesn't hit anybody.
On the German left, the Commanding Officer rallies ATG Gun #1 (left), as the PC and two squads of 2nd Plt, 2nd Company, pushes east (top center), taking cover in some hedges, stalking T-34 #2 (top right).
The German infantry guns again try to smoke T-34 #2, and again they fail, this time dropping the smoke behind him...
ATG Gun #2 gets into action.
On the German right, the last squad of 3rd Platoon has been folded into 1st Platoon, and they finally get moving, drawing close to the Soviet trenchline in the southwest woods, very tentatively.
The German mortars fire in support of 2nd Plt, 2nd Co (top left), and this time the smoke is on target, smothering T-34 #2 (top center right).
Despite the German Halftrack Platoon Commander getting close (far left) and firing on them, the remnants of the Soviet 1st Rifle Platoon manage to get over the railway embankment (far right, from bottom center), although the MG team froze up and didn't move!
T-34 #3 continues firing, now at fully visible panzers at point-blank range, but still he misses!!!
*Damned conscripts!!!
Meanwhile, to his right, T-34 #2 has not spotted 2nd Plt, 2nd Co (behind hedge at right top), but having smoke fall all over them has convinced them that something
just might be up, so they reverse out of their dug-out, pull left (far left), then open fire on the German tanks (top center)...
The 76mm armor-piercing round easily penetrates the Panzer Mk III (center), blowing it up.
The Soviet mortars (bottom left), still firing ineffectually on the German ATGs (top right), look on as the remnants of 1st Rifle Platoon creep north, following the railway embankment (center top, from far left), stopping every now and again to turkey-peek over the tracks to keep an eye on the German halftrack Platoon Commander (top center left). Amazingly, the Soviet 1st Platoon has not been spotted by the German 2nd Platoon, 2nd Company, in the former Soviet trench on the railway embankment (top right), which we'll chalk up to them being distracted by the constant exchange of fire (which I haven't been showing as both sides' fire has been totally ineffective) with the Soviet 3rd Rifle Platoon in the Collective Farm (off camera to right bottom).
*This is a very interesting development: the Soviet 1st Platoon remnants are now in position to ambush the German halftracks coming over the railway embankment, or they could do something really audacious like have their mortars do a quick pound on the German 2nd Plt, 2nd Co, in the trench at top right, then have the 1st Plt storm the trench, which would put a serious hurt on German infantry strength AND seriously threaten their ATG position. This is what I was talking about when I mentioned some tactical decisions/actions that were probably beyond the scope of a conscript force.
With three of his panzers kaput, the German Panzer Platoon Commander is a bit frustrated. He orders his driver to gun it, pushing (center, from left) to within 100 yards of T-34 #3. "Halt, Fire!!!"
BAM! Two of three T-34s are out of action!
The German 2nd Plt, 2nd Co (bottom left) and the Soviet 3rd Plt (in the Collective Farm, top right) continue to exchange ineffectual fire, oblivious to the Soviet riflemen nearing their position (1st Plt remnants, just off camera to right bottom). The Panzer Platoon Commander (far left) dances a jig on his back deck after knocking out T-34 #3 (top center left), before realizing there is still one T-34 left (#2, off camera to left top).
All of which sets up the climax of the fight...
Having lost track of the Soviet infantry on the right (the Soviet 1st Rifle Platoon remnants were just off camera to right, last time he saw and fired on them), the German Halftrack Platoon Commander pushes his vehicle forward, cresting the railway embankment...
Where he runs smack dab into the Soviet 1st Rifle Platoon remnants!!!
But the Soviet conscripts were just as surprised to see him as he was them!!! The veteran German Platoon Commander stood on the trigger of his MG-42, allowing time for the 2nd Platoon's Platoon Commander and 1st Squad to dismount and finish off the Soviet riflemen!!!
*That was incredible! That stuff about 'firing his MG-42... 2nd Platoon dismounting..." is all narrative trash; what happened was this: the German halftrack moved up into contact with the Soviets, then rolled to see who won close combat. The Soviets had a very serious advantage in the roll-off, owing to the fact it was infantry vs a halftrack and ambushing vs surprised, but the Germans still managed to pull it off. Quite incredible. I don't know what it would have meant overall for the fight; perhaps something incredible could have happened (as I mentioned, maybe the Soviet mortars pound the German 2nd Plt,, 2nd Co, in the trench, and then these guys lose assault them to take the trench back, or maybe it's just enough to have knocked out the Halftrack PC and the 2nd Plt PC and one squad, so that they can hold back the rest of the halftracks and 2nd Platoon while the Soviet mortars pound them, maybe wearing down the Germans enough that their force morale breaks. I dunno, but now it don't matter!
While all this was happening, the last Soviet MG team, the one that froze atop the railway embankment, runs back down the west slope of the embankment, back into the southwest woods, where they link back up with their Commanding Officer who, inexplicably, has just been sitting there, chilling out in the woods.
*Which leads me to another issue: in all my other games, the CO plays a very large part in getting men and machines up and moving, but in IABSM it's really a crapshoot, depending on whether and when their cards come out. I'm really not a fan of the CO just sitting around, I want him to be a lot more dynamic, so I'm looking at solutions. One is to add the 'dynamic leader' card to the deck, and let the CO operate on that or his own card. Another is to let the CO act at the end of the turn if his card has not come out. We'll see.
Having watched their comrades in the 1st Platoon get gunned down by the marauding halftrack and German infantry, the Soviet mortar platoon, now exposed, abandons its tubes and takes off running for the Collective Farm (top right)!!!
But the marauding halftrack and riflemen (bottom left) spot them (top right) and rain fire down upon them...
Killing about half of them and forcing the other half to surrender.
While on the German left flank, the German Commanding Officer (bottom left) directs the fire of the his anti-tank gun platoon. Both PaKs crank out round after round at the now exposed last remaining T-34 (top center left)...
They bust it wide open.
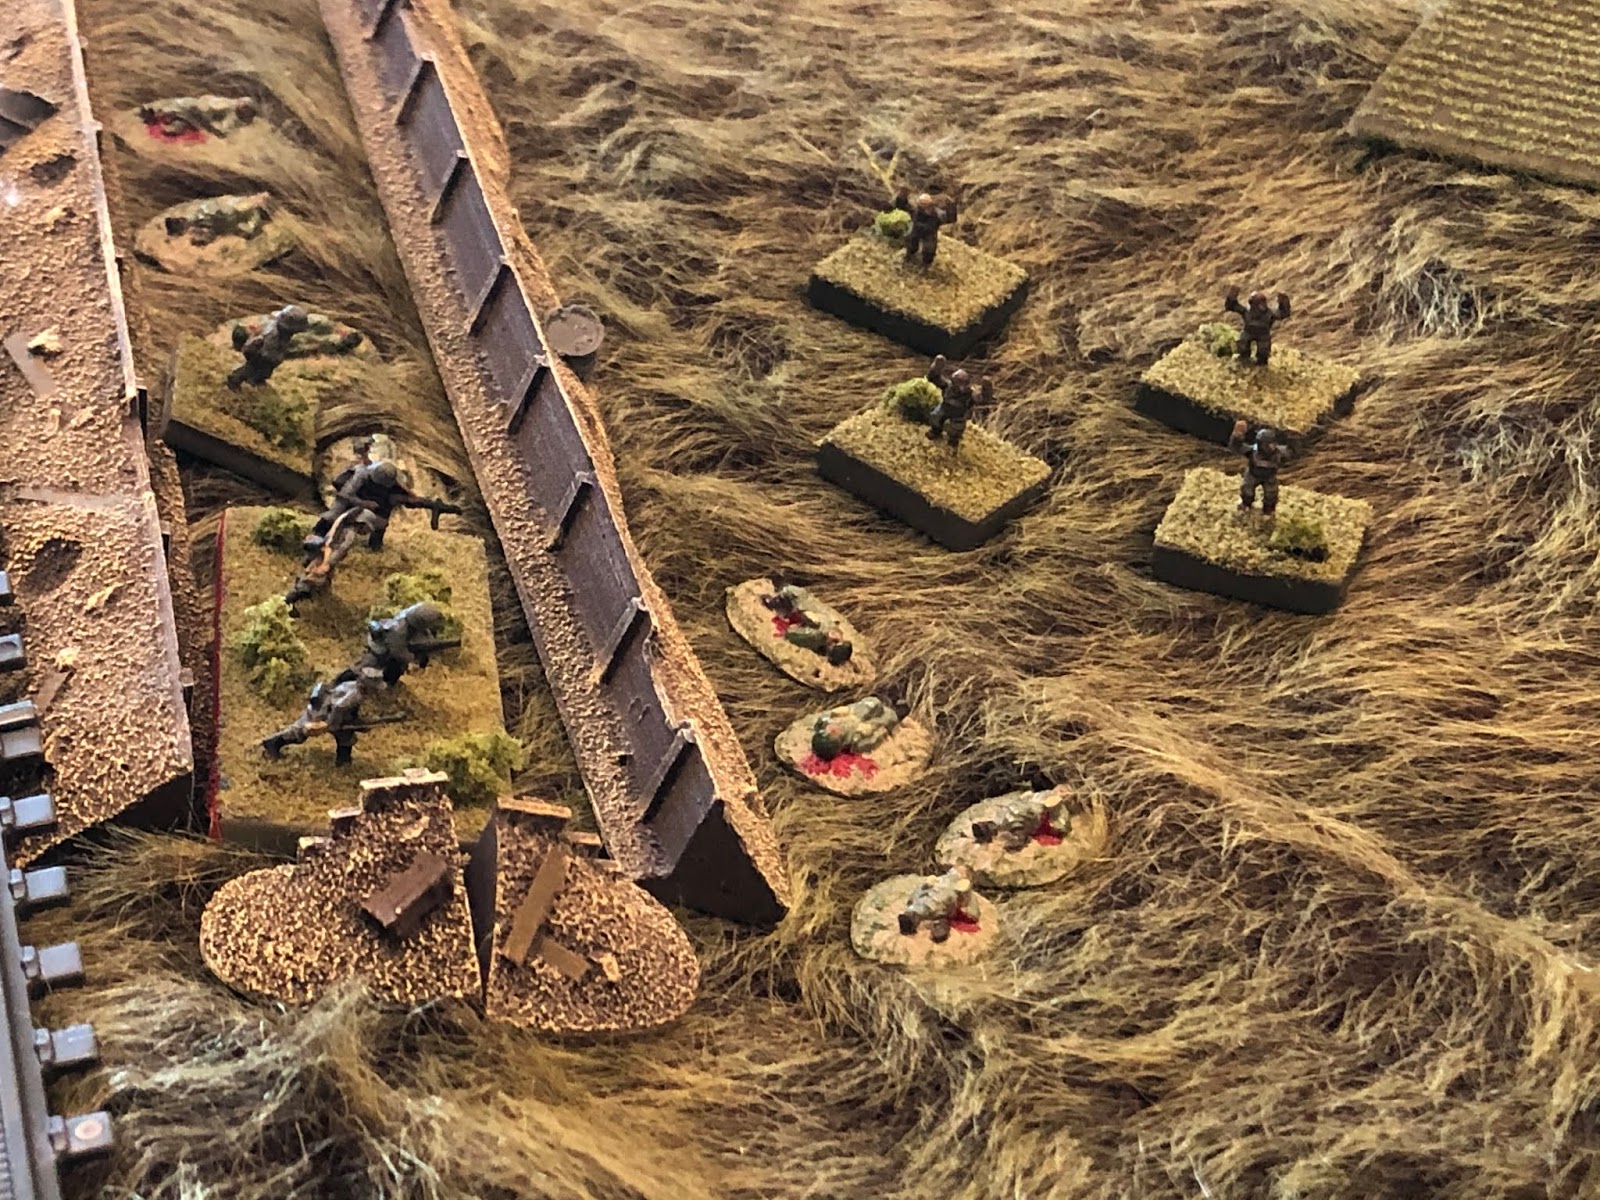
On the German right, 1st Platoon, 1st Company, moves up in the southwest woods, capturing the Soviet CO and the last remaining MG team.
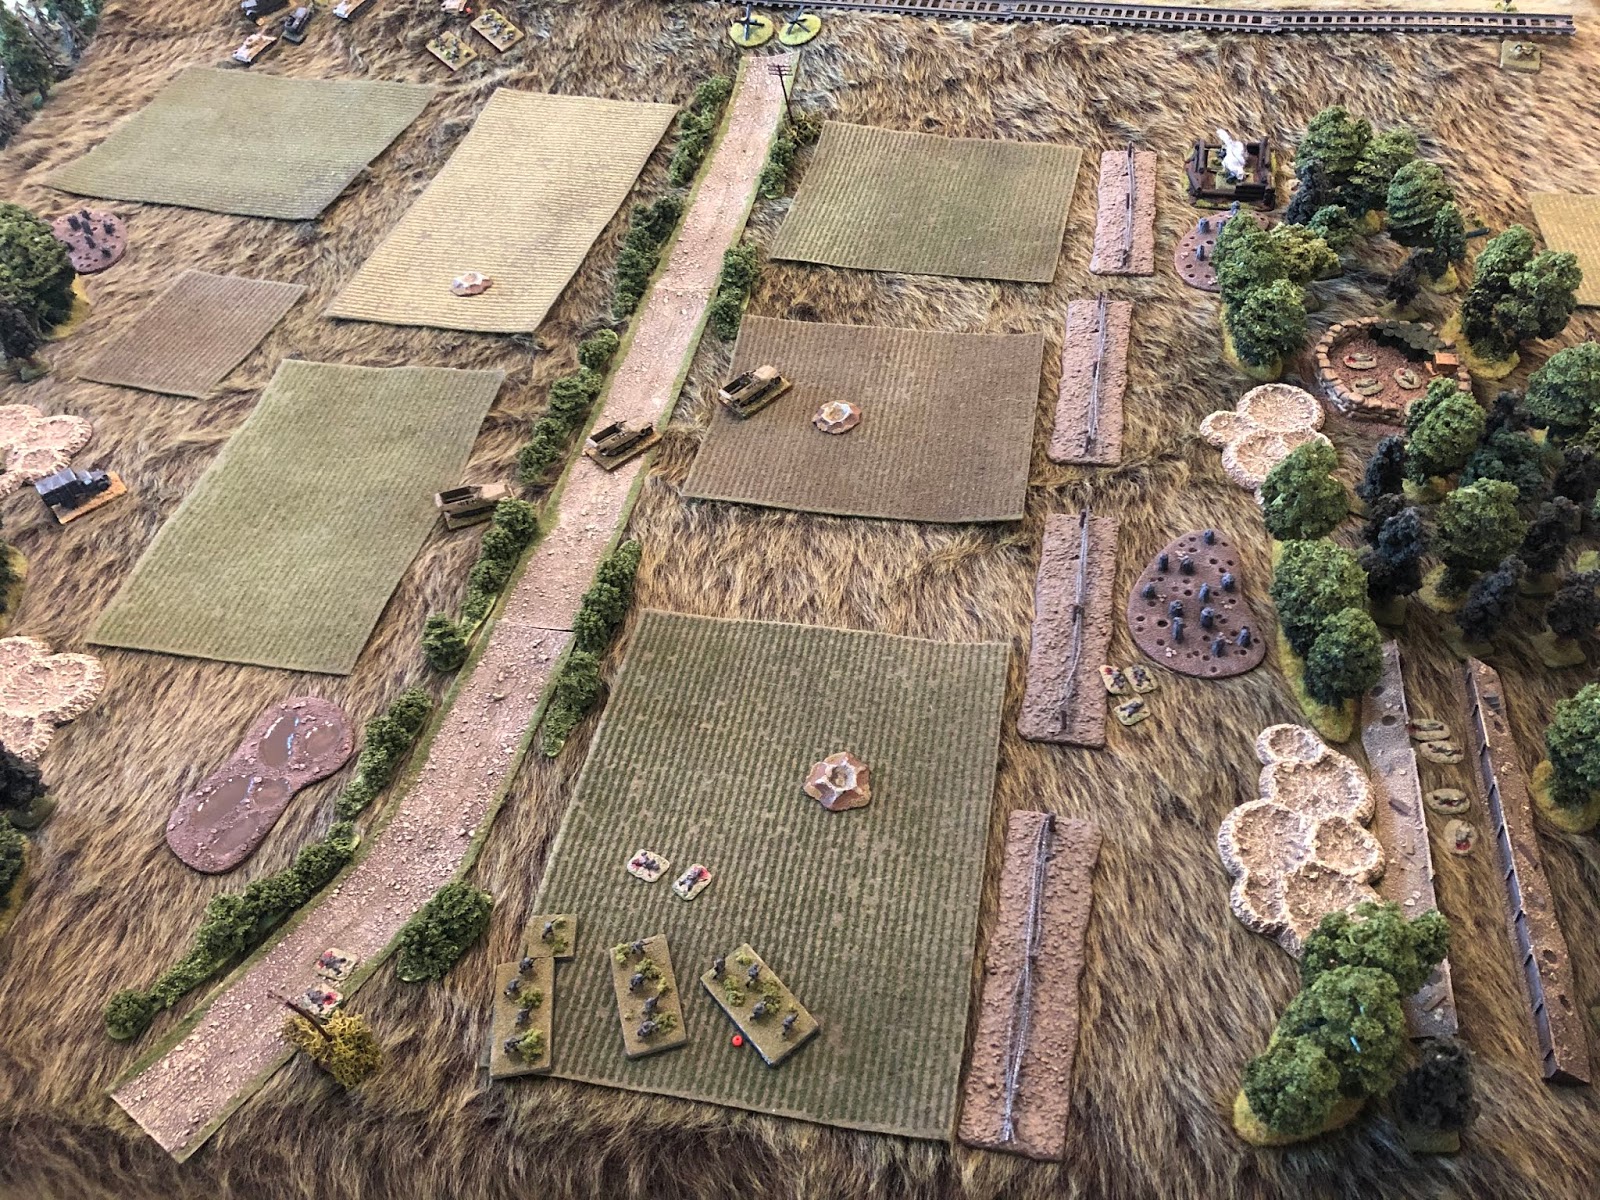
The German machine guns and infantry guns get into position atop the railway embankment.
As the panzers and halftracks go in, moving for the Collective Farm.
These Soviets in the 3rd Rifle Platoon may be conscripts, but they ain't crazy!!! They've seen their 1st Platoon, 2nd Platoon, ATG Platoon, MG Platoon, Mortar Platoon, Tank Platton, and CO all killed or captured, so these guys are outta here!
So the Germans did it, they re-took Shirokoye Bulotev. In the overall scheme of things, this means all options are still open, which in turn means that the Germans can actually beat 'real life' by succeeding in this portion of the Battle of Kursk. What does that mean? Well, the last campaign turn is coming up, so stand by for more vicious, desperate fighting!
So, the game was fun, but didn't go the way I thought it would. First, it took forever; I figure the game took about four and a half hours, played out over about six and a half hours, because I had to take a couple breaks when my family was bothering me ;) But the game itself; man, part of how long the game took was just down to how bad I was rolling to get the Germans moving. The German heavy weapons couldn't seem to get anything decisive done, so their infantry was just constantly getting pinned down by Soviet mortars and machine guns, whose heavy weapons were doing a great deal of damage. So the German infantry would get roughed up, and then couldn't get moving again.
Keep in mind that the southwest woods wasn't really taken; the Soviets beat the hell out of the German 1st and 3rd Platoons, knocked out two tanks, then walked way. Hell, the German 1st and 3rd Platoons could barely get rallied after the Soviets had pulled back!!! And the German success in the center was really all down to their 2nd Platoon, 2nd Company, Platoon Commander grabbing a single rifle squad, getting lucky enough to have advanced before the Soviet mortars laid waste to the rest of his platoon and 1st Plt/2nd Co, then moving up and clearing the Soviet trenchline on the railway embankment all by themselves!
With the German 1st Company pinned down outside the southwest woods and the 2nd Company pinned down pretty much on their start line, I was having serious doubts as to whether the German assault was going to succeed, and it was really the weakness of the Soviet deployment that did them in. If the Soviets could have gotten anything, anything into the southwest woods to bolster their defense their, they'd have almost certainly won. I seriously pondered having the Soviet 3rd Platoon leave the Collective Farm, cross the railway, and reinforce the southwest wood. But being conscript, I figured that would probably be beyond what you could expect of them, and in game terms, they were only foot mobile, so they probably would have never made it in time, even if I'd have re-grouped the PC and last squad of 1st Platoon with the last MG team and the CO and had them make a final stand. And even if they had, I think at that point the Germans re-focus their effort: with the objective (the Collective Farm) now abandoned and with increased enemy activity observed in the southwest woods, the Germans pull back the 1st and 3rd Platoons of 1st Company and use them (with heavy weapons, as necessary) to contain the Soviet force in the southwest woods, then have 2nd Plt/1st Co load in halftracks and move to support 2nd Co, along with the Panzer and ATG Platoons to make the attack via a left hook. The Soviet tank platoon would have been the only thing left on the east side of the embankment, and you saw how well they did, so you figure it would have been a cake walk for the Germans to get to the objective and leave the Soviet forces in the southwest woods to wither and die.
And that's what it really all came down to for the Soviets: the lack of a reserve (much less a mobile reserve), the inability of the Soviets to get a reserve where they needed it because of the 'segregated battlefield' owing to the railway embankment (even if they had one), and the extra poor showing of the Soviet tank platoon. I don't feel bad about having the Soviet tanks dig-in; it was a conscript force, and digging tanks in for the defense was done in real life, but damn, I was expecting the Soviet tankers to do a bit better than losing three dug-in tanks and only killing one panzer in the open. In the narrative I put that the climax was German Halftrack PC running into the Soviet 1st Platoon PC, but that was really more of the breakaway point. The climax was the German tanks and ATGs getting up on the railway embankment to shoot it out with the dug-in Soviet tanks, but that turned into an anti-climactic stalemate, so the real climax was when the Germans flushed out T-34 #2 with 1st Plt, 2nd Co, and charged their tanks down the embankment into point-blank range. That was the action that decided the game; if the Soviet armor was destroyed they wouldn't have been able to hold the Germans off of the objective, and the German armor was destroyed (and assuming the Soviet mortars finally knock out the German ATGs), the Germans don't have the wherewithal to get over the railway embankment and take the Collective Farm while subjected to HE fire from those tanks. And if you're thinking, "just smoke them," I'm pretty sure the Soviet tanks would have come out of their positions to deliver HE and MG fire on any German infantry advancing without anti-tank weapons. And I can't really see German infantry taking the T-34s out, there just wasn't enough cover (the only thing saving the German 1st Plt/2nd Co was that the Soviet tanks had to deal with the German tanks and ATGs).
But the halftrack/Soviet riflemen matchup sure was fun! ;)
In any case, here's looking forward to my next East Front game, which will probably be the last one for awhile. I hope you've enjoyed these, and let me know what you think of my ramblings on tactics and tactical decision making.
V/R,
Jack


Jack great write-up (and a ton of work - thank you), An interesting situation made more-so by the rail embankment. I quite like that games go in a direction that feel a little beyond a players control or expectations.
ReplyDeleteNorm,
DeleteThank you Sir, I appreciate it, and my pleasure. The railway embankment was indeed a serious aspect of the game, affecting nearly every plan and everything that occurred.
I don't mind games going in unexpected directions, they're just not supposed to go out of control! ;)
V/R,
Jack
Great write up, as usual. I'm looking forward to the next instalment.
ReplyDeleteCheers, Andy
Hey Andy, thanks man! Looks like this coming weekend will wrap up our Kursk campaign, so probably next Sunday night/Monday morning.
DeleteV/R,
Jack
Outstanding work, Jack. This was your beat one yet!
ReplyDeleteThanks Steve, glad you liked it.
DeleteV/R,
Jack
Another mind-bogglingly enjoyable battle report, Jack!
ReplyDeleteGoodness Jonathan, you're too much! But thank you, I appreciate it, and I'm very happy you enjoyed it.
DeleteV/R,
Jack
quite a report! If I could get the screen to move fast enough, a quick scroll makes it almost like a movie! Interestingly, the table photographs really well with the fur at a distance, but up close it is a bit odd looking - just a thought.
ReplyDeleteIt does remind me of the issues with IABSM, however. Glad I swore off all TFL games a few years ago.
Anyway, thanks for the win! Germans have a actual possibility of seizing an objective or two, but also the chance of losing the one they have, so who knows how this will end?
Alex,
DeleteThanks, it was a lot of fun. I'm sure the fur mats aren't for everyone, but I really like them.
What issues were the issues with IABSM? Overall, I think TFL's rules have some very interesting mechanisms that work very well for some things, and not so well for others.
My pleasure, I'm excited to see how this turns out. The finish line is in sight.
V/R,
Jack