All,
It's the evening of January 3, 1969 and everything is going swimmingly. The holiday has been joyously quiet, despite all the intel officers screaming about an NVA buildup to the east. Then combat erupts throughout the length of the country, with NVA and VC cooperating to attack dozens of US and ARVN bases.
The Brigade's planners have been gearing up for a series of operations to clear west of Dak To all the way to the Cambodian border, to reassert their dominance, so to speak. Alpha Company is once again expected to lead the way, so they are not manning the defense perimeter at Dak To, they are sleeping peacefully in their beds. Due to its size and importance, no one really ever thought the NVA/VC would attack Dak To, but that's exactly what happened: at 0330 sappers struck, blowing holes in the wire and disabling Claymores, tripflares, and Fugas. Simultaneously, 122mm and 130mm howitzers (yes, artillery), along with 107mm rockets, rained down for 15 minutes on Dak To, while the NVA assault battalions pushed through the holes created by the sappers. Alpha Company stood to as a QRF, with platoons being sent off as needed to plug holes in the perimeter. At 0430 it was the squad's turn, and they rushed forward to seal another breach.

Overview, north is up. Far right is main gate, with Bunkers 1, 2, and 3 top to bottom. To left of Bunker1 is a command post bunker, which is on fire; to its left is an arty position of two 105mm howitzers. At top left is a truck park, and just below it is the Base Operations Center. Bottom left is the beginning of the helo revetments, with a CH-47 sitting there. To its right is the Flight Operations Center. Between Flight Ops and Bunker3 is an ammo bunker and a communications bunker, both burning. Two NVA teams are moving forward about halfway east to west, with a number of VC milling around behind them. There are downed Americans and Vietnamese everywhere, but that's not the squad's concern: there mission is to evict the intruders and seal the perimeter off. The squad is entering at bottom left at the Chinook. It's pitch black except for the burning buildings, so spotting is affected, and everyone is starting unspotted.
Arty and CP bunker, with four NVA moving forward.
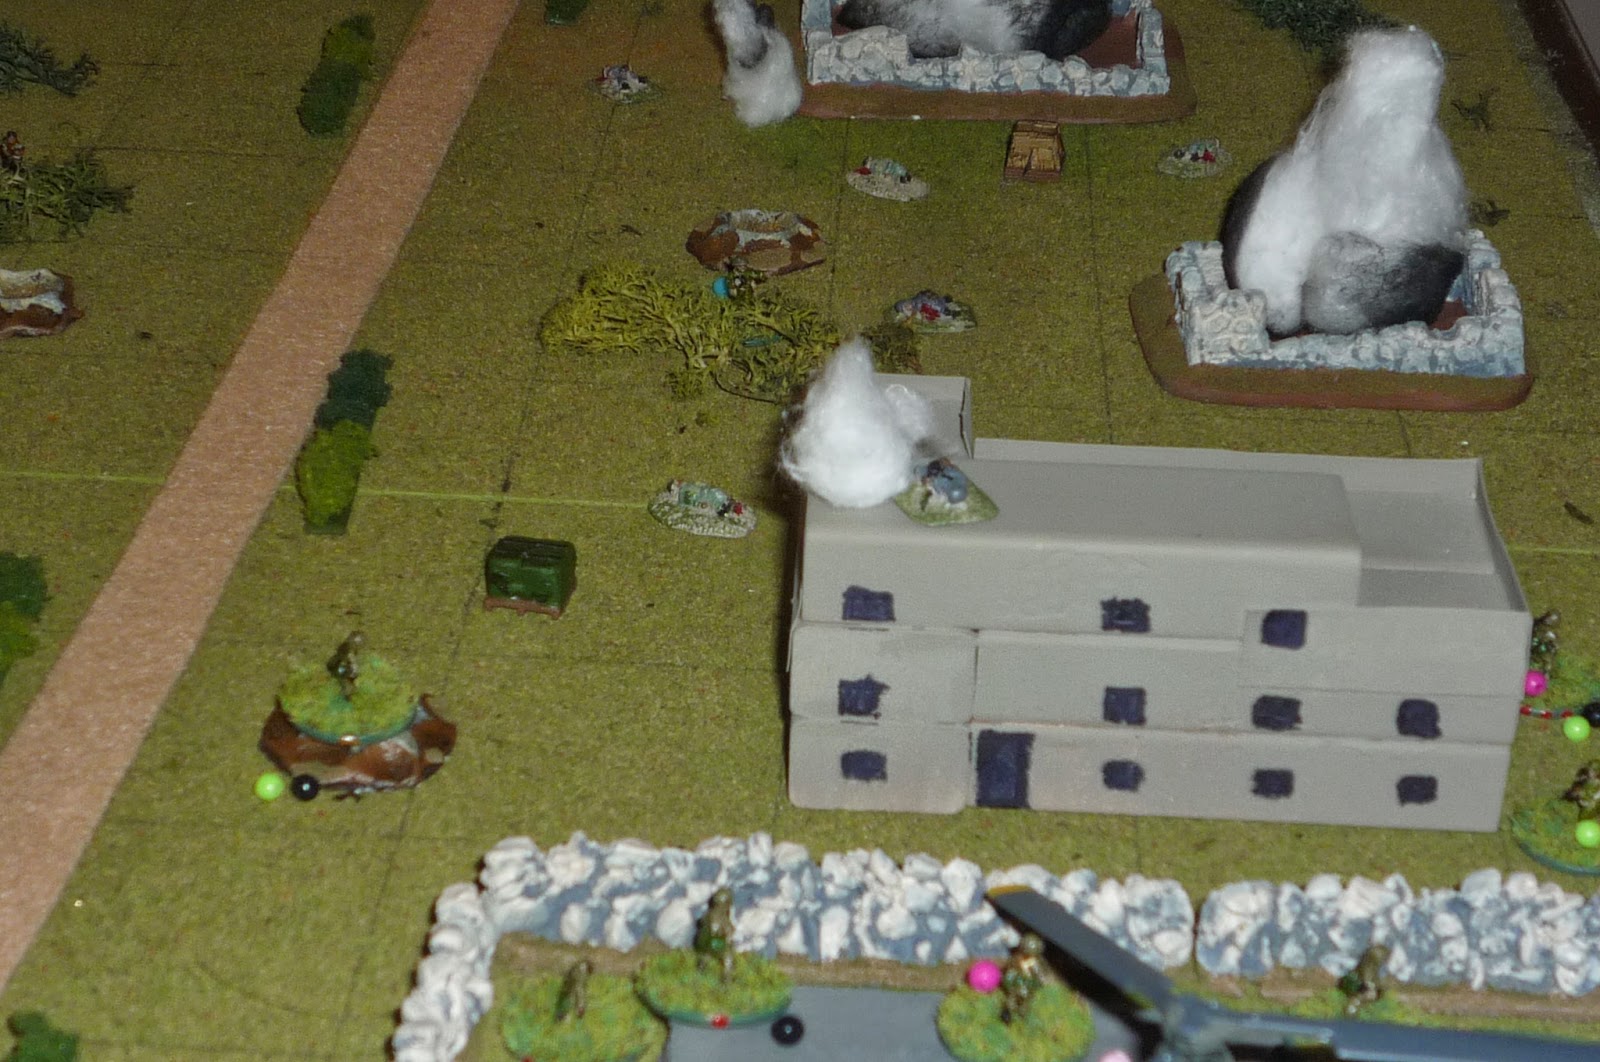
Ammo (left) and Comm (right) bunkers burning, with NVA moving up.
The squad moving forward, not knowing exactly what's out there but knowing the enemy is there.
Perimeter bunkers (left to right, 1-3), with VC milling about.
To start it off, Kruczek and Bradley (w/M-60) cross street and go upstairs in Base Ops. They have some troubles (take enough activations that they can't shoot!), but they spot three of the NVA at the artillery position, where several of the NVA have moved to. This should have been easy due to the fire being right behind them, but my dice rolling sucks... However, the NVA have been unable to spot the Yanks.
On the south side, the NVA move up to the Flight Ops building, but can't spot the Americans just on the other side of the revetment. Doc White (he's back!) moves into the corner but can't spot, while Kolb moves up next to him and spots the NVA leader at top right.
Clack moves up and spots the NVA at bottom center, fires, and lightly wounds him. Brown (center left, no longer carrying the M-60 due to running away last fight) comes up and fires, but doesn't hit anything (rolled a 1 and a 2)... Another NVA runs into the Flight Ops building.
Ham (bottom center) takes all three activations, but manages to spot the two NVA in Flight Ops.
NVA continue to move up to the arty position in the north, and are having a real tough time spotting anyone, as Harris (he's back too!) runs across the street, through Base Ops, and out the other side (he's at top right on the ground next to the building, with Bradley and Kruczek in building. Then the NVA spot Banaszak and Thomas (top center, between Base Ops on right and CH-47 on left).
Thomas (bottom center) moves right behind the wall and fires his M-79 at the NVA behind the arty position (top center), and the grenade hits on the money! One down, two lightly wounded. Bradshaw runs across the street into Base Ops, joining Kruc and Bradley.
Banaszak (bottom center, next to red barrels) drops prone and fires at Flight Ops, putting one NVA down. To Ban's 2 o'clock is Ham, to his 11 o'clock is Thomas, then Doc White, Kolb, Brown, and (just visible at top right) Clack.
A VC (bottom center) moves up and takes a shot at Thomas (top center, behind wall).
Banaszak fires a magazine at Flight Ops, not hitting anyone but severely annoying them, then sprints forward and goes prone in a shellhole (left).
Ham (left) moves up and fires at the NVA standing at base of Flight Ops, seriously wounding him, so Brown hops the wall and runs up past him, goes prone, while the last NVA in Flight Ops fails his test and falls back 12 inches (top right, you can see green bead behind Comm bunker).
The NVA leader in the south (center, you can see blue bead behind bushes) fires at Banaszak (bottom left, in shellhole), missing. Kolb (bottom center) fires at the NVA leader; the grenade arches up and hits Flight Ops... He reloads and tries again. It's long by about 25 yards (top center)... Doc (next to Kolb) fires at the NVA leader, missing three times...
VC (top right) fires at Doc White (bottom left in the wall's corner), hit, seriously wounded... Clack tests badly and goes fetal... Thomas fires a grenade, misses a little but lightly wounds the VC.
Thomas (bottom left) reloads, aims at the NVA in the north at the arty position (top center blue bead), and launches an airball (top left).
Then the guys in Base Ops (bottom center) got going: Bradley opens up with the M-60, putting one NVA down and seriously wounding another (red bead at right end of arty position).
Then Bradley swung the gun onto the NVA leader in the south (top center, blue bead just right of road), seriously wounding him too! Bradshaw fires at the VC (top left), putting him down.
Kruczek fires at the last NVA at the arty position and put him down. Things are going great. Then I get a little silly and make a big mistake. Got a little impatient. Things are going so great that Harris sprints around to the left (pink bead at far left above arty position).
Harris (top left) fails to spot anything, but the VC at Bunker1 (far right) hear something, and sure as hell, there's a capitalist pig-dog in the bushes! They open up, lightly wounding him.
Two VC move up (far right, behind bush on south side of trail) and fires at the guys in Base Ops (far left), missing.
Harris tests, goes prone, spots VC (top right), then fires, missing. VC pass their tests and fire back, missing but racking up a lot of stress as a third VC shows up (top of Bunker1).
Banaszak (bottom center) good to go on morale test, spots VC (top center, just right of trail), fires: he puts one down and seriously wounds the other!
Ham hops wall and moves into Flight Ops (far left), can't spot anyone... Brown moves up (bottom left, behind burning ammo bunker) and spots two VC at bottom right.
Kolb (bottom left) tests: "I'd better stay here with Doc, he looks pretty bad." Clack hops wall and moves left, next to Banaszak (in shellhole, with Ham in Flight Ops to right).
Thomas knows Harris (top center, yellow bead) is in trouble with the VC at Bunker1 (top right), so he sprints up to the arty position (far left) and fires a grenade (blue bead), missing terribly, nearly hitting Harris!
Bradley, in Base Ops (bottom center) passes his test like a champion, has to move left to get a shot at Bunker1; he fires but doesn't hit anything. Bradshaw, also in Base Ops, fires three times and misses three times. Kruczek heads downstairs to help Harris (far left, yellow bead). He sprints into arty position next to Thomas and fires at Bunker1, missing...
Two VC in the south (bottom right) move up, spot Brown (bottom left), and promptly light him up, seriously wounding him... The NVA (just above the two VC, with the red dice) fails his test and sits tight.
Ham (off camera at left, in Flight Ops building) opens up on the two VC (bottom right), hitting both but only lightly wounding them... Banaszak pops up and sprints forward (behind crates at left), fires twice but misses... The NVA (just right of burning Comm bunker) fail another morale test and sits tight, while Clack sprints forward, rounds the corner of the Comm bunker, and shoots the NVA. But guess what happened? Yep, a light wound. The first VC tests and decides to haul ass for the border, but the other passes and fires at Ban, missing.
Off camera to left, Kolb hops the wall and begins moving forward.
Back in the north, Bradley (off camera at bottom left in the Base Ops building) opens up with his M-60 at Bunker1 (top right), missing everything... One of the VC passes his test and fires at Kruczek (far left with yellow bead), lightly wounding him, while the next VC drops prone and fires at Harris, putting him down (top center left). Thomas (just left of Kruczek) fires his M-79 twice, neither hitting their intended targets, though one VC is lightly wounded.
The final VC at Bunker1 to activate has to take a morale test. He has so much stress that, even behind decent cover and with a couple buddies nearby, he still has a -10 modifier. This guy is absolutely gonna run, right? What's he do? He rolls a 20, so he drops prone and fires, missing Kruczek, who tests and runs for the hills!
Bradley (foreground, in Base Ops) fires his M-60 again at Bunker1 (top center), putting one down.
Ham (foreground, in Flight Ops) fires at Bunker1, missing three times. Kolb is on the ground just in front of Ham, next to a seriously wounded NVA.
Banaszak (far left) goes prone and fires at the remaining VC in the south (far right).
While the last NVA surrenders to Clack.
There are two VC remaining at Bunker1. The first tests and runs, so Thomas fires two M-79 grenades (the blue bead is the target marker), missing terribly, but enough to make the last VC test and run too.
Bradley and Bradshaw check the arty position. The damned NVA spiked the guns...
While Banaszak and Thomas clear the bunker line.
And Ham, Clack, and Kolb clear the south.
What the enemy left behind. During its counterattack, the squad killed 7 NVA/VC and captured another 6 (they faced 8 NVA and 8 VC).
Once again we have to reprimand someone for running during a firefight, this time it's Kruczek, who had been doing real well. I thought he was an up-and-comer, but I didn't do him (or Harris) any favors when I sprinted Harris out left, overextending everyone. This got Harris hit pretty bad, sending him to Japan for a couple months, and Doc White will be joining him. Brown was hit bad enough to require his being sent back to the World, his tour is over. The way things are going for Doc and Harris, they might survive their tours solely by getting wounded and spending months at a time out of the line...
Corps has ascertained that, while the fight here at Dak To was violent, it was brief as it was not an enemy focus of effort. The NVA and VC struck all over South Vietnam, and several major bases are being hard pressed. Seems the NVA did, indeed, manage to mass in the interior and unleash sustained attacks, even with artillery support, which is really blowing everyone's minds. In any case, the Brigade is gearing up for Operation Heartbeat City; a token force is being left at Dak To, but the majority of the brigade is packing up and moving north to relieve the ARVN garrison at Kham Duc, which is beleaguered and decimated. Brigade says we're gonna be there awhile, and better pack a mouthpiece...
V/R,
Jack


No comments:
Post a Comment