All,
Regarding the dogfighting rules, I had a monster of a game today (last Sunday, actually), RAF vs Luftwaffe over the Channel, 1940. It was a lot of fun, mostly; that is, I played 8 on 8 (all fighters), and it lasted almost four hours. The first three hours and fifteen minutes were fantastic, the issue in doubt the entire time, but the last (almost) hour got a bit tedious. One, I was wearing down (as a solo player that has to do all the thinking and moving for both sides, a real issue), and two, the combat was decided, there was simply still a lot to do (i.e., it took a long time for the victors to finish off the vanquished).
I think I've got the solution(s) though: 1) play on a smaller table, and 2) have a 'force morale' type mechanism so that the loser throws in the towel and disengages, rather than fights to the last plane. You read about this all the time (from WWI to present), but in our games we tend to fight to the finish (just like land combat games, I think). The problem is the losers certainly would have thrown in the towel, but the winner gets 'kill happy' and wants to chase down every last enemy aircraft trying to limp home.
Also, it's occurring to me that I may actually want two sets of rules, rather than one: this set, for dogfighting with up to eight or ten per side (~squadron level), and one for larger engagements (~wing level), with simplified mechanics to get three to six squadrons (per side) on the table, for big European bomber raids, and carrier vs carrier in the Pacific.
Read on at your own peril (there are a whopping 109 pictures!)...
The table, a beautiful blue sheet with a hand drawn grid. North is up, British Spitfires on the left and German Me109s on the right. It's eight on eight folks.
From behind the Brits: on the left is Rabble flight, and on the right is Bevy flight.
Bevy flight, from left: Bevy 2 ('Regular' pilot rating), Bevy 1 (Ace), Bevy 3 (Veteran), and Bevy 4 (Rookie). The Brits are low (Bevy flight it as altitude 3) as they are climbing to intercept the Germans fighters.
Rabble flight, from left to right: Rabble 4 (Rookie), Rabble 3 (Regular), Rabble 1 (Veteran), and Rabble 2 (Regular). The are trailing Bevy flight and are at alt 2.
The Germans, with Rot flight on left and Blau flight on right. The Germans are at altitude 6, coasting high over the English Channel on their way to the British Isles.
Left to right: Blau 4 (Rookie), Blau 3 (Veteran), Blau 1 (Ace), and Blau 2 (Regular).
Left to right: Rot 4 (Rookie), Rot 3 (Regular), Rot 1 (Veteran), and Rot 2 (Regular).
I rolled to see which side would go first, and the Germans won then elected to the let the Brits go first. The first problem is this: the Brits are supposed to be at a disadvantage, that is, they have just scrambled and are hurrying to intercept the Germans, who have a height advantage. But my table is too big, so the Brits have plenty of time to climb and meet the Germans on equal terms...
And so the Brits roll a 'normal' activation, and both flights immediately begin climbing while moving straight towards their foes.
The Germans (foreground) roll a 1 for activation, and so aircraft make a 'zoom' move, straight and level, closing the distance, but still well away from the Brit aircraft.
The Brits roll a 1, and the zoom as well, straight ahead while climbing. All Brit aircraft are now at altitude 6.
The Germans roll another 1: Blau 3 and 4 (top center right) continue straight ahead while Blau 1 and 2 head right (top right).
While Rot 1 and 2 (left center) charge ahead and Rot 3 and 4 split left (far left).
What the hell is going on??? The Brits roll a 1, which is the fourth 1 in a row. Bevy 1 and 2 gun their engines and charge at the German Rot flight, splitting them right down the middle.
While Bevy 3 and 4 (bottom right) move right.
While Rabble 1 and 2 (center) charge the German Blau flight.
And Rabble 3 and 4 pull up alongside their flight mates (bottom left). Stuff's about to get real.
The Germans roll up a normal activation, and Blau 3 (center right) gets the game's first shots in, targeting Rabble 3.
And the shots strike home, damaging Rabble 3's aircraft. From here on it, Rabble 3 is only allowed to head for his base edge (I screwed up though, I'm supposed to immediately turn him and move him three squares towards his baseline, but I forgot).
Blau 1 and 2 (bottom right), which had initially moved off to the right, now turn back in to the left following Blau 3's nifty shooting.
Rot 1 and 2 try to pull off the same feat, but Rot 1's firing misses Bevy 2.
So Rot 3 and 4 pull a 'loiter' move (bottom right) in order to hang back and fall in on Rot 1 and 2's left.
The Brits roll a 6, giving them quite a bit of flexibility in terms of being able to move and fire. So Bevy 1 and 2 perform a loiter move themselves, which keeps them directly in front of their foes, at very close range. Because of the 6 on the activation roll, Bevy 2 can fire without breaking formation, which he does, throwing two kill dice on Rot 1.
It's a kill! Rot 1's plane bursts into flames and plunges into the sea, taking its pilot with it...
Bevy 3 and 4 (bottom right) hang back, waiting to see the Germans' next move.
Rabble 1 and 2 slip left (bottom center), lining up a shot on Blau 2, but the rounds miss.
Rabble 3 (far left) makes his mandatory 'return to base' move, turning about to head for his baseline.
While Bevy 4 (far left) slips right and fires on Blau 3.
Another German plane catches fire and dives into the Channel, carrying its pilot.
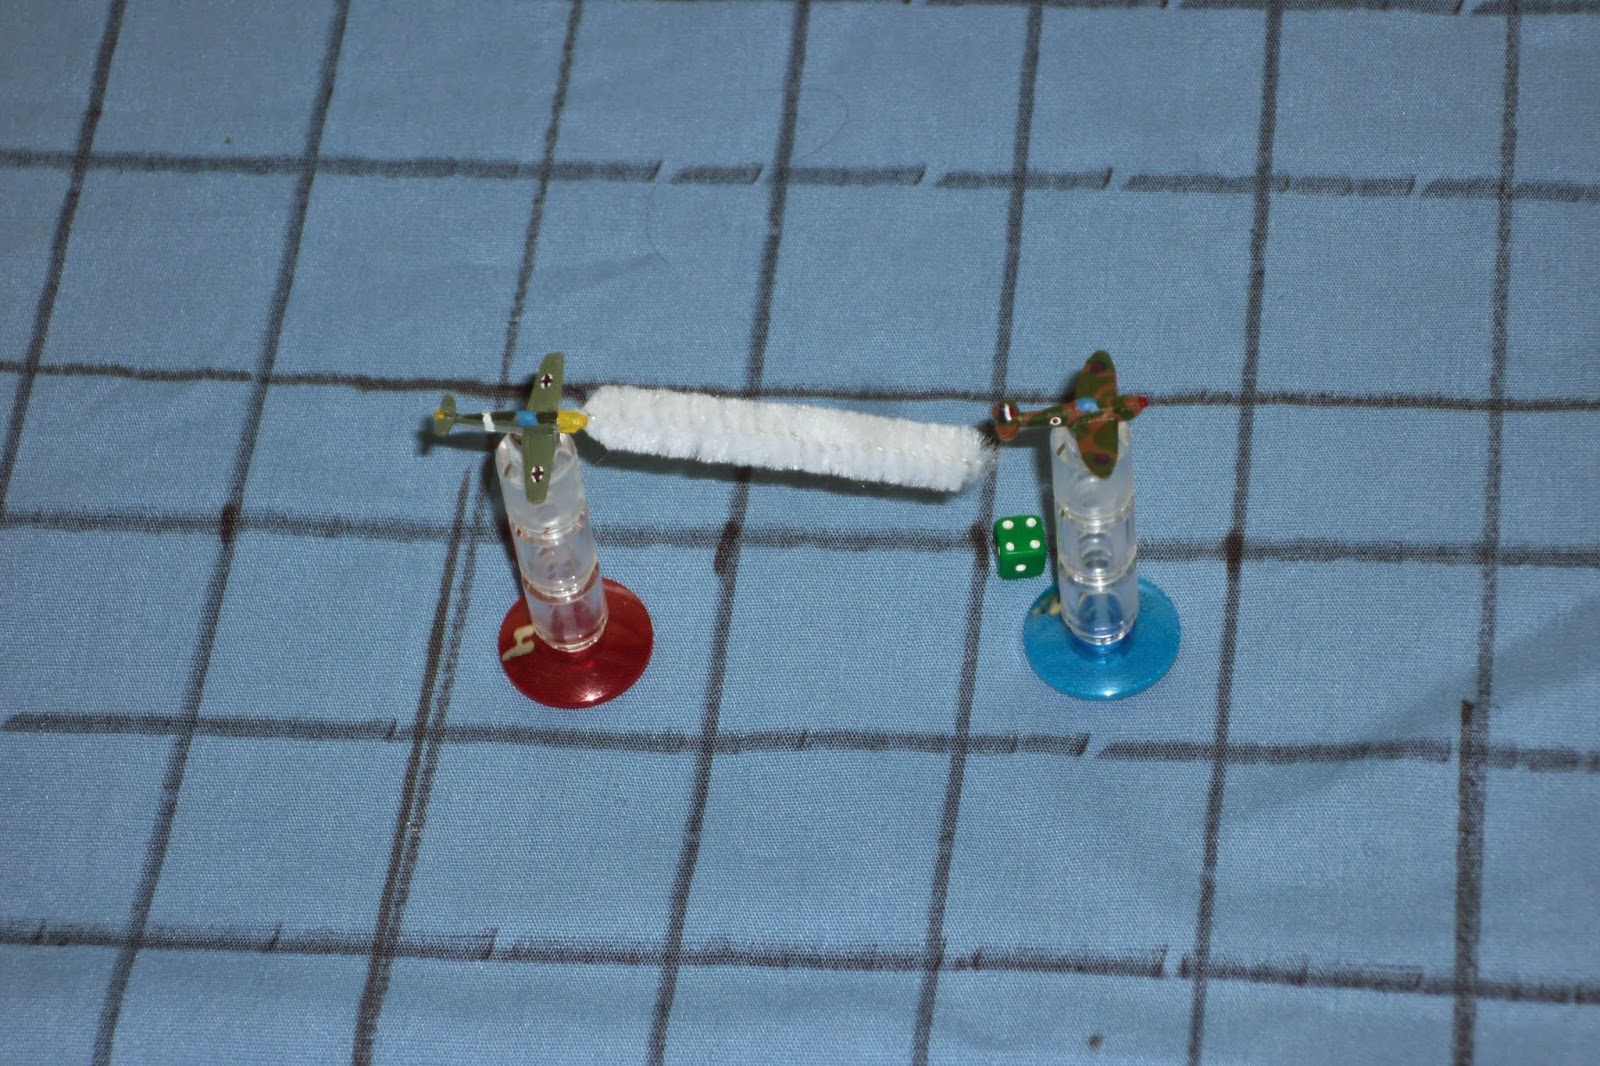
The Germans roll up a normal activation, and Blau 4 (center) darts past Rabble 1 and 2, then takes a shot on the already damaged Rabble 3 (far left), though there's no effect (another damage).
Blau 4 takes the tailing test and passes, so he is now 'locked on' to the tail of Rabble 3. This means Blau 4 will get to fire during the Brit turn, and if Rabble 3 survives, he may take evasive action to try to 'shake' Blau 4 (force him to take another tailing test).
**It was also at this point that I realized I've been screwing the rules up: I had forgotten all about reaction fire. I will finish this turn without it (not fair to let the Brits go without reaction fire, but subject the Germans to it), but will start once we've gotten to a new turn.
Blau 1 and 2 (right) swoop in, and Blau 1 takes a shot at Rabble 1, but misses.
While Rot 2 cuts hard left and lines up Bevy 1, the British Ace, sending a stream of cannon fire into his aircraft at point blank range.
Bevy 1 slumps forward in his harness as the plane dives into the Channel. Additionally, a 6 is rolled on the shock die and so Bevy 2 (far left) is forced to take an evasive maneuver, breaking left.
Rot 3 and 4 (center, facing left) take advantage of Bevy 2's forced evasive move, and swoop in behind him. Rot 3 can't get a shot off, but...
He takes the tailing test and manages to pass, so Rot 3 and 4 swoop in behind Bevy 2, who is in big trouble.
The Brits roll up a normal activation, and the first order of business is to resolve the two German fighters that are on the tail of an adversary. Blau 4 takes another shot at the damaged Rabble 3...
And sends him down in flames...
Then Rot 3 takes his shot on Bevy 2...
The rounds do not hit, but Bevy 2 is forced to take evasive action (top left), though Rot 3 manages to pass the test and stay on his tail.
And now for our first reaction fire: Rabble 4 charges in on Blau 2, hoping to get a killing head-on shot, but Blau2 fires in reaction...
Which forces Rabble 4 (bottom center) to break right in evasive action. Due to the enforce evasive action, and the fact he is a Rookie, Rabble 4's next move will be a mandatory 'straight and level' as he struggles to regain his bearings.
It's quite a furball, and the skies are looking pretty crowded. The game is fantastic!
Rabble 1 and 2 (bottom left center) drop down a level to avoid react fire from Blau 1 (top left), then climb and cut in front of Rabble 4 (just left of Rabble 1) to get at Rot 3 and 4 (bottom center right).
Rabble 1 is a Veteran, so he can take the tail test prior to firing (which gets you +2 kill dice for being at close range and being locked in); he tests and can only fail on a 1, which he rolls, but so does the German, so it's a success!
Rabble 1 (bottom left) opens fire on Rot 3 (here you can see Rot 3 was tailing Bevy 2)...
Splash another bogey, though Rot 3 manages to get out.
Bevy 3 and 4 (right) drop down to alt 4 and turn into Rot 2 to force him past.
The Germans roll up a normal activation, which is getting to be problematic for them. In real life fighter pilots look to maintain formation for mutual support. The rules do not mandate this, but they encourage it by making life harder if your planes are not in formation. A normal activation allows you to maneuver then fire (if possible) with half your planes (rounded up), then have their wingmen follow them. You don't have to do that, but you only get to maneuver half; anyone that doesn't get to maneuver themselves and can't move as a wingman is forced to take a mandatory move of four hexes/squares straight ahead and level, and if this carries them off the board they are out of the fight.
The Germans have five planes left, but only one pair, with three not in formation. So the Germans can maneuver three aircraft (half of five, rounded up), but only one is in position to make a move as a wingman. For example, the Germans can maneuver the pair leader (1 activation), then move his wingman for free. Then maneuver two more individual fighters (2nd and 3rd activations), but the fifth fighter has to make a mandatory 'straight and level' as there are no activations left.
Blau 1 and 2 move up alongside Rabble 4, knowing his next move is a mandatory straight and level (because he was forced into evasive action last turn) which will carry him straight into the Germans' path.
Blau 4 (bottom left), who just shot down Rabble 3, busts a U-turn to get back in the fight.
Rot 4 (center) hops onto Bevy 2's tail (right), but Rabble 1 reacts by opening fire, but it misses!
So Rot 4 opens fire on Bevy 2...
The fire misses, but is close enough to force Bevy 2 (bottom) to side slip to the right (unlike evasive action, this has no adverse impact the next turn; the side slip is a '1' on the shock die). The funny thing is that it blows Rot 4's attempt at a tailing test...
Rot 2 makes his mandatory straight and level because the Germans are out of activations. It looks bad, but please note the difference altitude levels.
The Brits roll a 'normal' activation. Rabble 4 (far right) takes his evasive action-mandated straight and level, putting Blau 1 and 2 in great position, as expected.
Rabble 1 and 2 (center) pull a loiter move to remain behind Rot 4 (far right).
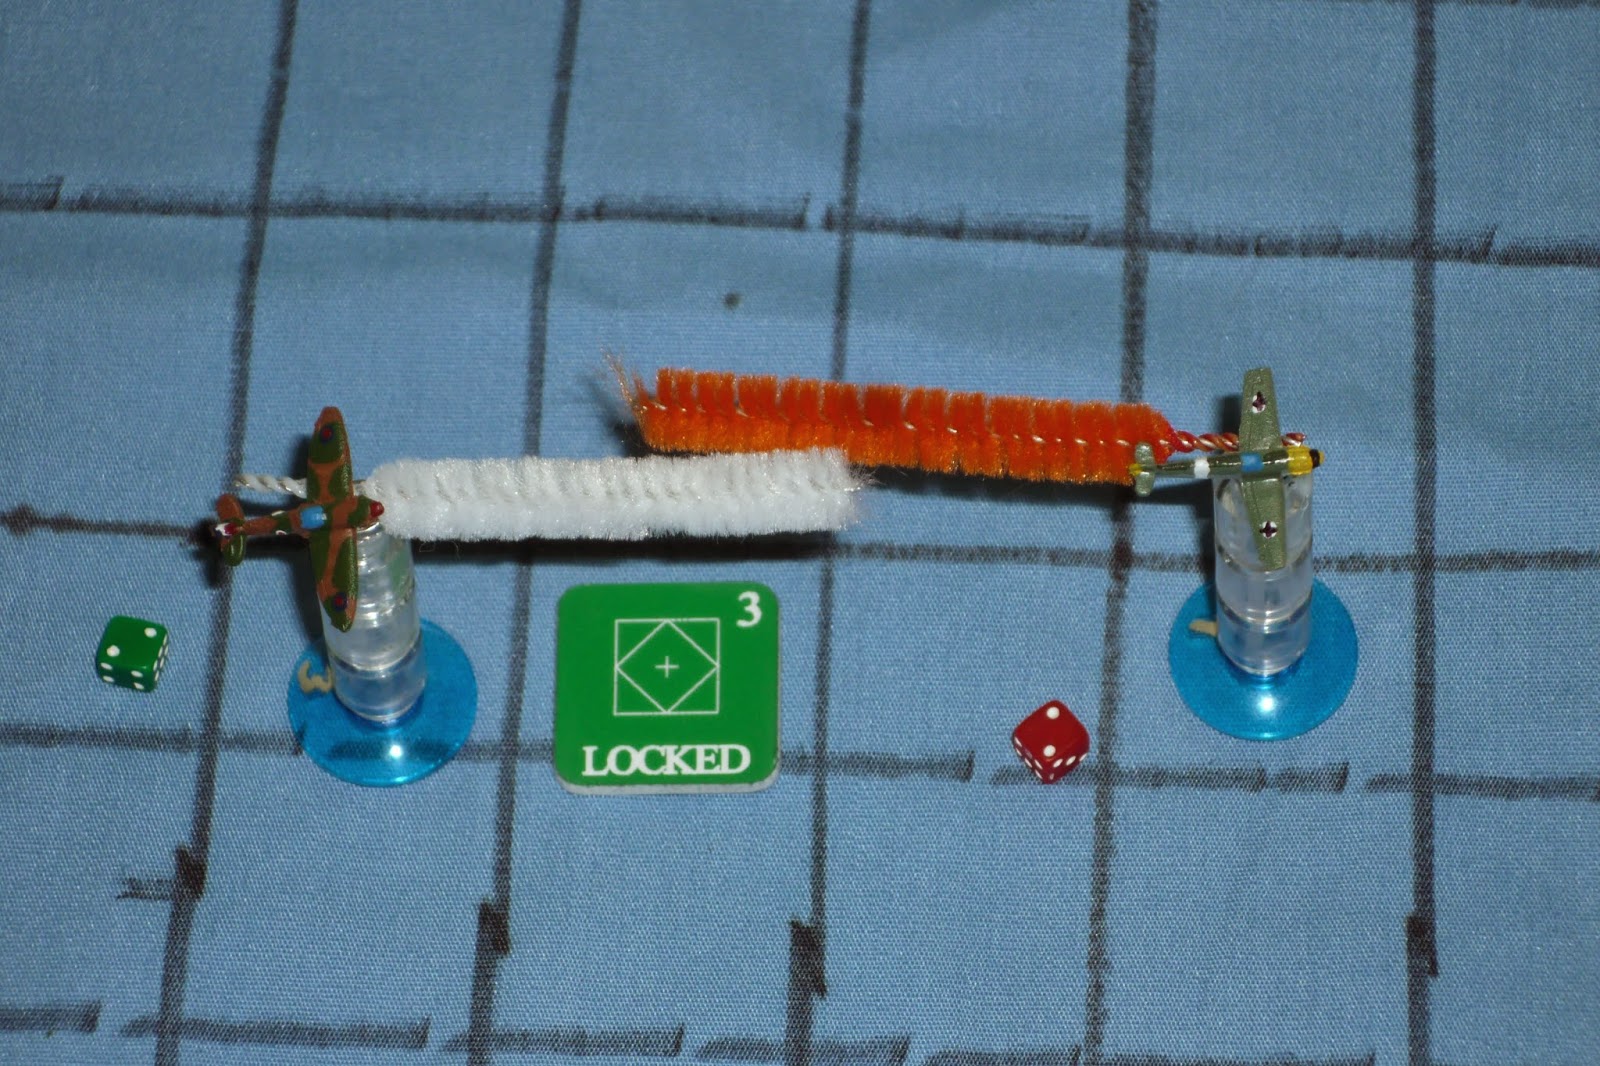
Rabble 1 is a Veteran, and so he can take the tail test before he fires, which he passes, then opens up (dammit! I just noticed I used the orange one instead of the white one). In any case, Rabble 1 fires with 3K and 1S, doesn't roll a single 1 or 6, miss...
Bevy 2 (bottom right), who's been harried by two different German aircraft but was saved, busts a U-turn to head back into the fight.
What to do with Bevy 3 and 4 (center right)? They dive under Rot 2 (far right; see, reaction fire is having an effect, forcing aircraft to go around), trying to get in on the action to keep Blau 1 and 2 (far left) from getting on Rabble 4's tail (center left).
The Germans roll up a normal activation, and the first order of business is Rabble 1 taking his shot at Rot 4, whom he's tailing.
Rot 4 begins trailing black smoke.
Blau 1 and 2 ease over behind Rabble 4. Blau 1 can't fire because he's higher than the target. For a Rookie or Regular, they can take the tail test, but can't fire now if successful. But Blau 1 is an Ace, so he'll take the tail test and, if successful, his aircraft will be moved down and directly behind Rabble 4, where he will be allowed to fire.
Blau 1 (top left) is successfull, so he moves down and opens fire on Rabble 4 (center), while Bevy 3 (far right) fires reactively at Blau 2 (far left). Bevy 3's react fire can't kill, he's just hoping to force Blau 2 to take evasive action or side slip, which will break up the German formation.
Bevy 3 (center) misses, while Blau 1's rounds damage Rabble 4. Rabble 4 (bottom left) is immediately turned towards his baseline and moved, though Blau 1 and his wingman, Blau 2, stay on his tail.
With some nifty maneuvering, Rot 2 (far right) manages to flip around on Bevy 3's (center, firing) tail. Rot 2 tests to get on Bevy 3's tail, but fails (can't shoot because of the altitude difference, though having an altitude advantage gives a big modifier for the tail test, though it didn't help here).
Blau 4 (bottom left) takes a mandatory straight and level (due to lack of activations), but it still leaves him in good shape to engage Rabble 1 and 2 (center top, heading away from him) or Bevy 2 (to their right, coming towards him).
The Brits roll up a normal activation, which starts with Blau 1 firing on Rabble 4 (whom he's tailing)...
And knocking him down...
A '6' means everyone can move and shoot, and in this case it's fantastic as Bevy 3 and 4 move up and fire, while staying in formation, their targets Blau 1 (firing) and 2, respectively. The deflection is terrible, so the Brits would normally only be firing with shock dice, but they're also at close range, which provides +1 kill die.
It doesn't go great, but the Brits do manage to break the German Ace off from his wingman. Bevy 4 misses Blau 2, and while Bevy 3 misses Blau 1, he does force him into evasive action. Blau 1 (bottom center, just below the Brits) breaks hard left, into the Brits.
Because Blau 1 is an Ace, he will not be forced into a mandatory straight and level following his evasive action.
Angry that Bevy 4 (bottom left) missed his shot on Blau 2 (center left, heading left), Bevy 2 (far right, firing left) moves behind Blau 2 and opens up with his guns...
The rounds miss, but force Blau 2 (top center left, heading left) to sideslip right, which ruins Bevy 2's tail test chance...
Rabble 1 and 2 (far right, heading right) do nothing, as they are already on the tail of a German. This kind of doesn't seem right; on the one hand, the benefit of being on the tail is that you don't move during your turn, you simply follow the enemy during his turn, after you get your chance to shoot him down. But not moving during your turn also (currently) means you don't shoot during your turn; I wonder if I should keep the 'don't move during your turn' part, but change it to your firing happening during your turn.
And now the Germans roll a 6 for their activation.
But my internal tailing conflict is quickly rendered moot when Rabble 1 promptly flames Rot 4, taking the pilot down with it.
Then Blau 2 (left) turns into Bevy 3 (right, firing), who uses reaction fire...
Which causes Blau 2 (bottom left) to take evasive action, breaking right. Blau 2 is a 'Regular,' so this is pretty much a death sentence as he will be forced to make a mandatory straight and level nexty turn, with two Brits on his rear...
Seeing this, Blau 4 (left, with Blau 2 at bottom center) leaps in to save his comrade, firing at Bevy 3, who can't reaction fire as the range is too great (I need to think about that too; having reduced reaction ranges in ground combat games seems to sense, but I'm not sure about an air game).
Blau 4's shells miss Bevy 3.
Bevy 3 (center right) is proving quite popular: Rot 2 (far right, with Blau 2 at bottom center, Blau 1 just below Bevy 3, and Blau 4 at far left) drops in behind Bevy 3 and fires, but he also misses! Bevy 3 seems to have a horseshoe or rabbit's foot nearby...
The German Ace, Blau 1 (bottom center) flips a U-turn, looking to get onto Bevy 3 and 4, as well as covering his partner, Blau 2 (bottom left).
The Brits roll up a normal activation, and Bevy 3 and 4 (top left) slip around behind Blau 2 (far left), which allows Blau 1 (bottom right) to react fire, but the German Ace misses (as of right now the rules don't give any benefit to shooting based on pilot skill. I kinda like the idea of doing that, but I don't want to make the shooting too powerful).
Bevy 3 (center, shooting) opens up and flames Blau 2, who parachutes to safety as his Me-109 (bottom left) heads for the water. Blau 1 is at bottom center, Blau 4 is at top left, and Rot 2 is at far right.
A '6' was also rolled on the shock dice, meaning a German plane is going to have to take evasive action. I roll to see who...
Rot 2 (far right) breaks hard right, and will be forced into a mandatory straight and level next turn.
Rabble 1 and 2 (top right) flip 180 degrees to come back to the fight. That's Bevy 2 just below them, with Bevy 2 and 4 at far right, Blau 4 at top left, and Rot 2, who just made the evasive maneuver, at bottom left. Blau 1 is off camera to far left.
Bevy 2 (bottom center left, with Rabble 1 and 2 at top right) turns into Rot 2 (bottom left) and fires...
Damaging the Me-109, which makes its mandatory move towards its own baseline.
The Germans roll up a normal activation, and Rot 2 takes a straight and level (actually mandated from his last real turn in which he was forced into an evasive maneuver) towards the sanctuary of his baseline.
On a side note, we're a long way from done, but it was about at this point that I felt the fight was finished, that the Germans would have broken off and headed home with their tails between their legs, and the Brits, bloodied themselves, would have let them. But I played on, and it wasn't much fun. Really it was just the Germans' attempt to escape with the Brits chasing them, which was pretty dull, actually...
Blaue 1 (bottom left) turns into Bevy 2 (center), taking a shot but missing, whilst trying to get to his baseline (far right).
Blau 4 (top center) moves in on Bevy 4...
Forcing him (top center, with Blau 4 just below him) to side slip right, breaking up the Bevy 3/4 formation.
The Brits get a normal activation, and Bevy 3 moves in on Blau 1. Bevy 1 opens up on the German Ace...
And the German Ace's aeroplane begins spewing black smoke, and he makes his mandatory move towards his baseline, bringin him very coose to Bevy 2 (bottom right). Even after damaging his aircraft, Bevy 3 is unable to get on the tail of Blau 1...
Bevy 2 swing around behind Blau 1's damaged bird...
And passes his tail test. But he's a Regular, not an Ace or Vet, so he doesn't get to shoot...
The Brits have activation troubles, and so decide to have Rabble 1 and 2 (center) make the mandatory straight and level, which brings them closer to to Blau 4 ( bottom center), while Bevy 4 (bottom left) pulls alongside the German.
The Germans roll a normal activation, but they only have one 'good' aircraft and two damaged aircraft left. At bottom right, Bevy 2 is on the tail of Rot 2, and he opens fire, getting another damage result (no effect). Rot 2 jinks, but Bevy 2 stays on his tail. Blau 1 (bottom center left) follows.
Blau 4 (center left) is seriously outnumbered and has no good moves (Bevy 3 and 4 at far left, Rabble 1 and 2 at top right, Blau 1 at bottom right). Blau 4 reverses course, turning into Bevy 4, who uses react fire...
Which forces Blau 4 to roll left (far left). He's momentarily safe...
Nooo!!! The Brits roll a '1' for activation; they have bonuses for movement, but no one can fire this turn... Bevy 3 (bottom center) gets on Blau 1's tail (bottom right). Off camera to right, Bevy 2 stays on Rot 2's (damaged) tail.
Blau 4 (far left) is in bad shape: Bevy 4 (next to Blau 4) makes a lazy left turn into Blau 4 while Rabble 1 and 2 (top right) slowly and patiently close the distance.
The Germans roll a normal activation and have to immediately deal with Bevy 2 on Rot 2's tail, and Bevy 3 on Blau 1's tail. Rot 2 is flmed and the pilot bails, while Bevy 3 only manages to get another damage result on Blau 1.
Blau 1 (center, left of parachute) jinks, but Bevy 3 stays on his tail.
Blau 4, isolated and surrounded (center left), turns into Rabble 1 and 2 (center right); Rabble 2 react fires but misses, so Blau 4 opens up...
But Blau 4 missed, and when the Brit turn (normal activation) came up, Bevy 4 (bottom left) got in behind him and opened fire. But Bevy 4 not only missed, he also failed the tail test. Somehow Blau 4 is still alive. Rabble 2 (top right) breaks formation and swings into Blau 4's path, and Blau 4 react fires...
And Blaue 4 (center) rolls 2S, and gets two 6s... Rabble 2 (bottom center) breaks left, as does Bevy 4 (far left). Blau 4 is looking okay if he can take of or get past Rabble 1 (top right).
But Rabble 1 closes on Blau 4 (center), guns blazing!
And Blau 4 is damaged. He then makes his mandatory move towards his baseline. If you're wondering why that mandatory move is in the rules, it's actually to help damaged aircraft survive by getting off the table, with the thinking being that most (competent) pilots in a furball would be looking for active threats rather than chasing wounded ducks. Please note that I said 'most' and 'competent,' not someone with target lock or a hot-dog with buck fever...
This is the official point in which all drama and fun left the game. Up to this point it was at least interesting to see what damage Blau 4 might do, or if he would get away. But now all the Germans have are two badly damaged fighters limping for home, with a slew of Brits circling like buzzards...
From here on out it's nothing but hot dogs fighting each other to get a kill...
Bevy 2 (bottom right), having finished off Rot 2, is chosen to make the mandatory straight and level.
The Germans roll a '6' for activation, but it really doesn't matter anymore... In any case, Bevy 3 finally flames Blau 1, and the Geraman Ace rides it into the waves...
Blau 4 (center) dives to the deck, heading for his baseline, hoping to make the table edge.
The Brits roll a normal activation, and Rabble 2 (bottom left) swoops in and fires on Blau 4, but misses.
Rabble 2 (far left) passes his tail test and is locked onto Blau 4, with a lot of space lef to the table edge... Bevy 3 (bottom center) pulls alongside, while Bevy 2 (far right) turns left.
Off camera, Rabble 1 and Bevy 4 make mandatory straight and level moves.
It's the German turn, so Rabble 2 fires on Blau 4, but only manages another damage result. Blau 4 jinks, but Rabble 2 stays on him.
And yes, this is how bad it got folks... The Brits roll a normal activation; Rabble 2 (far left) can't fire as he's on the tail and only acts during the enemy's turn, but Bevy 4 (bottom) turns in and fires, but misses, while Bevy 2 (far right) comes head on and fires, but gets 'damage' again!
It's the Germans' turn, and Bevy 2 fires, but misses (with 3K 1S dice)!!! I call it: the Brits are bingo fuel and must return to base, so Blau 4 escapes to fight another day.
So, as I previously stated, it was an incredibly fun fight most of the way, but then I carried on when I should have had the Germans disengage. That would have had the Germans finish the game with three aircraft (two damaged), rather than one, but it would have saved almost an hour of playing time and a whole lot of typing time.
For those keeping score, both side's Aces were KIA, the Brits got 7 kills, the Germans got 3 kills, and no one had more than two kills (the Brits had three pilots, Bevy 2, Bevy 3, and Rabble 3, with two kills each).
I've learned my lesson, and have a few more things to think about regarding the rules, but overall they're working like a champ, and almost ready for playtesting.
V/R,
Jack


Holy smokes, that's pretty intense.
ReplyDeleteMore comments later when I've digested it all :)
I do agree, knowing the right moment to call it quits might be more important for such a big encounter.
It was intense, but I'm not sure if you mean the fight or the length of the batrep ;)
DeleteAnd I'm waiting on your digested comments, Sir. I know you read slowly, and your lips move while doing so, but it's been 24 hours ;)
V/R,
Jack
Something the WW2 Wings of War version did nicely was use a simple Fuel mechanism - you burn it according to manoeuvres made and when out, you disengage. Assuming you get the right amount of fuel to start with it gives a nice tempo to fights where they come to a "natural" end and don't finish up with one side being hunted down like a dog!
ReplyDeleteOf course, get the initial fuel allocation wrong and everyone buzzes in, runs out, goes home before anything happens.
Good stuff above - I'm amazed you got much fighting in with that many piccies :D
TP,
DeleteThat's pretty interesting as a limiting factor. Might be a little farther than I want to go (I'm looking at cutting things out to speed it up!), but perhaps an optional rule.
The only thing is that it would take some serious playtesting to avoid the situation you described (game over before it starts), or going too long (you give so much fuel it's not a factor). And I imagine you have to have a pretty rigid construct for the table size as well, since that directly impacts the distances traveled.
It is something to think about, though.
Thanks for taking a look man.
V/R,
Jack
I might tie it to number of turns, then roll a dice at the end of each turn and on a 1 or 6 someone goes home... perhaps on a 1 no one can take extreme manoeuvres, on a 6 they're assumed to break off.
DeleteOr have to make for their board edge if you don't fancy a furball suddenly disappearing.
TP,
ReplyDeleteSorry man, I missed this comment somehow. That's interesting. I had been thinking about having random events for bingo fuel, but having a sort of morale component to the game.
For example, once you reach a certain loss level, i.e., 1 out of 4 aircraft, 2 of 6, 3 of 8, you start rolling every turn to see if you stay in the fight, and the chances get worse for every additional aircraft you lose on top of that.
We'll see, I didn't get to play a game this past weekend :(
Hope all is well.
V/R,
Jack
I suspect "bottle" is probably as well integrated into a fuel state sort of thing - the two would seem likely to correlate with pilots losing their bottle being more likely to bug out earlier than those more aggressive who are less concerned about fuel states.
ReplyDeleteGiven the speed of play above I suspect you don't want to burden down with much else, but a "on turn X roll for each pilot/wingman and on a 1 or 6 they bug out" seems quick? Ignore 1's for Vets or above, possibly?
Very interesting. I especially like the Aces and Vets option, thanks man.
DeleteV/R,
Jack
Just trying to keep in the Nordic Weasel vein, as it were :D
DeleteThe weasel approves
DeleteThe weasels approval is well received :)
DeleteA great idea, TP, and you two can keep your vein approvals to yourselves ;)
DeleteI've been hard at work, will have a post up here tomorrow.
V/R,
Jack