All,
It's 0600, 9 Sept 1939. Following the reversal seen yesterday as the Reconnaissance Company tried to push into Warsaw which saw the death of its commander, the unit fell back and awaited the rest of the kampgruppe to catch up and consolidate. Colonel Klink consulted with his commanders and decided on a dawn attack; he's also received a Warning Order from 4th Panzer Division, which iterated a threat to the west (the beginning rumblings of what would become the Battle of Kutno), necessitating Klink hold his armor out of the upcoming fight, so the morning assault once again saw Lt Freitag's Landser at the forefront.
An all infantry fight, but for Sgt Pichler's Sdkfz 221 (he and his crew refused to be left behind after the previous day's manhandling). The Polish National Guard did their job the previous day, buying time for reinforcements, and so today's foe is composed of regulars from the Polish 31st Infantry Division.
The Poles: CO, 2 x 37mm ATG, 1 x 82mm mortar, 2 x .30 cal. MG, and 7 x rifle squad (4 of which have attached anti-tank rifles).
The Germans: commanded by the Schutzen Company commander, 1st Lt Freitag, Sgt Pichler's armored car, 2nd Lt Klugmann (an Iron Cross holder) and his 2nd Platoon HQ section, along with his 1st Squad (Sgt Aust), 2nd Squad (Sgt Haas, also an Iron Cross holder), and 3rd Squad (Cpl Arndt), 2nd Lt Tausch and his 3rd Platoon HQ section, along with his 1st Squad (Sgt Schlessinger) and 2nd Squad (Cpl Nader). In support from the Schwere Platoon are Cpl Creuzburg and LCpl Steinkamp's MG-34 MGs, Cpl Osswald's 80mm mortar, and Sgt Oberlander's 75mm field gun.
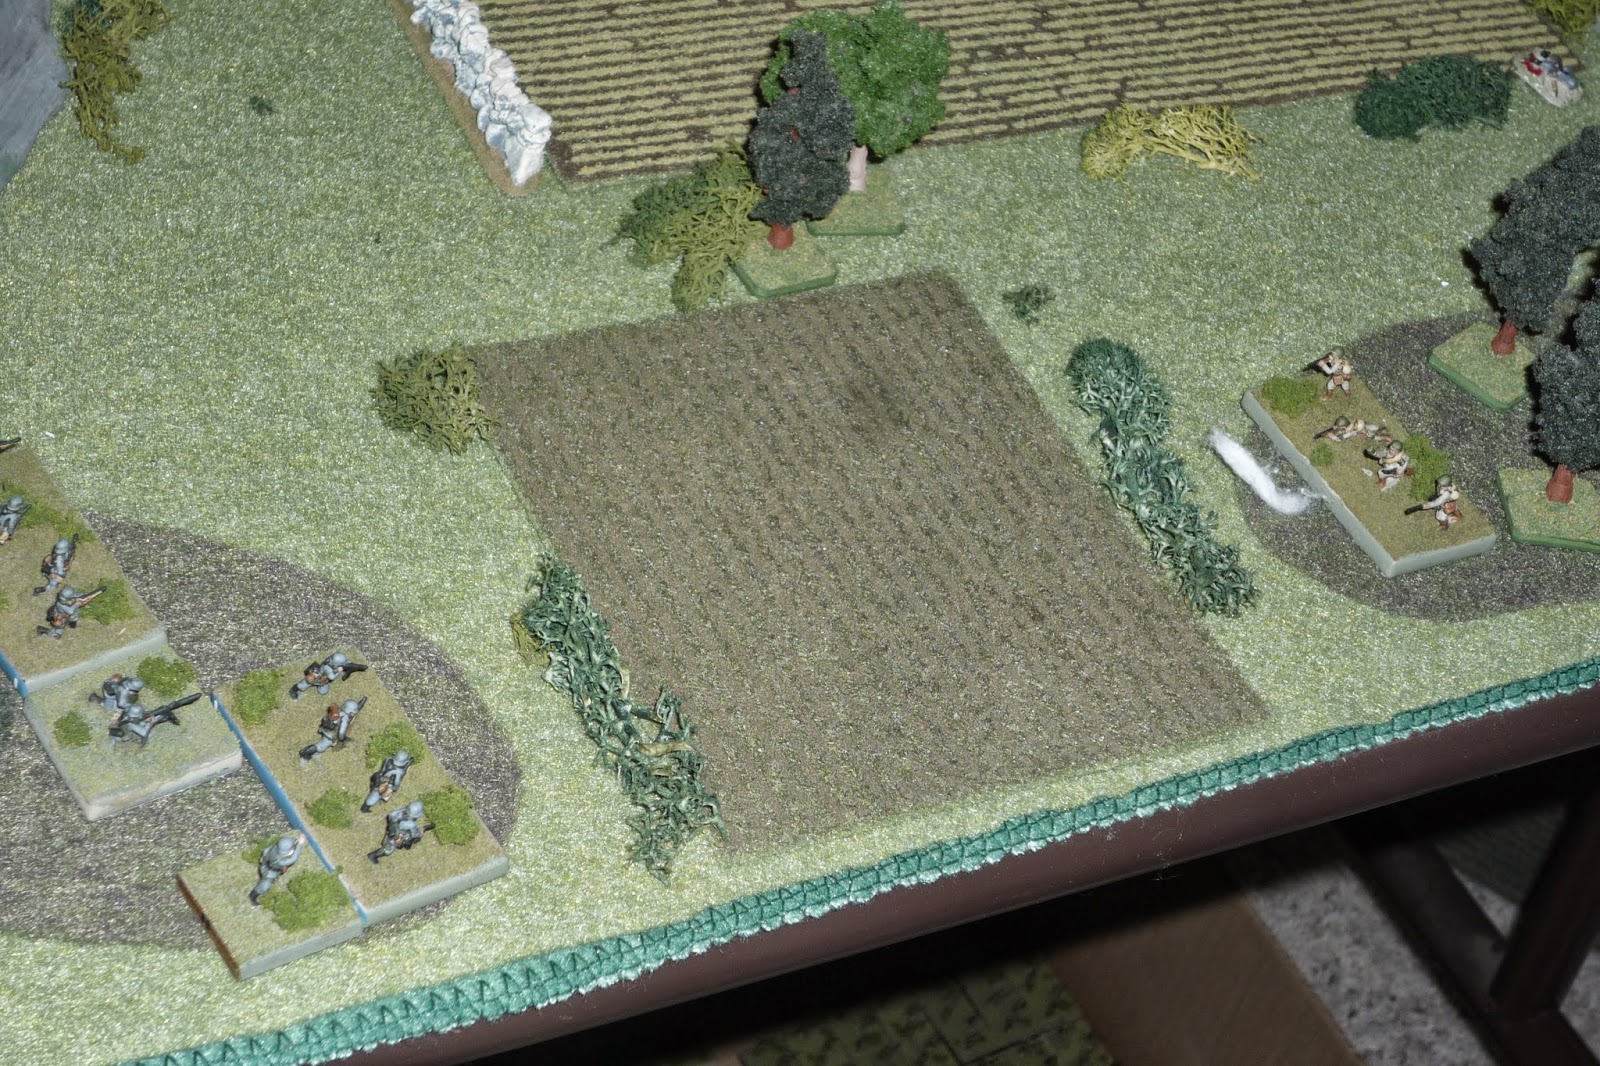
Overview, north is up, Germans on left (west) and Poles (on blinds, for now) on right (east). The CO, 3rd Plt, and Sgt Pichler's vehicle are in the north, 2nd Plt, plus one MG, is in the south, minus one squad covering the mortar, an MG, and the field gun in the center.
There are still casualties and burning German armored cars on the battlefield from yesterday's fighting.
The blinds are uncovered: here are the defenders in the north.
And in the south.
Closeup of German deployment in north.
And German south (left) and center (right).
The game begins on a good note, with Cpl Osswald's mortar team targeting the enemy machine gun at the north wall; the MG is untouched, but the ATG is pinned (yellow bead) and an enemy rifle team runs for the hills!
And my luck holds as the field gun fires on the main building in the enemy's center. The enemy MG in the building is knocked out, and the rifle squad below it is pinned.
Back in the north, Sgt Pichler's vehicle (far left) moves up, then begins pumping 20mm rounds into the enemy rifle squad atop the hill (top right), forcing it to fall back to its comrades behind the wall (off camera to right).
The turn finishes with LCpl Steinkamp's MG34 (supporting 2nd Plt in the south, far left) firing at the enemy rifle squad in the treeline (far right), forcing them to fall back.
Then the Poles get quite a stroke of luck: they roll a 'normal' activation, but get a random event, and that random event really saved their butts! At this very early stage of the fight I already had a bunch of them on the ropes, either pinned or hunkered, but the random event was 'Lull,' and so all Polish units suffering pin, hunker, or man down automatically recovered. This allowed a total of four units to rally and get back in the fight immediately...
And they put it to good use. The Polish mortar team opened up on the German center position, forcing Sgt Oberlander's gun crew and Cpl Creuzburg's machine gun team to fall back...
In the north, the enemy MG (off camera to bottom right) opened up on 3rd Plt, getting 'man down' on Lt Tausch's section (white bead) and causing Cpl Nader's squad to fall back (red bead).
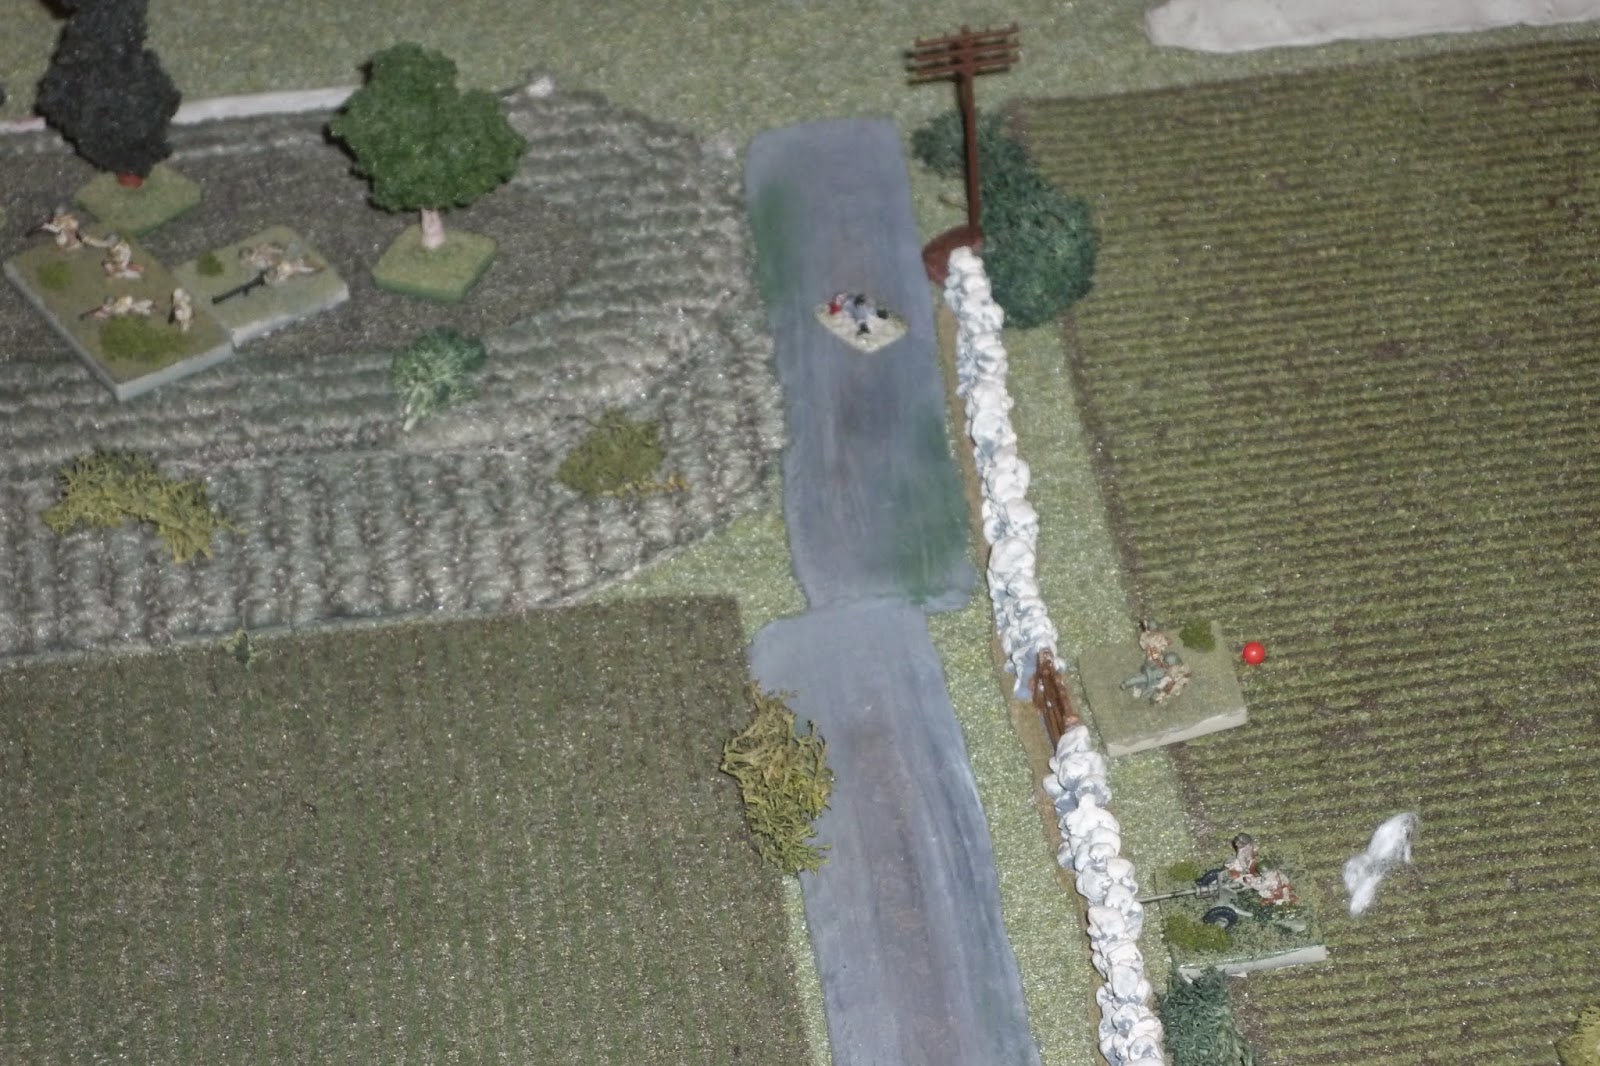
That covering fire allows a Polish rifle squad (far right; they were recently knocked off there, but able to rally due to the lull) to get back into place atop the hill, lining up its ATR on Sgt Pichler's vehicle.
I was really hoping for a 'scurry,' which would allow me to make up some ground following the lull, but of course not. The CO, Lt Freitag, moves to Lt Tausch's section to try to rally them, but fails...
Then Cpl Osswald's mortar goes to work on the north wall again. The enemy ATG is fine, but the MG (red bead) runs for the hills!
NOTE THE COTTON PUFF NEXT TO THE ATG, WHICH I USED TO SHOW THE MORTAR ROUNDS DROPPING.
Sgt Pichler's Sdkfz 221 again fires on the enemy squad on the hill and forces them back behind the north wall, then he orders his vehicle forward up the hill.
Lt Klugmann moves his men forward (bottom center) while Sgt Haas moves his squad to the wall (far left). I'm moving them forward, but I'm also trying to 'mortar-proof' them, i.e., spread them out so they're not such an attractive target.
Then the 'fog of war' hit: remember that puff of cotton (bottom right) next to the enemy ATG? Whilst scanning the battlefield prior to moving my armored car up on the hill (top left) I'd glanced at the ATG, and I saw the white puff and thought the ATG was knocked out. But it wasn't, that was simply showing the mortars had fired...
So the enemy chambered a 37mm round and launched it directly into Sgt Pichler's armored car, immobilizing it and causing the crew to bail. War is hell, no?
Then, despite my recent dispersal, the Polish mortar decided to target 2nd Plt anyway (die roll), but I got off relatively easily, getting only a pin on LCpl Steinkamp's MG and Sgt Aust's 1st Squad, 2nd Plt.
Off camera, the Polish CO began moving north to the defenders at the north wall.
Then some Polish rifles in the south opened up on Lt Klugmann's squad, pinning them (yellow bead).
In the north, Lt Freitag managed to rally Lt Tausch and Cpl Nader's squads.
Back in the south, Cpl Osswald's mortar fired an enemy rifle squad (center, yellow bead), covering Lt Klugmann's squad as it moved up and dispatched the Polish rifle squad in the treeline (bottom center) at close range.
Meanwhile, in the center, Cpl Arndt moved his squad forward (far left) and fired on the enemy squad at center, knocking them out and causing the squad at the wall (top right, red bead) to fall back.
Then the Poles try to rally the team at far right, but fail and they run off the map. Similarly, their CO tries to rally a rifle squad in the north and failed, though they didn't run.
A Polish rifle squad moves in on Lt Klugmann's squad, who snap fired but missed, which allowed the Poles to fire, forcing Klugmann's squad to fall back.
The enemy mortar begins dropping rounds on Cpl Arndt's squad in the center, and achieves a 'man down.'
Lt Klugmann, being a 'Hero,' rallies his squad gets them right back in the fight, where they move up in the trees and trade fire with the Polish squad there, to no effect. Then Sgt Haas (top left) moved his men up and took a shot, but missed too...
Off camera, Lt Freitag was able to rally the field gun crew and Cpl Creuzburg's MG team, which have been huddling at the table edge in the fetal position since turn 1.
At bottom left is the enemy squad Lt Klugmann and Sgt Haas just engaged. At far right, Cpl Osswald dropped some 80mm mortar rounds on these chaps, getting a 'man down.'
Off camera, the Polish CO is able to rally his rifle squad in the north before moving south, while the enemy mortar fires on Sgt Haas' squad and forces them to fall back (they are at far left, and you can see the white puff from the mortar rounds in the center, where the squad was moments ago). The enemy squad at far right recovers from man down, while the enemy squad in the treeline (bottom center) fires on Lt Klugmann's men (also in the trees at bottom), but misses.
Off camera in the center, the CO (Lt Freitag) moves up and rallies Cpl Arndt's squad, but fails.
Lt Klugmann's men (bottom center) fire on the enemy squad in the trees, pinning them, so Sgt Haas (being a 'Hero,' top left) rallies his men and charges the enemy...
And Sgt Haas' men are victorious (bottom left), vanquishing the enemy rifle squad. Cpl Osswald's mortar fired on the enemy squad at top right, causing them to leave town. This is key as the Poles now no longer have any units in the south to spot for their damned mortar!
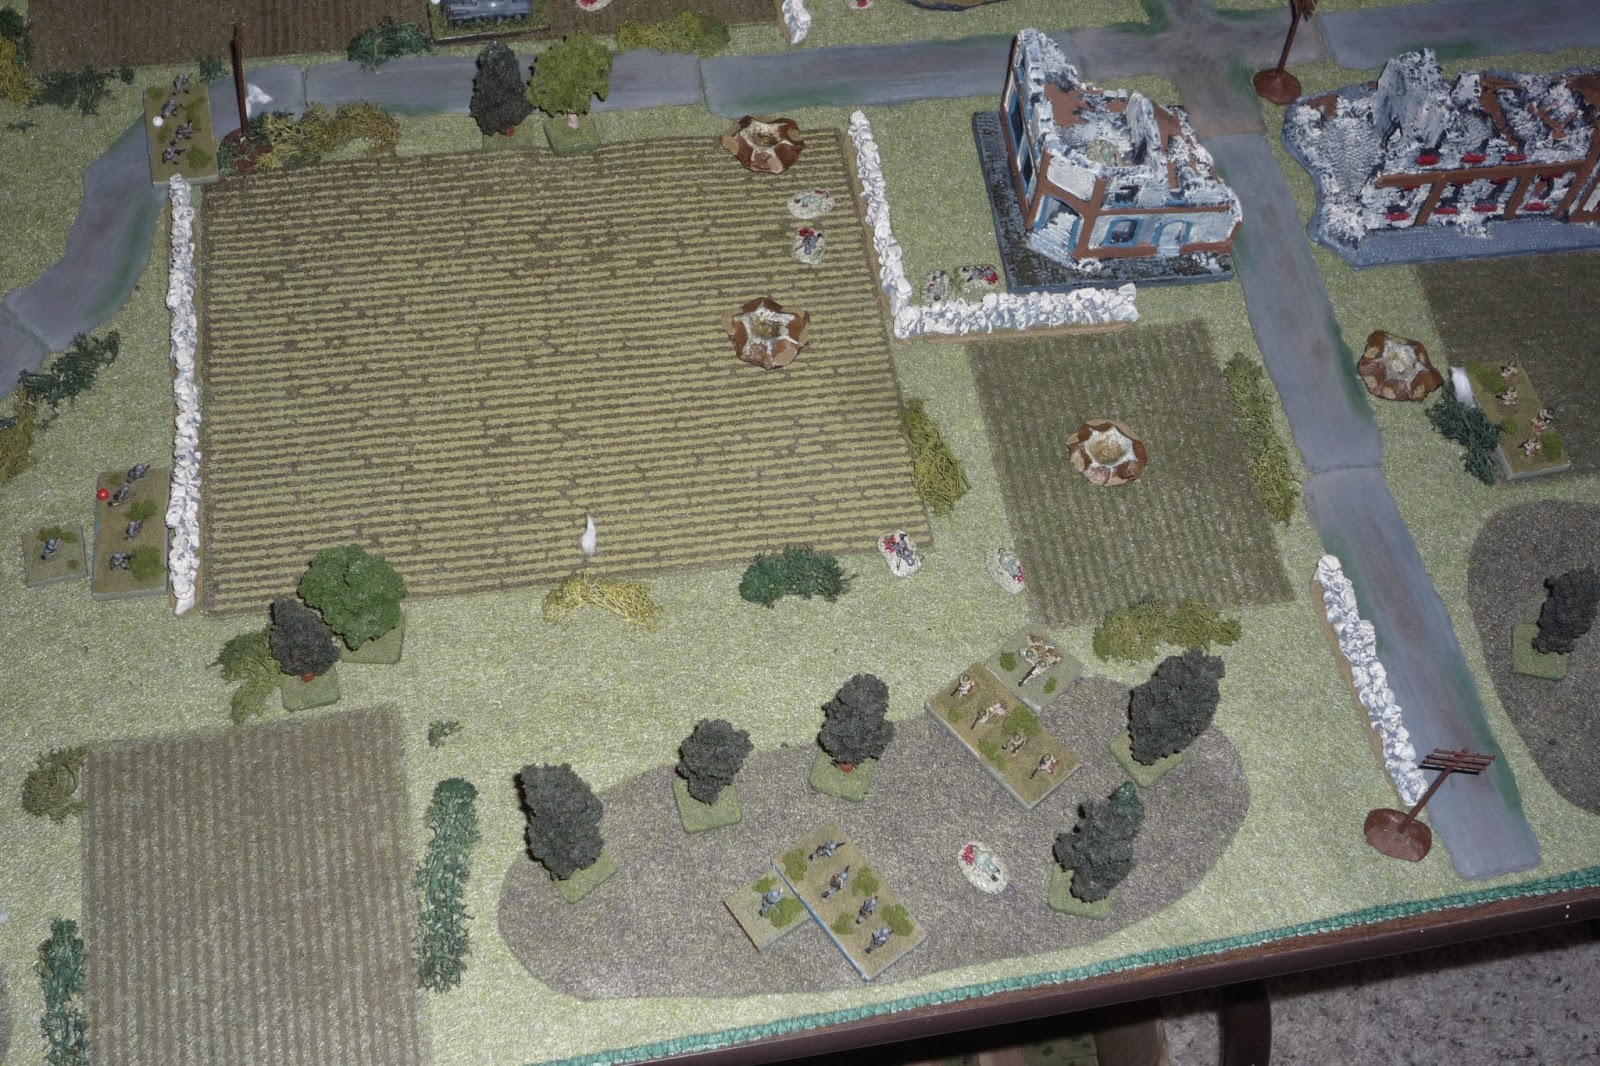
Just off camera to right, the Polish CO rallies one of his rifle squads, who then moved up into the building at bottom right. Once there, they called back to their mortar, who began dropping rounds on 3rd Platoon (top left), getting man down on Lt Tausch and pinning Sgt Schlessinger's squad... You can just see the CO and Cpl Arndt's squad at bottom left.
The CO again tries to recover Cpl Arndt's squad (they were man down, I tried to recover the, rolled man down again): this time I rolled a '6,' meaning they are knocked out, combat ineffective. The CO then moves north to try and help out 3rd Platoon...
Off camera to bottom left, Sgt Oberlander's men re-man the field gun, while Lt Klugman and Sgt Haas (bottom right) begin maneuvering their squads to deliver the coup de grace on the enemy.
Just as things are going swimmingly, the Poles roll a random event which allows one of their knocked out rifle squads to come back. BS!!!
Then, to add insult to injury, the enemy mortar begins pounding the German center position, causing Sgt Oberlander's cowards, I mean men, to abandon the gun again...
Now, the interesting part of the equation that you're missing (because I haven't told you), is that the Polish center, where their mortar and CO are, is about to have Lt Klugmann and Sgt Haas rolling up its left flank. So the mortar had a choice: fire or displace. I rolled the die and it came up 'fire,' so they laid into the German center position, but they had to know they're about to die at the hands of Klugmann and Haas (bot Iron Cross wearers). Guess they just wanted to take as many Nazis with them as they could...
Please note that the mortar could not have fired on Klugmann and Haas' squads as no Polish forces can see them.
This leaves the newly come back rifle squad (center, at crossroads, with mortar team at far left) to face off against Klugmann and Haas' squads (bottom right).
In any case, the rifle squad is easily swept aside by Lt Klugmann's men...
Which allows Sgt Haas' squad to leapfrog ahead, firing on the mortar and getting man down. Meanwhile, Cpl Osswald's mortar fired on the enemy ATG at bottom left, but couldn't find the range.
The Poles roll up a firefight, but the only unit they have that can fire is the ATG at the north wall (off camera to far right), which fires on Sgt Schlessinger's squad in the north, forcing it to fall back (far left, while the white puff is where they used to be).
Cpl Osswald's mortar went to work again, pinning the ATG at bottom left. But the real show was Lt Klugmann and Sgt Haas (center, bottom center). Klugmann led his men in a charge which eliminated the enemy mortar crew and forced the Polish CO to fall back (top right). At that point, he and the rifle squad next to him ran, leaving the two ATGs to be captured by the Germans.
Notes:
-Cpl Arndt (Schutzen Co, 3rd Sqd, 2nd Plt), Wound Badge, Campaign, F8.
-Sgt Pichler's Sdkfz 221 damaged, but recovered, as well as two other KG Klink armored cars lost on 8 Sept 1939.
-Lt Klugmann (Plt Cmdr, 2nd Plt) and Sgt Haas (2nd Sqd, 2nd Plt) mentioned in dispatches for valor, leading several close combats each. This will not gain the Iron Cross 1st Class, but will count towards its achievement.
-Lost ~15 KIA/WIA, one Sdkfz 221 damaged but recovered.
-Caused ~40 KIA/WIA, captured ~10 POW, two 37mm ATG.
What stands out to me about these rules are the swings in momentum. This may drive some folks crazy, but it's a big part of the attraction for me. Between the activation rolls ("man, I really need a scurry," but roll a firefight, and "I hope he rolls anything but a firefight," but there it is) and the random events (the enemy getting lulls to recover/rally their troops, or reinforcements, etc..., and me getting confused or panicked, etc...), you never know what's going to happen. It has enough chaos to never let you know what's going to happen, to never have a fight seem like a sure thing, but it never makes me feel like I can't control anything. You're constantly making decisions; it's almost always the between two or three crappy choices, but you're always making decisions.
The campaign is moving right along. KG Klink secured a toe-hold in the outskirts of western Warsaw, only to be immediately recalled to combat the threat to the west (yes, behind them!). The Polish army opposite Guderian's troops coming down from the north have linked up with the Polish army pushed aside by the German 10th Army (which entered from the west). They fought their way together, but ended up in caught in the junction of two major rivers. Now there is much confused fighting, with German forces entering the area from all points of the compass, and the Poles counterattacking to the north, east, and south, seeking to push the Germans back, secure river crossings, and consolidate their combat power. KG Klink is hastily thrown into the fray.
V/R,
Jack


Great battle report again Jack. At first the rules didn't sound like my cup of tea but reading your comments near the end certainly perked my interest :)
ReplyDeleteSad but these BatReps are the nearest thing I'm getting to game so I appreciate the trouble your going to.
Panda,
ReplyDeleteNo sweat man, but, is indeed quite a bit of work to document all this mayhem, so I thank you as I always appreciate folks stopping by and commenting. And I hope you're able to back to gaming soon. Along those lines, I really have to recommend these rules, even though the author is a commie dork ;)
They're quick, don't take a lot of room (I've been playing on 3' x 3', but would honestly probably be better served by using a 2' x 2' as there's always a lot of unused area), they're intuitive and match up well with my view of this level of combat (your mileage may very), and did I mention they're quick?
I'm curious what made you think they weren't your cup of tea. Maybe they're not, but I can certainly give you the low-down. And Ivan's working on an even higher level set of rules (working name "Brigade Commander") which use the same base mechanisms (which are the same mechanisms as 5 Men in Normandy) and I'm really looking forward to for my modern 6mm stuff.
Take care man.
V/R,
Jack
I never know whether to respond here or on the other sites :-)
ReplyDeleteWar Panda - if you already know FiveCore, the ups and downs are mostly the same. If you don't, I can give you the ups and downs of the system:
It isn't for rivet counters. A tank is, largely, a tank.
You can never do everything you want with everybody but you can always do something with somebody.
Troop quality is less a factor compared to troop placement.
Reaction fire is constant, moving around is hard (but not as brutal as in No End In Sight).
The ups:
Plays very quickly.
It's an excellent chance to just get some toys on the table and actually play a game.
No stats and not a ton of special exceptions, I find.
The tactics work out to be pretty "realistic" as far as toy soldier battles go. Suppressing fire, outflanking and the "find, fix, flank, finish" work just as they should.
Easier to figure out and you could play Crossfire scenarios without any fuss.
Oh and just for Jack:
DeleteFrom each according to his dice rolls. To each according to the whim of the random force generator (unless there's a shortage)
Yeah, yeah, yeah, I know, some random force generators are more equal than others ;)
DeleteV/R,
Jack
i really like the rules from reading them, all I have to do it actually play them! I also like swings in a game. At the moment card activation in my rules does it for me, but I do like the die roll activation and combat mechanism in Ivan's rules.
ReplyDeleteNote due to bus real life, I am only just catching up on Jack's AARs. Today I had read game 7 and 8. Three to go!
By the time you read 3 more, he'll have posted 5 more :)
ReplyDeleteI am hoping that is not the case. I got a week behind but catching up fast. If Jack could just delay writing up game 12+ for a few days, I think I will be alright.
Delete