All,
It's 1530 on 10 August 1986, and Team Whiskey is on the run. Warsaw Pact forces have overrun Rhein-Main Airbase, where Team Whiskey's 3rd Tank Platoon and Kilo Company made a gallant last stand, and now the enemy is in a pursuit/exploitation operation to reach Wiesbaden and its Theodor-Heuss-Brücke, the last bridge standing over the Rhine River. A small Bundeswehr contingent (all that is left of a Panzergrenadier Battalion) is holding the bridge open, though they are prepared to blow it should the enemy encroach. But right now that bridge is the only route of escape for Team Whiskey and the remaining forces of V Corps.
The opposing forces, with Soviets on the left and NATO on the right.
The NATO force is broken into two elements: the US force is all that remains of Team Whiskey. The CO, LtCol Lacy, is personally leading them. All that is left of C Company, the tanks, is Lt Travers' 2nd Tank Platoon of four M1 Abrams. All that is left of the infantry is I Co under Captain Phillips, and it's down to only two platoons, 1st under Captain Sighe, and 2nd under Lt Ensmith (K Company was eliminated at Rhein Main). All that is left of Weapons Co is an M-113, a single TOW team, and a single M-60 MG team. They also have an AH-64 on call in direct support.
The Bundeswehr force has a Command Team, three rifle teams, two MG3 teams, and two Milan ATGM teams. They also have a couple M-109 SPGs on call, though only enough rounds for three fire missions.
The Soviets have a full-strength tank company and an understrength mechanized rifle battalion with rotary attack assets and off table 2S1 122mm arty in support.
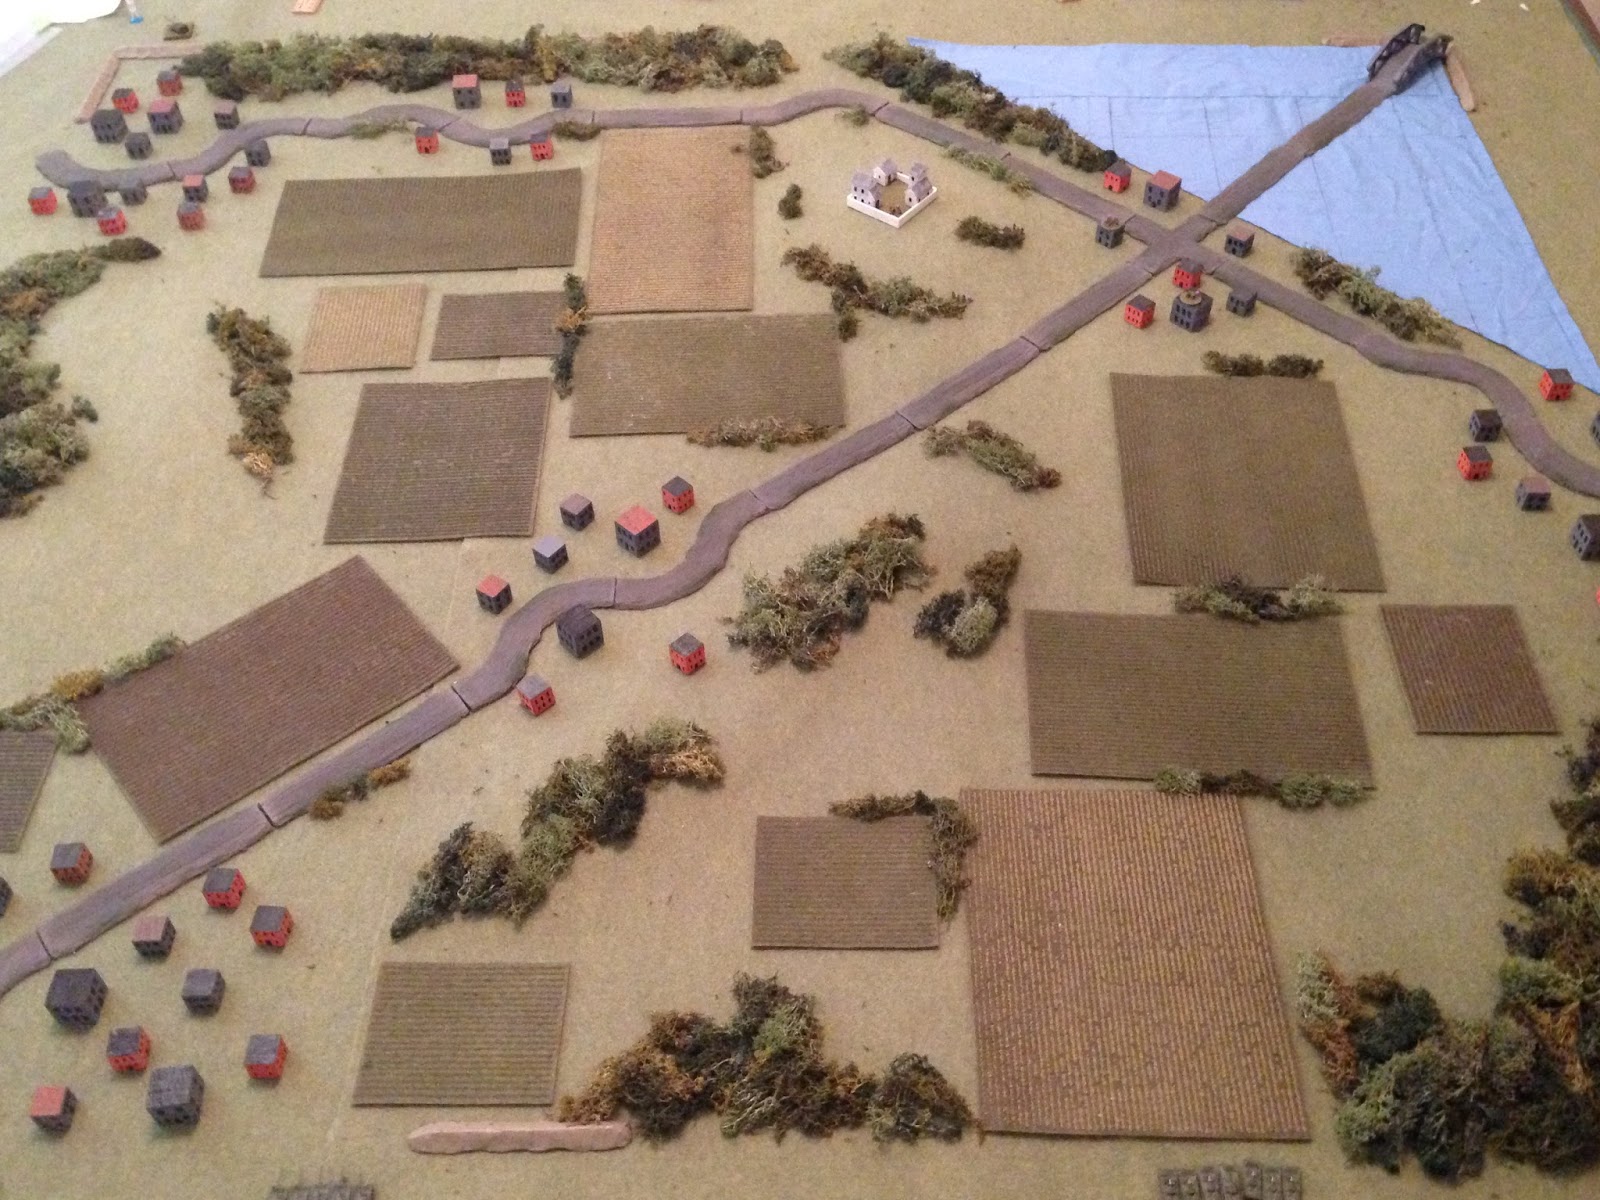
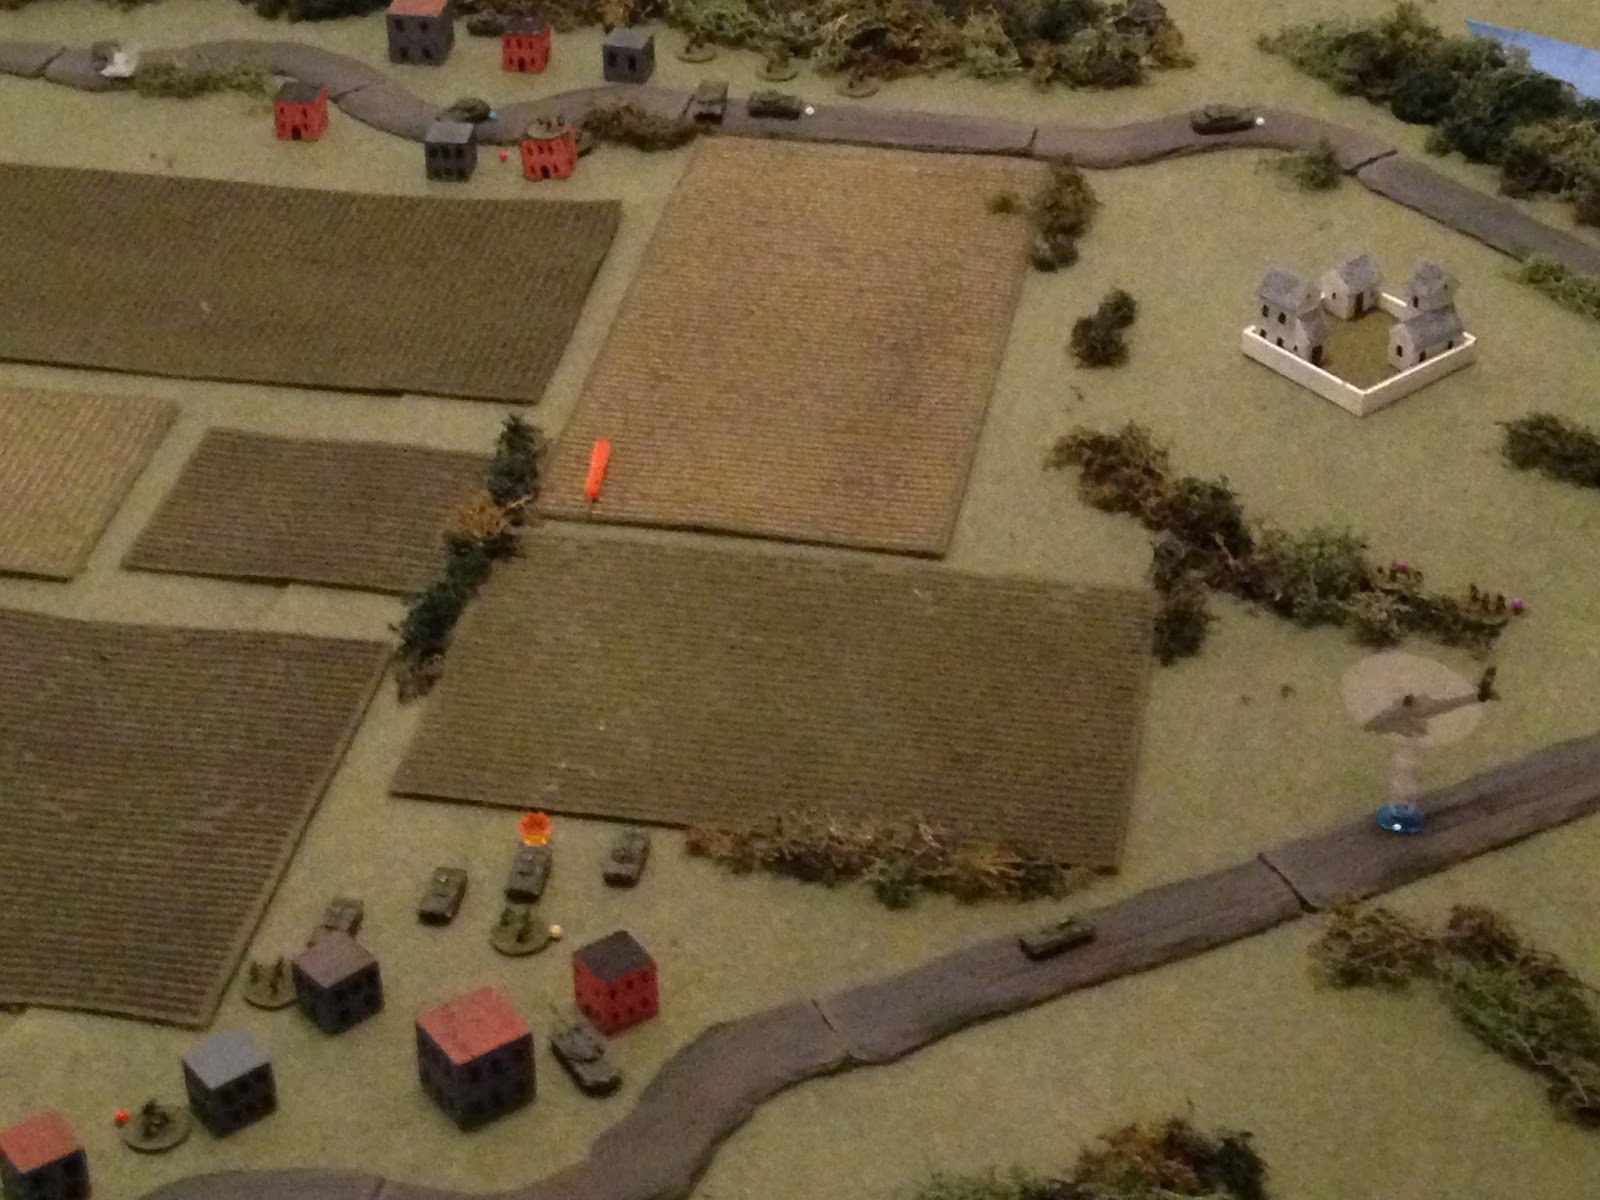
The map, looking west to east (north is left), with the Soviets entering from left and top left, and the NATO forces trying to withdraw via the bridge at bottom right. The Bundeswehr bridge force is at center right near the crossroads, while Col Lacy, Lt Ensmith's Mech Plt, and Lt Travers' tanks are entering the table via the road at top right, while Capt Phillips leads Capt Sighe's Mech Plt and the Wpns Co attachments entering the table via the road at bottom center.

Looking south to north, bridge just off camera at bottom left. It's hard to tell because I put the hills under the mat now, but there is a ridge running southwest to northeast at center, running along the top side of the main road. There's also a sizable hill at top left, though it probably won't factor into the battle, though there's another sizable hill at far right center, which does block LOS between the Team Whiskey entry point on the road at right bottom and the Soviet entry point between the two treelines at top right.
Looking north to south from the Soviet baseline. The Soviets will have elements coming on table from far left, bottom left, and the gap at bottom center-right.
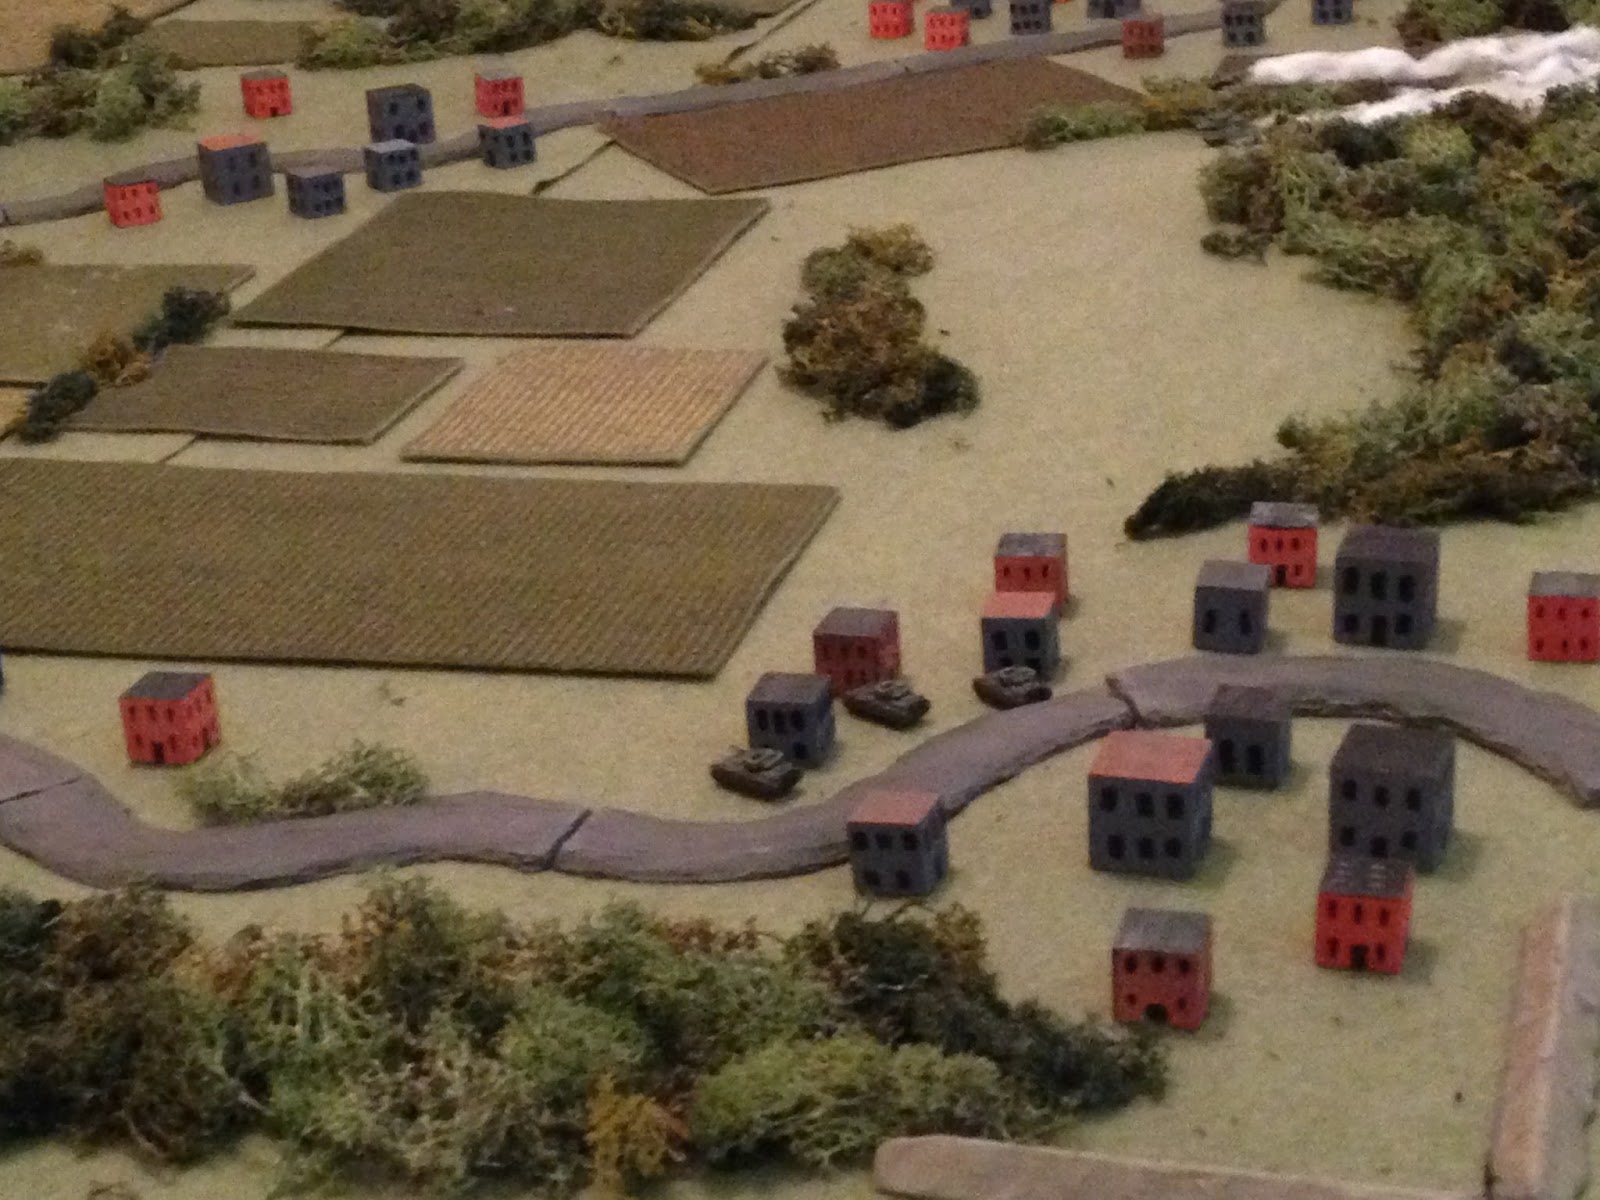
Soutwest corner of the board. You can see the West Germans around the crossroads, with their two Milan ATGMs, two MGs, three rifle teams, and command team (some are on the small hill at center right in/around the Monastery). Capt Phillips and Capt Sighe's men will come on the table via the road at top left.
The southeast corner, showing where Col Lacy, Lt Travers, and Capt Sighe's men will come on at far right on the road.
Looking north to south at the northeast corner of the board, you can see how the Soviets plan to attack the table. At far left is "Tank 1" (5 T-72s) and Mech 1 (BMPs and infantry); at bottom left is the Soviet CO, ZSU-23/4 air defense vehicle, and Mech 2 (BMPs and infantry), with "Tank 2" (5 T-72s) at bottom right. Tank 2 will come on just right of the village at center, then follow the ridgeline (top right) south (up), paralleling the road at center.
Looking north to south at the northwest corner of the board, you see "Mech 3" (BMPs and infantry) at bottom center. Tank 2 is just off camera to left, and you can see the ridgeline at top left. The US force under Capt Phillips and Capt Sighe will come on the board via the road at top right, and the German positions are at top center-right.
Closeup of Team Whiskey elements in the southeast. The Colonel, four tanks, and Lt Ensmith's three Bradleys with infantry.
Looking east to west at the German positions. Their CO is in the Monastery, which is probably a bit too obvious a position, but he wants to have good LOS to call in his arty. There are rifle teams at bottom right, top center, and center left (in treeline). Milan ATGMs are at center bottom (just below Monastery) and in building at far left, while MGs are at top left (one in treeline, other in building). They are lying in ambush for the Soviets.
Looking west to east at the southwest corner. Here we have Captain Phillips in his M-113, an MG and TOW team in an M-113, and Capt Sighe's three Bradleys and rifle teams.
Looking east to west at the northeast corner. You see Soviet Tank 1 and Mech 1 at bottom left; they will enter the board moving straight ahead, then turn left (south) around the trees at left, which are atop a hill blocking LOS. At right you have the enemy CO, AA vehicle, Mech 2, and Tank 2. At top right is Mech 3. German positions are at top center.
This is the last fight of Team Whiskey's campaign, and it's time to get it on!
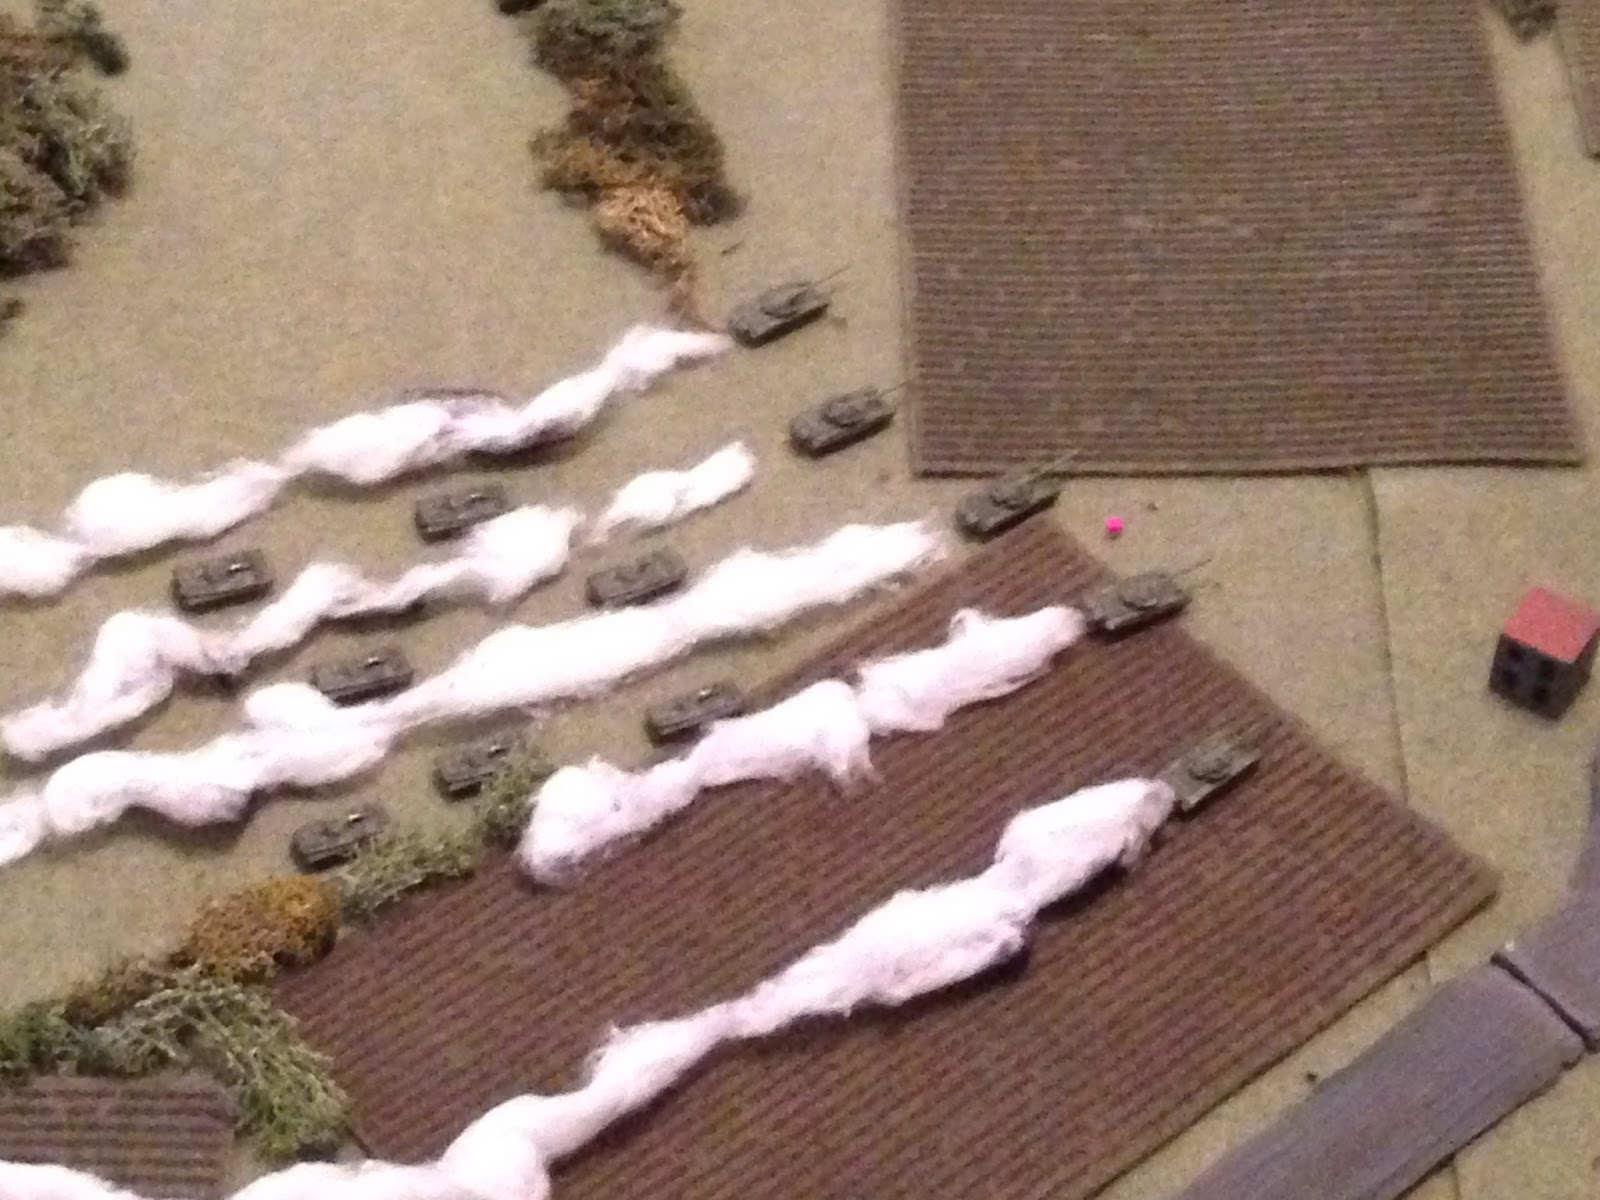
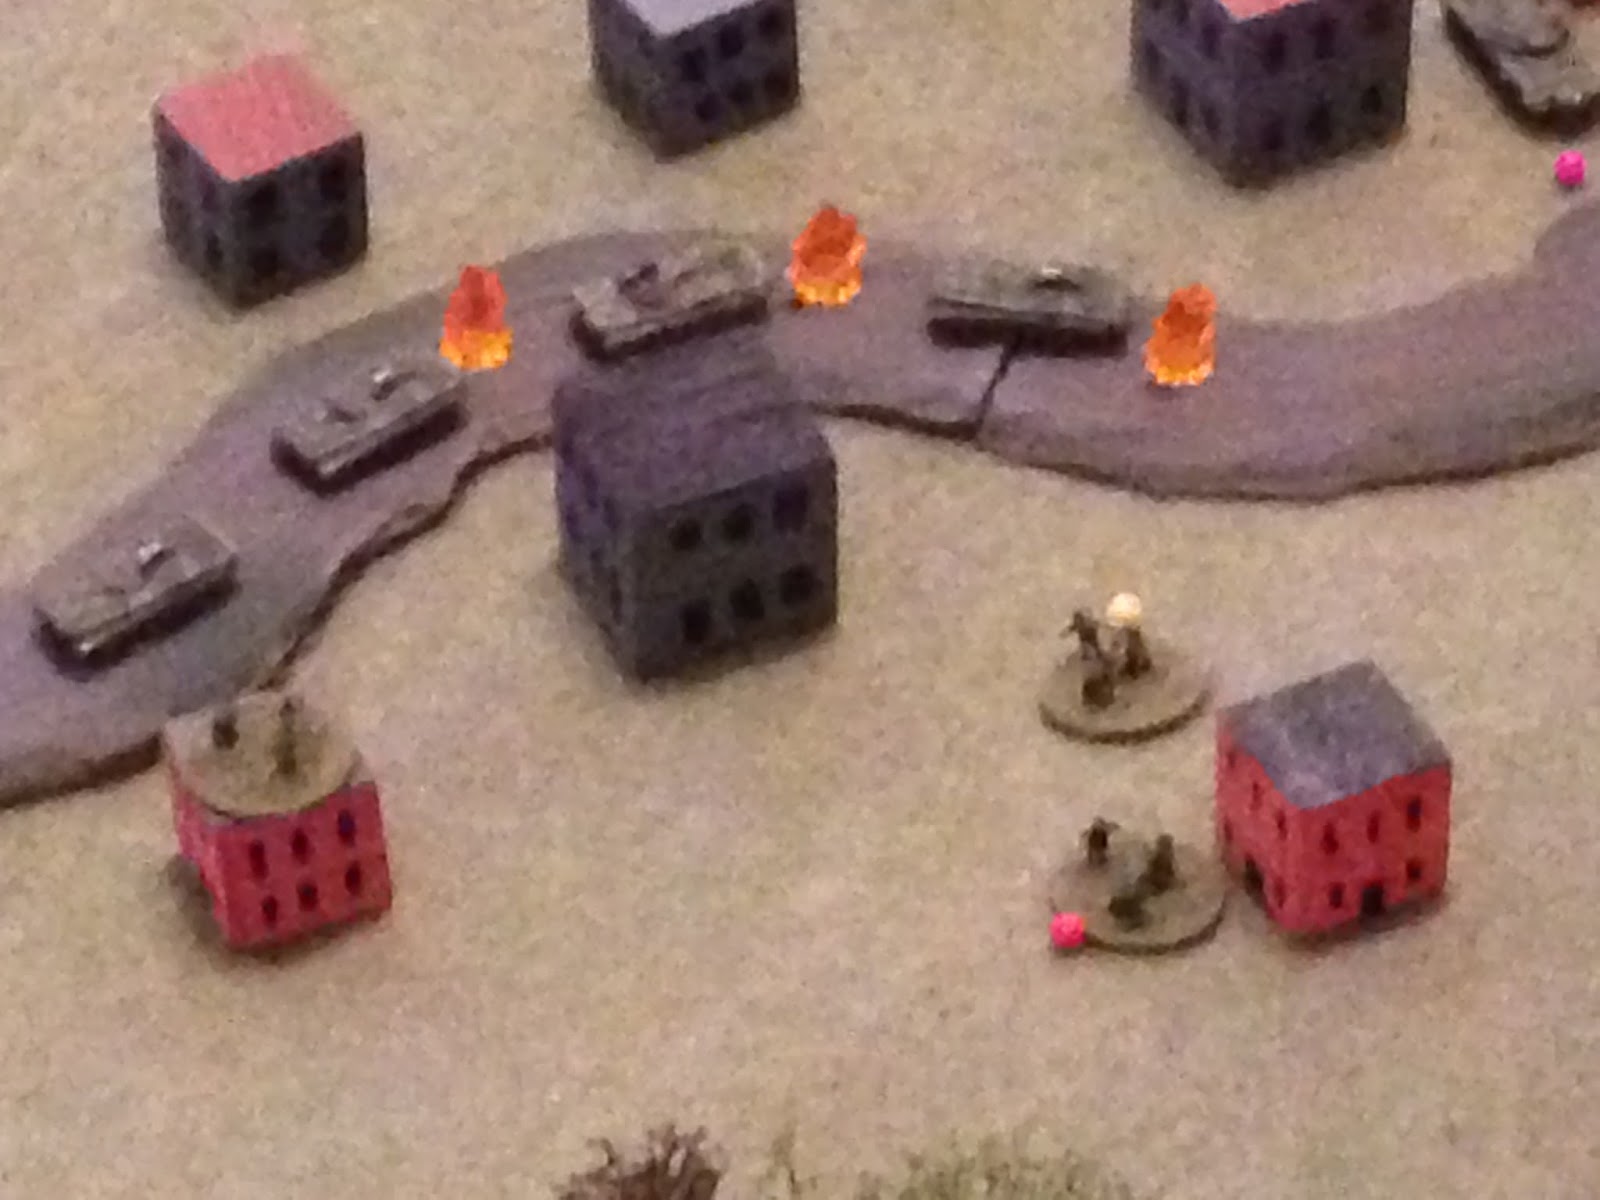
Looking north to south, the T-72s of Tank 1 come on the table, laying smoke.
And somehow, ludicrously, they spot German troops at the Monastery (top right).
And so four tanks launch HEAT rounds at the Monastery.
The German CO is forced back (center left, from red bead at center), a rifle team is pinned (top left), and the Milan team just right of the CO is knocked out.
For @#$%'s sake!!! I can't believe the Soviet spotting rolls, but the firing rolls too? I've got a bad feeling about this...
Looking southwest to northeast at Team Whiskey's western entry point, the Weapons Company M-113 comes on and drops off the MG and TOW teams, who crawl into a couple buildings unseen, taking up overwatch positions to cover the rest of the western force as it comes on. At top left you can see Soviet Mech 3 waiting to come on.
Back in the northeast, Mech 1 comes on behind Tank 1, with its infantry mounted up.
Looking south to north at the southeast corner of the table (you can see the smoke from Tank 1 at top right), Lt Ensmith's Bradleys come on board in the east and take up overwatch positions.
Looking west to east at the northwest corner, Mech 3 comes on the table (bottom left, with the US Wpns Co guys just off camera to bottom right). Tank 1 and Mech 1 are at top left, Lt Ensmith's Bradleys are at top right, and the Germans are just off camera to right center.
The lead BMP spots the Wpns Co M-113 and fires its 30mm gun.
The track is hit and damaged, but the crew stays and the vehicle can still move. The MG (left) and TOW (right) are still unspotted.
Looking south to north at the German position, their remaining Milan ATGM fires on a T-72 of Tank 1.
The gunner is tired, scared, and his tracker hasn't been well maintained, and the round completely misses. The target T-72 (bottom left) returns fire.
But he misses, and so the Milan team falls back (bottom left, from top right).
Looking north to south at the northeastern corner, the Soviet CO comes on in his BTR50 then hops out into a building (center right), with the ZSU nearby (just right of the CO), while Mech 2 comes on the table. That's Tank 1 and Mech 1 at top left, the explosion being the missed Milan shot.
The Soviet CO marks the Monastery (top left) for artillery, while the Mech 3 commander marks the Wpns Co position (bottom right) for the Mi24 Hind.
Looking west to east at the US west entry point (Wpns Co guys at bottom right), Captain Sighe's Bradleys come on the table, with Sighe's vehicle using its Bushmaster to engage the nearest Mech 3 BMP.
The lead BMP is ripped open, knocking out its rifle team also, while the BMP behind it has its turret damaged, though the crew stays with the vehicle.
Sighe's 1st Platoon dismounts, while Captain Phillips comes on table in his track (top right). He dismounts his command team and hops into a building, trying to rally the Wpns Co M-113.
The rally fails and the Wpns Co M-113 falls back (bottom right, from center right, while Capt Phillips marks Mech 3 (top left) for the Apache.
Damn what a terrible picture, my apologies everyone... Looking north to south with Mech 3 at bottom right, Mech 2 at bottom left, and Tank 1/Mech 1 at far left, the five T-72s of Tank 2 come on the table (center, just right of the ridgeline).
And then Soviet arty pounds the Monastery.
The German rifle team at top left is knocked out, while their CO is forced to fall back again (bottom left). Perfect.
In the east, Col Lacy leads Lt Travers' tanks on the table, with Lt Ensmith's Bradleys in overwatch positions.
Back in the west, Capt Sighe and his rifle teams move right, then try to rally the Wpns Co track (bottom right).
But the rally fails again, and the crew abandons the vehicle.
Everyone hears the 'whup-whup-whup' of rotors, but with all the bildings, the ridgeline, and the hills, no one can tell where it's coming from. All eyes turn skyward, and all think the same thing: "Is it ous or theirs?"
Theirs, of course.
The Hind (top left) rolls in with 57mm rockets, as the initial call was for an M-113 and possibly some infantry. But he now sees the Bradleys of 1st Platoon (bottom right), so he'll be looking to use some ATGMs in the near future.
Not good: Captain Phillips, his command team, and his track (top right) are all knocked out, while Capt Sighe falls back and hunkers (bottom center, red bead).
Back in the center, a German rifle team sprints to the rear to rally his commander (bottom left, from purple bead at bottom right).
The rally is successful (bottom left), so the German CO moves up (far left, in treeline) and marks Soviet Tank 1 and Mech 1 (top right) for their artillery.
But now the sound of more rotors joins the fray.
And a load of Hellfires is launched at the BMPs of Mech 3.
I'm really hoping to bust a bunch of them open, seeing as how they're still pregnant with infantry.
One BMP is knocked out, taking its rifle team with it (third in line), while the one behind it is pinned.
I've had better (in my best Jim Carrey from Liar-Liar voice).
And then the German artillery strikes Tank 1/Mech 1.
Yahtzee!
Oh wait, I hate this game. The Soviet armor of Tank 1 and Mech 1 comes through the 155mm barrage totally unscathed. And that's how Turn 1 ended...
Turn 2 starts with the commander of Mech 3 thinking "hey, we're under attack, we'd better dismount the infantry so they don't get blowed up every time one of our BMPs gets blowed up." They try to rally the pinned and hunkered BMPs (yellow and red beads, respectively).
Both rallies succeed, and the rest of the infantry move up (bottom left, with Capt Sighe's force, already beat to crap, at top right). Their CO marks 1st Platoon's Bradleys for the Hind.
The Hind is not yet ready, so Tank 1 moves up in the east (center), still laying smoke (Mech 1 is behind them, Mech 2 is just visible at bottom center-left, and Tank 2 is at bottom right). The Soviet tanks, moving at speed and eyes to the front (and far left T-72 masked by terrain), fails to spot Col Lacy's force at top left.
The German CO (center bottom, just left of the Monastery) again marks Soviet Tank 1 (top right) for arty, while the Milan Team (bottom left) reloads for another shot.
In the west, a 1st Platoon rifle team moves over to rally Capt Sighe's command team.
It's successful, so Capt Sighe leads his team forward and launches a Stinger at the Hind!
The Hind is hit! The giant bird of prey doesn't go down, but does slowly limp away trailing smoke.
Finally something goes right! The bird wasn't downed, but it's out of the fight.
The BMPs of Mech 3 move forward against the Bradleys of Capt Sighe's 1st Platoon. The Brads don't react fire because they know they need to fire and move, and react fire means they won't be able to move this turn, so they resolve to take what the Soviets dish out, which is coming in the form of 30mm cannon rounds.
On the left, Vehicle 1 (V1) is hit and immobilized, but the crew stays. In the middle, V2 is missed and returns fire with its 25mm gun. On the right, V3 is also hit; the crew stays here too, but this vehicle is also immobilized, while the MG next to them is pinned. This is not good; see, if your vehicle is immobilized, it doesn't stand a very good chance of retreating over the river ;)
V2's return fire knocks out a BMP (top center left explosion), but two more BMPs open up, forcing V2 to fall back (bottom right, red bead, next to immobilized V3 and pinned MG team). The Mech 3 commander marks 1sst Plt for Soviet artillery.
And due to lucky cards and a great activation roll, the 122mm rounds begin landing immediately!
V3 (center left, with V1 at bottom left) is knocked out.
Looking northwest to southeast, with Mech 3 at center-bottom and US 1st Plt at far right, Soviet Tank 2 and their ZSU move up in the Soviet center (column of tanks at left).
The ZSU (top left, at the tail-end of the Tank 2 column, with Mech 3 vehicles at left) takes a long range shot at the Apache (bottom right), but misses.
Seeing the advancing infantry of Mech 3 (top left), the German MGs move left to take up position (bottom right, with US 1st Plt at bottom left).
The loaded BMPs of Mech 1 move up behind Tank 1 back in the northeast.
With Soviet Tank 1 and Mech 1 at left, the loaded BMPs of Mech 2 push up the road, with the Soviet CO accompanying them (center, just right of the road). Tank 2 is at bottom right, on the other side of the ridgeline.
Over with 1st Plt in the west, the TOW team picks out a BMP that's just beyond minimum range and launches.
The target BMP is knocked out (bottom center-right), while another is pinned (yellow bead at center) and another is forced to fall back and hunker (far left, red bead).
The TOW team falls back (blue bead at far right) and tries to rally the MG team (yellow bead).
It's successful, so they move over to V2 and try to rally them (center).
This also succeeds, so V2 leaves the MG team (bottom right), moves left, and fires on a BMP while trying to rally V1 (bottom center-left, red and white beads). The BMP's turret is damaged and the crew bails, while V1 only gets rallied up to 'pinned.' V1 then self-rallies, and they're good to go.
With Capt Sighe's command team right below him, and the 1st Plt Bradleys just off camera at bottom left, the Apache fires its last salvo of Hellfires at the T-72s of Tank 2 (top left).
A single T-72 is immobilized and the crew bails.
On the far right, Bradleys V1 and V3 of Lt Ensmith's 2nd Plt launch, one at a T-72 of Tank 1, the other at a BMP of Mech 2 (on the road).
At center-top, one T-72 is knocked out while another is pinned by one missile, while the other destroys the lead BMP (center right, explosion), which leads to a catastrophic explosion which destroys the BMP behind it as well, and forces the Soviet CO's BTR50 (bottom center-left, red bead) to fall back and hunker. Both rifle teams in the stricken BMPs are toasted, too.
The Bradleys displace (bottom left/left, from the smoke trails at center) and kick out their rifle teams.
And then Colonel Lacy moves up, with Lt Travers' tanks following. Three of the Abrams are able to acquire targets and fire at T-72s of Tank 1.
Two enemy tanks are knocked out, and one is pinned by the round that knocked out a nearby T-72. But that means one of the Abrams missed (I won't say who, Mr. Travers), so the T-72 gets to return fire. The last Abrams fires.
At top left, the last US round immobilizes a T-72 and the crew bails, while at bottom right, an Abrams is hit. The turret is damaged, but the crew stays.
The German rifle team that previously rallied their commander moves left (bottom center, in the trees just above the road).
And the second German fire mission lands, again hitting Tank 1 and Mech 1.
And it does quite a bit better this time: a BMP and its rifle team is knocked out (center right explosion), one is pinned (yellow bead right behind the KO'ed BMP), and two more are forced to fall back and hunker (top left and center left, red beads). But the German arty only has one more fire mission.
On the US right, Lt Ensmith's grunts begin moving right, and one team stops to rally the damaged M1.
But it fails and falls back (bottom left, from center).
And that's the end of Turn 2.
In the center, the BMPs of Soviet Mech 2 move up the road, while the Soviet CO bails out of his BTR50 (bottom center-left) and rallies it.
And then Mech 2's infantry dismount. Their CO moves up (into orange building at bottom center left) and marks the US positions at top center left for artillery.
And then the CO's BTR50 moves over to rally a BMP belonging to Mech 1 (center, yellow bead, from the CO in orange building at far right). The BTR rallies the BMP.
Looking southwest to northeast at the US far left, Bradley V1 of Capt Sighe's platoon react fires at a T-72 of Soviet Tank 2, which is moving up south.
The target tank is knocked out, but his partner returns fire and pins V1 (top right, with infantry and BMPs of Mech 3 at bottom right).
When the other two T-72s of Tank 2 move up, Capt Sighe's V2 launches a TOW in reaction.
A fantastic shot! The target tank is knocked out, and its ammo detonates and damages the tank next to it, which causes the crew to bail out and the last remaining T-72 of Tank 2 to fall back (top left).
Cautiously following Tank 2, the Soviet ZSU creeps forward and lets rip with its four 23mm guns on the Apache (top right). Another miss!
On the US left (V1 and V2 at far left, Capt Sighe's team next to burning track at far right), the MG team sneaks into a building (center, orange building) while the US TOW team (just left of MG) reloads its missile launcher.
But then Soviet arty falls on the US right...
One of my @#$% tanks is knocked out, and a @#$% Bradley has its turret damaged. Its weapons systems are inoperable, but the crew stayed and vehicle is mobile, once the crew is rallied (red and white beads).
In the NATO center, the German Milan Team rushes to the roof of a building (bottom right), sets up, and launches a missile at a BMP of Soviet Mech 2.
The Milan Team (bottom right) takes heavy fire and flinches, causing it to miss its target. That's two shots, two total misses!!! To add insult to injury, the return fire puts the Milan Team out of the fight. To recap, two German Milan Teams, one killed off before firing a shot, the other fires twice, doesn't hit a damn thing, then is knocked out by BMP return fire. What a day...
With the explosion at center bottom-right showing where the missed Milan shot hit, the infantry teams of Mech 2 push forward (T-72s of Tank 1 at bottom left and Tank 2 at bottom right).
On the US left (Bradleys V1 and V2 just off camera at bottom left, TOW and MG team visible, German MG teams and rifles visible at far right in buildings), Captain Sighe leads his dismounted infantry teams along the water's edge towards the bridge, sheltering behind the cover of the treeline (bottom right).
Opposite them, the infantry of Soviet Mech 3 push forward, minus their commander and a rifle team which fell back to rally two BMPs (yellow and red beads at bottom center).
The hunkered BMP is good (far left), but the damaged BMP fails and falls back to hunker (red and white beads at bottom left).
Incredibly, once again, a US ambush is sniffed out with an incredible spotting roll. The Soviet infantry are apparently extraordinarily alert and spot the US MG team as they press forward, and four enemy rifle teams take the MG team under fire.
Forcing it to fall back (top right, red bead). The TOW team is at center, V1 and V2 at bottom left.
Back on the US right, Lt Ensmith and his boys push west (left) towards the bridge, stopping to rally the damaged M1 at bottom left, while Col Lacy moves over to rally the damaged Bradley.
Both rally attempts are successful, and the CO moves dismounts and moves into a building (center left, orange building).
Each Soviet tank element began with five T-72s, and each is now down to one operational tank. The last T-72 of Tank 1 (left) darts and dodges amongst the building at bottom center, then takes up a firing position (center right, between two buildings) and sends a 125mm sabot round downrange...
The Abrams at top right is hit, immobilized, and the crew bails out.
The German CO moves up (center left) into the treeline next to one of his rifle teams, then marks Soviet Mech 2 (top center) for his last artillery fire mission.
While the German MG teams (center left, in buildings near crossroads, with CO and rifle team at center right) once again nervously re-position in preparation to receive the Soviet infantry, now coming from top left and top right.
On the NATO right, Lt Travers moves his tank west (left), takes up position, and fires on Soviet infantry of Mech 2, pinning them, while the damaged M1 makes its break for the bridge (bottom left). Meanwhile, the CO (center, in orange building right next to Lt Travers' tank) marks Mech 2 for the Apache.
The Apache immediately swings in, hugging the deck and cutting loose with its 30mm chain gun on the Mech 2 BMPs.
I rolled up a pin and a fall back, and I was so disgusted with the pitiful show of marksmanship I didn't even roll to see which targets were hit, I simply assigned the results to two enemy infantry teams, rather than allowing the BMPs the possibility of being affected...
Then, to once again add insult to NATO injury, the Apache gun run is immediately followed by the 155mm shells of the German artillery's last fire mission.
The rounds fall in and around the Soviets of Mech 2, but all that happens is a single rifle team si forced to fall back and hunker (red bead at far left).
Back on the US left (Soviet right), one BMP of Mech 3 successfully self-rallies (bottom left), while the other remaining BMP moves forward towards Capt Sighe's Bradleys and the Wpns Co teams (BMP at far right, US forces off camera to top right).
The lead BMP opens fire with its auto-cannon on Bradley V1.
V1 (bottom left) is knocked out, and V2 is pinned.
That really sucks. 1st Plt is down to one Bradley, it's unable to move due to being pinned, and it's about to be overrun...
Back on the US right, the damaged 2nd Plt Bradley begins moving west towards the bridge (white bead at left) while another (bottom right) reloads and the last takes up overwatch (center, next to CO).
The last act of Turn 3 sees two BMPs of Soviet Mech 1 (looking northeast to southwest: bottom center red bead and bottom right red bead, on the far Soviet left flank, with Mech 2 at top right, US eastern force at top left, and wrecks of Tank 1 at center) successfully self rally while the four remaining BMPs move left through a cut in the woods (center left).
Once again the Soviet CO (bottom center-left in orange building) marks the US eastern force (top center-left) for artillery bombardment.
And then he dashes out of the building at bottom center-left to go rally two rifle teams of Mech 2.
And then the BMPs of Mech 2 break cover, advancing on the US eastern force. Lt Travers (top center) calmly calls out: "Gunner, HEAT, AFV at 12 o'clock, 500 meters, fire." "On the way!" BAM!
Travers' round finds its mark and rips the target BMP to pieces, but the remaining BMPs ripple fire a a volley of AT5 Spandrel missiles in return.
Travers' mighty Abrams has two rounds strike his frontal armor but fail to penetrate, but his things are not happy inside the tank and Travers is busy trying to get his just-knocked unconscious loader back into the fight when his driver panics and retreats the tank (bottom center, red bead, from explosions at center left). However, the retreating damaged Bradley takes a missile in the flank and is knocked out (center left).
Meanwhile, the last BMP of Mech 2 moves up the road (bottom center) and somehow, for the fifth time this game, smells out a NATO ambush with a fantastic spotting roll. the BMP commander notes the German CO and one of his rifle teams in the treeline at right, then opens fire with his 30mm cannon, knocking out the rifle team.
Back on the US left, realizing they need to get to the bridge before they get left on the wrong side of the river, the US TOW team decides to move left to V2 (far left) to rally it, rather than fire its missile at the enemy. Meanwhile, the US MG team (bottom right) self rallies. Both rallies are successful, so V2 is ready to move; the TOW team hops in to catch a ride.
While back on the US right the Soviet arty crashes down again.
The Bradley on overwatch is hit, damaging its turret. Once again the vehicle is still mobile, but its weapon systems are inoperable (red and white beads at center).
In the center, the last remaining German rifle team sneaks into a building (center left, with MGs at top left and CO at top right.
While on the US right, Col Lacy sprints to Lt Travers tank to rally it (bottom center) while his track moves to the damaged Bradley (center right) to rally it.
Lt Travers' tank is good, but the damaged Bradley fails and falls back to center left. The last remaining fully operational Bradley moves to them and tries to rally the vehicle, but they only get up to pinned.
While Lt Ensmith and his grunts hoof it west towards the bridge (bottom left, along the treeline), almost catching the damaged Abrams (white bead).
As an aside, I'm actually starting to feel a bit scared. Despite poor supporting fires rolls and the fact my anti-armor ambushes keep getting spotted, I was feeling pretty good about my orderly withdrawal to the bridge. But I've taken a LOT of casualties and my surviving units are feeling pretty disjointed, so I'm starting to feel less like a withdrawal and more like a route.
At bottom right, the Soviet CO and his BTR50 move up and rally troops, while the BMPs of Mech 1 push hard ahead (far left), breaking out of the treeline into the rear of the remains of the US eastern force.
The lead Mech 1 BMP fires a Spandrel at the retreating, damaged Abrams, while the next BMP fires its gun at Col Lacy's M577.
The Abrams (bottom left) suffers a near miss that makes it find cover and hunker, while the Colone's track (top right) is knocked out.
And then the last T-72 of Tank 1 moves up (ahead of the BMPs of Mech 2, at bottom left) and fires his main gun at the damaged Bradley.
The Soviet main gun round misses, so the 'good' Bradley returns fire with a TOW.
The last T-72 of Tank 1 (bottom right) is knocked out by the guided missile, while the next BMP in line is pinned (yellow bead, with BMP above it being the one Lt Travers knocked out last turn).
Back on the US left/Soviet right, the infantry of Soviet Mech 3 push hard at the Bradley, MG team, and TOW team still in the village on the US left flank.
V2 react fires with its coax machine gun.
One enemy team goes 'men down,' but their partners launch an RPG at V2.
Well, the great news is that V2 (center left) was knocked out, as was the TOW team they were carrying.
Oh wait, that's not great news...
Back on the US right, the damaged Abrams really wants to get to the bridge (off camera to bottom left), but he's busy hunkering behind some trees. So he tries to self rally, but fails and has to fall back again (bottom left, from red bead at far left, with Lt Ensmith's dismounts nearby).
Back on the Soviet right with Mech 3, the damaged BMP picks up their commander (bottom left), while the other BMP catches up with the infantry (center). Amazingly, for me, they are unable to spot the Germans (in the buildings at top center).
Already there, the Apache makes another gun run on the BMPs of Mech 2 in the Soviet center.
One BMP is immobilized so the crew bails out (far right), while another BMP (center-bottom) and a rifle team (bottom left) fall back and hunker.
With the US MG team (bottom left) being the only NATO team left on the US left, Capt Sighe leads his dismounts to the bridge, where you can see one team has just gotten onto the highway (far right, with Germans to the left of him).
In the Soviet center, the last tank of Tank 1 was just knocked out and the BMPs of Mech 2 just got the crap kicked out of them, so the riflemen of Mech 2 fall back into the village to help rally units to get back in fighting shape. They also fall a team back to rally the last T-72 of Tank 2 (indeed, the last Soviet tank on the battlefield).
The Soviets don't have a lot of luck with their rally attempts, with various units falling back again or staying pinned, but they do manage to rally the tank.
And so the damn T-72 goes full speed ahead (far right, just above all his knocked out brothers, from bottom center), where he somehow spots the damn German MGs (top right)!!! Meanwhile, the ZSU moves up the center ridgeline to to engage the US attack helicopter at point blank range (center)!!!
Tracers are flying skyward at an alarming rate...
But they miss, and the Apache pilot is able to dip left and his gunner opens fire on the enemy air defense vehicle. The ZSU is ripped to pieces!!!
But then the Soviet tank fires several main gun rounds into the buildings occupied by the German MGs, pinning both teams. They activate next and are forced to rally off the pins rather than displace...
And that's the end of Turn 4.
Turn 5 starts with Col Lacy (center left, dismounted on road) marking Soviet Mech 1 BMPs (top right) for the Apache, then moving over to rally the damaged Bradley.
The rally attempt failed, so the Bradley fell back and hunkered (far left, red/white beads, from center right), but as they were doing that the Apache thundered in to make a gun run on the enemy BMPs.
The Apache's 30mm chain gun hammered out rounds, tracers flying to and fro, ricocheting into the sky, but ultimately not causing one lick of damage to the enemy's vehicles or morale. Yes, you read that correctly, a total miss.
Which was followed by the Soviet CO launching an SA-16 (surface to air missile) at the Apache, but it also missed.
But the decisive moment was upon us; the total miss by the Apache...
Allowed the BMPs of Soviet Mech 1 to charge right into the US eastern force.
Col Lacy's command team launched a volley of LAWs at an encroaching BMP.
Causing it to fall back and hunker (far right, black and red beads, with Col Lacy on road at center). But the remaining BMPs opened up with everything they had.
And they put on a mighty fine display of shooting. The damaged Abrams (far left) and damaged Bradley (center) were both knocked out, while Lt Ensmith's command team (center-bottom, white bead) took heavy casualties and one of his rifle teams fell back and hunkered (bottom left, red bead).
But the Russkies ren't finished...
Then they kick out their dismounts (with Col Lacy at bottom left).
The Soviet infantry push forward, drawing react fire from the last Bradley (left), Lt Travers' tank (bottom center), and Col Lacy's command team (center-left, on road).
The Bradley (left) knocked out a Soviet rifle team, but the other fire was ineffective and the Soviets launched a volley of rockets at Lt Travers' tank.
Lt Travers is seen firing his .50 cal HMG until flames engulfed him and and set off ammunition in his tank (bottom left), while, similarly, Lt Col Lacy (center-left, on road fighting three Soviet rifle teams) was seen firing until all ammo was exhausted, then continuing with fists and using his rifle as a club until overwhelmed by a mass of Soviet infantry.
Having overrun the Colonel's team, the Soviet infantry move forward, then spot the last Bradley.
They immediately close assault the vehicle, climbing over it to fire small arms into vision ports and stuff hand grenades into hatches and road wheels.
The Apache sees this, turns, and fires its 30mm gun into the fray, trying to help the Bradley by 'scratching his back.' But it's too late, and the Bradley's crew succumbs to bullets and fragments bouncing around the inside of the vehicle.
Lt Ensmith and his boys, the last survivors of the US eastern force, rally themselves.
Then push west (left) towards the bridge, hugging the waterline, much like their counterparts in 1st Platoon on the opposite side of the battlefield. The German force remains in their positions (top left), covering the US withdrawal.
The US MG team catches up with Capt Sighe's infantry at the bridge (bottom center-left), while the Apache moves over to help cover the withdrawal of the Germans.
The Apache is laying it down while 1st Plt is almost off the map (bottom right), 2nd Plt has just reached the bridge, and the Germans are collapsing back to the bridge.
The entire NATO force is now on its way across the bridge. NATO has suffered incredibly high losses, but the Soviets have been punished too. Lt Ensmith catches up to Capt Sighe: "You know, I think we just might..."
A blinding flash of light, and Team Whiskey is no more. I'm reminded of an anecdote by a (then-) Sergeant Mullen, who explained that you were supposed to report in the detonation of a nuclear weapon by shooting an azimuth from your position to the mushroom cloud, then estimating distance by counting the 'flash to bang time.' "The flash to bang time, Sergeant?" "Yeah, you count one-Mississippi, two- Mississippi, three-Mississippi. You start counting when your eyes are melted out of your skull, and you stop counting when the blast wave picks you up and throws you a couple hundred yards. Whatever your number was, that's how many klicks away the blast was." "Oh..."
Well, that's it folks! It's been a tremendous amount of fun; a lot of work, but definitely a labor of love, and I've very happy to have been able to be a part of the playtesting for this new scenario book. Ben Lacy of Britton Publishers has just released the book of ten scenarios, titled "Fulda Gap," available here: http://brittonpublishers.com/Skirmish_Scenarios.htmlf
Sorry to seem so 'commercial,' but if you've followed any of my batrep postings you'll know I've been quite a fan of Britton Publishers' scenario books for several years now, and I own about 15 of them. They've been a great resource for me, and I so I highly recommend them.
In any case, back to the battle. It was my usual knife-fight in the slaughter house, and I got my butt kicked! As usual, NATO put heavy casualties on the Soviets, but they rolled over me. I made things a little more difficult than perhaps need be (split the US force between east and west entry points), I had some very bad luck (two arty fire missions and an Apache strike hit absolutely nothing, and all my ambushes got sniffed out by incredible Soviet spotting rolls), and I probably made a tactical mistake in not pushing faster for the bridge in Turn 1, choosing instead to hang back until Soviet forces were on so I could strike at them before moving in earnest towards the bridge, which allowed the Soviets to tie me up with supporting fires then roll over me with their superior numbers. But it was a great game, not settled until right at the end.
I hope you guys have enjoyed this as much as I have. I always am very appreciative of comments (here on the blog and/or on the various forums I post), and I'd really like to hear any thoughts on the campaign as a whole, now that it's finished.
I've got lots of new ideas/old ideas that need to be finished, so stay tuned, you know I'll be starting another campaign soon.
V/R,
Jack


A very dramatic finale to a tremendously well told and exciting campaign!
ReplyDeleteTake a bow Jack my lad ;)
Thanks for all the entertainment
Thanks John, glad you liked it. What've you been up to?
DeleteV/R,
Jack
Very exciting end. Your campaigns give me a lot of ideas for if and when I get mine started.
ReplyDeleteChris,
DeleteCool man, thanks, and I can't wait to see your campaign. If there's anythin I can do to help, please let me know.
V/R,
Jack
Thank you Jack. I truly appreciate all you have done to help make this book a success. Great AAR my friend. Ben
ReplyDeleteBen,
DeleteThe pleasure was all mine, thanks for letting me be a part of this, and I hope there's Motrin our futures. I was trying to look at In Country and Cuba Libre, but my internet has been down the past couple days...
V/R,
Jack
Great campaign, and a lot of anguish at the end. Thanks for sharing it. I suspect that you've sold me on the book as well
ReplyDeleteIrish,
DeleteThanks man. I figure this is as close I'll get to a massive campaign like yours. And my anguish was solely about my shooting dice! Of course I high recommend the book.
V/R,
Jack
What a saga! I've been flowing along in the background and I'm really impressed by the detail and depth of your AAR's. The terrain is great too...simple but really effective.
ReplyDeleteI wonder what you'll be up to next???
:O) Jim
Jim,
DeleteThanks, I appre the kind words. That is the big question, isn't it? What to do next. Stay tuned!
V/R,
Jack
Great fun reading these. Thanks for the work.
ReplyDeleteThanks buddy. I don't mind putting in the work as long as there are fed out there reading them.
DeleteV/R,
Jack
Hello Jack
ReplyDeleteWhat a fantastic end. I really thought a few more units would make it over the bridge (not just Norm and some remnants). While it did seem like a route, i had thought that you had knocked enough stuffing out of the Soviets so that they would not have enough to stop the escape, I did not realise to near the end how little was left of the NATO forces.
The whole campaign has been fantastic to read - 10 games, 1000 pictures, 10,000 words (I am guessing here obviously for effect but it must be close-ish). An epic! It really shows why campaigns are so much fun.
And thank you for detailing out my small part.
Shaun,
DeleteAwesome, I sup you're right: I'm a member of the 10-1000-10000 club! The campaign was a lot of fun, and using the names of various forum members certainly makes it more lively. The "Escape of the Panda" was my favorite, though you certainly went down in a blaze of glory ;). Norm and Si were the only named characters to make it to the bridge, where they became photo-etched into the superstructure...
I'm with you buddy, campaigns are where it's at, and I can't wait to get to my next one, though I'm not yet sure what that will be.
V/R,
Jack
"Escape of the Panda" ?1? I missed this....my ego demands the satisfaction of reading this....To answer your question "What have you been up to?" I've been very busy at work but neglecting my gaming world. I've played Frostgrave a lot with buddies who are not gamers and they all loved it. The most social minis game ever I'd say. I really don't have much time. I've also played it with my kids and it's universal appeal seems faultless ;) I've been in a mode of taking other areas of my life very seriously too ...ironically I then received some very some news concerning health issues unfortunately. I've only glanced at TMP and TWW a couple of times and thats mainly to see how your games are going but it seems I missed the Great Panda Escape so off I go to check that out :)
ReplyDeleteAhhh....the first batrep in the series...#$@% I've just spent 20 mins reading the #%$iest conversation between you and Rod and Blue on TWW ....wow I thought I was a nagging so and so ;) You have patience bud, more than I :)
ReplyDeleteDi you do anything with your C&C Nappy? I'd like to play some at Christmas...And hey would you be interested in some Play by MAil during the Christmas (I'll try to finish this time)
"Escape of the Panda" is in batrep #7, and I'm sure you'll love it. And yeah, Rod and I were having a good time regarding Soviet arty and battle drill. The funny part is that we're not as far apart as it seems.
DeleteSorry to hear about your health issues, I've b having a rough time myself. Getting old sucks...
Frostgrave certainly seems to have gotten a large following very quickly. Fantasy really isn't my thing, though occasionally I find myself online perusing LOTR, Star Wars, and/or Pulp stuff. But I've got too much going on as it is, which is why my C&C Naps aren't ready yet. That's a long term project; I supp it has to be with the vast number of minis needed... On a side note, what is so cool about the Frostgrave rules (from a game mechanisms standpoint)?
I'm game for some play by e-mail, assuming, of course, the GM and my opponent don't conspire against me (again). I mean, how bad do I have to be whooping someone's ass that the situation is so irretrievable, without me being there (I'm assuming quite a bit of cheating can be had without me watching) that you're only option was to wreck the table and blame it on your child? ;)
V/R,
Jack
Yeah I actually was enjoying that game and it was going very well for you but it had just reached a very interesting point...and I could put that scenario back exactly as before. The Lord knows I've enough maps of the troops positions ....I'll get back to you about Frostgrave v soon
ReplyDelete"...it was going very well for you..."
DeleteIndeed, despite the German and Irish-Canadian forces arrayed against me ;)
I know it's a tremendous amount of work for you, and I really appreciate it, so if you're up for it again I am too, and regarding setting up the old game or a new one, it's entirely up to you. My only concern is that this delay has given you and Ivan plenty of time to come up with new ways to mess with me...
V/R,
Jack
Ha ha...it reminds me of the first time I roleplayed a wargame with a friend of mine when we ere kids. I didn't quite get the idea of Game Master and played "against" this poor guy as if we were playing chess....God vs a platoon. Well we'll see I've just informed my niece that she can have her Irish friend stay with us over the Christmas which I instantly regretted ;) Definitely less me time :)
ReplyDeleteTalk soon about Frostgrave...oh and if you are really a Christian say a prayer for me ....I'm heading into my Doc for some "bad news" not sure what it is yet which is always nice :) Talk soon bud
Yeah, it was a rough fight man, but a lot of fun. I should have done better, just made some tactical errors and had some bad firing dice. Doesn't matter, it all ended with a mushroom cloud...
Delete"...my niece that she can have her Irish friend stay with us..."
Well, it'll be nice to have more folks around that are your height ;) In all seriousness, sounds like excuses to me buddy.
"...oh and if you are really a Christian say a prayer for me..."
1. Will do.
2. Don't worry, it's probably just about your undescended testicles.
3. I thought we already established I was the real deal, unlike you fellas from up north with the pictures, stones, and beads (AKA "Lucky Charms") ;)
Take care man, and I hope everything turns out okay. Talk to you soon.
V/R,
Jack
You should be a stand up Jack...
ReplyDeleteWell standing up in front of a firing squad :)
emailed you with a health update
C'mon, the undescended testicles thing had to make ya laugh. I'll check e-mail.
DeleteV/R,
Jack
Hi Jack
ReplyDeleteReally enjoyed the series! You mention you used 5Core Company Command with mods, are those mods available anywhere? I would really like to try them.
Regards
Dave
David,
DeleteThank you, Sir, I appreciate it. And you have just reminded me that I need to talk to Ivan (5Core author) and see what he wants to do with the mods.
I will get back to you (here I suppose).
V/R,
Jack
Hi Jack
DeleteMany thanks! I have 5Core and would be very keen to see them. You can always email me at dave at dwrdistribution dot co dot za
Thanks again
David,
DeleteGood news, I spoke with Ivan and we're going to put it out as a Cold/Modern-War variation of 5Core Company Command. Bad news, it's probably not gonna be out until March as he's changing residences soon and that will put him behind.
But it's officially coming, we have a map for the way ahead!
V/R,
Jack
Great stuff! Thanks Jack!
Delete