All,
August 11, 1993: Major Louis-Louis called Captain LaPieux into his command post: "Captain, we believe the Sirellists (rebels, named after their commander Colonel Sirel) are encamped northeast of Talinn, in some very rough ground, very swampy. I need you to conduct a route reconnaissance, and secure for the task force a means through the marshes. Take a look at the map. You'll see here (pointing to the map) is probably the most likely spot, with a semi-improved road crossing two fords through the marsh, as well as a railroad line on a raised embankment with its own bridge. Take your task force and secure our route through the marshes!" "Oui, Major."
At approximately 1530 local time the company task force approached the grid coordinates, comprised of two infantry platoons in armored personnel carriers, a platoon of light tanks (Panhards with 90mm guns), and an HQ section of the Captain, 1st Sgt, Medical Orderly, RTO, and an 81mm mortar section in Land Rovers.
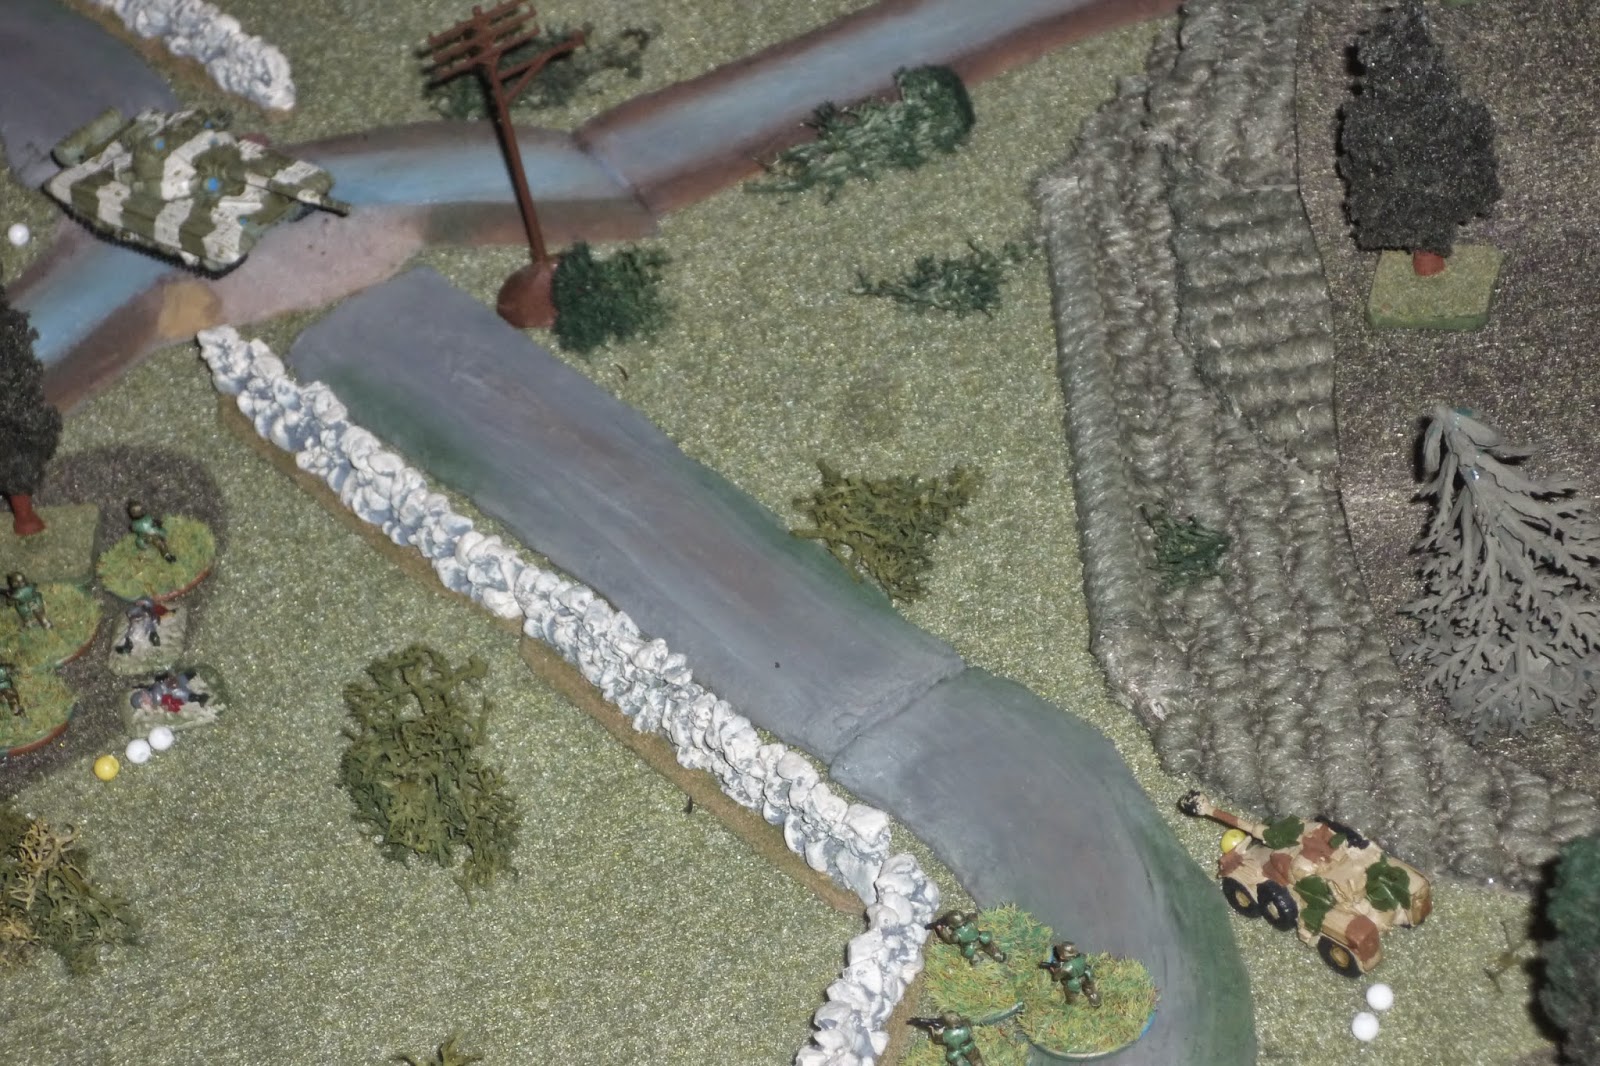
The table is 3' x 3', top is east and is the 'bad guy' baseline, bottom is west and is the 'good guy' baseline.' You can see the road leading right through the two fords, the railroad on the left, and a small hamlet in the center. The 'rivers' are actually streams which can be crossed by infantry (at a small penalty) but not vehicles, which must use the fords or the railroad bridge.
The French force, commanded by Captain LaPieux. Only one carrier platoon will be represented on the table top as three of the infantry teams were ordered dismounted as the task force neared the objective area.
The Sirellist force, with a platoon of T-72s, two platoons of BMPs, and six rifle teams, four of which have RPGs.
The French start positions on the bottom table eage. At far left is Sgt Adrien's squad, moving right to Sgt Guebert's Panhard, then Lt Harpin's rifle team dismounted. At far right is Lt Patrie's Panhard, with Lt Bisson's squad dismounted on the road, trailed by Lt Davault's AMX-10 APC, then Sgt Bernier's APC, the Land Rover (LR, driven by Sgt Lyon) carrying the HQ element, trailed by Cpl Geroux's APC, the second LR (driven by Cpl Navarre) carrying the mortar team, and lastly Cpl Faurot's Panhard. Each of the APC's is carrying an infantry squad.
The bad guy setup, with a tank and two BMPs on the rail track, and one BMP on overwatch, while on the right three BMPs are moving up the road with a T-72 at each end of the column. All six BMPs are carrying infantry.
Bad Guys on the French left.
Bad Guys on the French right.
Let the games begin! Actually, before we do, a quick comment: I wanted to try something a little different, so I created a very board with close terrain, then threw a bunch of armored vehicles on it, and a lot of troops in general. I figured this would get real hairy, and it did, and was a lot of fun.
The game starts with a black card, and so Lt Patrie's Panhard (bottom left) moved up and fired at the T-72 on the railroad bridge, damaging it. Then Cpl Geroux's APC moved up and discharged Sgt Oran's team (center, in the hamlet).
The T-72 fired on Sgt Oran's squad but missed (white smoke), and the infantry returned fire with their Eryx missile, knocking out the T-72's main gun.
An enemy BMP moved up to get a clear line of sight (top left), then opened fire, pinning Sgt Oran's team (center at hamlet). Cpl Geroux's APC returned fire with its 25mm gun, immobilizing the BMP. The BMP then debarked its troops and returned fire with its 30mm gun, causing engine damage to Cpl Geroux's vehicle.
The enemy squad that was just let out of the now immobilized BMP quickly crossed the river and rushed up into the treeline (far left).
Some great Bad Guy activation rolls see the damaged T-72 roll up into cover behind the LOS-blocking trees, then another BMP moved up (behind the T-72) and fired at Sgt Bernier's Panhard (far right), immobilizing it (you'll see that I had bad vehicle destruction rolls all game). He then fired again, using his 30mm gun first on Sgt Oran's squad in the hamlet (one casualty) and then on Sgt Adrien's squad (center, causing another casualty). Then the damned BMP went again, firing with no effect on the hamlet, but then devastating Sgt Adrien's squad, ultimately leaving only him on the table (after he fell back, bottom right).
Then the action moved to the right flank, where the lead T-72 moved up and took a shot at Lt Patrie's Panhard (bottom right), missing. The T-72 fires again, damaging Lt Patrie's vehicle...
And the red cards keep coming. Still on the right side (T-72 that just fired is just off camera at top, Lt Patrie's damaged Panhard at top right), a BMP moved up, kicked out troops, then moved up to the river. Then a second BMP moved up, then kicked out its troops, then fired at Sgt Bernier's APC (bottom right), immobilizing it! Finally a black card comes out; for the record, that was 15 red cards in a row (who shuffled these things!?).

Sgt Bernier returns fire with his APC's chain gun, damaging the BMP's gun (top center). The BMP tried to reverse out of the line of fire, but was exhausted. Sgt Bernier dropped the back ramp and Sgt Cheuvront's squad hopped out. Sgt Bernier's vehicle got in two more rounds of fire on the damaged BMP, but had no effect. Then a rebel infantry squad moved up (into the trees at left center) and fired an RPG at Lt Davault's APC (behind wall), immobilizing it, then turned their small arms on Lt Bisson's squad (also behind the wall), suppressing them. Then the other enemy infantry squad crossed the river and got into the treeline at top center.
Lt Davault's APC (bottom right) opened up on the two enemy squads, causing each a casualty and forcing the left-hand squad back (far left). The third BMP on the right began to move up (not pictured).
And then the Legion began asserting itself. It began with Lt Harpin's team moving forward and firing on the enemy squad on this side of the river (top right). The fire caused a second casualty and suppressed the enemy squad, and so Lt Harpin let out a yell for his men to follow him...
Into close assault, which caused two more enemy casualties and forced the sole survivor to fall back, though he couldn't because the river was at his back, and so the Legion had its first prisoner of the day. Nice work, Lootenet! This was followed by Lt Bisson's squad rallying itself.
And then Cpl Faurot's Panhard pulled up besides Sgt Guebert's damaged vehicle (bottom right), and cued up a BMP in its sight. "Fire!" "On the way!" The 90mm round penetrated the enemy vehicle, with a small explosion quickly followed by a catastrophic explosion which killed all occupants of the vehicle, to include the infantry squad that had not yet debussed as the BMP had been too busy shooting up Sgt Oran and Sgt Adrien's team. Ain't revenge a @#$%!?

The third BMP on the right activates again, moving up, debarking its squad, then creeping forward (on the road at far right). Lt Patrie's vehicle (bottom left) then opened fire, pouring out 90mm rounds as quickly as possible. The BMP in the road took one, knocking out its main gun, then another slammed into it, immobilizing it. At that the crew said 'hell with it' and abandoned ship. Patrie's third round slammed into the T-72 (right next to the BMP), immobilizing it, at which point it's crew also decided to bail out! Back on the left, Sgt Oran tried to rally his squad but failed.

Back on the left, Cpl Faurot, feeling saucy, pulled his Panhard away from Sgt Guebert's damaged vehicle (off camera at bottom right), up the railroad escarpment, and pumped a 90mm round into the T-72 sitting on the tracks. The T-72 suffered engine damage, and this was in addition to its main gun already having been knocked out by Sgt Oran's team, and so the tank crew decided to get the heck out of dodge. Cpl Faurot's Panhard is now exhausted (that's what the black beads mean), as is the enemy infantry squad with the RPG at top left. Despite this, I'm still a bit nervous about Faurot's future health...
Cpl Navarre moved his Land Rover up and dropped off the 81mm mortar team (far right), which immediately went to work, targeting the enemy infantry that were staring down Cpl Faurot's Panhard. The enemy took a casualty, and was forced to fall back to the river (far left). I was severely aggravated that my mortar then became exhausted after only one activation...
Which was followed by Sgt Cheuvront's team (center, behind house) activated to move up, then fell exhausted, also after only one activation... At top right is Lt Harpin's team, still reveling in the freshness of their victory in close combat. Lt Davault's vehicle (at right) goes exhausted.
The other T-72 on the right goes hell for leather and charges right up to the ford (with Lt Harpin's team right below it and Lt Patrie's Panhard at bottom right). He fires at Patrie's vehicle, knocking out its main gun.
The T-72 activates again, departing the ford (at top left) and climbing the hill at top right. He pivots and fires a 125mm sabot round at Lt Davault's APC (center). Apparently the round passed straight through the lightly armored APC, only lightly damaging it, but it was enough to encourage Lt Davault to bail out, and Sgt Laroux's squad followed suit in exiting the vehicle.
Sgt Laroux's squad wastes no time in heading straight for the T-72, and they fire their LAW, knocking out the tank's main gun. Apparently I didn't take a picture, but the far right bad guy infantry moved up and took a shot at Sgt Laroux's squad, pinning it, and Laroux's squad returned the favor.
A quick note: the French decisions (good and bad) are all mine, whereas I use die rolls to help the bad guys out in their decision making. I also rolled for 'temperament,' and I rolled up 'aggressive,' so that should help to explain some of the stuff that probably has you wondering, "why the hell did they do that?" These Sirellists aren't the best troops and don't always have the best equipment, but apparently they are quite devoted to their cause.
And then, with his blood up, Lt Bisson led his squad in a charge that saw his men mount the tank, ripping the hatches open and dropping hand grenades through, killing the crew and disabling the vehicle.
Another card and another good activation roll saw Lt Bisson lead his men off the destroyed tank (bottom left) to cover at the wall, before the bad guys could lay into them (very fortuitous). Now if you look at the BMP at far right, just to the left of it is a treeline. There were bad guys in there, but Bisson's squad opened up on them, causing a casualty and forcing them to fall back (you can see them at top right).
At this point Sgt Lyon drove his Land Rover up to the hamlet and dropped off Captain LaPieux and his entourage. The CO immediately got to work, rallying Sgt Oran's squad (at left, with red bead), and dispatching the Doc to Oran's casualty.
Then the Captain ordered Sgt Cheauvront's squad up the hill (center), where they take a shot at the BMP, damaging its engine. Apparently their Eryx ATGM has an option to fire unguided AT munitions at extreme short range which wouldn't allow the guided missiles time to arm ;)
Doc drags the casualty back to the Land Rover (bottom center). Then the enemy BMP activated; he took a shot at Sgt Cheauvront's men, but missed, then decided to hightail it by reversing away from the French.
But in his haste, he ran over two of his supporting infantry...
Back on the right, Lt Harpin rallied his troops (center, in the trees just left of the river), while Sgt Laroux's squad (bottom left) also rallied. The bad guys that were cowering at top right rallied and moved back up into the treeline (at center, just right of the river).
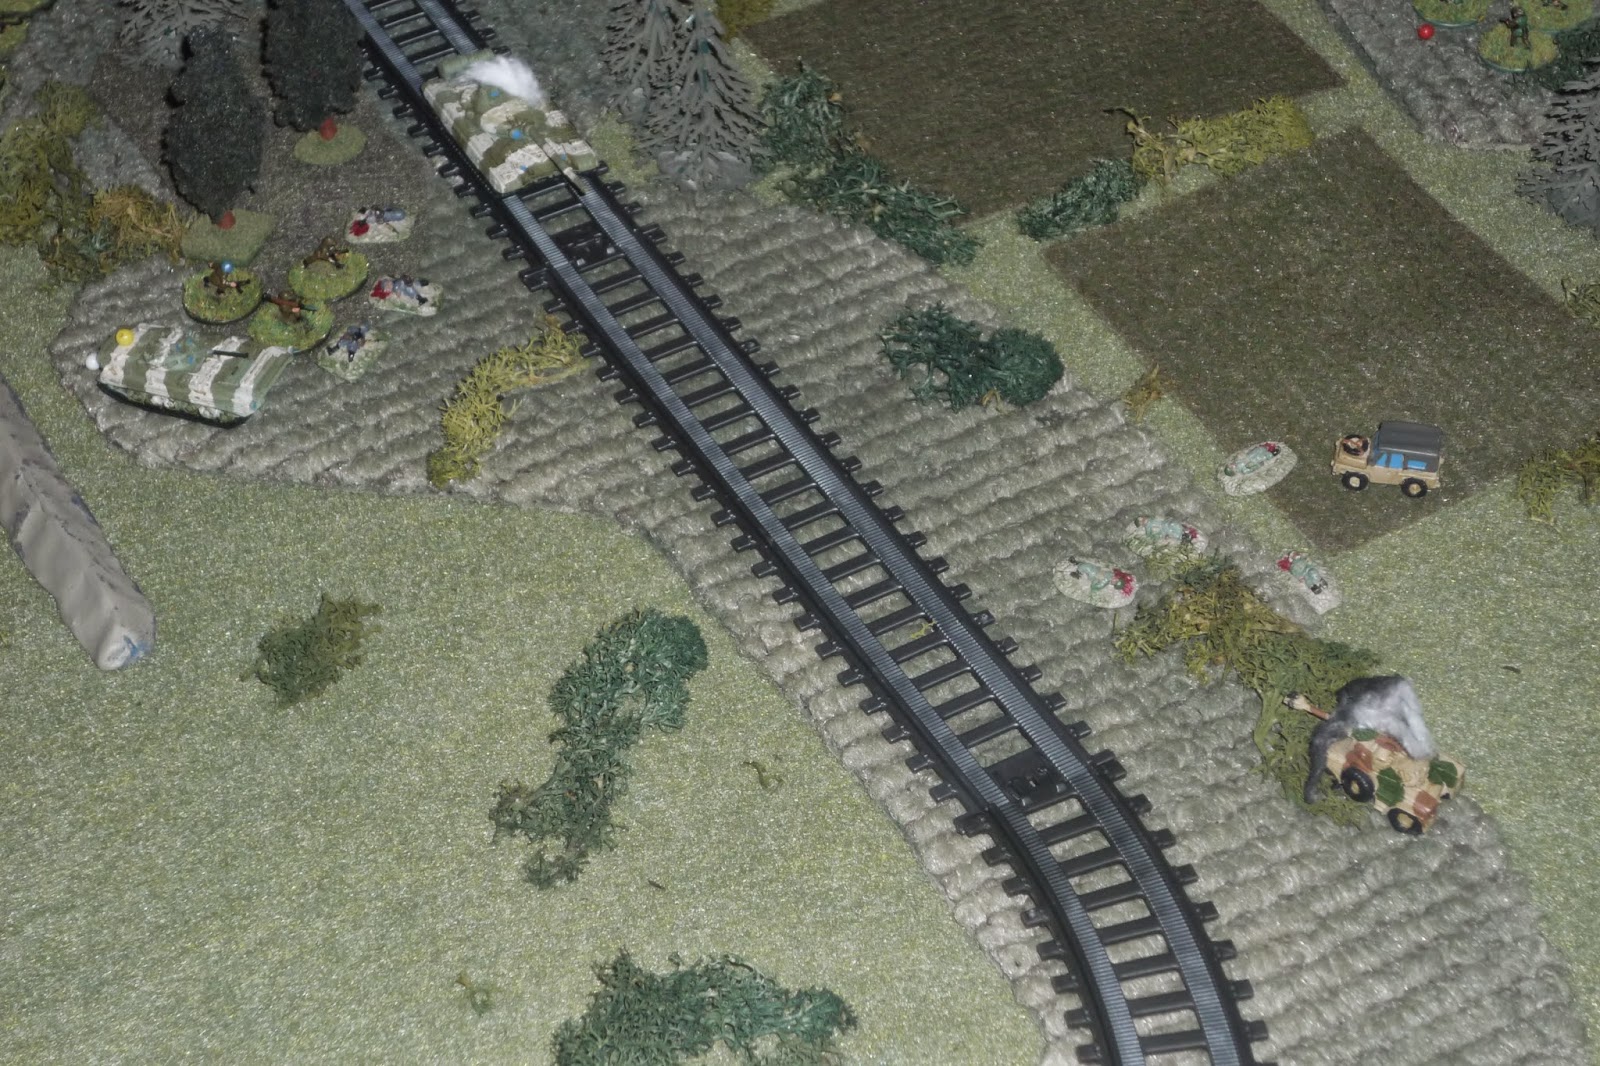
Back on the left. the immobilized BMP at the railroad bridge (far left) somehow activates and gets a lucky shot off on Sgt Guebert's Panhard (far right, next to telephone pole), knocking out his main gun, causing Guebert and his crew to abandon the vehicle. Sgt Adrien, the sole survivor of his squad (bottom right), rallies then exhausts himself.
Then the last enemy BMP activates. He sprints up and across the railroad bridge, then kicks his troops out at the far left treeline.
Cpl Geroux's APC (far right, in hamlet) is ordered by the Captain to engage, and so he fires his chain gun at the enemy infantry in the treeline (far left), putting two down and forcing them to fall back (top left).
But then the damned enemy infantry rally and move back up to their recently vacated position... Then they decide Sgt Adrien hasn't had enough, so they fire on him and suppress him (bottom center). Then they return the favor, firing their RPG at Cpl Geroux's vehicle, immobilizing it. Geroux and his crew bail out.
And that was the end of Turn 1. Here's what the table looked like. On the left, the bad guys lost a BMP, had one immobilized, and abandoned their T-72. On the right, the bad guys abandoned a T-72 and had one ripped open by Legionnaire infantry, while they abandoned one of their three BMPs, and the other two are damaged. The French have abandoned a Panhard and have one other damaged, and they've abandoned two of their APCs, and the last is damaged...
The 2nd turn starts with a black card, and Cpl Faurot (bottom right) orders his gunner to fire on the enemy BMP; the first round caused engine damage, and the second bounces! The BMP returns fire, destroying Cpl Faurot's vehicle, killing all inside...
The BMP then decided to get off the skyline, and darted down behind the rail embankment, heading towards the French rear.
The French mortar (bottom right) opened up on the railroad treeline again (top left), getting a kill and suppressing them, and Sgt Adrien sprinted across the road (bottom left, near the BMP).
And then the BMP activated again... He climbed the embankment and fired on the mortar position, killing one and driving back the other (top right).
The enemy infantry in the railroad treeline realize the danger Sgt Adrien (bottom left) poses to their BMP, unsupported. So they rally themselves and charge forward onto the railroad tracks (top center) to get a clean shot at Sgt Adrien, and they manage to pin him.
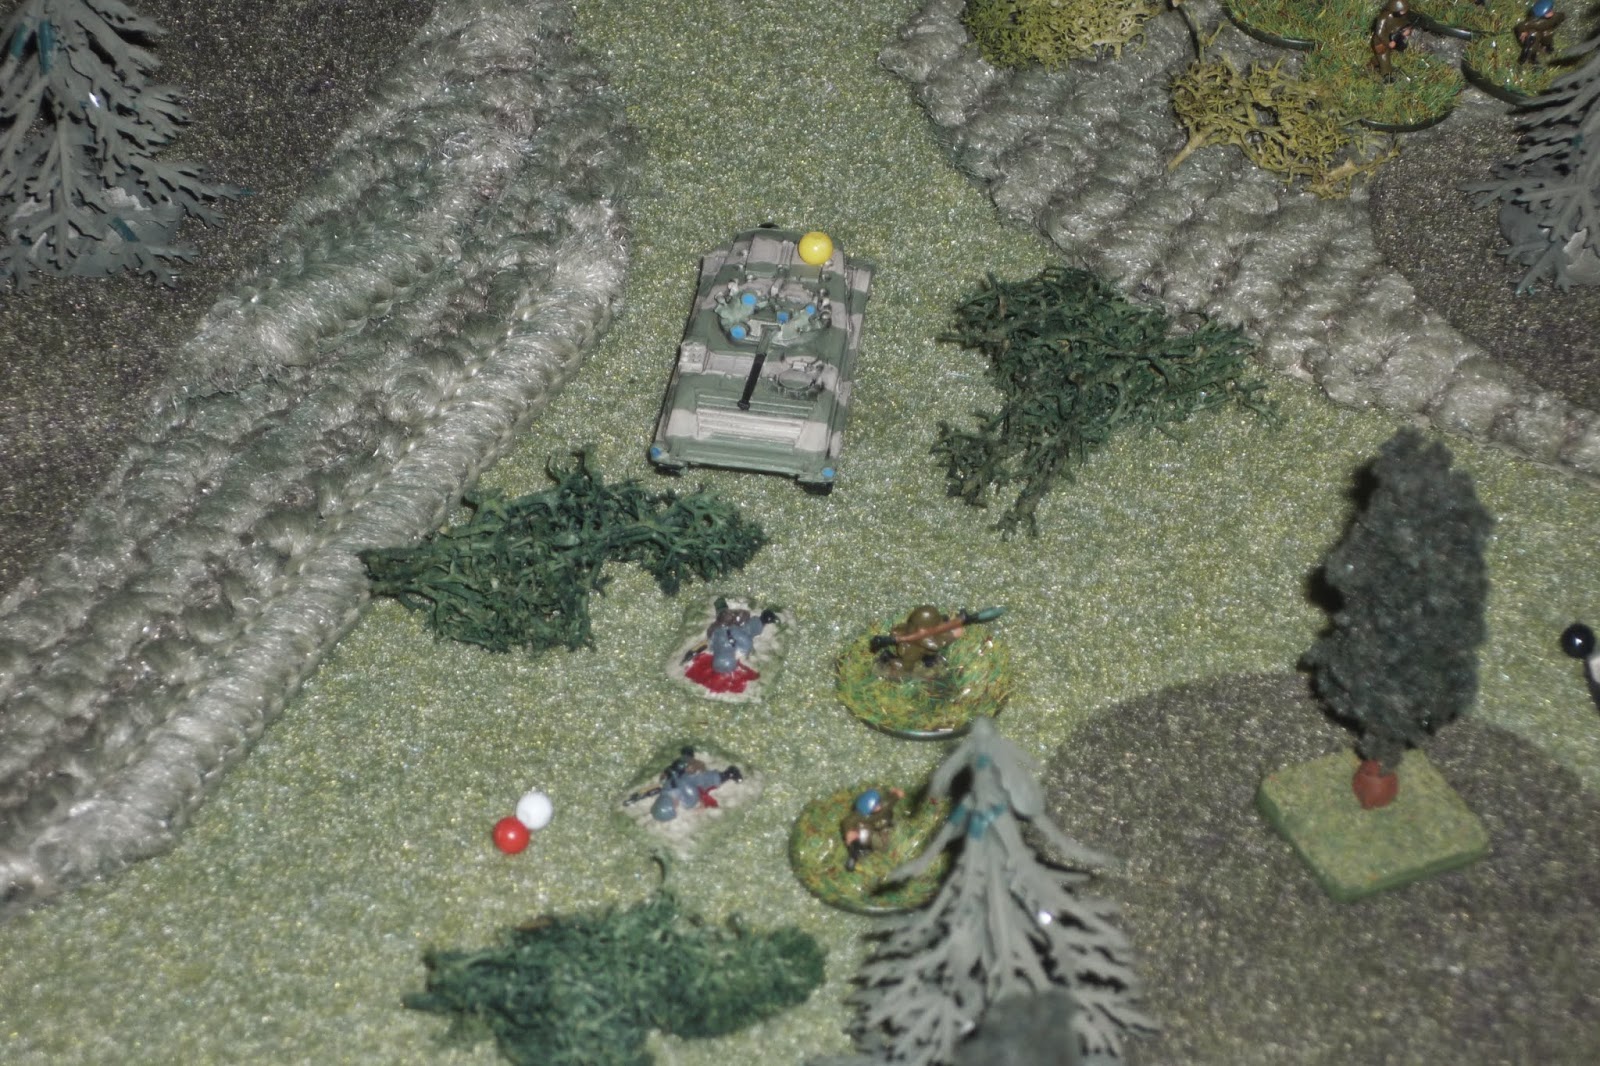
Sgt Cheauvront's team, formerly atop the hill at bottom right, charges down the hill into the treeline at bottom left. They quickly line up a shot on the enemy BMP (top center left) and put a missile into it, seriously damaging it and causing the crew to bail out. The two suppressed infantry nearby see this and surrender to Cheauvront's men.
There was an enemy squad cowering, suppressed, down next to the river at bottom left. Well, they got a few cards and some good activation rolls, and so they managed to rally themselves, sprint over the railroad bridge, and hop into the woods at center, BEHIND Sgt Cheauvront's squad!!! However, they do all that only to blow their firing roll, and their gunfire has NO EFFECT on Cheauvront's squad! They are then exhausted.
The last BMP on the right (with a knocked out gun) then moves up and fires its coax (BMPs have a coax, right?) at Sgt Cheauvront's men (center, with the bad guy squad we just discussed at far left), getting a pin. The BMP manages to activate again and suppresses Cheauvront's squad.
Forcing them to fall back, all the way from the empty spot at top left center, to behind the building at bottom right...
Over on the far right, some bad guy infantry (far right, in trees) open up on Sgt Laroux's team (far left), suppressing them in two rounds of fire. They then turn their attention to Lt Bisson's squad (behind the wall on the road at top center), but no effect.
Finally a black card comes out. Once again the bad guys had quite a run, going 5 red cards, 1 black card, then 6 more red cards before this black card...
Lt Bisson's squad (bottom center, behind wall) returns fire, suppressing the bad guys (top left), but they rally themselves back into shape. So Bisson's men fire again, getting a pin, but then they and Sgt Laroux's team (far right) are both exhausted.
Back in the center, the BMP tries to activate but is exhausted (this is the one with knocked out gun that fired the coax at Sgt Cheauvront's team, who were in the woods at center left but fell back behind the building at bottom right). The BMP is quickly set upon by Sgt Oran's team, who fired their ATGM and seriously damage the BMP, causing the crew to bail out. Sgt Cheauvront does manage to rally his men, but then is exhausted.
Having just taken care of the BMP (top right), Sgt Oran's squad moves left (far right) and fires at the bad guys on the railroad tracks (bottom left), suppressing them.
Back on the right, Lt Harpin leads his men into the river, firing and suppressing the enemy. "Let us show them the bayonet once again, boys!"
Lt Harpin leads his men, crashing into the enemy squad, capturing one and killing two, while suffering one casualty of their own! This is the second successful close assault of the afternoon by Harpin and his men, and has crushed enemy resistance on the French right.
Captain LaPieux sends Sgt Oran's squad after the two rebels cowering on the railroad tracks, and they quickly surrender.
And the damaged BMP which had charged to the French rear suddenly finds itself alone and isolated, and is thankful to have found a Frenchman to surrender too, despite the fact Sgt Adrien was alone.
Meanwhile, Captain LaPieux leads the HQ section and Sgt Cheauvront's squad to the top of the hill, intent on getting to grips with the enemy infantry at top left.
The Captain activates again, and leads the group down the hill to close range with the enemy, and they open up a withering fire...
Killing three, and the remaining rebel surrenders.
The commander of the immobilized BMP on the east side of the river, standing on the turret of his vehicle for a better view, sees things are not going his way. "Let's go," and with that the remaining enemy forces quit the battlefield, leaving the French in possession of two routes through the marshy area.
Losses:
FFL
4 casualties from Sgt Adrien's squad
1 casualty from Sgt Oran's squad
1 casualty from Lt Harpin's squad
1 casualty from the mortar section
The three men of Cpl Faurot's Panhard were killed.
Light Tank Platoon vehicles - Lt Patrie's Panhard was damaged but can be fixed, and the same goes for Sgt Bernier's Panhard, though Cpl Faurot's was a total loss.
Mechanized Vehicle Platoon vehicles - All three vehicles were damaged but can be repaired.
**Quick note: you can probably tell I've modified the rules a bit. A big difference is that I'm not really playing one man is one man, which is why you see me referring to five-man elements as squads. For what I'm doing, I figure each figure is representing two actual men. This change has nothing to do with the rules, it's simply to facilitate what I want to represent in my campaign, which is the French "Sous Groupement" (two infantry platoons and a light tank platoon), not just a rifle platoon.
Sirellists:
29 casualties (~58 KIA)
9 captured
3 T-72s (one destroyed, two damaged and captured)
6 BMPs (one destroyed, five damaged and captured)
I'm not sure how the game looked to you guys, probably kind of crazy and hectic, and it was, and I had a really good time. If you've not noticed, I'm about as far from a 'simulationist' as one can get; I'm in it for entertainment, drama, decision-making, and a good story.
I was a little aggravated about losing the initiative, that is, the two long runs of cards for the bad guys. If you look at the pics, it should really tell that the French barely moved off their starting positions, whilst the bad guys covered quite a bit of ground. I'd have preferred it the other way, but ces't la guerre, and in a perverted sort of way, I'm proud the Legionnaires were able to hold their ground then fight their way out of the bag, ultimately turning the tables and accomplishing the mission.
Along those lines, Lieutenants Harpin and Bisson will be recognized for valor. Harpin eliminated two different enemy infantry squads in close combat, while Bisson led the charge onto an enemy tank, and disabled it.
Stay tuned, my plan is to get in another game tomorrow (Sunday) morning. Next up is a 'drop everything and get your butt over there' mission, in which the French have discovered the Sirellists have positioned/are working to position a SAM near the Talinn International Airport. Bringing down an airliner would suck for Colonel Pouspous, but bringing down a French C-130 would be a disaster!
On a side note, if you've been paying attention here you've probably noticed I've been anguishing about an Imagi-Nation-type situation to serve as a background for another campaign in which I'll bust out my 6mm and 20mm forces. I'm starting to think it will spring from this campaign; the French are here to protect the liberal government from regressive, Soviet/Russian leaning forces. I'm thinking that Poland, Estonia, and Latvia begin banding together as a means to stave off Russia (whom they know will return to power at some point in the future) as well as the Sirellists. So my Legionnaires come in, do their job, and leave, and NATO begins pumping arms and equipment into Poland, Estonia, Lithuania, and Latvia, but the Sirellists become stronger and stronger, until ultimately a 'civil' war erupts. Voila, a decent amount of land to work with, and WarPac and NATO equipment on both sides, with qualitatively similar forces. Pretty clever, no?
V/R,
Jack


It looked crazy and hectic. The long run of red cards should mean you get a long run do do whatever you want without much interruption. But it seems the game ended before you got to do that.
ReplyDelete