All,
Ambush at Abbeville, #1
0530 28 May 1940
Following the fighting in and around Flavion, KG Klink was briefly pulled out of the line to rest, refit, perform maintenance on their weapons, machines, and equipment, and bring in a few replacements. They were actually parked outside the Dunkirk perimeter when they were called back to action; further south, German forces had forced a crossing on the Somme. At 0600 27 on May, the Allies counterattacked the German bridgehead, striking the German 57th Infantry Division southwest of Abbeville, in an attempt to reach the encircled Allied troops at Dunkirk.
Unbeknownst to the Germans, the French French 4e DCr (or 4th Division Cuirassee, 4th Armored Division) arrived in the battle area that evening. The French force, heavily armed with Char B1, Somua S-35, and Hotchkiss light tanks, immediately set about reorganizing, preparing to attack on the morning of 28 May.
But KG Klink moved all through the night in order to reach the battle area. arriving at approximately 0500 on 28 May. The plan was for KG Klink to counterattack down the Blangy-Abbevile Road, hoping to flank the French 2e DLC (2nd Cavalry Division), maybe even cut all the way across and in behind the British 51st Highland Division, cutting off the British 1st Armored Division. With that, KG Klink set off, passing through the German 217th Infantry Regiment, launching its attack down the Blangy-Abbeville Road. KG Klink passed through Villers sur Mareuil, then Huppy, and were moving towards St Maxent en Vimeu, when they encountered trouble near the three (fictional) villages, Dujour, Deture, and Toujour, on the River Bleu.
The first fight sees Colonel Klink himself, looking to seal his axis of advance from flank harassment and searching for a place to post his headquarters, lead 1st Grenadier Platoon, supported by attached Stugs, in the attack on Dujour.
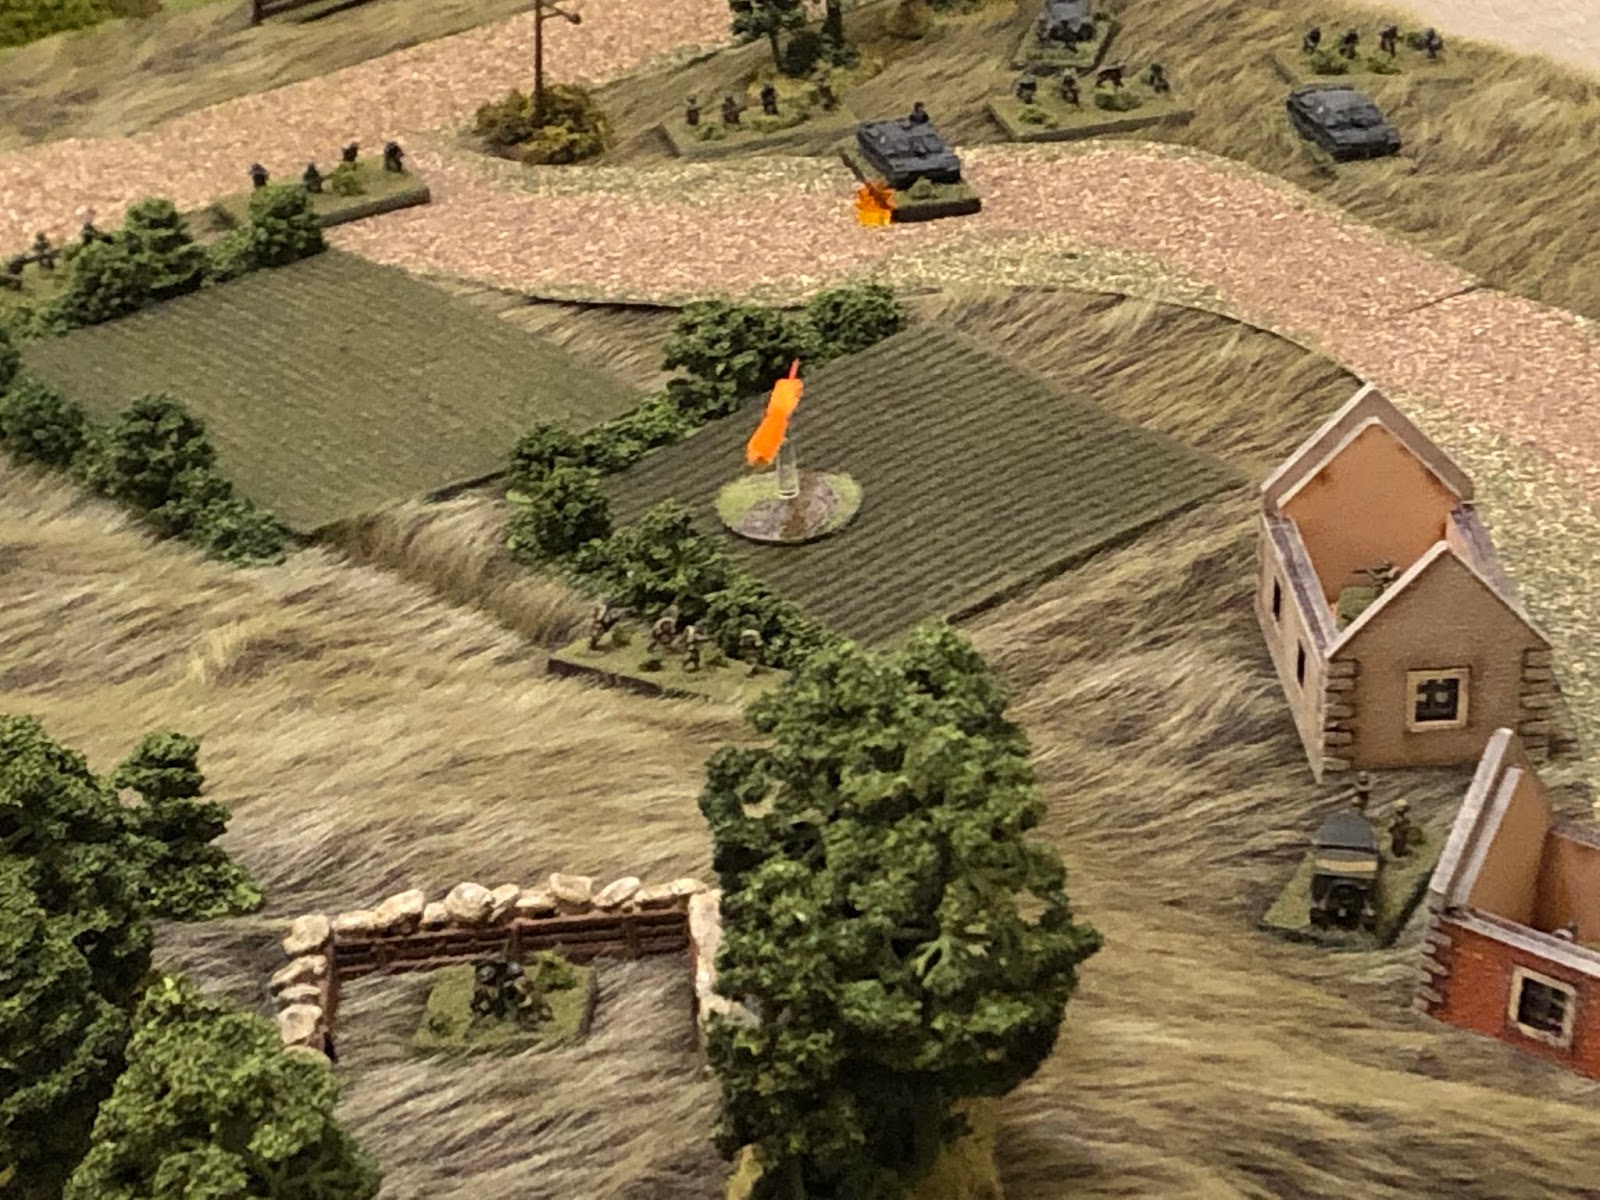
The overall area of operations, and that stupid north-seeking arrow at top right is incorrect, north is to far left... The three villages are, from left to right: Dujour, Deture, and Toujour, and the hills are, from left to right: Hill 34, Hill 44, and Hill 54. The River Bleu runs east-west down the center of the table.
My intent is to play a series of battles on a 6' x 4' layout, using small pieces, maybe 2' x 2' with 10mm troops. I've gone back to my old standby, Ivan's "5Core Company Command."
The first fight is Colonel Klink leading two Stugs and 1st Grenadier Platoon against French forces holding the village of Dujour, with the red arrow showing the axis of attack. This attack occurs at the same time as the second fight, which is Lt Tausch leading 3rd Grenadier Platoon against Hill 34 (bottom left).
The opposing forces, with Germans on left and French on right. The French are completely made of Minifigs UK troops, while the German infantry is Minifigs, but the Stugs and command stand are Pendraken.
The German force:
CO: Colonel Klink (Iron Cross 2nd Class), Kampfgruppe Commander
Stug 1: Sgt Gebhardt
Stug 2: Sgt Kulle
1st Grenadier HQ Element: Lt Klugmann (Iron Cross 1st and 2nd Class)
1st Squad: Sgt Lehmkuhl
2nd Squad: Cpr Arteis
3rd Squad: Sgt Lutz
4th Squad: Cpl Lipniki
The French force:
Commanding Officer
MG Team
2 x 25mm Anti-Tank Guns
Four Rifle Squads
My interpretation of the operational area, with the villages Dujour (top left), Deture (center), and Toujour (far right) and hills 34 (bottom center left), 44 (top center left), and 54 (bottom center right, with the River Bleu running east-west (top to bottom) at center.
The battle area, north is down. The tiny village of Dujour is occupied by a reinforced platoon of infantry, with some support atop Hill 44 (top left), as the Germans attack from the northwest and west (bottom right and right).
The German layout, from bottom: Sgt Lehmkuhl's 1st Squad, Sgt Kulle's Stug, Lt Klugmann's command element, the CO, Sgt Gebhardt's Stug, Cpl Arteis' 2nd Squad, Sgt Lutz' 3rd Squad, and Cpl Lipniki's 4th Squad.
The French garrison, with ATG1 at center bottom (just left of the fountain), ATG2 atop Hill 44 (top left), 1st Squad and the MG team at bottom right, 2nd Squad in building at center top, 3rd Squad in building at left, and 4th Squad in hedge at top center.
Time to fight!
The French wait, quietly huddled in their defensive positions, allowing the oncoming Nazis to advance until they are impossible to miss. Nervous fingers caress anxious triggers, until the French CO (bottom right) signals "Fire!" ATG2 (bottom left, in sandbagged position atop Hill 44) sights in on Sgt Gebhardt's Stug (top center, with Sgt Kulle's vehicle at top right) and fires!
And Sgt Gebhardt and his crew are engulfed in flame as the 25mm round penetrates and sets the vehicle on fire! The death of the Stug and its crew are so sudden and so violent that Lt Klugmann's command squad is suppressed and Cpl Arteis' 2nd Squad is pinned (red and yellow beads, respectively)!
A split second later, the French ATG in the village (bottom left) fires on Sgt Kulle's Stug (top right, with Sgt Gebhardt's Stug burning at top center), but misses.
Sgt Kulle coaxes his driver forward, then lurches to a halt as they send a 75mm HE round back the other way.
Knocking the gun out and suppressing the French 3rd Squad!
Colonel Klink rallies Lt Klugmann and his command squad...
Then moves over and does the same for Cpl Arteis' 2nd Squad.
And then Lt Klugmann leads his command squad and Sgt Lehmkuhl's 1st Squad up to protect the advance of Sgt Kulle's Stug (far left, from far right, where Colonel Klink remains).
But as the two German squads move up, the French MG team opens fire on them...
1st Squad is pinned (yellow bead at far right), but Lt Klugmann advances his command element past the Stug.
*Sorry if that seemed a little goofy, but what happened is that I initially moved both squads up, then moved them back for a second to carry out the French reaction fire.
On the German right, 3rd and 4th Squads move up, but the French 4th Squad opens fire on them... The rounds miss.
*But the French roll a 'scurry.'
And the French 4th Squad hastily charges Cpl Lipniki's 4th Squad! The two squads are at pointblank range, submachine guns blazing, hand grenades flying...
The German squad is knocked out of the fight, though Cpl Lipniki is able to crawl away to safety in the confusion. The haughty French decide to press their luck...
They quickly close on Sgt Lutz' 3rd Squad...
But Sgt Lutz saw what happened to 4th Squad and has his men prepared, eliminating the French rifle squad.
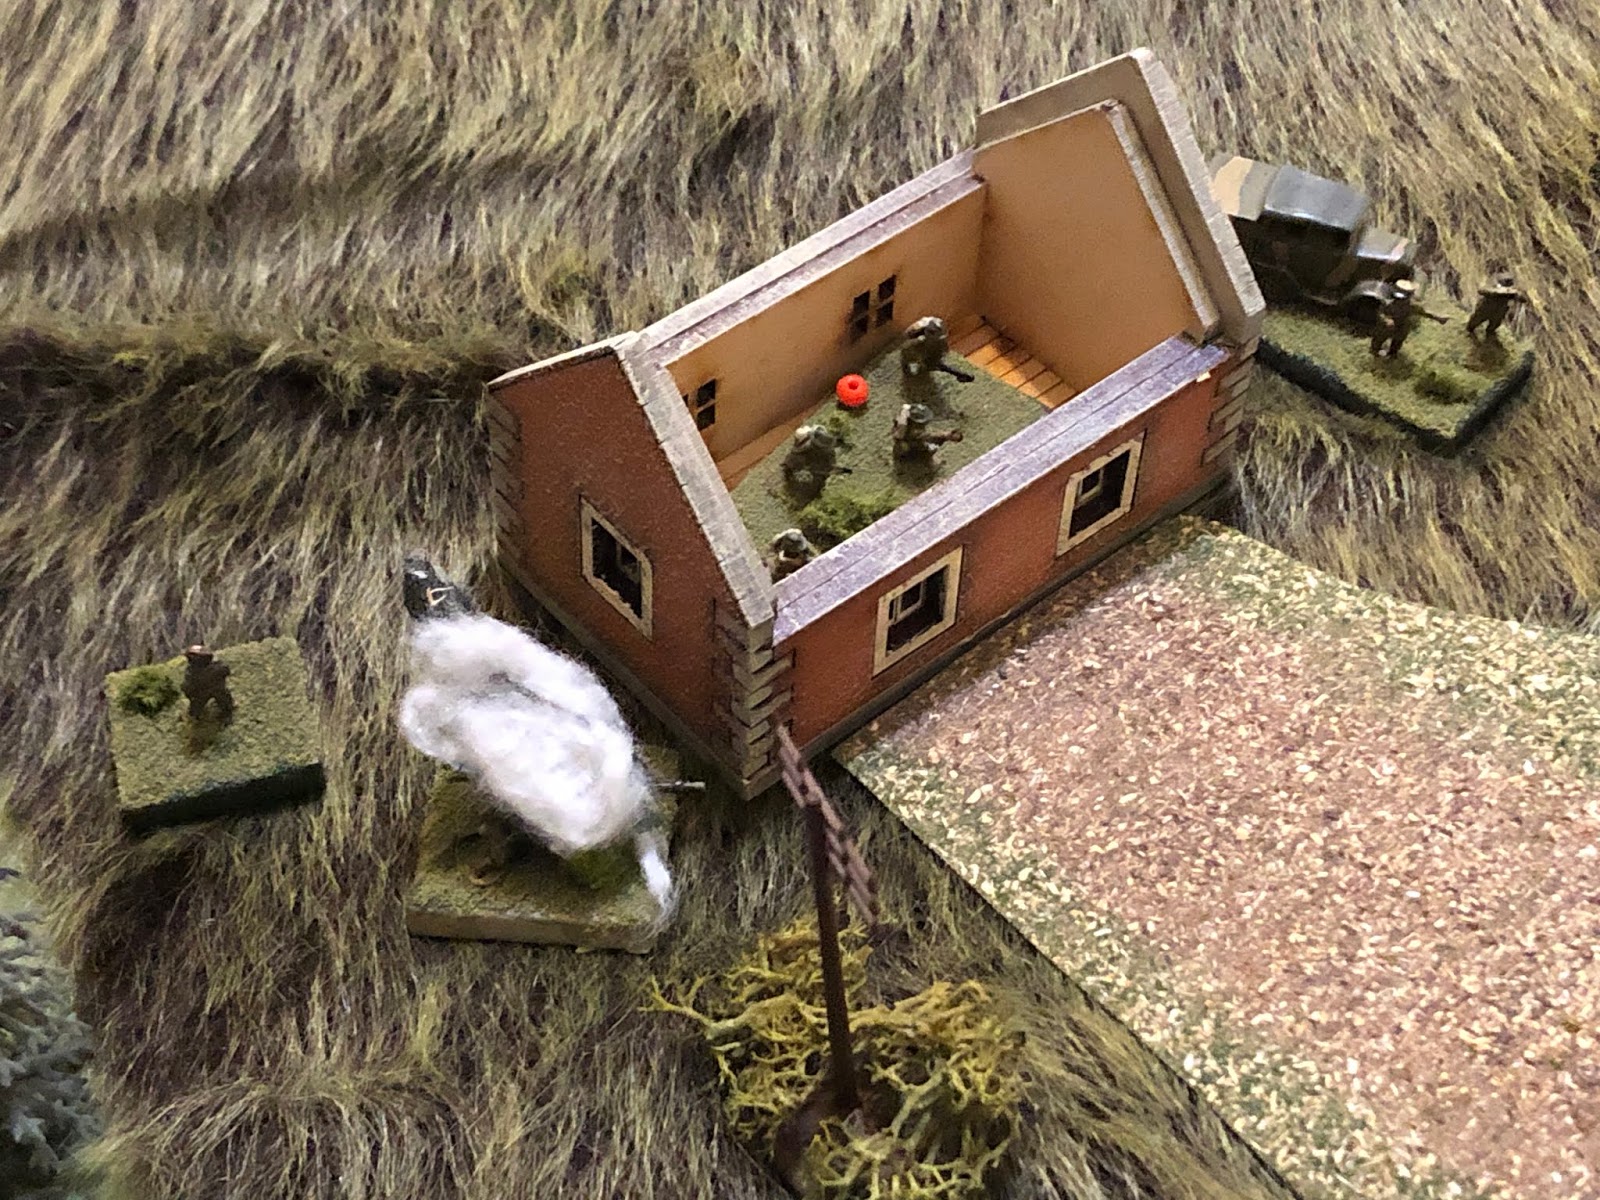
While on the other French flank, the MG (bottom left) jams, so the French 1st Squad, looking to buy them time, dashes out of the house and into close combat, hoping to overwhelm Lt Klugmann's command squad and jump on Sgt Kulle's Stug!
But again the Germans are successful in close combat, this time led by their Iron Cross-winning leader!
Who immediately leads his men into the house!
But the French team gets the gun going and mows them down!!! Lt Klugmann is among the wounded, out for the remainder of the campaign in France.
In the French center, their CO tries to rally his 3rd Squad (red bead)...
But they're still shaken up and fall back, out of the house. The French CO, looking on from top right, screams "Sacre bleu!" Or something like that...
And seeing their comrades abandon their house (French 3rd Squad just visible at far left) and believing this signaled the beginning of a route, the French 2nd Squad leaves its house (bottom right) and begins tearing up Hill 44 (center top)!
*This was a random event that made the French 2nd Squad panic and run.
Further north, Sgt Kulle pushes his Stug forward and begins lobbing shells directly into the house containing the French MG team, as Sgt Lehmkuhl's squad, still pinned (yellow bead), looks on. The French MG team was unharmed, but his may have been when Lt Klugmann was actually wounded...
Colonel Klink moves up to rally 1st Squad (center right).
They've got their bottle back, and rush ahead, firing point blank into the French MG team's house, without effect.
While over on the German right, Sgt Lutz' 3rd Squad can't help but take some potshots at the retreating French 2nd Squad...
And the panicking French soldiers go down in a hail of fire, mere meters from safety! The remaining French ATG fires at 3rd Squad, but the 25mm shot is not designed for anti-personnel use and ends up being harmless.
The French CO again attempts to rally the French 3rd Squad, and this time he succeeds.
They immediately re-enter the house, take up firing positions, and open fire on Sgt Lutz' squad...
Catching them in the open, firing uphill at the panicked French Squad, Sgt Lutz and his squad are eliminated, with Sgt Lutz out for the remainder of the French campaign.
On the French right, their machine gun team opens fire on Sgt Lehmkuhl's 1st Squad at point blank range...
Mowing the hapless Landser down! Sgt Lehmkuhl is also out of action for the remainder of the campaign!
Colonel Klink is in despair, attempting to rally troops he no longer has!
**The Germans rolled a scurry, but that wasn't going to help anything as they only had a Stug and a rifle squad left, with the Stug unable to fire (because of the 'scurry') and unable to crash into the large stone building to crush the French MG team, and Cpl Arteis' squad too far away to accomplish anything useful.
So we've got no choice but to call this one a German loss! However...
Colonel Klink pulled the Stug and squad back to the treeline, and called for reinforcements.
Not long after, the Kampfgruppe Executive Officer, Major Schultz, showed up with the 4th Grenadier Platoon.
As soon as the German force deployed to attack...
The French skedaddled up Hill 44, leaving the shot-up village of Dujour to the Boche.
Well, that sucked! Nothing like starting off a multi-game mini-campaign with a resounding loss! The Germans accomplished their mission of taking Dujour, after being reinforced, though they let elements of the French garrison escape to Hill 44, which will have to be dealt with, sooner rather than later.
Germans: ~40 KIA/WIA, 1 Stug III destroyed
French: ~35 KIA/WIA, 1 25mm ATG destroyed
Of the named characters, none really distinguished themselves...
Lt Klugmann, 1st Gren Plt Commander, WIA, out for campaign
Sgt Lehmkuhl, 1st Squad Leader, WIA, out for campaign
Sgt Lutz, 3rd Squad Leader, WIA, out of campaign
Sgt Gebhardt, acting Stug Platoon Commander, KIA
Colonel Klink, Sgt Kulle's Stug, Cpl Arteis' 2nd Squad, and some stragglers lead by Cpl Lipniki set about clearing the village as Maj Schultz begins moving 4th Platoon south.
Time to head over to the simultaneous attack on Hill 34.
V/R,
Jack


I enjoyed this action!
ReplyDeleteThanks, Jonathan!
DeleteV/R,
Jack
Looks great Jack! In my search for rules for Korea, I think I am coming full circle and coming back to 5core. Are you playing out of the box or any mods?
ReplyDeleteHey Tin Man! Pretty much straight outta the box I suppose; with mods I guess ;) I personally don't think of them as mods, more like just molding the rules to the situation. I played a game the other day where a rifle squad was on the second floor of a building, shooting down on a bridge that was packed full of German troops. The rifle squad is supposed to get 1K 1S, but I think I gave them 2K 2S, maybe even 2K 3S, because the bridge was so packed full of vulnerable infantry.
DeleteV/R,
Jack
Thanks Jack, another fine example of an action highlighting how much play can be squeezed from this size of game space.
ReplyDeleteMy pleasure, Norm, I do what I can. Nowhere near as good looking as your Stalingrad setup, though!
DeleteV/R,
Jack
Thanks, Andy!
ReplyDeleteV/R,
Jack
You say you lost, and yet you hold the village. Did you lose because you were expecting an super outstanding victory where you chase them as they retreat to the next hill?
ReplyDelete:-)
As you know, always enjoy the Klink reports. On a small table you are bound to lose the odd game. I am sure you lost a game sometime in 2018 as well...
Shaun,
DeleteYeah, I lost the game in terms of the French defeated the German forces initially deployed. I could have brought in Major Schultz's reinforcements in a second batrep, then had them fight it out to take the village, but I didn't figure it was worth it, so I simply tacked the German reinforcements onto the end of this game and had the French fall back without a fight.
Losing happens every now and again. Well, not actually. Whenever I lose, I didn't really lose, I just made it look like I did so you guys wouldn't feel so bad about your inferior wargaming skills ;)
V/R,
Jack