All,
Ambush at Abbeville, #3
0630 28 May 1940
Following the fighting in and around Flavion, KG Klink was briefly pulled out of the line to rest, refit, perform maintenance on their weapons, machines, and equipment, and bring in a few replacements. They were actually parked outside the Dunkirk perimeter when they were called back to action; further south, German forces had forced a crossing on the Somme. At 0600 27 on May, the Allies counterattacked the German bridgehead, striking the German 57th Infantry Division southwest of Abbeville, in an attempt to reach the encircled Allied troops at Dunkirk.
Unbeknownst to the Germans, the French French 4e DCr (or 4th Division Cuirassee, 4th Armored Division) arrived in the battle area that evening. The French force, heavily armed with Char B1, Somua S-35, and Hotchkiss light tanks, immediately set about reorganizing, preparing to attack on the morning of 28 May.
But KG Klink moved all through the night in order to reach the battle area. arriving at approximately 0500 on 28 May. The plan was for KG Klink to counterattack down the Blangy-Abbevile Road, hoping to flank the French 2e DLC (2nd Cavalry Division), maybe even cut all the way across and in behind the British 51st Highland Division, cutting off the British 1st Armored Division. With that, KG Klink set off, passing through the German 217th Infantry Regiment, launching its attack down the Blangy-Abbeville Road. KG Klink passed through Villers sur Mareuil, then Huppy, and were moving towards St Maxent en Vimeu, when they encountered trouble near the three (fictional) villages, Dujour, Deture, and Toujour, on the River Bleu.
The first fight saw Colonel Klink lead the 1st Grenadier Platoon, supported by Stugs, in the attack on Dujours. Repulsed, they were reinforced by the 4th Grenadier Platoon and drove the French force back onto Hill 44.
The second fight saw 1st Lt Tausch, lead his 3rd Grenadier Platoon into the assault on Hill 34. The attack stalled in several locations, but the Lieutenant's skillful leadership maneuvered his troops until they were able to unhinge the enemy's defensive line.
The third fight sees the Reconnaissance Company Commander, 1Lt Wehner, lead his men forward to seize the bridge over the River Bleu at Deture.
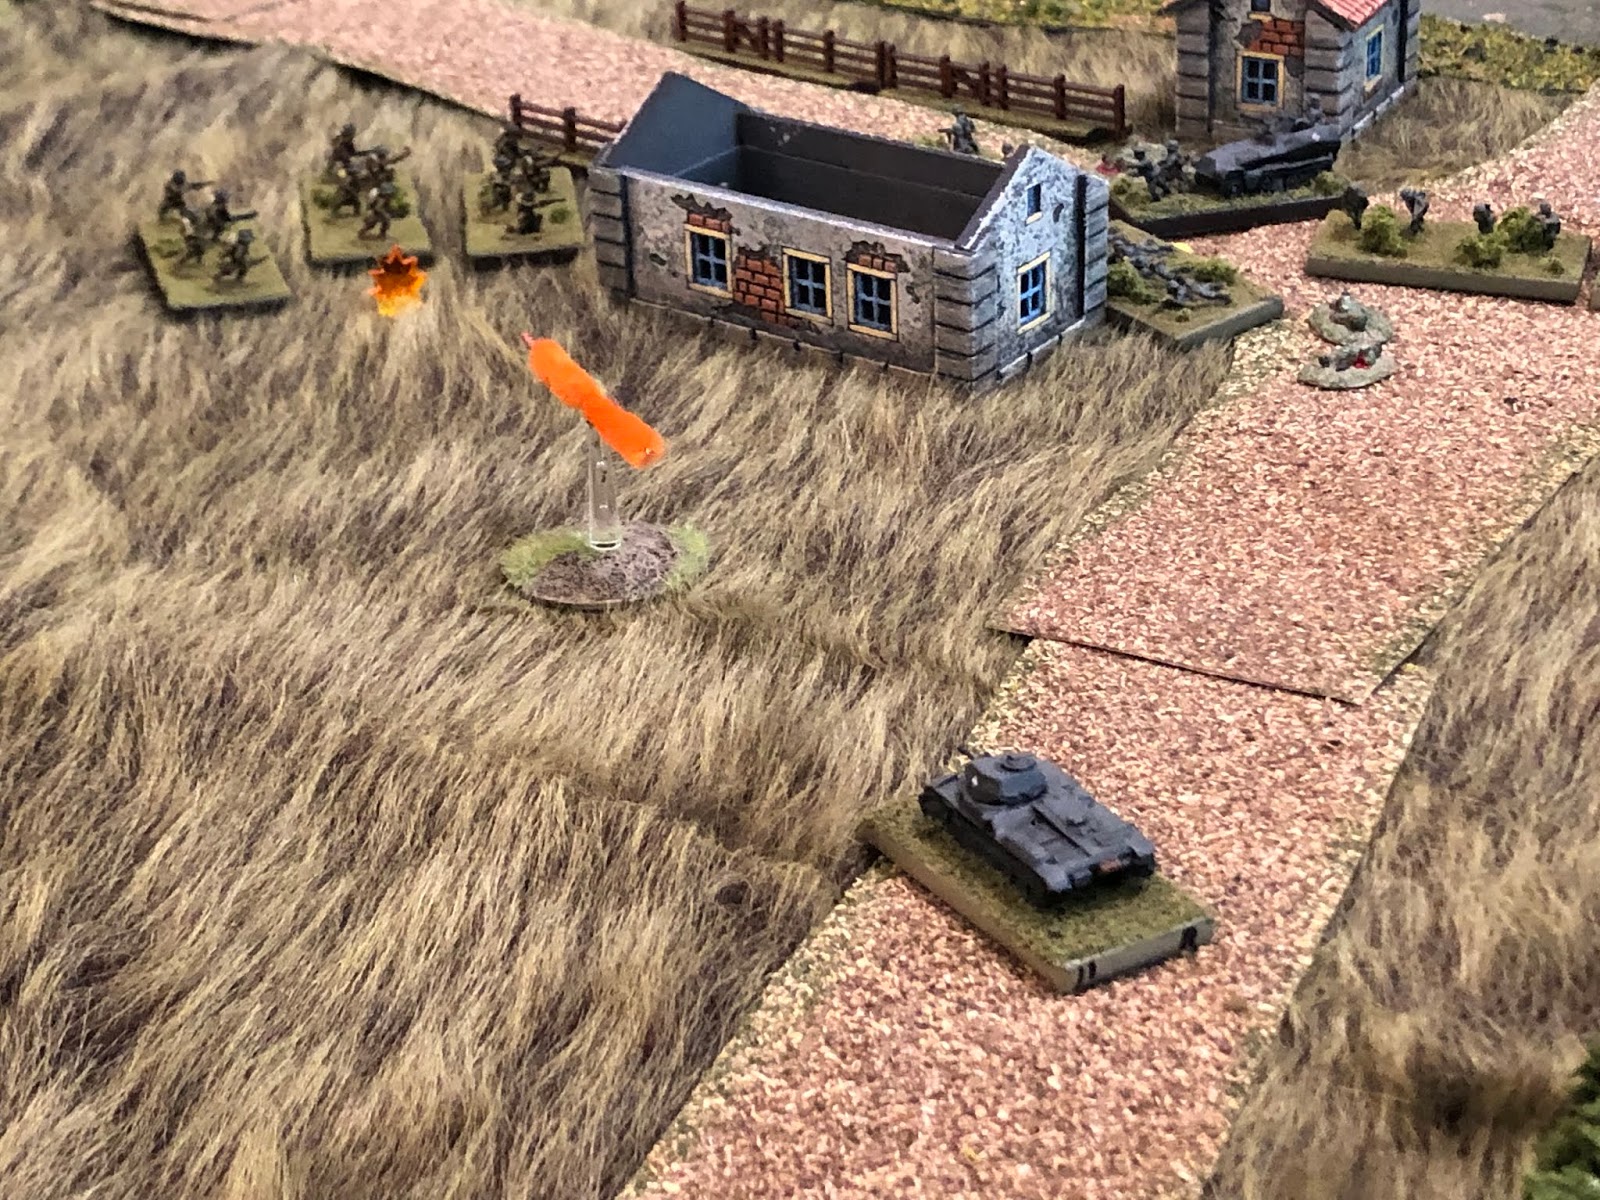
The overall area of operations, and that stupid north-seeking arrow at top right is incorrect, north is to far left... The three villages are, from left to right: Dujour, Deture, and Toujour, and the hills are, from left to right: Hill 34, Hill 44, and Hill 54. The River Bleu runs east-west down the center of the table.
My intent is to play a series of battles on a 6' x 4' layout, using small pieces, maybe 2' x 2' with 10mm troops. I've gone back to my old standby, Ivan's "5Core Company Command."
The German force:
CO: 1st Lieutenant Wehner (Iron Cross 2nd Class), Reconnaissance Company Commander
-Armored Reconnaissance Platoon Commander: 2nd Lt Weider (Sdkfz 222)
Vehicle 2: Sgt Keck (Iron Cross 2nd Class) (Pz II)
Vehicle 3: LCpl Fasbender (Sdkfz 222)
Vehicle 4: Cpl Edst (Iron Cross 2nd Class) (Sdkfz 221)
-1st Motorcycle Platoon Leader: SSgt Dorn
1st Squad: SSgt Sachs
2nd Squad: Cpl Wilhelm
3rd Squad: Cpl Walon
2nd Squad, 2nd Motorcycle Platoon: Cpl Obst
The French force:
Commanding Officer
2 x MG Team
2 x Anti-Tank Gun
Four Rifle Squads
The Reconnaissance Company elements move south towards Deture, past the farmhouse on the right, and with Major Schultz leading 4th Grenadier Platoon up on the left.
The French defenders in Deture: they have their 1st Squad and MG Team 1 in the building at bottom center left, 2nd Squad in the building at bottom left (that squad is supposed to be in the building; the house comes off the building, but the stand doesn't fit!), 3rd Squad on the 2nd floor of the building at center top, with MG Team 2 on the 1st floor and the CO behind the building, ATG 1 near the hedges on the road at far right, ATG 2 and 4th Squad at top left.
The German Reconnaissance Company continues pressing towards the bridge (top left).
Almost to the bridge, with LCpl Fasbender's Sdkfz 222 almost there.
And up onto the bridge when...
The French ATG 1 (bottom right) opened fire on LCpl Fasbender's armored car!
The 25mm round ricocheted off the armored car's forward glacis (far left), suppressing Fasbender and his crew, as the French ATG 2 (in the treeline at bottom right, with their 4th Squad), fires on Sgt Keck's Panzer, missing!
The French, screaming 'La Marseillaise' at the top of their lungs, leave the cover of their building (bottom center) and dash out onto the bridge to assault LCpl Fasbender's armored car!
But Fasbender comes to, sprays a burst from his MP-40, and begins tossing hand grenades like a madman, chasing the French infantry away! The French riflemen fell back to behind their previous station (far right), suppressed.
*That was quite a shocker! The French should have had that easily, and blocking the bridge like that would have forced the German motorcycles to dismount and attack on foot over the very exposed bridge, while the German vehicles would have had to uncork themselves and find suitable support positions on the far (north) bank.
But Fasbender is in it, and he orders his driver forward, chasing after the retreating Frenchmen (center top, from explosion at bridge)!
But as he rounds the corner, the French MG Team 1 (bottom left) opens up on his armored car.
The rounds ricochet off harmlessly, and Fasbender begins pumping 20mm rounds into the house, causing the French machine gun team heavy casualties and suppressing the French 1st Squad next to them.
"Yes, seize the initiative," shouts Lt Weider, Fasbender's platoon commander, as he drives his vehicles straight up into the intersection.
Where the French MG Team 2 (center bottom on 1st floor, with the French 3rd Squad on the 2nd floor) immediately rattles off a long burst...
But it, too, fails to impress, and the German platoon commander begins pumping rounds into the building, suppressing the other French MG team.
As SSgt Dorn leads his motorcycle troopers up onto the bridge. A bold move, to be sure...
From the 2nd floor, the French 3rd Squad (bottom right) opens fire on the densely packed bridge!
Well, that move was brave, bold, and stupid, all at the same time, and resulted in SSgt Sachs' 1st Squad being knocked out of the fight and SSgt Dorn's command section being pinned down (yellow bead). SSgt Sachs would be out about a month, but would make a full recovery.
The rest of the Motorcycle Platoon dismounts.
The French CO moves to the west side of the road and sets about rallying his MG Team 1 and 2nd Squad; the MG team is good, but the rifle squad is still a bit shaky (up to pinned).
From the south, the French ATG )bottom center) there takes another shot at LCpl Fasbender's vehicle...
The round sails past, high, but close enough for Fasbender (bottom left) to feel the heat from it. He slews the turret left and returns fire, pumping out 20mm shells, pinning the French ATG 2 (top right).
Just as the second French ATG (bottom right, with 4th Squad) fires into the flank of Lt Weider's armored car!
BAM!!! The platoon commander's vehicle was immobilized and the crew bails, and the explosion was enough to suppress the Motorcycle Platoon commander's team (red bead at far left).
Sgt Keck (Pz II, just above the house at bottom center) can't locate the French ATG, but knows it came from the tree line (top center), so he slews the turret and starts raking it, without effect.
Back on the 2nd floor, the French 3rd Squad still finds the bridge to be a target-rich environment, so they continue to fire as fast as they can reload, but with all the smoke pouring out of Lt Weider's vehicle their aim is thrown off and the fire is ineffective!
*That is quite amazing; normally, rifle teams in normal conditions fire with 1K 1S, but because the bridge is so packed, I was giving them 2K 2S, and they didn't get a single result.
German return fire pockmarks the stone walls, but does not affect the French 3rd Squad inside (top center).
LCpl Fasbender cuts his vehicle hard left and goes nose to nose, with the French ATG 2, firing as he goes, suppressing the gun crew and pinning the French 4th Squad.
Determined to get off the 'X,' Cpl Wilhelm, Squad Leader of 2nd Squad, leads Cpl Wallon and Cpl Obst's squads forward, where they run into the French 1st Squad!
But as they round the corner (top left), the French MG Team 1 opens fire, but they're afraid of hitting their own men (the French 1st Squad, the red bead at left, up against the building) and the rounds sail wide!
*Wow, I didn't realize how badly the French dice were until I was writing the batrep. That MG was firing with 1K 2S (because of reacting with friendlies nearby, normally would be 2K 2S or 2K 3S), didn't touch a thing.
Lt Weider and his bailed out crew get back to the German side of the river (left), as Lt Wehner, the CO, finally manages to get over the congested bridge, where he rallies SSgt Dorn, the Motorcycle Platoon commander (the motorcycles at center top right).
No one is sure what Cpl Edst is doing with his vehicle waaaaaaay back there (far left), but Sgt Keck pushes his tank through the mess and pops out on the other side, right in the middle of the intersection (top right, from just in front of Cpl Edst's vehicle).
The Panzer II's 20mm gun pumps rounds into the French ATG 1, suppressing the crew (top right).
But just then, the French garrison on Hill 54 (bottom right) decides to get in the fight! A mortar is moved into place atop the hill, and the three rifle squads come pouring down the hill towards the village.
*This was a random event.
The French CO rallies his 2nd Squad (yellow bead at center bottom), with an eye to aiding his 1st Squad (red bead at center left top).
The French CO then dashes out into the street to rally his 1st Squad, right in the face of the German infantry!
The gallant Frenchmen get back in the fight and begin firing into the German infantry...
Cpl Wilhelm's squad was suppressed (the lead German stand), and Cpl Wallon's squad (next in line, with Cpl Obst's behind them and SSgt Dorn's in last place) returns fire but it's too hectic a situation and it's ineffective.
And as the French 1st Squad (bottom left) is engaged in the fracas, their 2nd Squad charges out into the street to attack Sgt Keck's Panzer II!
But the German tank commander is cool and calm and responds in a methodical manner, eliminating his assailants!
*Wow, the French again fail a close assault on a vehicle with odds that favor them. Not as good of odds as when the French 1st Squad charged LCpl Fasbender's vehicle, but favorable nonetheless.
The French are all in at this point, flinging human flesh at cold steel, fighting desperately to retain control of the bridge and their countrymen's homes! The French 3rd Squad charges down off the 2nd floor, swarming LCpl Fasbender's armored car!
And for the second time today, LCpl Fasbender and his crew are able to fight off a French infantry assault, this time with deadly effect.
*Yeah, the Germans had the odds with them that time, as Fasbender was facing that direction and the French squad was in a pinned state. Could have happened for the French, but it didn't.
And Fasbender pushes his vehicle further up the road, pounding the French ATG 2 and 4th Squad, but he's gotten too close and can't depress the gun far enough to target them!
*Just kidding, he just missed. Lot of that going around today...
While, following in trace, Cpl Wallon maneuvers his squad forward, into close combat with the French MG Team 2, which is suppressed.
But the plucky French machine gunners (top right) are able to get the gun back into action and force the Germans back (bottom left, with red bead)!!!
*Two tied close combats in one game? Wow.
At this point the Deture intersection is a scene straight out of Dante's Inferno; gunfire, explosions, ricocheting rounds, fire and smoke from Lt Weider's burning vehicle, broken and bloodied bodies and gear strewn about. The CO, Lt Wehner, grabs Cpl Obst's squad and leads them forward into action against the French 1st Squad and their Commanding Officer (top center)!
The Germans are victorious, eliminating the French CO and 1st Squad!
Lt Wehner pushes Cpl Obst's squad forward to finish off the French MG Team 1, but the desperate Frenchmen open fire, suppressing the German riflemen!
But SSgt Dorn is Johnny on the spot, moving his command section up with a quickness. They manage to get weapons into the windows and deliver effective fire, suppressing the enemy MG team, while also rallying Cpl Obst's squad back into the fight.
Although the same can't be said of Cpl Wallon's squad; the young German NCO stood on the bridge, pleading with his riflemen, but they kept on running, all the way back to... Cpl Edst's armored car (top left)???
*I'm trying to figure out if I just forgot about this vehicle, or what???
And the French still have a platoon's worth of infantry coming down the hill, but, to be honest, it's too little, too late, and they're walking into a meatgrinder. The French mortar team (bottom right) begins pounding the intersection with 81mm HE rounds...
SSgt Dorn's command team and Cpl Obst's squad are suppressed, and Lt Wehner's command group is pinned! Maybe it's not too late; the fresh French infantry platoon dashes down the hill, hoping to get into contact with the roughed up German infantry on the east side of the intersection!
*If they can just get into close combat, they're pretty much guaranteed to roll up the German right, but the French are really hurting with all these losses, and not having a Commanding Officer.
LCpl Fasbender turns his vehicle and practically pokes his barrel into the window of the French MG Team 2 position. The 20mm gun thunders, putting some casualties on the French machine gunners.
Lt Wehner (bottom center) is hurriedly rallying his troops back into fighting shape, but it's tough with all the mortar rounds dropping in. Sgt Keck pushes his vehicle up the road (top right), with an eye towards ending this...
He pivots his tank, then opens fire, catching the French reinforcements in the open, but only one squad is suppressed.
Cpl Wilhelm pushes his squad into the house, close assaulting the French MG Team 1 (sorry about popping them up on top, but it didn't look right when I put them inside)...
Cpl Wilhelm's squad knocks out the MG team, then continues, charging straight into the first of the French reinforcements.
And another victory is notched on their belts...
Which is enough to convince the rest of the French reinforcements to surrender!
On the western side, the French gunners spike their guns and retreat south into Toujour!
Except the French mortar team on Hill 54. The German force sets about policing up Deture, but doesn't have the men to spare to go and secure the hill, so the Frenchmen take the opportunity to get comfortable, dropping mortar rounds in and around the intersection for the rest of the day.
What a fight! My apologies that things got so congested on the bridge and in the intersection, but that was kind of the point of this fight, to have some dirty, in-close, nitty-gritty street fighting at bayonet point. And, despite it probably being a bit hard to follow, and looking pretty silly, it certainly worked. The funny thing is, despite all those troops and vehicles crammed together right on top of each other, despite all the crazy close assaults, relatively speaking, there weren't that many casualties. The Germans only lost one armored car and one rifle stand, while the French only lost four rifle stands and a machine gun team. There was a whole lot of shooting, and even a couple close assaults, that had no effect in terms of removing troops from the table.
The CO, Lt Wehner, tipped his hat to LCpl Fasbender, Sgt Keck, and Cpl Wilhelm. Fasbender was a madman, fighting off two enemy close assaults, and generally driving around wildly and shooting up the west side of town, while Sgt Keck was simply steady, right place at the right time, putting effective fire on enemy units to allow friendly forces to maneuver into and through the intersection. Sgt Keck would be given a pat on the back, Fasbender would be meritoriously promoted to Corporal, but Cpl Wilhelm would be the only soldier decorated for this action.
Germans: ~20 KIA/WIA, 1 Sdfkz 222 damaged
French: ~45 KIA/WIA, 10 captured
Of the named characters, only one was hit:
SSgt Sachs, 1st Squad Leader, WIA, out for campaign
Cpl Wilhelm was decorated for first leading the dismounted platoon off the bridge and out of the kill zone when his platoon commander was suppressed, then leading the close assault that eliminated a machine gun team, a rifle squad, and captured two more rifle squads, breaking the back of the French defense in Deture.
Lt Wehner set about cleaning out the rest of Deture and organizing its defense, expecting an enemy counterattack at any time, but at this point all attention shifted back to the north, where Colonel Klink was busy scratching together a force to go and take Hill 44, securing the flank of his penetration towards Toujour.


Another cracking AAR Jack:)! Keep up the good work.
ReplyDeleteThanks, Steve, will do!
DeleteV/R,
Jack
Jack, an amazing amount of work put into your Action Report, enjoyed the narrative and the visuals, thanks.
ReplyDeleteOh, stop! You're giving me a big head, Norm! I appreciate the kind words, and can't wait for your next batrep.
DeleteV/R,
Jack
Hello Jack
ReplyDeleteYou set up such a wonderful table, and then most of the action happens in a tiny space in the middle :-) Slightly different to your usual games with so many units so close together. Great report!
And there I go, promptly forgetting that you ARE only playing the game on part of the overall table. My bad. It is what happens when you break up reading the report!
DeleteShaun,
DeleteNo sweat man. Yup, seven games one big table, makes setup a snap ;)
V/R,
Jack