All,
It's 0715 on 15 May 1940, and KG Klink, attached to the 7th Panzer Division, is on the move. The 7th Panzer Division has broken through the French front line and is on the road to Flavion, with reconnaissance elements pushing both north and south of the city in search of a way to by-pass the city, or at least find an undefended back door. North of Flavion, recce elements of KG Klink have discovered a ford over the River Moiste near a small farming hamlet; led by KG Klink's Reconnaissance Company Commander, 1st Lieutenant Wehner, the Germans quickly push across the river and secure a small bridgehead on the western bank, before sending for reinforcements. Colonel Klink, the Kampfgruppe Commander, immediately broke off a detachment of infantry and armor to reinforce Lt Wehner at the ford. But time is of the essence; French forces under Captain Cognac have spied the German bridgehead and are already forming up for a counterattack.
I am playing this game, the sixth of KG Klink's campaign during the Fall of France in 1940, with my eight-year old son, with me commanding the Germans and the boy commanding the French. We are playing the games in 10mm, a mix of Pendraken and Minifigs UK troops and equipment, on a 6' x 4' table, using Too Fat Lardies' "I Ain't Been Shot Mum," modified a bit to suit our tastes. The scenario is "Cognac and Moiste Cabbage," written by Robert Avery and published in the Lardies' Christmas 2005 Special. On a side note, Mr. Avery is now pasting my IABSM battle reports on the Vis Lardica website (https://www.vislardica.com/); I am happy for the extra exposure, and proud to be considered a contributor.

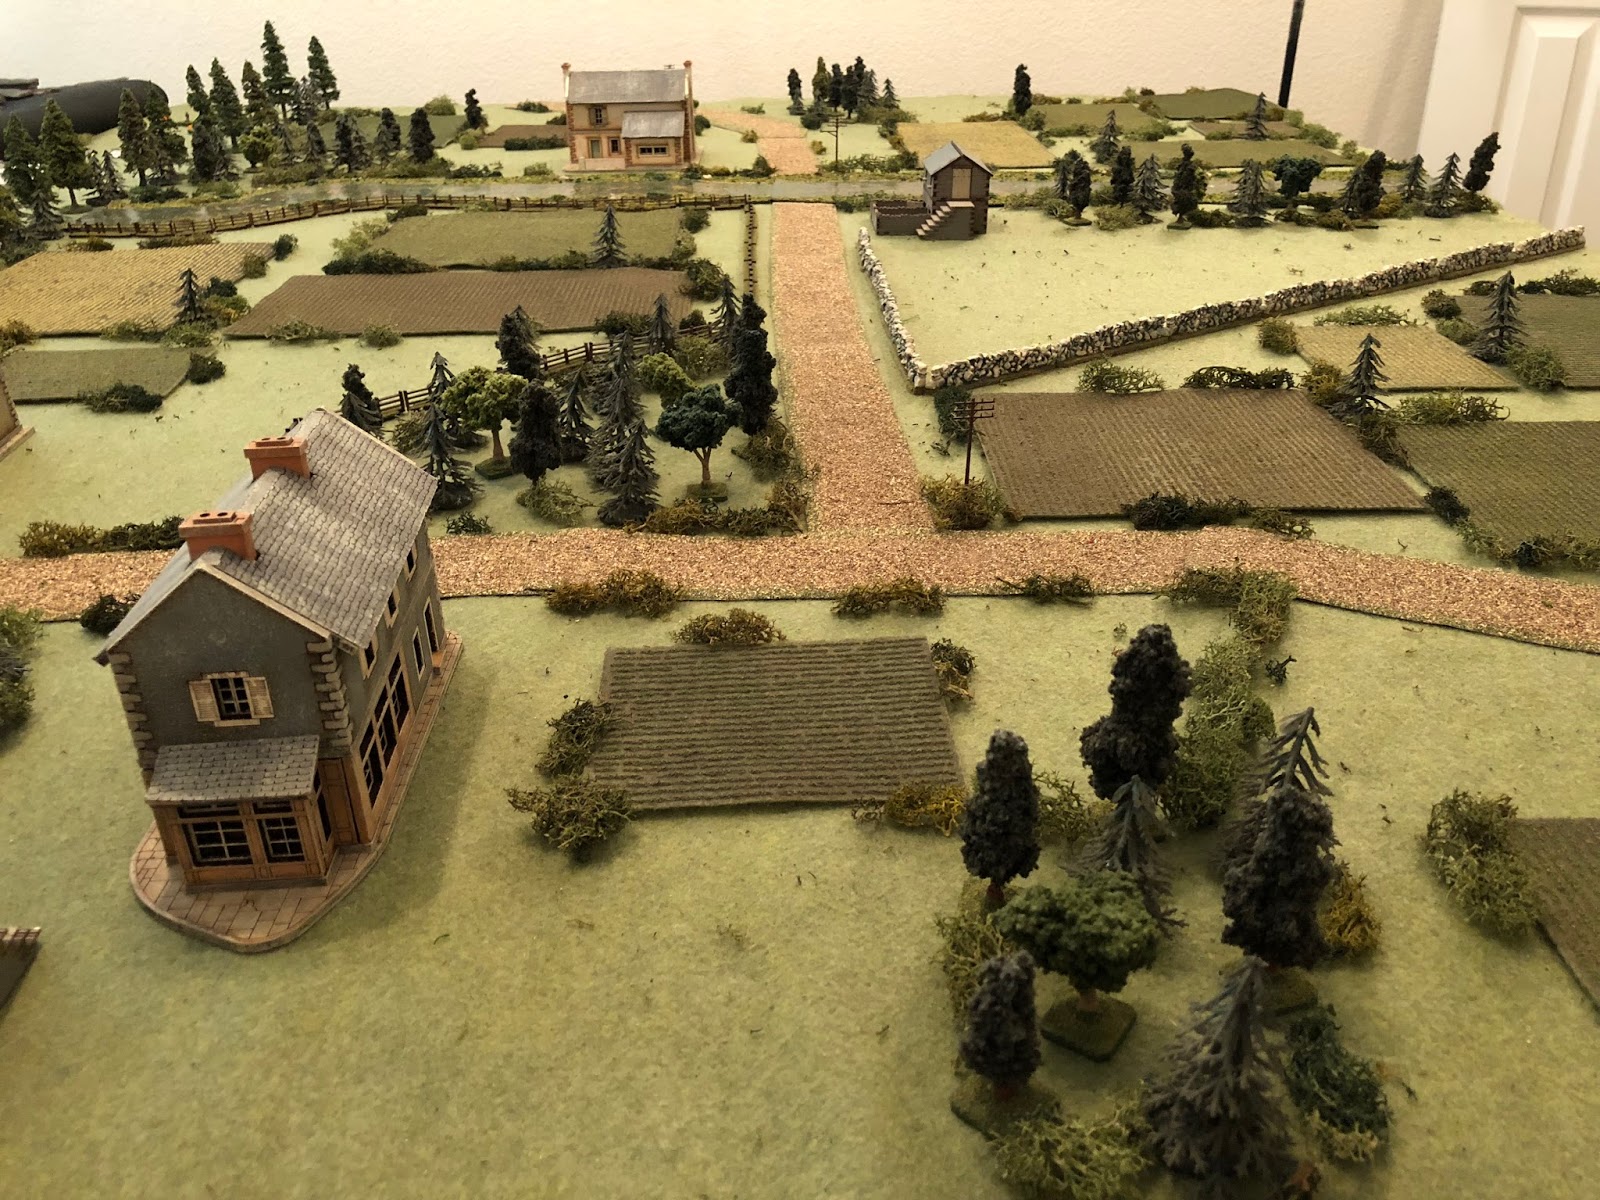
Overview, north is up, with the German baseline at right (east) and the French at left (west). The River Moiste is at center, running north to south, and the key ford is at center right, where the dirt road intersects with the river. The ground is flat, rolling fields, with heavy stands of trees at far right, bottom center, left, top left, and far left. Cabbage fields abound, providing no significant cover or concealment nor real impediment to movement, but there is a stone wall (the sideways 'V' at center left/bottom) that halts movement and is only barely passable to tracked vehicles; similarly, there is a wooden fence running along the northern side of the main, east-west running road. The fence itself is not the problem, it's the drainage ditch running just below, invisible to the naked eye ;) , the fence. At top left is The Farm, consisting of a residence, an outbuilding, and a barn. At center is the tollkeeper's house, and at top center right is Mademoiselle Chevelle's home.
The objective of the game is possession of the ford, with possession being defined as having troops on the enemy's side of the river at the conclusion of the fight. The Germans start the game in defensive positions, with guidance being to set up a significant amount of their forces on the western (French) side of the river. The French begin the game at The Farm, in the northwest (top left), which is their marshalling area for the counterattack.
A close up of the objective, the ford (center), with the tollkeeper's home at bottom left and Mlle Chevelle's home at top right. You get a good look at some of the cabbage fields and the wooden fence running on the north side of the main road.
The battlefield, looking southwest to northeast.
Looking northwest to southeast.
Looking northeast to southwest.
Looking southeast to northwest.
Looking east to west, straight down main street.
The reverse, looking west to east, straight down main street, with The Farm's outbuilding at left.
The opposing forces, with Germans on right and French on left. Each side will begin the game with a main force on the table, then each side will receive two separate sets of reinforcements as the game goes on.
The entire German force.
Here is what the Germans have on the table at the beginning of the game.
At bottom center is the onsite commander, 1st Lt Wehner, Recon Company Commander and holder of the Iron Cross, 2nd Class.
At top right is Lt Wehner's 1st Motorcycle Platoon (already dismounted). They are led by SSgt Gradl, holder of the Iron Cross 2nd Class. He has three squads:
1st Squad - SSgt Sachs
2nd Squad - Cpl Rein, a replacement squad leader.
3rd Squad - Cpl Wilhelm
At top center are two squads of the Assault Engineer Platoon:
1st Squad - Sgt Barkstrom
2nd Squad - Sgt Hafl
And center left is a Schwere Platoon consisting of:
-an MG-34 team under LCpl Steinkamp
-and two Pak-36 37mm anti-tank guns under Sgt Kallenbach
On the fourth draw of the "Turn Card" the Germans will receive reinforcements from the KG's Panzer Company, specifically, two Pz IVCs from 4th Panzer Platoon:
-Sgt Graebner's tank, holder of the Iron Cross 1st and 2nd Class, with four tank kills
-Sgt Kapp's tank
And on turn 10 the infantry arrive, the Schutzen Company's 2nd Grenadier Platoon under 1st Lieutenant Ost, with three squads:
1st Squad - Sgt Lutz
2nd Squad - Lipniki
3rd Squad - Sgt Axthelm
They are riding in trucks and accompanies by a section of two 80mm mortars under LCpl Vigerte, seeing his first action of the war.
And the French, under Capitan Cognac.

This monstrosity is the force the French start the fight with on the table. I must admit I'm a bit nervous, looking at the force arrayed against me. At top center right is Capt Cognac's command stand. At top left are two platoons of infantry, each consisting of a platoon commander and three squads. At bottom left is a weapons platoon of two machine guns and an 81mm mortar (the scenario says it's supposed to be a 60mm mortar; I don't have a 60mm mortar for the French, so I resolved to use an 81mm mortar but treat it like a 60mm mortar, but, in the event, I forgot, and ended up treating like an 81mm mortar). At center are two Somua S35s, with a single H39 to their right. At bottom center/right is a 75mm field gun being towed by a horse team; it's supposed to be towed by a truck in the scenario, but I've got horses so they're using horses (no difference in capability on the table, and wouldn't matter anyway as they came straight off blinds into firing position during the game).

At turn 8 the French receive this beast as reinforcement. Please note this is a different Char B than I used in the last fight. Why am I telling you this? Just pointing out how goof I am; I actually have three Char Bs, but only two S35s and three H-35/39s. And my British early war tanks are even more limited. To be honest, I never really thought I'd be playing early WWII games, it was something that hadn't really interested me before I started the KG Klink saga.
And in Turn 12 the French receive another platoon of infantry as reinforcements.
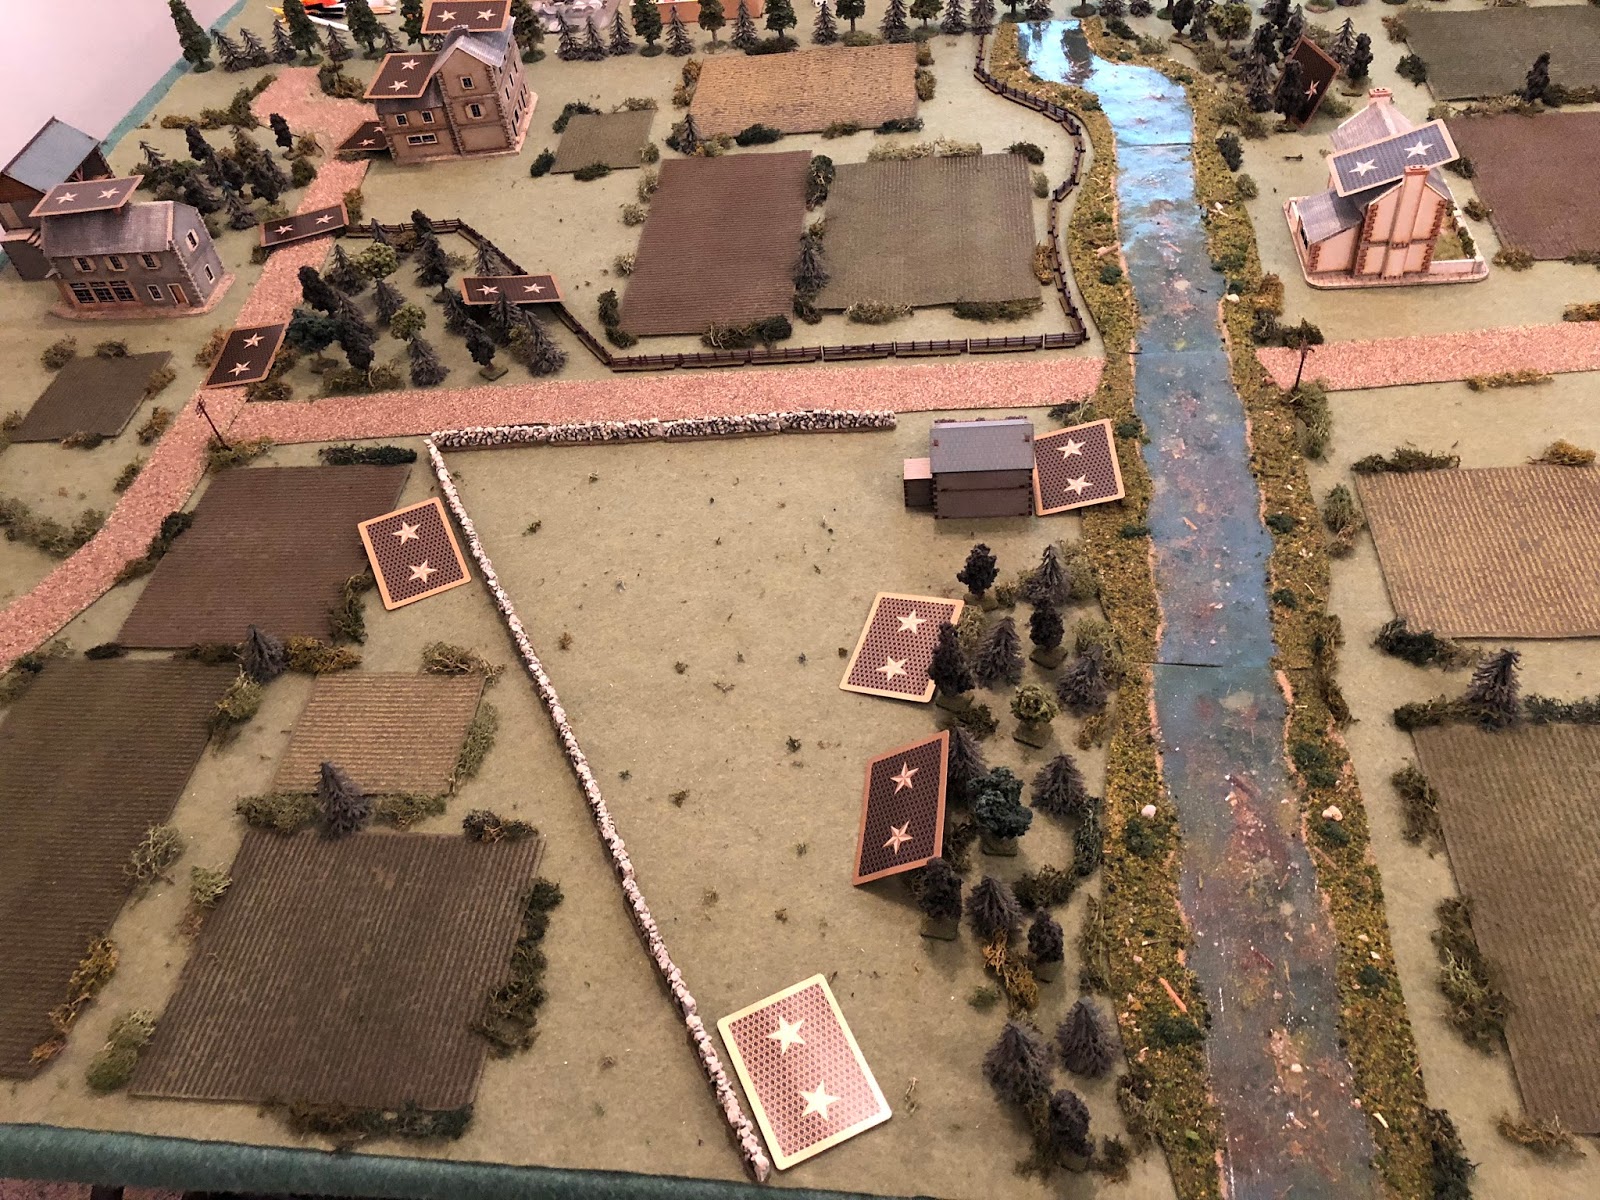
Overview of the map, north is up, this time with blinds on the table. The German blinds are at center bottom and top center, while the French blinds are all at top left, in and around the farm and intersection.
Yes, the playing cards as blinds are ugly, but I'm having a hard time coming up with an alternative as these are so simple, cheap, and effective (for play purposes, not aesthetics), and there are so many variations as to make a prettier solution tough. What I mean is, each game is different and has different forces. I'm playing with an 8-year old, so I'm trying to keep things as straightforward as possible. So I can buy pack after pack of playing cards and write directly on them what the card is: i.e., 1st Rifle Platoon (PC and 3 Squads), Weapons Plt (2 MGs and 1 Mortar), Field Gun, Char B, etc... But I can't see doing that with something that is better looking but much more expensive.
I know a lot of guys make pretty blinds and just label them as "Blind #1," then they have a roster on the side to show what troops Blind #1 is. Again, I'm trying to keep things simple for the boy, I don't want any confusion as to where he puts the blinds, what he does with them (because he thinks it's a certain unit), or what troops go on the table when the blind gets lifted. And printing off new blinds each game doesn't work either; I'm a cheapskate, and printer ink gets damn expensive! So, I apologize for the ugliness of the playing cards, but I don't see another way right now.
I am all ears if someone out there has an idea for prettier blinds that I can write the exact unit on AND change to meet the unique needs of every single game.
The Gemans have four blinds (out of a total of seven, three real, four dummy) in the south and three blinds in the north.
And the French mess in the northwest, with a total of eleven blinds (if I recall correctly), three of which were dummies.
And the game is afoot! The French blinds start pushing east towards the ford (top center), approaching the unseen German forces at top left and top right. I would later verbally and physically abuse the boy for being so timid with his blinds and not pushing forward stronger to seize the river crossing. We both have seen everything about each other's forces, the only secret is their location, so he knows exactly how little I have and how much he has, and he knows what to do (you'll see him establish a base of fire and begin pushing his maneuver elements forward, just not as aggressively as I expected).
The French blind at the Farm's residence (bottom center), quite unbelievably, have spotted movement across the river, in the treeline to the northeast (top center left). Whatever could it be?
It's my damn Weapons Platoon, dammit! Two ATGs (the infamous "doorknockers," at top left and center), and the MG-34 (bottom right). Sorry for the blurry photo, I'm just aggravated that he spotted these guys, immobile in the treeline, so quickly. This is not good at all...
The Germans counter only by moving a blind into Mlle Chevelle's home (building at top right) and up to the wall at bottom center.
And the Germans in the good Mademoiselle's house (bottom center) have spotted some goings on up around The Farm (top center)...
It's a 75mm field gun, already unlimbered and being swung into action!
The Germans in the northeast (bottom, the Weapons Platoon and a dummy blind) keep looking. Something is up there at top right, and it looks like a...
TANK!!!! The Germans not only spot a Somua (bottom left), but also the French Weapons Platoon, with two machine guns on the 2nd floor of the farmer's residence and their 81mm mortar setup I the garden below (bottom center).
The French continue to sheepishly advance, or just move laterally (bottom right). The boy is very scared of my anti-tank guns, even though I've told him they can't hurt his Somuas from the front AND he has spotted both my guns already.
In the south, the Germans (right) spot movement up at the 'V' of the wall (top left); it's the French H39 light tank.
And now is the time to fight!
The cool stillness of morning is suddenly shattered as LCpl Steinkamp's MG-34 (bottom center) rips off a long burst across the river, sending a steady stream of tracers into the 2nd floor of the farmer's residence (top center).
Pinning one of the French machine gun teams (yellow bead).
And then both 37mm anti-tank guns (or ATGs, bottom right) sight in and commence firing on the French Somua in the northwest (top right), but the rounds bounce away harmlessly...
Below in the courtyard, the French 81mm mortar fires a spotting round at the German ATGs, which is off target...
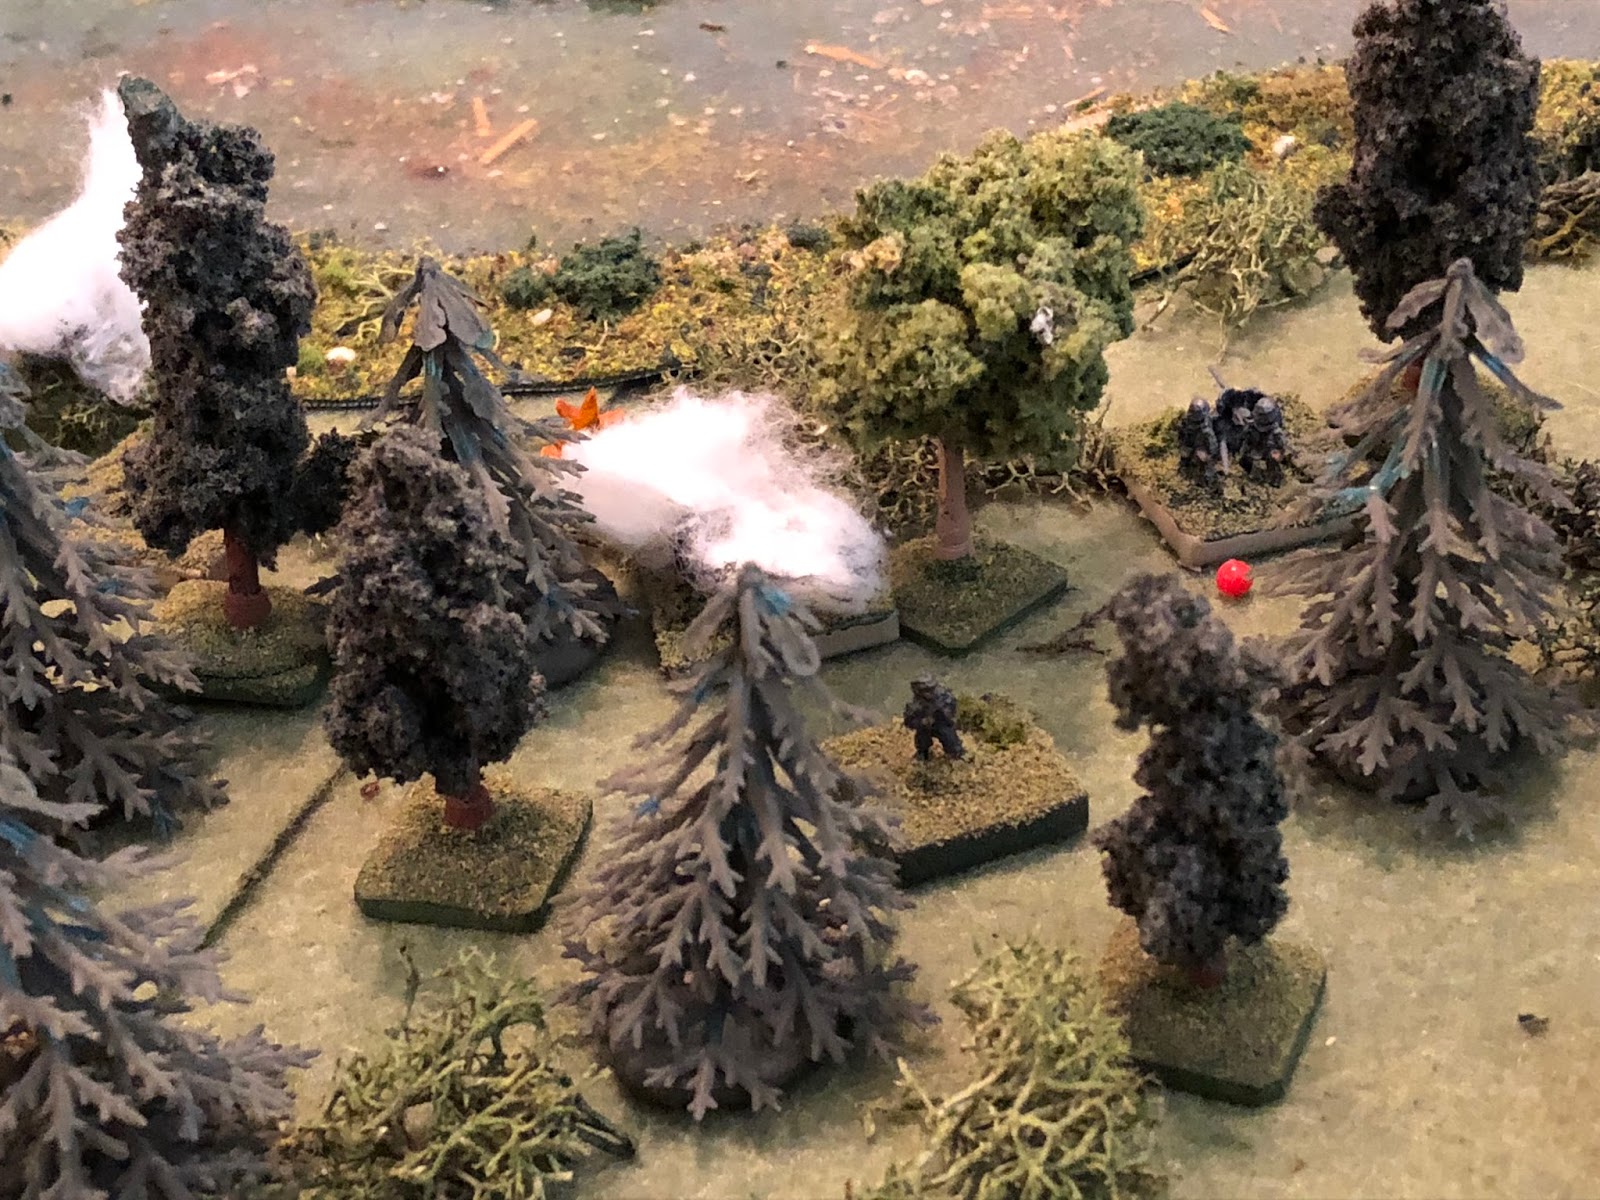
The round doesn't hit the ATGs (off camera to bottom center), but it impacts close enough to suppress LCpl Steinkamp's machine gun team (red bead)!
And then the French machine guns get into the action (bottom center), sending tracers into the woodline across the river (top left, you can see the orange explosions of their impacts, as well as the white puff from the mortar's spotting round).
The enemy machine gun fire suppresses both of Sgt Kallenbach's ATG crews!!!
The French continue to push blinds east (right) and south (bottom left).
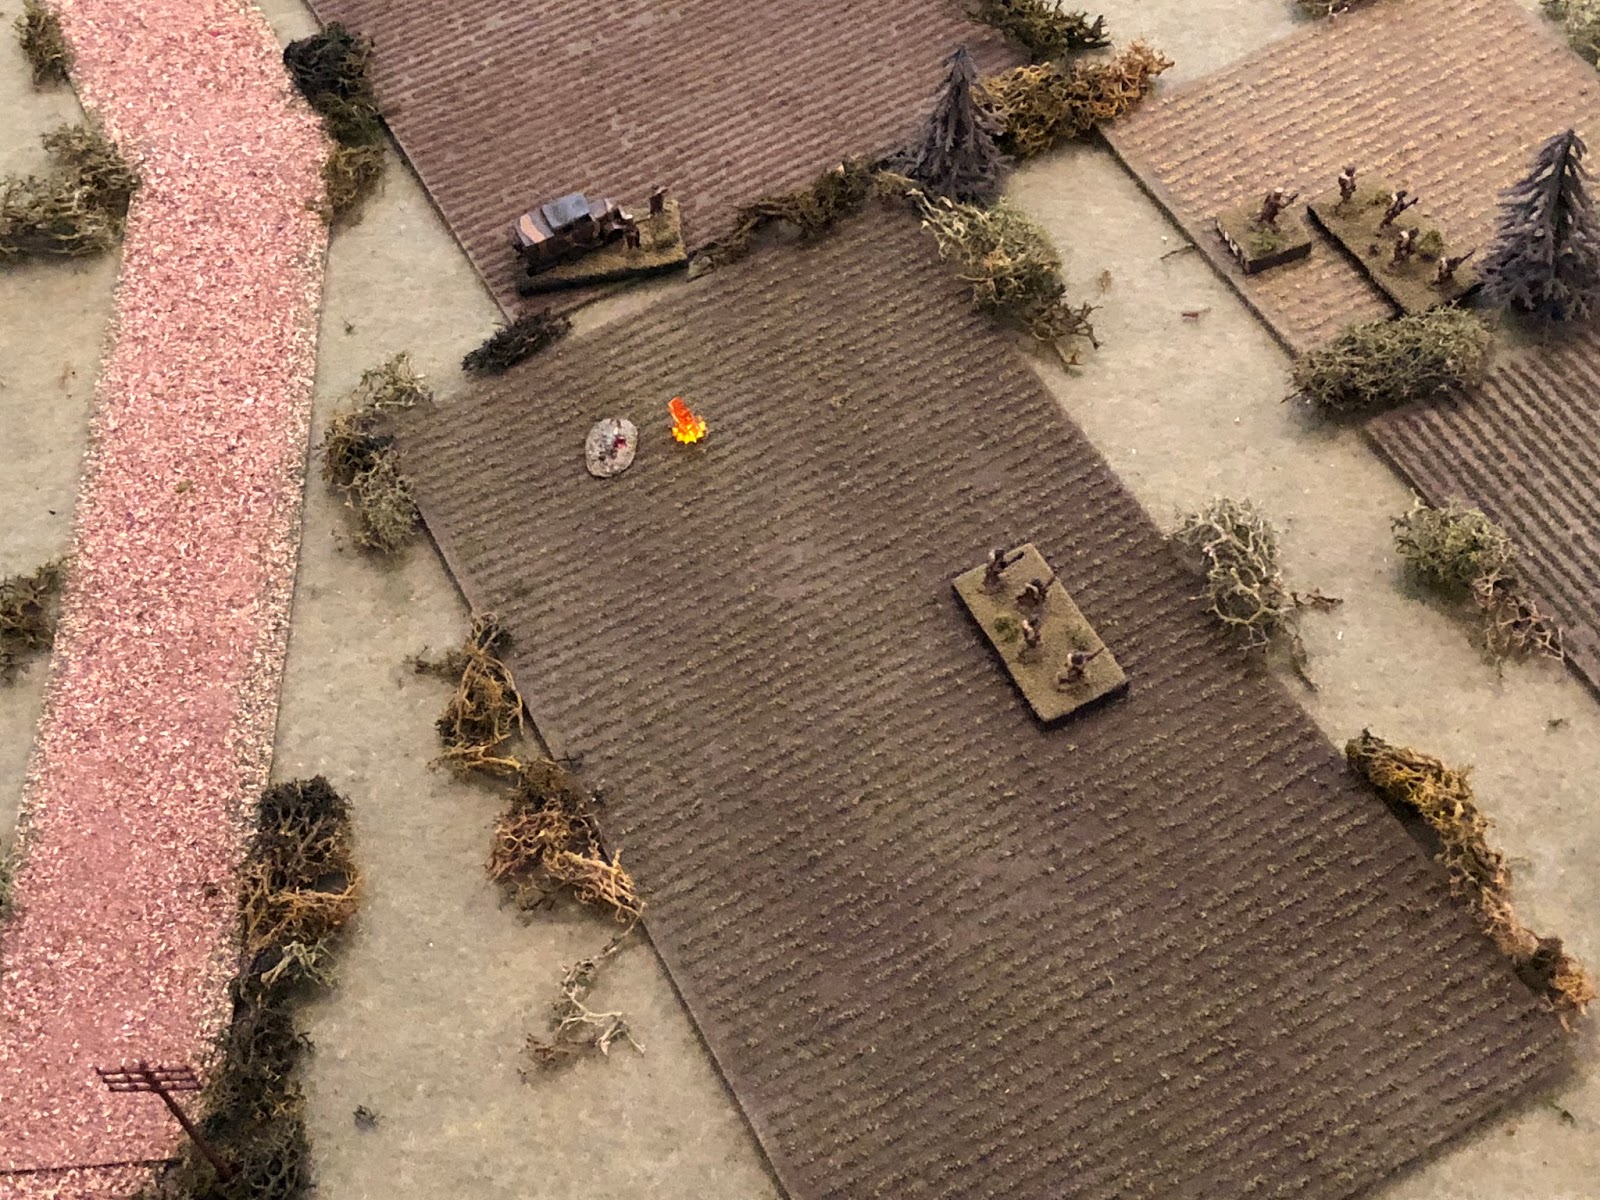
Then the French notice movement in the southern treeline (top center right)...
They've spotted SSgt Gradl's 1st Motorcycle Platoon, which had dashed across the river, dismounted, and taken up defensive positions. Wow, I can't believe they've been spotted, too. I was hoping it would have been a lot harder, maybe even get off a close range ambush or something...
Back at the farm, the French 75mm (bottom left) goes into action, pounding the German Weapons Platoon in the northern treeline (top center right).
One of the ATGs is destroyed, its crew abandoning the gun and fleeing (center)!
The German blind at the tollkeeper's house (bottom center) has spotted something up at the intersection (top center left)...
It's the other Somua pulling up behind the H39.
And then north of the main road, the French 2nd Rifle Platoon is sighted in the trees (center bottom right, with the French 75mm field gun at far left and the farmer's residence at top center).
The French Somua in the northwest (bottom left) had found itself in a very loud hailstorm, with 37mm projectiles bouncing off every couple seconds, but then suddenly it got quiet, the French mortar (center), machine guns (2nd floor of the building at center), and the 75mm gun (off camera to right) having done a great job, suppressing an ATG and the German MG, and knocking out the other German ATG (top left). The French tank commander orders his gunner: "enemy infantry in the trees, 200m, high explosive, fire!" But, being buttoned up, he hasn't actually seen anything, and the HE round slams harmlessly into some unoccupied part of the forest.
The French blinds, down to only two, continue to push east (center top and bottom left), approaching the tollkeeper's house (far right).
And the French blind in the central fields (bottom center) spots movement at the tollkeeper's house (top right)...
And the two German engineer squads are discovered before they can surprise anyone with their flamethrower...
With the engineers discovered (far left), the German blind at Mlle Chevelle's house (bottom center) keeps its eyes peeled, noting movement in the center (card gone because it was a dummy) and the southwest (top left)...
Where the French 1st Rifle Platoon (left) has been seen! Their H39 and one of the Somuas is at top right, at the 'V' of the stone wall.
With all French blinds spotted I remove the German blinds as well, which were all dummies and serve no further purpose, which means the table should look a little prettier now that no nasty playing cards are lying around.
In the northeast, the German Recon Company Commander, Lieutenant Wehner moves in to rally the Weapons Platoon (center right), passing the fleeing crew of the knocked out ATG (bottom center right). The MG-34 (far left) and the other ATG (center top, both with red beads) are suppressed.
The Commander exults the anti-tank gunners to get back in the fight, and they rally 'up' to pinned.
Then Lt Wehner moves left (bottom left) and rallies LCpl Steinkamp's machine gun team.
In the center, Sgt Barkstrom's engineer squad (bottom center, with Sgt Hafl's engineer squad to their right) peeks out and fires on the French 1st Platoon (top left)...
Pinning a squad!
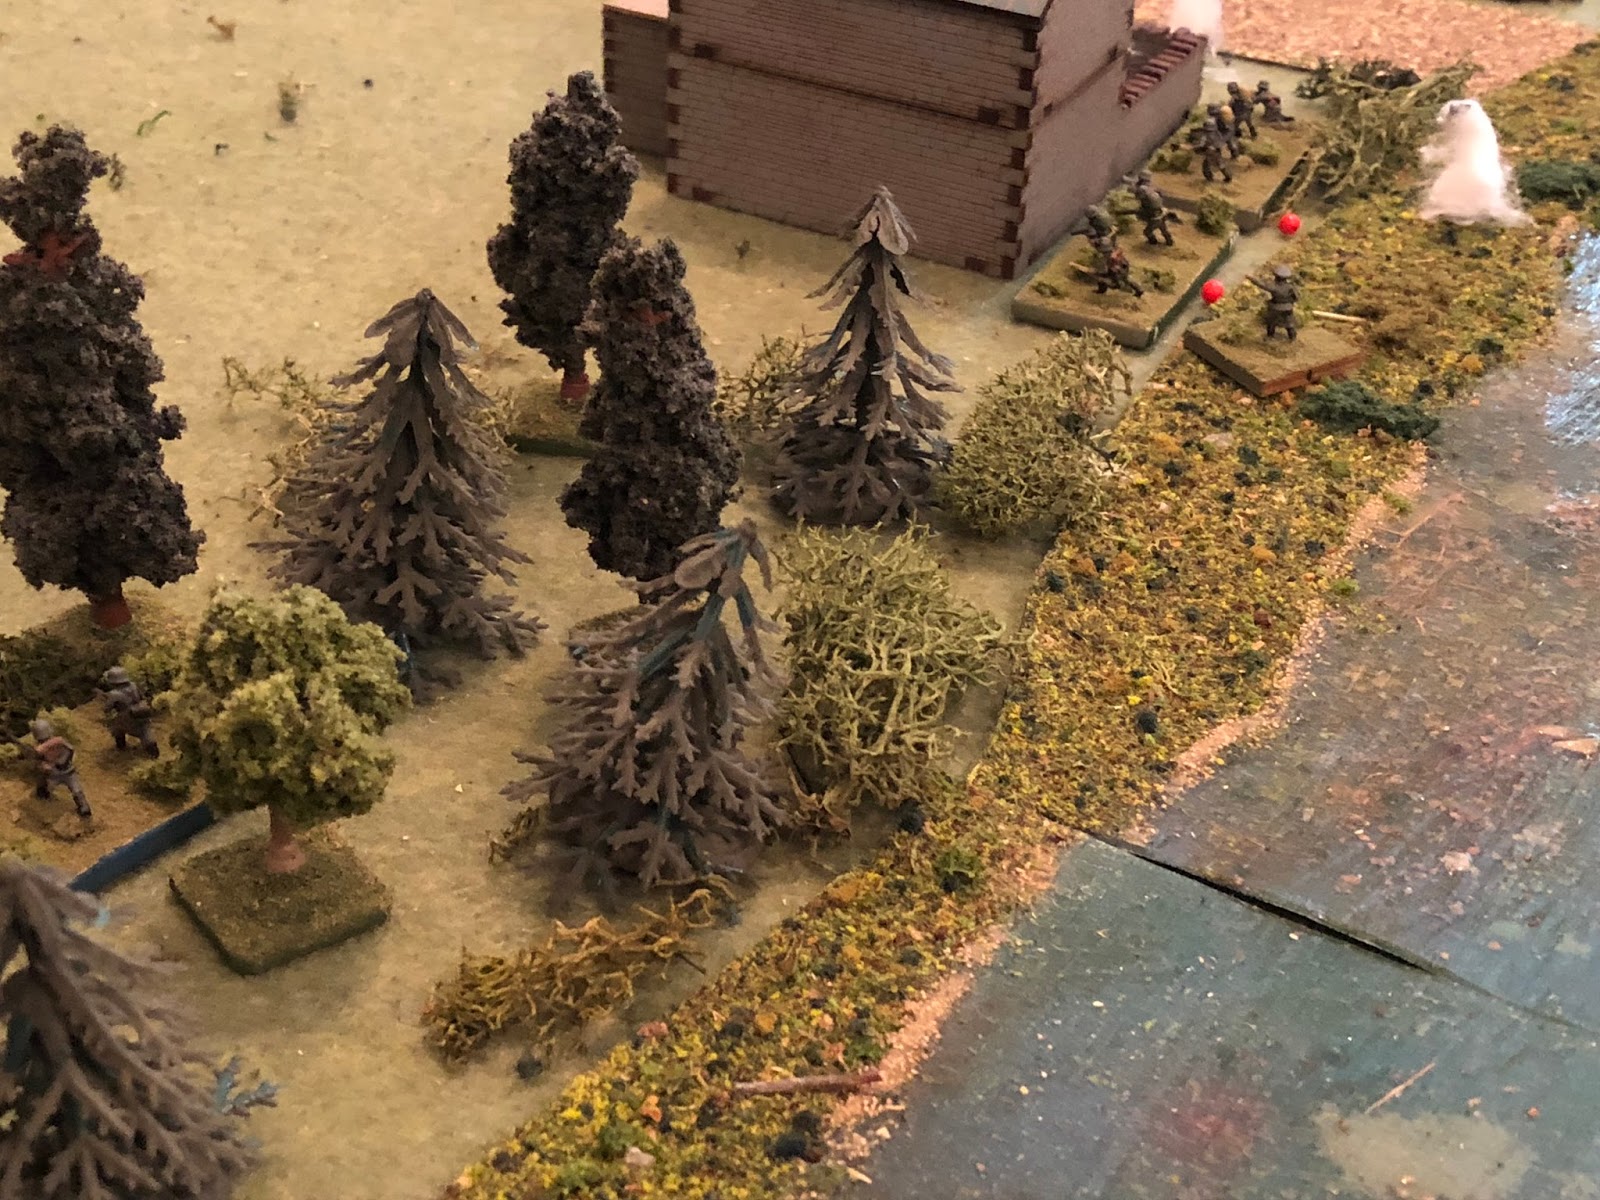
And then Sgt Hafl's squad (bottom right) opens fire on the enemy MG teams in the residence (top right)...
And they suppress one of the enemy MG teams (red bead), which was focused on the German Weapons Platoon and not expecting fire from the tollkeeper's house!!!
But the French Somua in the center (bottom left, with the H39 light tank above it) turns and fires on SSgt Gradl's Motorcycle Platoon, but the German infantry, veterans of the war in Poland and several fights in France, hug the ground as shrapnel harmlessly zips through the branches above them.
With the Somua (far right) laying down covering fire, the French 2nd Platoon pushes up in the center (center left).
And Capitan Cognac makes his appearance in the south, joining 1st Platoon.
I spoke to the boy about this; I don't think this was the right place to put his CO, kinda isolated in the south, with a stone wall and then 75 yards of open ground ahead of them, this was not going to be the location of the decisive push, and the pin of a single squad was something the platoon's Lieutenant could easily have handled himself. The boy was worried about the platoon getting caught in the open and chewed up, so he figured that, with the platoon's card, the PC's card, and the CO's card, he was more likely to get them up to the stone wall, into hard cover, then get his CO over to another hotspot.
On the French left, the northern Somua (bottom left) continues firing on the northern treeline, targeting the German Weapons Platoon (top left)...
And the remaining gun crew has taken casualties (white bead)...
Meanwhile, the French 75 (bottom center right) turns on the tollkeeper's house (top left) and begins pounding away...
Suppressing both squads of German engineers!
SSgt Gradl's Motorcycle Platoon, dug-in in the southern treeline (bottom center, with the tookeeper's house just off camera to right) opens fire on the French 1st Platoon (top center).
With his boys plugging away (bottom left), and seeing the engineers getting roughed up by the French 75 (top right), SSgt Gradl dashes over and begins rallying them.
The German Motorcycle Platoon is unable to knock any of the French 1st Platoon's squads out, but the fire is pretty damn effective, suppressing two rifle squads and pinning the third. Their Lieutenant and Capitan Cognac (top center) look on in exasperation.
SSgt Gradl rallies Sgt Barkstrom's squad.
And, despite the shelling, gets Sgt Hafl's squad up to pinned (yellow bead).
When suddenly the sound of engines is heard in the east (top left)...
Sgt Graebner and Sgt Kapp's Panzer Mark IVs have arrived!!!
They immediately being pushing west towards the ford.
The French officers in the south set about rallying their 1st Platoon, under fire.
Doing a decent job and even getting one of the rifle squads (bottom center) to return fire on the German Motorcycle Platoon (top center)...
Pinning SSgt Sachs' 1st Squad!
Then the H39 (far left, with the southern Somua just below and left of it, Capitan Cognac at bottom right, with 1st Platoon) then throws its fire into the mix, shooting its stubby little cannon at the treeline...
Suppressing Cpl Wilhelm's 3rd Squad (red bead).
Back in the north, a machine gun duel has broken out. LCpl Steinkamp has his MG-34 back in action (bottom center) and opens up on the 2nd floor of the residence.
The right-hand enemy MG team is suppressed, having suffered some casualties.
In the south, the French platoon leader continues trying to rally h is 1st Platoon back into the fight...
But one of his squads is not feeling so hot and decides to fall back to cover (red bead at far left, from center bottom).
And as that is happening, the German Motorcycle Platoon (bottom center) ups their fire on the French 1st Platoon (top left). Well, 1st and 2nd Squads, anyway; Cpl Wilhelm's 3rd Squad red bead at bottom left) tries to rally).
But the French infantry and tank fire is a bit much for them so they fall back to the river.
If they fail again they will drop their weapons and swim for it, escaping to fight another day, but hoping Colonel Klink doesn't find out about it, lest their be some summary executions for cowardice in the face of the enemy...
The German small arms fire suppresses a French squad, causing them casualties (white bead).
The French mortar team goes to work...
And 81mm rounds begin impacting in the northern treeline, pinning LCpl Steinkamp's MG team (yellow bead).
That was pretty damn lucky, actually, I was expecting a lot worse. Maybe the French 81mm mortar remembered it's supposed to be a 60mm mortar ;)
With one of the MG teams still suppressed (bottom center), the other French MG team (bottom left) turns on the tollkeeper's house (top right) and cuts loose on the two German engineer squads, but they're safely hunkered down in cover.
Sgt Hafl's squad (bottom right) even waits for the French gunners (top right) to reload, then returns fire, to no effect.
While Sgt Barkstrom's squad (bottom center) leans out and fires on the French 1st Platoon (top left), but they don't hit anything either.
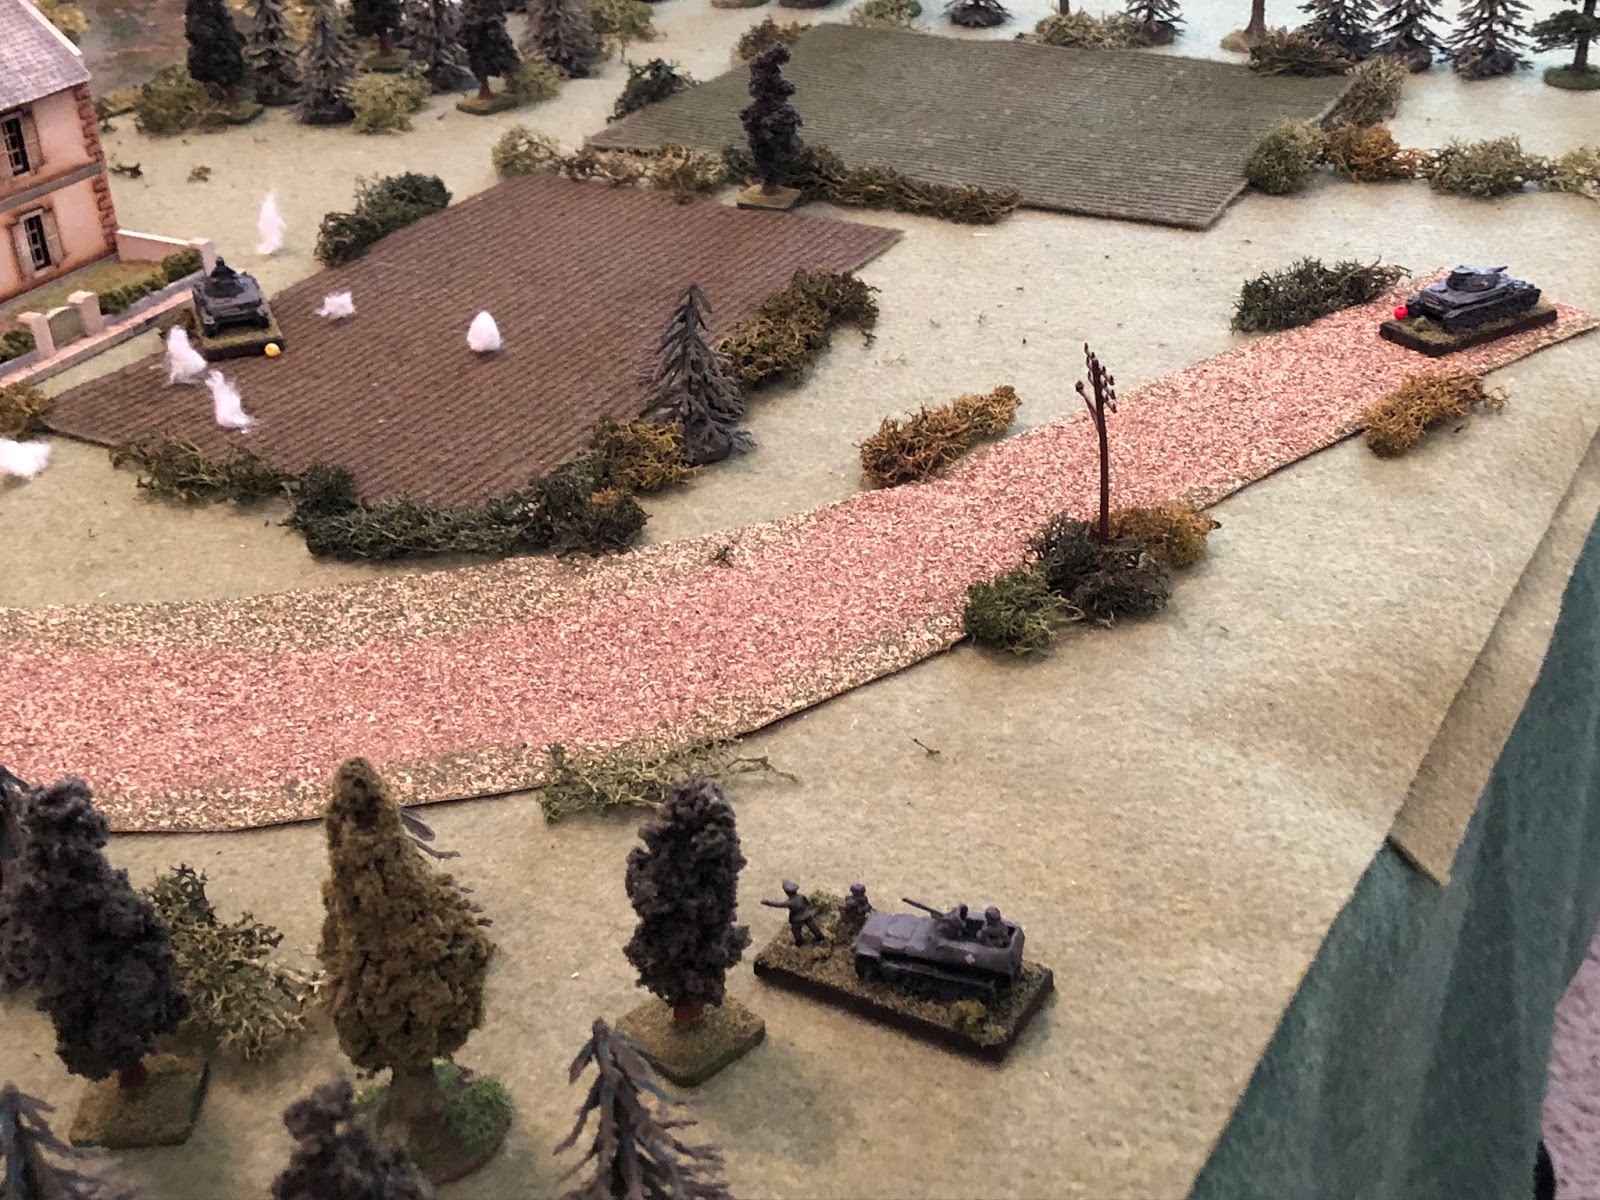
The French 75mm Field Gun (bottom left) spots German armor (top center right) and begins firing at the cyclic rate...
Which is enough to force Sgt Graebner's Pz IV off the road and into shelter behind Mlle Chevelle's house (red bead at right, from white puff at left, with Sgt Kapp's Pz IV at bottom left).
On the French left, the northern Somua (bottom left) continues pounding the German Weapons Platoon in the northern treeline (top left)...
Putting casualties on LCpl Steinkamp's MG team (white bead at left, with Lt Wehner just below them) and suppressing them. Now the MG team and the remaining ATG (top right) are both suppressed and need to be rallied; the German CO has his work cut out for him. Now go, go and rally your troops!
With Sgt Graeber's crew shaken up (center), Sgt Kapp moves his vehicle forward (bottom center) and fires on French armor (top center)...
Just missing the southern Somua (left)... The H39 commander (bottom right) looks on anxiously, and the French 2nd Platoon (top center) decides it's maybe not so bad being totally ensconced in the woods.
Sgt Kapps' Pz IV pushes up.
The German engineers (bottom center, with SSgt Gradl nearby) keep firing on the residence (top center left)...
And French 1st Platoon (top left)...
But the only success is in the south, where the French 1st Platoon is getting beat to hell. They had a squad pinned that then failed it's rally and fell back, suppressed (far left), a squad suppressed (center top, with red bead), and a squad suppressed, with casualties (white bead at far right). Their Lieutenant (center) and Capitan Cognac (top center) are unable to do anything due to the incoming German fire.
Very interesting. Looks like the boy was correct in getting his company commander down there to help, as they sure need it, but even so, he hasn't been able to get anything done! I can't believe I'm pretty much fighting the French to a standstill with just my infantry (the tanks just got here and haven't done anything useful yet).
There's a lull in the fire and finally the French officers are able to get the platoon back up to fighting trim, all three rifle squads rallied.
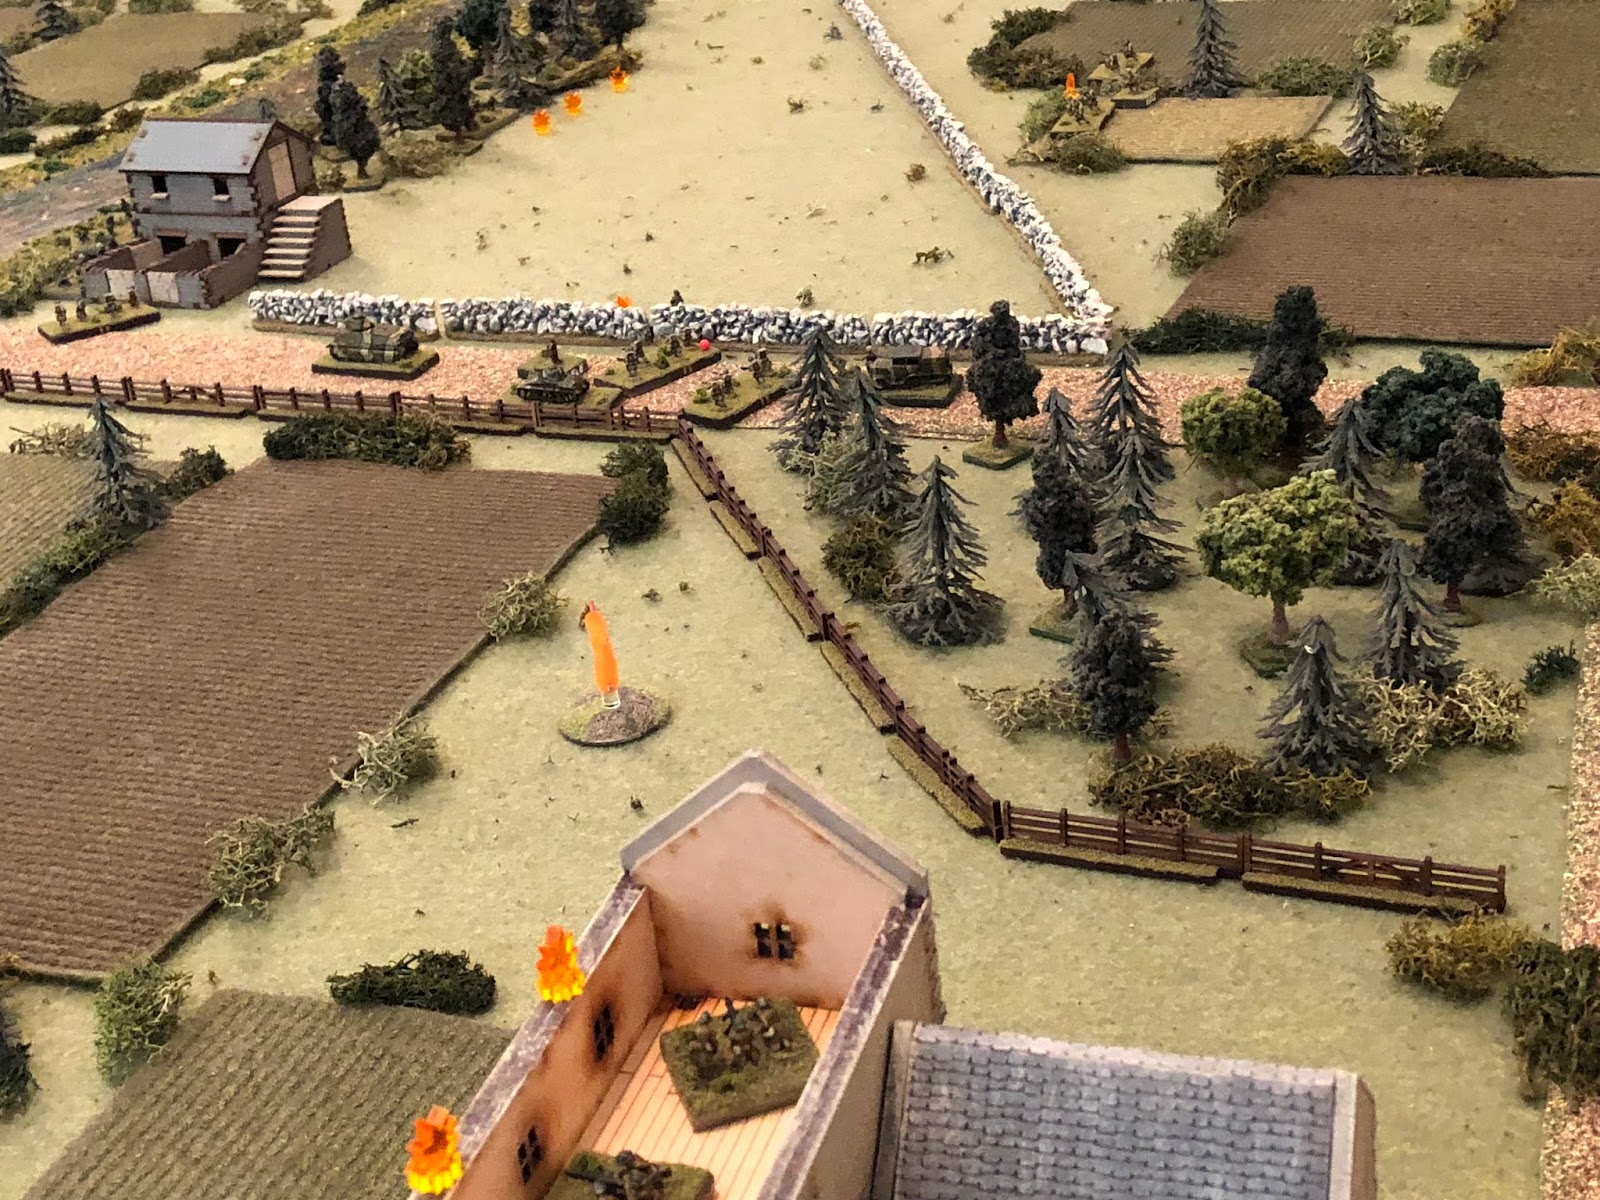
Looking west to east down main street (the ford is just off camera at top center), the French 1st Platoon is rallying (off camera to right) as their 2nd Platoon finally gets going, moving up in the center (bottom center left), with one if its squads getting into position and firing on the German engineers at the tollkeeper's house (top center right).
Suppressing Sgt Hafl's squad!
The French 75 (bottom left), having already driving off Sgt Graebner's Pz IV, opens fire oon Sgt Kapp's tank (top right)...
Sgt Kapps' vehicle pushes through the showers of earth and shell fragments, unperturbed!
The French situation in the north: they've got a pinned MG team and a suppressed MG team on the 2nd floor of the residence, the mortar team is in the courtyard, and the Somua finally begins pushing forward (bottom left).
While the mortar team goes to work.
The French have decided to change targets, so they fire a spotting round (bottom right). Off target, but good enough to be adjusted in for the fire for effect pretty quick.
With the German Weapons Platoon in the north suppressed, the boy decided to change targets for his mortar team. He knows the mortars can't hurt the tanks, but he also knows they can have a suppressive effect on them. He has belatedly come to the conclusion he needs to be a bit more aggressive in pushing east to the ford; he feels like he's got my infantry and engineers handled with his MGs, the two tanks in the center, and the field gun, plus he just got 1st Platoon back into the fight, so his plan is push forward in the center with 2nd Platoon while moving his tanks up, leapfrogging in the center and charging in the north, so his main concern right now is my tanks. He wants to keep them pinned/suppressed/confused while he pushes forward with his tanks to take them on.
Not a bad idea, we'll see how it shakes out.
At the farmer's residence, the French pinned MG team moves over and helps to rally and treat the casualties in the suppressed MG team...
And they're good to go, both MG teams are back in the fight.
In the south, SSgt Sachs and Cpl Rein's squads (center) fire on the French 1st Platoon (top left), while Cpl Wilhelm's squad (bottom center)...
Finally manages to rally (bottom center).
But the fire from the other two Motorcycle Platoon squads is vicious, knocking a French squad out of the fight!
All this shooting, but so far all that's been lost is one German ATG and one French rifle squad.
In the center, SSgt Gradl rallies Sgt Hafl's engineer squad (red bead)...
Then dashes south (center left, from top right) to rally SSgt Sachs' squad (yellow bead at bottom left).
And they shake it off.
In the north, Lt Wehner, the Recon Company Commander (and overall onsite German commander for this engagement (bottom left) finally shakes off the ill effects of the enemy tank, mortar, and field gun fire and gets to work. He rallies LCpl Steinkamp's MG team (just above them)...
Then moves over to the suppressed ATG (top center, ATG with white bead at top left, from bottom right).
In the center, the French 2nd Platoon (bottom center) continues its advance, again firing on the German engineers at the tollkeeper's house (top right), but the Germans are no worse the wear for it.
In the north, LCpl Steinkamp's MG-34 (bottom right) gets going again, firing on the residence (top left) as the French northern Somua (top center left) pushes towards them.
The German machine gun fire is very effective, pinning one French MG team and suppressing the other!
The German commander, Lt Wehner (bottom center), gets Sgt Kallenbach's ATG (just above the CO) back into action, and just in time too. They begin firing again on the northern Somua (top right), but still their shells ricochet harmlessly into the sky or earth...
In the south, the French 1st Platoon is scattered and taking casualties. Rather than sit and wait, the platoon commander grabs 1st Squad and pushes them forward (far right), as Capitan Cognac (top center) and 3rd Squad (far left) look on.
1st Squad fires on the German Motorcycle Platoon (tp right), but scores no hits.
Back in the east, Lt Wehner, the German CO, has gotten the MG-34 and ATG (top right) back into the fight and begins moving south (center right) to assist the panzers (left and far left bottom).
Which was probably a mistake, now Weapons Platoon, always a popular target of French MGs, mortars, field guns, and tanks, has no leader available to assist in rallying them back into the fight should/when they get hit again...
In the northwest, the French Somua S35 there shrugs off the 37mm mosquito bites and keeps pushing forward, albeit ever so slowly...
He halts (bottom left) and pumps another 47mm HE round into the northern treeline (top center right)...
Sgt Kallenbach's gunners flinch (bottom center), but keep bouncing fire off the front glacis of the S35 (top right).
I've been thinking about this: I give the 37mm ATGs ZERO per cent chance of knocking out the enemy Somuas and Char Bs from the front. From 5Core, I've been letting them fire with only 1S dice each time they fire, so no chance whatever to hurt (destroy or damage) the tank, and only a 33% of pinning/suppressing it. Between the two German ATGs, they've fired probably five times at the French tank. If guns are going to get that many shots in I need to figure out some mechanism to give them a possibility of knocking the tank out. Maybe ever third of fourth round of fire I give them 1K 1S to represent those freak shots, or the aiming at vision blocks, or knocking off a track, or injuring a crewman and making it combat ineffective.
Having roughed up the two French MG teams on the 2nd floor of the residence (top center), LCpl Steinkamp (bottom right) directs his team to engage the enemy Field Gun (top center left, just left of the residence).
But the brave French crew (bottom left) stands in and keeps pumping shells at Sgt Kapps' Pz IV (top right, just right of Mlle Chevelle's house)...
And it's enough to force Sgt Kapps to move his tank to shelter in the lee of the French house, right next to Sgt Graebner's vehicle, which had the exact same thing happen!
With both German tanks sheltering from the 75's fire, the southern Somua begins pushing east down main street (center right, with the H39 below it and 2nd Platoon above it, in the trees).
The boy is making his play, stuff is about to get interesting...
The Somua pulls up (bottom center) and fires on the tollkeeper's house...
Pinning Sgt Hafl's engineer squad (yellow bead). Not a big deal, but now that SSgt Gradl has moved back to his Motorcycle Platoon, it means these guys could have a hard time staying in the fight.
In the southwest, the lagging squad from the French 1st Platoon dashes (center, from left) to catch up with 1st Squad and their Lieutenant (top right), as Capitan Cognac (top center) looks on.
The Good Captain hasn't been particularly useful this fight, n'est pas?
While 1st Squad (bottom center) lays down fire on the German Motorcycle Platoon (top center)...
Cpl Wilhelm's 3rd Squad (bottom center) looks on at Cpl Rein's 2nd Squad (red bead at center), which is suppressed by the incoming French rifle fire. SSgt Gradl is at top right with SSgt Sachs' 1st Squad, and the engineers are off camera at top right.
In the northwest, the French northern Somua (bottom center) is totally unconcerned with Sgt Kallenbach's (top left) 37mm harassment fire. The French tank commander has spotted Sgt Kapp's tank (top center right) peaking out from around the north side of Mlle Chevelle's house. "Gunner, enemy tank at 12 o'clock, 200 meters, load AP, fire!!!"
The enemy shell plows the cabbage field at Sgt Kapp's right flank.
Sgt Graebner cautiously rolls his vehicle forward to see if he can acquirer a target, nosing past Sgt Kapps' tank, looking to spot the Frenchman firing on his partner.
Sgt Graebner (bottom left) stands tall in the hatch and calls out his fire command; a 75mm projectile is soon screeching at the northern Somua (top right)...
Missing!
In the center, the French light tank (bottom center) pumps 37mm rounds into the southern treeline...
Again pinning SSgt Sachs' 1st Squad (yellow bead, next to Cpl Rein's suppressed 2nd Squad).
The H39 then pulls onto main street.
The German Commander, Lt Wehner (far right), looks on as Sgt Graebner's vehicle (left) trades shots with the northern Somua (top right), as Sgt Kapps (bottom left) tries to rally his shaken up crew...
But the unit is still not ready to get itself straightened out with all those incoming tank and mortar rounds, so he pulls back to a safer area (bottom left, from center right).
But at the same time, one of Sgt Graebner's 75mm shells skips off the turret of the northern Somua, forcing him to fall back (bottom center, from top left)!!!
Lt Wehner braves enemy mortar and tank fire (center, from off camera to top right), chasing Sgt Kapps (bottom left), pleading with him to get his tank back into the fight!
The French in the north are in a bad spot: the German 37mm ATG (top left) is totally harmless to the Somua's frontal armor, but German shells have forced the French tank to fall back, turning its thin rear armor (bottom left) to the enemy. The French 75 (bottom right) cranks over and again begins pumping high explosive shells into the northern treeline...
Pinning Sgt Kallenbach's gunners!
But pinning is not enough, and the French 75's (top center) failure to suppress or eliminate the German anti-tank gun (bottom center right) is about to have serious consequences. Under heavy fire, Sgt Kallenbach lines up the shot, firing on the northern Somua (top right)...
The crew bails out as the S35 takes two rounds in the rear and bursts into flames!!!
And then LCpl Steinkamp's MG-34 (bottom right) loads a fresh belt and goes to work again on the enemy field gun (top left)...
Pinning the crew (bottom center) as the northern Somua's crew (top center) dashes for safety.
In the center, the H39 (bottom left) provides overwatch as the remaining Somua dashes east down main street (top right). The French 2nd Platoon, still sheltering in wood at the intersection (far left), look on as the tank skids to a halt...
And begins pumping high explosive rounds into the tollkeeper's house.
Sgt Hafl's squad (white bead) is taking casualties and is suppressed.
On the German left, SSgt Gradl attempts to rally SSgt Sachs' 1st Squad (top right)...
But they need a breather and fall back to the river, still suppressed (top right, from top left). SSgt Gradl then hustles down to Cpl Rein's suppressed 2nd Squad (center, with Cpl Wilhelm's 3rd Squad still taking its own breather at bottom right) to rally them.
Cpl Wilhelm pushes his squad back up on line (bottom right), where they open fire on the French 1st Platoon, which, despite their commander, Capitan Cognac, being with them, still hasn't even made it to the stone wall...
But while that's going on, the French 2nd Platoon commander kicks his men in the rear and gets them double-timing east down main street, pulling up behind the Somua.
The Germans are in a pickle: LCpl Steinkamp (bottom right) realizes how big a threat the French tanks and infantry on main street (far left) pose, and he really wants to turn his MG-34 on the exposed French rifle platoon there, but he knows the enemy 75mm field gun (top center) is still in action. He decides to keep the gun on its current target, and tracers go zipping out across the river, but they zip by harmlessly over the heads of the pinned French gunners!
Sgt Kallenbach (bottom enter), having knocked out one enemy Somua already, turns his 37mm ATG on the other (top center), currently leading the French 2nd Platoon east down main street. "Fire!" The stoic German gunners fire on the exposed flank of the French medium tank!
But they missed! The shell slams into the dirt road, pinning the crew!
The enemy 81mm mortar team busts out another case of ammunition and continues raining down mortar rounds...
Sgt Graebner's Pz IV, pinning the crew behind Mlle Chevelle's house!
That is a significant development, the pin meaning Sgt Graebner can move his vehicle out to engage the French tanks on main street, but will more than likely not get the first shot off.
In the north, on the 2nd floor of the farmer's residence (bottom left), one MG team is still suppressed, but the other team, which is only pinned, gets back in the fight, spraying rounds into the northern treeline (top center left)...
They don't hit anything, but the suppressed MG team manages to rally itself.
Back in the center on main street, the French Lieutenant for 2nd Platoon (center), orders his 1st Squad forward. The French infantrymen double-time up the street (top center), slowing once they reach the tollkeeper's house (which has the German engineers on the other side).
In the south, SSgt Gradl moves to SSgt Sachs' suppressed 1st Squad (right)...
The inspiring German NCO rallies his subordinates back into the fight!
The French are getting serious in the center (top right) and south, though. Capitan Cognac orders the remains of 1st Platoon (bottom right) to come online and establish a base of fire on the German Motorcycle Platoon (off camera to bottom right), in order to isolate the toll keepers' house (off camera to top right), then moves north onto the road, joining 2nd Platoon and the two supporting tanks (top center right).
Back at the tollkeeeper's house, Sgt Hafl's engineer squad (white bead) has suffered casualties and is suppressed. Sgt Barkstrom's squad (bottom center) can't see anything, but they can hear tank firing (off camera to top left) and have a strange feeling there are enemy troops nearby (top left)...
Sgt Barkstrom moves his squad over (bottom left) and rallies Sgt Hafl's squad back into the fight, just as Adrian helmets begin popping up over the wall to their right...
Back in the northeast, Sgt Kallenbach's PaK-36 (bottom center) continues firing 37mm armor-piercing rounds at the remaining Somua's (top center) vulnerable flanks...
The Somua (right) is hit three times in quick succession. A round penetrates but doesn't really do any damage; the crew look at each other and break into nervous laughter. But then another round clanks off the turret, and a the third punctures the vehicles main gun barrel, disabling it and filling the compartment with smoke. The crew bails out, suppressed (red bead at center right). The ricocheting rounds also manage to suppress the French 2nd Squad, 2nd Platoon (red bead at left)!
Nice shooting Sgt Kallenbach! We'll count that as a kill, his second of the day!
As Sgt Kallenbach's lets out a cheer (off camera to bottom right) at disabling the other Somua (far left, with the other at top right), LCpl Steinkamp's MG-34 team (bottom right) keeps pouring rounds into the enemy 75mm field gun (top center)...
The gun is knocked out, the crew fleeing in terror!
The momentum is beginning to swing back; I've got a big challenge in the center still, even with the Somua being knocked out (he still has an entire platoon of infantry, his CO, and an H39 light tank on the road). He desperately wants to eliminate my engineers at the tollkeeper's house, then chew up my Motorcycle Platoon to their south, and I desperately need to get my tanks back into action.
In the south, the Motor Cycle Platoon is getting itself back into fighting shape, but it's not really in position to support the engineers at the tollkeeper's house as they've still got to deal with the French 1st Platoon (off camera to top left). SSgt Gradl (top right) knows the enemy's main thrust is coming, it's coming now, and it's coming at the tollkeeper's house.
So he leaves his platoon (bottom left) and dashes back to the engineers at the tollkeeper's house (top right)!
The French 2nd Platoon commander (center) is screaming at the bailed out crew to re-man their vehicle, but they are in no mood! The tank commander makes a vulgar gesture at the French Lieutenant, then he and his crew hop the wall and begin moving away to the west (left, on this side of the wall)!!!
In the east, the Germans are dealing with a similar situation: Sgt Graebner's Pz IV (top right) is pinned down under enemy mortar fire, while Sgt Kapp's Pz IV (bottom left) is still trying to sort itself out I the shelter of a nearby stand of woods. The German CO, 1st Lt Wehner, drives his vehicle over to the friendly tank and begins haranguing the wayward tank commander...
Who promptly drives off (top right, from bottom center)!!! "Where are you going?" Shouts Lt Wehner. "We need more ammunition!" "But you just got here!"
And with that, Sgt Kapp's Pz IV departed the field of battle...
In the south, the French 1st Platoon continues to push ahead (center), doing their best to fix the German Motorcycle Platoon (to right) so they can't assist the engineers at the tollkeeper's house (top center left), which 2nd Platoon (top left) is pushing on.
The French Lieutenant gets the remaining two squads of 1st Platoon on line (bottom, still haven't reached the wall!), where they open fire on the Motorcycle Platoon.
Pinning 1st and 3rd Squads (yellow beads)! Cpl Rein's 2nd Squad (bottom left) is still taking a breather off the line. It would be alright with me if they'd go ahead and get back up into the line, back in the fight...
The French H39 light tank begins moving east down main street, skirting left (center) around 2nd Platoon.
The tank halts (bottom left) and pumps a few 37mm rounds at the German Weapons Platoon in the north treeline (top center right), but he doesn't hit anything.
Thee German Motorcycle Platoon (center to bottom right) has two squads pinned and one lollygagging around in the rear, but begins directing small arms fire at the French 2nd Platoon on main street (top center to top left), trying to protect the engineers at the tollkeeper's house (top center right).
The French 2nd Platoon commander is pinned, but that's it.
Cpl Wilhelm finally gets 3rd Squad (bottom left) back on the line, and while the other two squads (center, right) are firing on the French 2nd Platoon (off camera to top right), they fire on the French 1st Platoon (top left), to no effect.
The French mortar team shifts fire again...
Back to pounding the German Weapons Platoon in the north treeline, suppressing (red bead) Sgt Kallenbach's PaK-36 anti-tank gun!
And then the French left-hand machine gun (bottom center) goes to work on the north treeline (top center left), too.
LCpl Steinkamp's MG-34 team (white bead at far left, with Sgt Kallenbach's suppressed ATG at top right) takes casualties and is suppressed.
Then the French right-hand machine gun (bottom center) shifts fire to the south. Their own men are too close to the German engineers at the tollkeeper's house (top left), so they line up on the German Motorcycle Platoon in the south treeline (top center left) and open fire, but they don't have a good look at their target and the fire is ineffective.
In the center, the Capitan Cognac (bottom left) and the 2nd Platoon commander (center) get to work getting themselves rallied.
The Lieutenant (center left bottom) sends his 2nd Squad forward (center, just above the disabled Somua) to join his 1st Squad (top center, at the edge of the tollkeeper's house)...
1st Squad pops up and cuts loose with a brutal fusillade at point-blank range on the German engineers...
SSgt Gradl (white bead at bottom left), Sgt Hafl's squad, and Sgt Barkstrom's squads are all suppressed!!!
Holy @#$%, they can't do that!!! One round of fire at point-blank range and the German engineers are in very big trouble!!!
Still cursing at Sgt Kapp taking his Panzer IV and going home, and unaware of the debacle unfolding at the tollkeeper's house (top center left), the German CO, Lt Wehner, sprints to Sgt Graebner's vehicle (center right, from bottom left)...
...and rallies the remaining tank crew. Dark, ominous storm clouds begin blowing in...
The French 2nd Platoon, looking to press their advantage, push east down main street (top center/right), looking to eliminate the German engineers, take the tollkeeper's house, and push across the ford.
The situation is dire; Lt Wehner (top right, with Sgt Graebner's Pz IV) has noticed the unfolding calamity, with SSgt Gradl and both engineer squads (bottom left) trying to reorganize and treat casualties, a slew of French infantry practically (far left) in their laps. Lt Wehner orders Sgt Graebner to get his tank out onto main street and start tearing big, gaping holes in the French infantry moving on the tollkeeper's house!
Sgt Graebner enthusiastically acknowledged his commander's orders, then turned and gave his own orders to the his driver. The driver pivoted the vehicle south, threw the tank into gear, and began lurching forward...
But in the moist, muddy cabbage fields, the Pz IV's tracks had a difficult time finding purchase, and so the engine whined and labored, but the tank barely budged (center, tollkeeper's house and engineers needing saving at top left)!!!
And that, ladies and gentlemen, is the beauty of dice-for variable movement! I couldn't help but burst out laughing; surely my goose is cooked!
In the north, French mortar shells continue to rain down on the beleaguered German Weapons Platoon. LCpl Steinkamp's MG team (top center) and Sgt Kallenbach's PaK-36 ATG (bottom center) are both already suppressed.
Despite the impacting 81mm rounds and the fleeing crew (bottom left) from his #1 gun, Sgt Kallenbach manages to rally the crew of his other PaK-36 (right)!
In the south, the French 1st Platoon (bottom center/left) continues its duel with the German Motorcycle Platoon (top center/right)...
Gaining the upper hand by suppressing Cpl Rein and Cpl Wilhelm's squads (red beads) again!
On main street, the French light tank (bottom left) keeps pumping shells into the north treeline (top right)...
And the tank rounds find their mark, forcing Sgt Kallenbach and his crew to temporarily abandon the gun!
The H39 then dashes east, up to the ford (center right).
In the south, SSgt Sachs' 1st Squad returns fire (right) on the French 1st Platoon...
While the other two squad leaders successfully rally their troops!
And SSgt Sachs' fire manages to suppress one of the enemy squads.
The situation at the tollkeeper's house is dire.
As the enemy light tank (top left) emerges, SSgt Gradl (bottom right) gets shocked from his stupor! His mind is clear, an immediate appreciation for the immediate threat facing them. He calmly rises to his feet, dusts himself off, and sets to organizing the engineer's defense.
The French mortar crew is busting ass, pounding rounds out. The crew members are stripped to the waist, helmets removed, the position is littered with discarded storage tubes, the barrel glows red hot...
And rounds continue to impact all around the German CO and Sgt Graebner's Pz IV. But the haste in which they're aiming and firing, and the overheated tube, mean that the rounds aren't as accurate or in as tight a sheaf, and the Germans are unaffected by the fire.
One of the French machine guns (bottom center left) tacks on another belt and continues pounding the south treeline, where the German Motorcycle Platoon resides...
But they only manage to pin Cpl Rein's 2nd Squad (bottom left).
And then it happens: the boy makes his push, and the most ridiculous thing I've ever seen on a wargaming table occurs.
The French 2nd PLatoon hurls itself around the tollkeeper's house and into close combat with the German engineers. SSgt Gradl (left) leads the Germans, but Sgt Hafl's squad (white bead) and Sgt Barkstrom's squad (red bead) are both suppressed and not ready for the sudden French onslaught!
Rifles are fired at point blank range, then turned around and used as clubs; hand grenades are thrown, then picked up and tossed back. Knives, bayonets, pistols, brass knuckles, entrenching tools, anything to give advantage, are brandished. The NCOs and lone officer lead their men into the melee, screaming at the top of their lungs...
Both German squads rebuke their attackers in the first rush, and the French Lieutenant falls in the center of the scrum!
SSgt Gradl finds himself alone and rushed by a squad of Frenchmen...
SSgt Gradl falls not far from the French Lieutenant. The French squads, previously thrown back, charge back into the fray...
The Germans rush headlong to meet them, straightening their line...
A French squad on the German right falters and is consumed by the swirling mass of death and destruction...
Their comrades immediately step forward to fill their place...
But then suddenly it is quiet but for the agonized moans of the wounded, the Germans have stood, wiping out the entire French 2nd Platoon in close combat!!!
The German engineers (bottom center, with the Motorcycle Platoon at bottom left) let out a guttural cheer of victory! "What was that? What was that?" queries Capitan Cognac (center top, on the road, with the disabled Somua below him, its crew left, in the field, and the H39 at bottom center right). The French commander grabs a private by the collar: "go forward and see what happened, then report to me immediately. Go! Go!!!" The private scurried off, reaching the H39 just as the tank commander popped his head out to see that 2nd Platoon's assault had failed.
Capitan Cognac's scout approached the tank commander and asked about the situation. The French tank commander responded, "they are dead, all dead." "Who?" responded the Private. "The 2nd Platoon, they fell, all of them, right there," replied the tank commander. "I think we have lost. We should go, before those savages eat us, too," the tank commander said, pointing at the German engineers, battered and bloodied but still holding the tollkeeper's house.
The French private jumped onto the back deck of the little tank as it reverse course and began treading west, back to French lines, approaching Capitan Cognac. "Halt!" the French commander shrilly screamed. "Halt, we are not yet done fighting! We still have two squads from 1st Platoon, and our machine guns, and our mortar, and... you."
The H39's tank commander pointed to the southwest (top left), a shape growing larger on the horizon: "Capitan, what is that?" "It's a tank! TANKS!!! Tanks to our rear!!! RETREAT!!!" And with that, the French commander turned his vehicle north and began fleeing, away from the Germans and their tanks appearing to the southwest.
But it wasn't German tanks appearing in the southwest, it was a lone Char B, sent by High Command to reinforce Capitan Cognac's attack on the River Moiste.
The Char B's commander ordered the tank forward (center, from bottom right) at all speed, desperate to assist his comrades, but the French force was already retreating in disarray, following its Capitan's lead...
Wow, what a fight!!! At the same time, I feel terrible, my boy is shellshocked! Just kidding; he was a bit on Sunday, when we played, but's it's Monday and he's already over it. But man, that was rough! We talked about him being a bit more aggressive; his comment was 'being the attacker is kind of hard.' I couldn't help but laugh; he gets it. It's not fun having to move up and expose yourself to enemy fire in order to accomplish your mission, but it's gotta be done, and he's showing a pretty good grasp of fire and maneuver between elements. We also talked about small unit leadership, working to make sure your leaders are in the right spot at the right time to help your attack or defense succeed. I really didn't like his positioning of his CO on his far right, for a supporting effort (we talked about unity of effort and focus of effort, too), and late getting to the main effort (Somua, H39, and 2nd Platoon pushing up the road). I thought he did a good job with his supporting fires; I wouldn't have fired the mortars on the German tanks, I would have kept them on the north treeline and pounded the German Weapons Platoon into oblivion, then shifted fire to the south treeline to pound the Motorcycle Platoon. Having said that, what he did worked; the MGs, mortar (for a moment), and field gun did a good job overall in keeping the German Weapons Platoon in check, until the shifted the field gun to firing at the German tanks, too. Shifting the mortar and the field gun to the German tanks kept them out of the fight, but was probably too much, and let the German MG and one ATG back into the fight, as well.
Having said all that, I should have just kept my damn Company commander up there with the Weapons Platoon, and I had some bad luck with the tanks not activating much, and then one running away. And I would have been in more trouble if the boy would have pushed sooner in the center; we talked about the art of trying to time up the assault with appropriate suppression by supporting fires. It turns out he had the idea down, he just didn't foresee how long it was going to take his assault troops to get to the objective once the Germans were sufficiently beat up.
But it still all came down to that crazy close combat at the toll keeper's house; I was certain I was going to lose that fight, and by all accounts, I should have. I figured I was going to have to throw in the towel; my tanks cover the withdrawal, holding the French at the ford while Weapons Platoon falls back in the north and the Motorcycle Platoon has to drop all its gear and swim the river to escape. But somehow I won; the French moved up with a PC and three squads in good order. I had a PC, a suppressed squad (-2 in close combat), and a 'men down' squad (-3 in close combat). The first round of combat was atrocious for the boy, and it didn't get any better.
In the first round he had a squad match up against each of mine, and then the PCs faced off. I went -2 and -3 but managed to tie both squad vs squad fights, and then my PC beat his PC in a straight up roll! The two French squads fell back, suppressed, and their PC went down. Their 3rd Squad charged my PC and put him out, but then I beat a suppressed French squad in an even-up roll off, and I beat his fresh squad despite being -2. Then I finished off his last squad in an even-up roll off (both sides were suppressed). Incredible!
Casualties:
German: ~25 casualties, one PaK-36 ATG destroyed
French: ~60 casualties, one 75mm field piece destroyed, two Somua S35 tanks destroyed
Character casualties:
Cpl Rein, 2nd Squad, 1st Motorcycle Platoon, Recon Company, KIA
SSgt Gradle, Commander, 1st Motorcycle Platoon, Recon Company, WIA - out for campaign
Sgt Hafl, 2nd Squad, Engineer Platoon, Recon Company, WIA - out for campaign
Sgt Kallenbach, ATG Section, Schwere Platoon, Schutzen Company, WIA - ambulatory
Sgt Barkstrom, 1st Squad, Engineer Platoon, Recon Company, WIA - ambulatory
Awards:
-SSgt Gradle, Commander, 1st Motorcycle Platoon, Recon Company, was awarded the Iron Cross 1st Class, for leading the defense of the Toll Keeper's House at the ford of the River Moiste.
-Sgt Hafl, 2nd Squad, Engineer Platoon, Recon Company, was awarded the Iron Cross 2nd Class, for the defense of the Toll Keeper's House at the ford of the River Moiste.
-Sgt Barkstrom, 1st Squad, Engineer Platoon, Recon Company, was awarded the Iron Cross 2nd Class, for the defense of the Toll Keeper's House at the ford of the River Moiste.
-Sgt Kallenbach, ATG Section, Schwere Platoon, Schutzen Company, was awarded the Iron Cross 2nd Class, for destroying two enemy tanks in the defense at the ford of the River Moiste.
*Lt Wehner did not report Sgt Kapp for withdrawing his tank from the fight; Sgt Graebner told the Lieutenant he would take care of the matter.
The rules are working like a champ; the boy finally complained about the Tea Break card ("maybe we ought to take out the Tea Break card..."), but I talked to him about friction, not being able to do everything you want, when you want, and he was okay. Our 'blinds move at end of turn' house rule worked; my only complaint there, as I mentioned above, is the ugliness of my blinds, and my only answer so far is to move to get the blinds off the table as quickly as possible. My only other complaint is how long the games take; I don't want to sound like a whiner, but you have to keep in mind I play a LOT of skirmish games and small, platoon-level games where I can play three games in as many hours. Our game last week took about 3 1/2 hours and this one took about 4 1/2 hours. So I'm not complaining that they are inordinately long games, it's just that I can only take playing so many long games in a row before I get aggravated and move back to playing my small, quick games for awhile.
Having said that, we're having a lot of fun and I really want to keep this going so I can close out KG Klink's "Fall of France" episode and move on to whatever is next. I have a campaign plan, and it says next up is North Africa, but now I'm not sure. One, I never finished off my 10mm desert stuff and ended up selling it off, so I actually don't have any forces for it (I keep looking at hitting up Ros Heroics for some 6mm North Africa stuff). Two, KG Klink is largely an infantry task force, and I just don't know how to do infantry fighting in North Africa. What I've actually pondered is splitting KG Klink in two, with the tanks going to North Africa and the infantry going to Greece and then Barbarossa. Either they stay separate for the rest of the war, or maybe they meet back up at some point after North Africa; like the infantry are beat up on the Eastern Front and are pulled out for some R&R, and North Africa falls so the armor is pulled out, too, then they meet back up while refitting in France, then get rushed to Italy in response to the Allied invasion in 1943. What do you think? My issues are: 1) like I said, I don't know what to do with infantry in North Africa, and I don't want them just sitting idly by. But, 2) I also don't want KG Klink to simply go to the Eastern Front and never come out, I want them getting to a lot of different theaters, plus 3) I do want to play some games in the deserts of North Africa, I figure they'll just be armor heavy, maybe even armor exclusive.*
*As I so often do, just play a portion of a larger fight. I've thought of playing pure tank vs tank fights in the desert, actually using 3mm from Picoarmor mounted on pennies, with tanks clashing and shooting each other to pieces, racking up lots of kills, sort of like fighter pilots. Gotta get the Knight's Cross and swords and oak leaves and diamonds and stuff somehow ;)
Anyway, hopefully we've given you an entertaining battle report to enjoy, some food for thought regarding the rules, and some food for thought regarding the future of KG Klink (and go ahead and toss your thoughts my way, please). Thanks for reading, hope you liked it.
V/R,
Jack


What was the game mechanic for bringing on reinforcements? It worked well, with the Char B coming on fashionably late. Looking forward to the rest of the campaign, shame it'll end sometime and you'll move onto another period. Sharing your posts at https://www.facebook.com/groups/386297688467965/ if you do Facebook
ReplyDeleteLes,
DeleteRegarding reinforcements, you put a 'Turn' card in the deck, and every time it comes out is one turn. So the German tanks were Turn 4, the French tank Turn 6, the German infantry Turn 8, and the French infantry Turn 10 (the last two didn't make it).
Don't worry, I play on playing another five or so fights here in France. I've also got a campaign in the Dutch East Indies going on right now (lots of playing, but haven't posted my recent stuff yet), the War for Israeli Independence, and my Cuba Libre alt-history stuff going, so plenty to look at, and don't worry, I'll keep KG Klink interesting, no matter where it ends up going next! ;)
V/R<
Jack
Jack,
ReplyDeleteGood stuff and family time to boot! I hear you I find it hard not to play skirmish now. After 90 minutes I am done. You should go to Greece next. Same uniforms and tanks but you can add early war brits and some greeks as opfor. (The Greeks actually had some bren carriers. Most of their uniforms where french as they were just making the transition to british stuff. I have already done the research for my greek platoon.)
Joe
Hey Joe! Yeah man, getting the little guy back into the games has been a lot of fun. And yeah, skirmish keeps things a lot simpler. For this game we were up there 4 1/2 hours; I was getting worn out, I could see the boy was getting worn out, and then it took another five hours to transfer the pics and write the report...
DeleteLike I said, I could see doing a few fights in Greece, I just don't know much about it. I think the Lardies have an IABSM scenario book for Greece, I'll take a look. And you're saying you think I can use my French as Greek infantry? I have Brits, so no problem there.
V/R,
Jack
Superb battle report- stirring stuff. It's great that you are getting the next generation involved too.
ReplyDeleteCheers,
Pete.
Thanks Pete, the boy and I are having a great time!
DeleteV/R,
Jack
A superb AAR with excellent terrain and kit
ReplyDelete"Our 'blinds move at end of turn' house rule worked; " is an excellent idea as this is probably my biggest issue with IABSM ie getting blinds to work ! Once unit cards get placed into the deck I find blinds just operate too infrequently if at all.
Kudos to your son as at 8yrs old I was still throwing stuff at plastic Airfix figures as a 'wargame' :-)
Si,
DeleteThanks man, glad you liked it. I enjoyed your BG Market Garden batrep, but for some reason I'm not able to leave comments on your blog :(
Yeah, this seems to fix the blinds issue, and it's simple. I think at 8 years I hadn't found the Airfix yet, I still was throwing stuff at 54mm Army men, so you were ahead of me! ;)
V/R,
Jack
Hey Jack,
DeleteI think you're confusing Sgt Steiner with Kpl Steiner. Basically Gary got to it first so I ended up a Kpl.
Anyway, I agree with my superior's view, another excellent post. I replied this morning on your rules mods, but also see my 'missing' reply has appeared there too (the suggesting Fireball Forward).
Best,
Si
Si,
DeleteOh my goodness, you’re absolutely right! I’m sorry man, I was looking at Sgt Steiner’s blog and thinking it was yours, then conflating the comments.
Sorry for the confusion, and thanks for clearing that up. So, do you have a blog then?
V/R,
Jack
Jack,
DeleteNo problem, I just didn't want credit for the real Sgt Steiner's blog. I don't have a blog, for a couple of reasons but mainly because with work and travel, I don't get much gaming done, much less find time to blog about it.
I do enjoy a few blogs though, your's and Sgt Steiner's prominent amongst them. Maybe one day I'll find the time but with a house move imminent, it'll be a while.
Si
Thanks buddy, and here’s to hoping you find time for a wargaming blind someday ;)
DeleteHope the move goes smoothly for you!
V/R,
Jack
Thanks Andy!
ReplyDeleteV/R,
Jack
Hello Jack,
ReplyDeleteI am very late to the party...I have had this as a browser tab for the last 8 weeks or so until I had the time to read it in one go. All I can say is fantastic! and give your boy a break - he is only 8! I was wondering how long it took and you answered that - too long. I have always liked IABSM except the combat mechanism, and you have made me put on my list to play IABSM - keeping everything except the combat rules (will replace with my own). In 2002 I made up a lot of the cards required. I have no easy solution for you for blinds - I have some oval shapes made out of card - one side is painted green, on the other I write in pencil what is under the blind. Rosters are too hard for me ;-)
Indeed you are, Sir! But no sweat, you’re always welcome Shaun, whenever you can make it.
DeleteAnd cut the boy some slack, he’s only eight??? You’re soft, Shaun, gotta toughen these kids up! ;) I did feel terrible when he rushed the crossing/tollkeeper’s house and was stopped cold; by all accounts he should have carried that position and had me worried about breaking through.
I still haven’t figured out a better way for blinds, but it won’t stop us from having a good time, just looks ugly.
V/R,
Jack