All,
It's 0545 on 1 August 1986, and (for whatever reason, make up your own) the Soviets/Warsaw Pact has decided to launch an invasion of Western Europe. Battalion Task Force 4-11 (fictional 4th Troop, 11th Armored Cavalry Regiment) receives the call to arms, moves from barracks to assembly area to defensive positions in the Fulda Gap, awaiting the onslaught of the Red horde.
US Order of Battle
India Company: Captain Phillips (M-577)
1st Mechanized Platoon: 1Lt Eirserbe
2nd Mechanized Platoon: 1Lt Ensmith
3rd Mechanized Platoon: 2Lt Teigner
1st Tank Platoon: 1Lt Dillon (only two of his tanks made it to the area in time)
Elements of Weapons Company (4 x TOW, HMG, 4 x M-113)
Elements of 10th Special Forces Group (2 x ODA)
Elements of 399th Attack Aviation Company (1 x AH-64)
Elements of 999th Tactical Fighter Squadron (1 x A-10)
Soviet Order of Battle
Tank Company (+) (16 x T-72)
Motorized Rifle Battalion (-) (2 x Company of 10 BMP)
Elements of Spetznaz (2 x SOF Team)
Elements of Attack Helicopter Regiment (1 x Mi-24)
Motorized Artillery Regiment in support (122mm, off table)
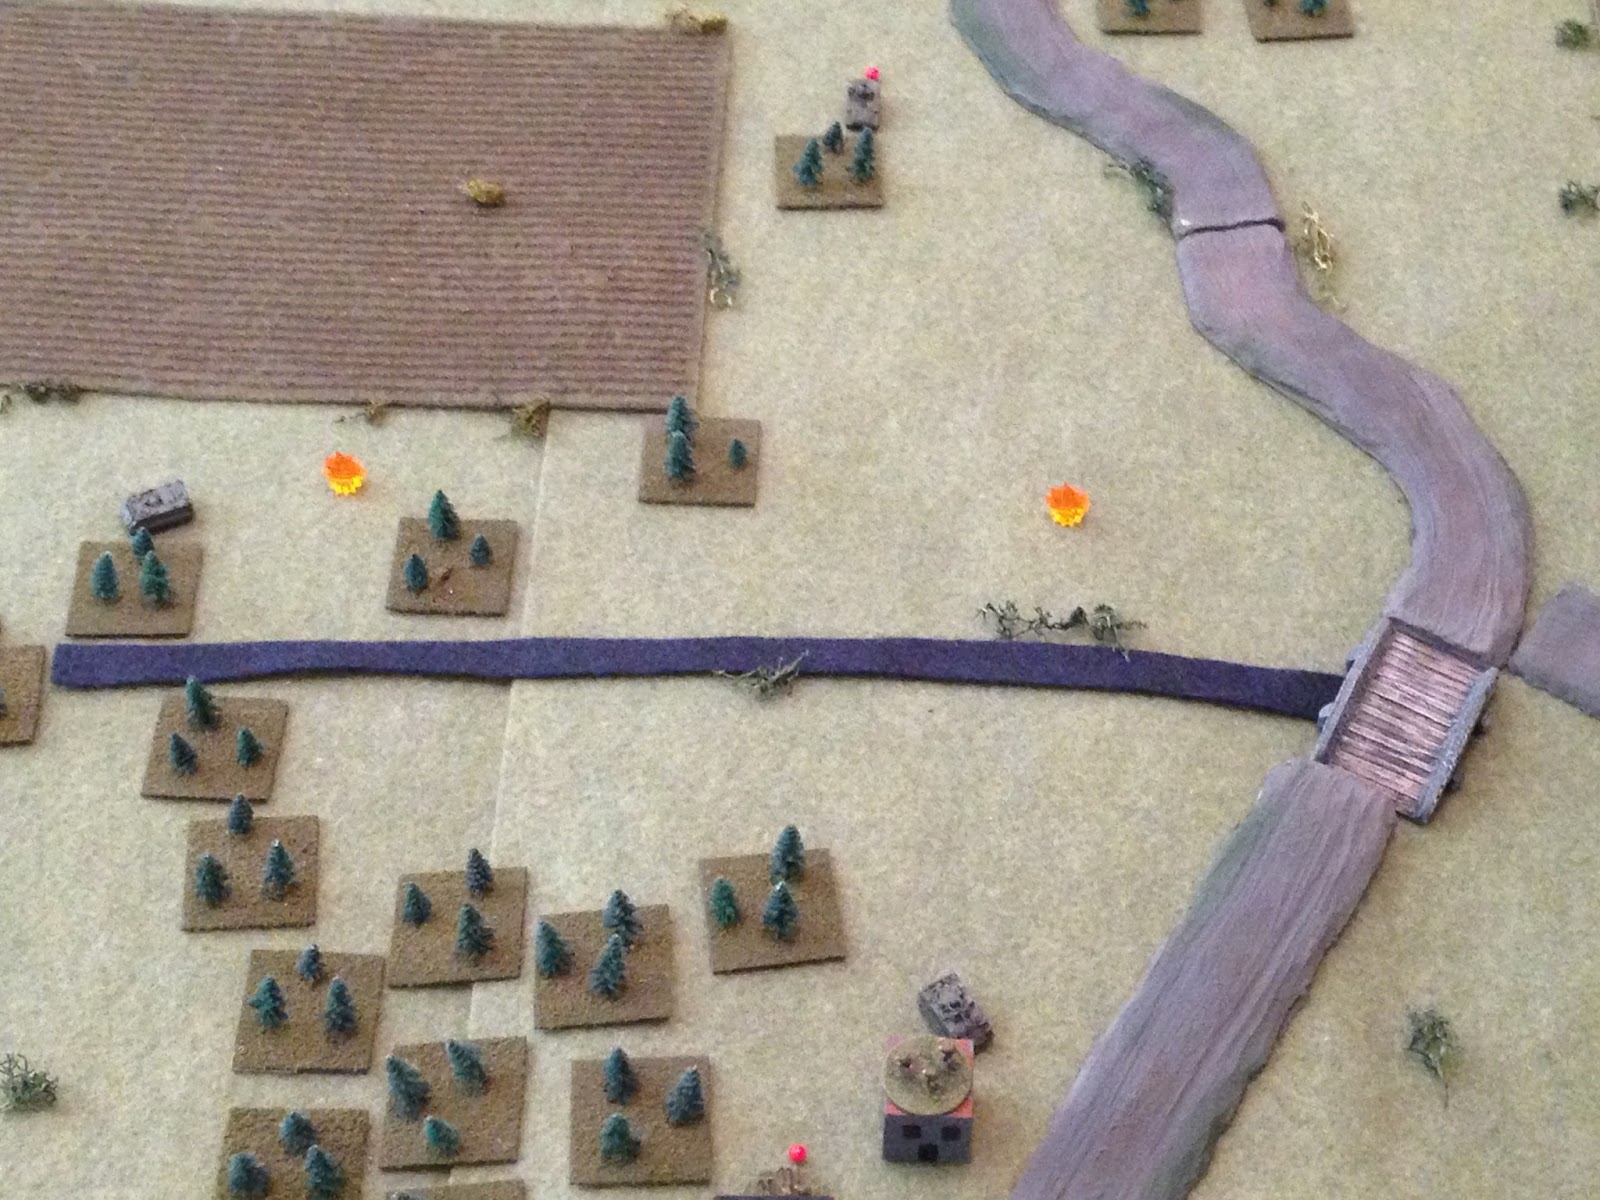
The first scenario is "Lariat Advance," in which the Soviets come crashing through the West German border into 11th ACR. This is a look at the table, which is 5' x 4', looking south to north. The US will be defending the southern portion against the Soviets, who enter with a massive force from the northern board edge. They're goal is to exit as many vehicles as possible off the southern board edge.
There are small villages at top left and top center, and a sizable town at bottom center. There are a few small rises, but no geographically significant elevations. The rises (one level) are at bottom left, bottom right, top right, the village at top center, and the open area to the left of that village. I don't think the scenario book called for any rises, so I didn't throw in any significant hills, but I wanted the table to reflect the rolling terrain. The rises are difficult to ascertain as I actually put the hills UNDER the terrain mat; moving up in the world. The table's still ugly though...
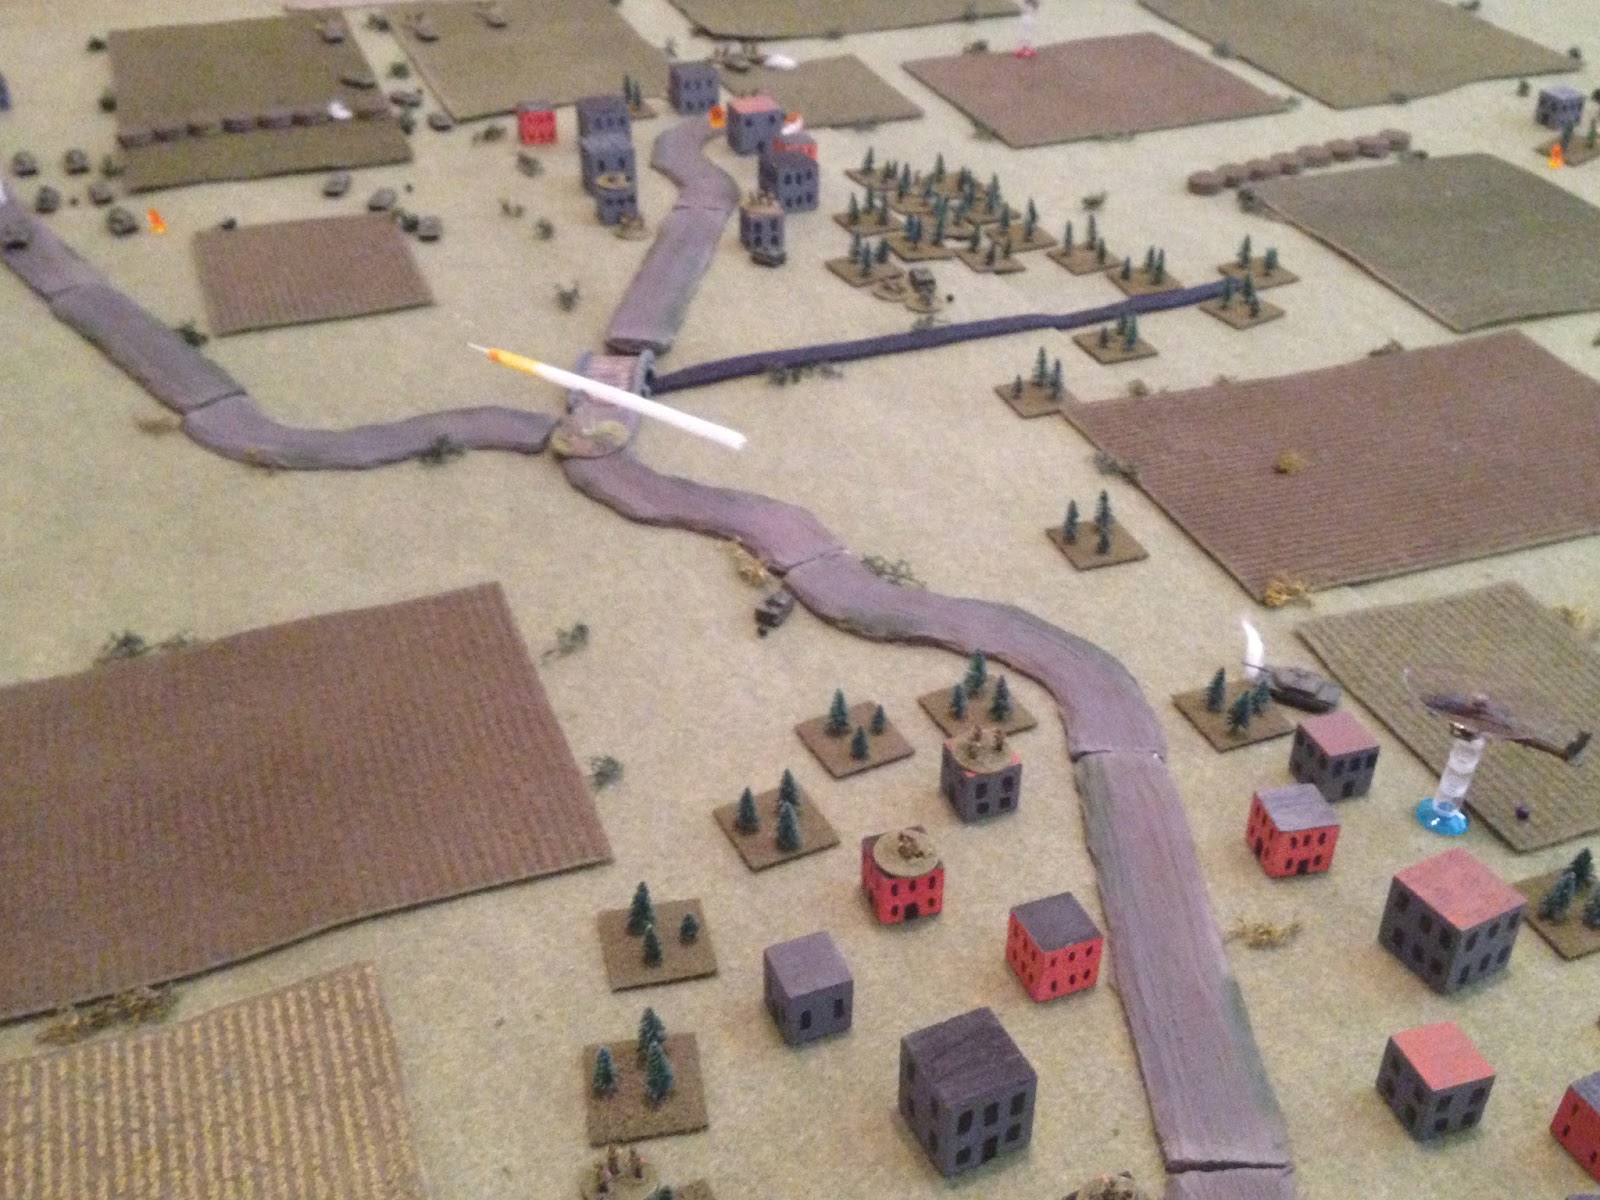
Another look at the table, this time from west to east. The Soviets will come in from the left, looking to exit on the right (at far right you can see the Soviet forces lined up for photos). I set the table up last night, and had to hit the garage to find some more trees. Luckily there were some lying around.
What you're going to see in a second is that 1) the Soviets have a huge force, and 2) the US has a pretty small force, so this is going to get real interesting real fast. I need to go upstairs and place the US defenders. As in real life, the Soviets are going to make heavy use of preparatory bombardments, and the US is going to make heavy use of minefields. As a solo player, you can see this poses some real game problems, i.e., the need to randomize the prep fires and minefields so that they are not too powerful, nor simply skirted by the player's knowledge.
My solution is to place the US defenders and their minefields, then draw up six separate attack plans (with differently plotted prep bombardments), then roll a dice to determine which one the Soviet side goes with. This will randomize the prep fires so I can't cheat as the US player and simply avoid them, and the Soviets will follow their planned routes of attack until (if) they run into US minefields.
If you've got a better, smoother, easier, and faster way of doing this, please let me know!
The US force: two (TWO!!!) damn M-1 Abrams, four M3 Bradleys (there are four more in the pic, but that's when I realized four of the Brads are supposed to be M-113s), quite a bit of rifle teams, a handful of ATGMs, and a bunch of machine guns. There are also a random number of minefields, an Apache on station, and one airstrike by the A-10.
And they face this mess: sixteen (16!!!) T-72s, eighteen (18!!!) BMPs, plus command, rifles, and a big, bad Hind. So it's pretty much 'die in place, take as many of them with you as possible' for my 4th Troop, 11th ACR fellas.
The US defensive positions, as marked, with left being north. The area at center-bottom, where TOW1 and SOF1 are emplaced, is a small hill called Hill 23. It would be the scene of much death and destruction...
On the far left, 1st Platoon occupies the village of Weisse. Looking south to north, you can see the minefield emplaced to funnel any Soviets on the far left back into the village strongpoint.
Again looking south to north, here you see TOW's 1st Section and SF Team 1 dug-in atop a small rise (Hill 23, hard to see because the 'hill' is under the game mat) on the US center-left, between Weisse (in the west) and Heffe (in the center). Their M-113s are actually placed in defile behind the rise, so that the TOWs and SF can load up out of LOS and fall back to their next defensive positions in the south.
From behind TOW's 1st Section, looking north to south, with Weisse at far left and Heffe at top right. The plan is for the TOWs to overlook the mines (at top center), and once enemy armor hits the mines take their shot, then fall back (off camera to bottom center). With any luck, the Soviets will suffer a bloody nose and decide not to press the minefield, thereby funneling them either left into 1st Platoon or right into 2nd Platoon.
This is a photo of Heffe, looking west to east (north is left), showing 2nd Platoon in the village, with the M-163 at far right and SF Team 2 at top right. You can also seen the last minefield at top center, leading to the hamlet of Schlitz.
This photo is looking south to north, with the hamlet of Schlitz at bottom right and minefield (from last photo) at center left. Schlitz is occupied by the TOW's 2nd Section on the US far right flank. Due to space limitations with the border, 2nd TOW Section is not dug-in to hit enemy armor as soon as it hits the minefield, it's going to hit Soviet armor as soon as it enters the battlespace (along top), then fall back to its next defensive positions (off camera to bottom center), where it can place fire on the minefield.
This pic cant' help but remind me of an old saying we had in the Marines: "an obstacle not covered by fire is not an obstacle."
This photo is again looking south to north, pulled back a bit from the last shot, so that you see the outskirts of Heffe at far left, the right-hand minefield at center, and Schlitz at far right. SF Team 2 is visible at bottom left.
Looking south to north at the last stop, the town of Heineken, on the southern table edge. Heineken is occupied by Captain Phillips, the Company Commander, 3rd Platoon, and the two M-1 Abrams of Lt Dillon's 1st Tank Platoon. The idea of placing the tanks in Heineken is that they move right or left, serving as a 'fire brigade,' to counter enemy advances to either sector, with alternate firing positions pre-established for them to both the left and right.
We are seriously outnumbered and I can't wait to see how this goes. I drew up six different enemy attack plans (with prep barrages included), now I need to roll a dice to determine which course of action the enemy will carry out, place them, carry out the prep barrage, then get it on!
And I rolled up a '5,' so here's what the enemy's going to do:
Tank 1 is 6 T-72s
Tank 2 is 6 T-72s
Tank 3 is 4 T-72s (coming on Turn 2)
Mech 1, 2, and 3 are 6 BMPs and 6 rifle teams each
The Hind and SOF are marked where they will insert, and the ZSU-23-4 is with Tank 3.
So, the Soviets have decided to attack on a narrow front, focusing on the center left of the US defensive position. Two of the three Mechanized Units will commit to neutralizing US infantry platoons in the villages of Heffe and Weisse, in the US center and left, respectively.
The remaining Mech Unit, along with all three Tank Units and the Air Defense vehicle, will seek to push through the gap in the US minefields, straight at the 1st TOW Section atop the small rise (Hill 23). The Soviets hope to be on top of the US 1st TOW Section very quickly, getting inside the minimum range for the TOWs and overrunning them.
Furthermore, by taking this corridor, Hill 23 serves to block US lines of fire (their AT weapons are capable of ranging the entire table), which should allow the Soviets to advance quickly via a relatively covered route, only being engaged at very close range at the US last line of defense (on the southern table edge), where the Soviet commander hopes to simply overwhelm the relatively few defenders there.
Aside from the pinning attacks near their line of demarcation, the Soviets intend on staying away from the US forces in the urban areas, particularly the southern town of Heineken.
The Soviets are, however, apparently unaware of the US air defense vehicle, as they have chosen their LZ for their Spetznaz team very near the M-163, as well as the US 2nd SF Team. The goal of the Spetznaz is mostly to spot targets to the east and southeast for the Mi-24 Hind, to take out long range US AT capabilities (TOWs) present so they may not fire east to west to interdict the Soviet main thrust. This will be a key aspect of the battle; if the US 2nd TOW Section (on their far right flank) are able to fall back to the high ground in the southeast (top right of pic) and fire on the Soviet armor in the west, which will be pushing hard to exit the southern edge of the board just west of the town of Heineken.
Regarding US air capability (an AH-64 Apache on board, and an A-10 available for one sortie), and given the Soviets' limited air defense options, they are going to keep their ZSU-23-4 with the tank main thrust, and do the best they can to whether the US air attacks while pushing forward as quickly as possible to exit the board and render the US air superiority irrelevant. The primary target for the ZSU will be the AH-64, which has the capability to loiter over the battlefield and cause sustained casualties, even if this means not harassing the A-10 on its one sortie (should it be successfully called in, which the US commander is more than a little worried about as he needs all the help he can get).
The US player is going to have his hands full; not only finding himself severely outnumbered, he now also finds himself very much outmaneuvered, (having fallen into the trap of) having to defend the entire battlespace. Now his TOWs in the east are out of position and will have to fall back to alternate firing positions, as will the reduced Tank Platoon, while the TOWs in the west are going to be in the fight of their life, and will be lucky to arrive safely at their fall back defensive positions. The infantry of 1st Platoon are going to have to fight very hard to disengage from what is sure to be a very aggressive Soviet mechanized attack on them in the village of Weisse (in the west). But it must be done as the US commander absolutely needs the anti-armor capability their four M-3 Bradleys possess.
Meanwhile, 2nd and 3rd Platoons are foot mobile, having left their Bradleys in the assembly area (off table), and so 2nd Platoon (in the village of Heffe) will likely be left to die in place. Sorry, but that's reality, as they are not mobile enough to fall back (they'd only be caught in the open between Heffe and Heineken and run down by Soviet tanks), and they have only very-short range AT weapons (LAWs) which would require them to move into the open just to get at the enemy AFVs. 3rd Platoon, in the southern town of Heineken, is going to find itself simply by-passed if they don't move, so they are going to have to leave the cover of the urban environment to move into blocking positions along the Soviets' line of advance.
This is going to be interesting, so let's get to it!

Looking north to south, from the Soviet perspective, on the village of Weisse. All directions will be from the US perspective, so this is the US far left flank, the Soviet far right. The war starts with the numerous 'thumps' of 122mm projectiles leaving their tubes, and here they strike on positions of the US 1st Mechanized Platoon under Eirserbe.
That is Hill 23, with TOW1 and SF Team 1, at top left.
Straight out the gate, one M-3 Bradley Cavalry Fighting Vehicle is knocked out (white smoke at center right), two rifle teams are pinned (yellow beads), two more fall back and hunker (red beads), and Lt Eirserbe's command team is hunkered.
Simultaneously the Soviet barrage strikes 2nd Mech Inf Platoon's positions (under Lt Ensmith) in the north central village of Heffe...
Looking north to south, a rifle team is eliminated, two more fall back and hunker, and an MG team takes heavy casualties (white bead).
Then, just south of Heffe, the last rounds of the barrage fall near SF Team 3 (top left) and the air defense vehicle, an M-163 (top right)...
The SF team (far left) is fine, but the M-163 falls back and hunkers (top center, red bead, from center right explosion).
Looking south to north at center of table, SF Team 1 (far left, in emplacement on Hill 23) and SF Team 2 (far right, at end of stream), both report in to the Company Commander, Captain Phillips (call sign, 'Techno'), to inform him the Soviet onslaught seems to be aimed at the US center-left, leaving the right (TOW2 in the village of Schlitz, off camera to right) with nothing to do.
On the far left, Lt Eirserbe works on getting 1st Mech Plt back into fighting shape. He's only able to get his command team up to 'pinned,' while three rifle teams try to rally but fall back and hunker (three 1's in a row!)...
Looking north to south at Heffe, Lt Ensmith tries to do the same with 2nd Mech Plt. The MG team with heavy casualties melts away to the rear, a rifle runs (bottom center, red bead), and the other rifle is successful.
Looking west to east at the US left position in the village of Weisse, the enemy's unit "Mech 3" comes on the table with seven BMPs trailed by dismounted infantry, looking to beat up on Lt Eirserbe's already beat up 1st Mech Plt.
But score one for the good guys when a Bradley (bottom right) opens up on a BMP (top left) with its 25mm gun, knocking it out.
Another Bradley in Weisse (far right) opens fire on a BMP, but misses...
As does the enemy's return fire.
A Soviet BMP and rifle team move up to the minefield just northeast of Weisse (yes, I need better markers for minefields)...
But somehow they squirm through, untouched!!! Then he opens fire on a Bradley, but misses.
Because the first BMP made it through the minefield, the Soviet commander doesn't know it exists, so he sends another BMP forward, but this one detonates an AT mine and bursts into flames (with BMP that the Bradley killed at far left).
The enemy pushes a BMP and rifle team forward on his left (top center), looking to get into Weisse.
Looking north to south (from behind Soviet baseline), the enemy unit "Mech 1" comes on opposite the US 2nd Mech Plt in the villge of Heffe.
The enemy moves up; can't spot any US units, they use some speculative fire but score no hits.
At top left you can see another minefield, which butts up to the village of Schlitz (off camera at top left), where TOW2 (2nd TOW Section) is located with its wire-guided anti-tank missiles. They have not fired; with no enemy units east (left in this pic) of Heffe, they expect to receive orders from Captain Phillips to fall back in order to engage enemy armor sure to come between Heffe and Weisse (from this picture all the way right to the village we were just looking at a minute ago).
Looking west to east at the village of Heffe, the Soviet Mi-24 Hind comes on (center), dashing straight up the gut, intent on delivering two Spetznaz teams to their landing zone just off camera to right.
Please recall that the US Air Defense vehicle was situated very near the Soviet landing zone, but was sent fleeing by the enemy artillery barrage.
Looking northeast to southwest at the Hind hovering over its LZ, with the town of Heineken (which holds Captain Phillips and 3rd Mech Plt), Captain Phillips immediately orders his command team to fire a Stinger Surface to Air Missile (SAM) at the enemy helicopter...
Looking east to west, with Heffe at center, the Stinger (top left) does not find its mark, but it does force the Hind (bottom right) to take evasive action and head for relative safety.
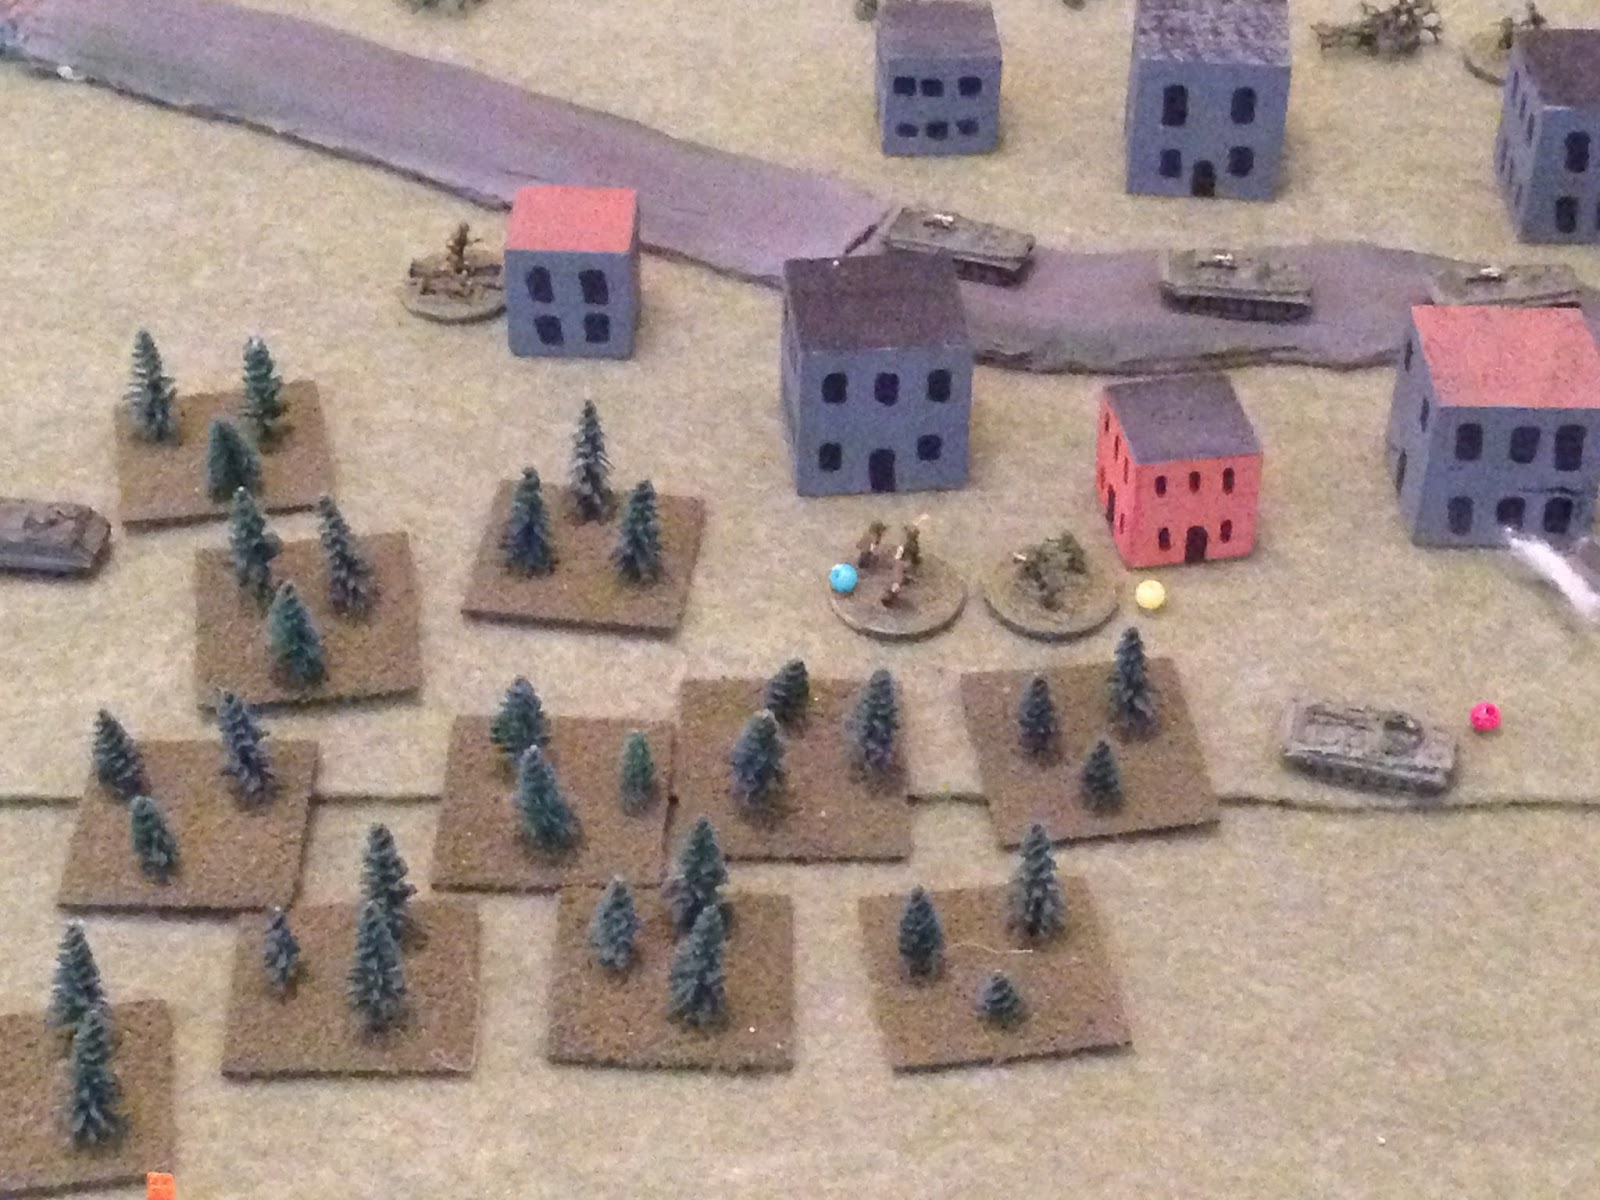
Captain Phillips (center left, you can see the M-577 Command vehicle below his team atop a gray building) has a bad feeling after receiving the enemy activity reports from the two SF teams; he orders Lt Teigner to have his 3rd Mech Plt to start displacing left in order to get into the enemy's axis of advance (rather than have the enemy simply race right past them; 3rd Mech Plt doesn't have any long range anti-tank weapons).
Here you see 3rd Mech Plt in their original positions...
And how they are sliding left to get into the corridor, where there are two already-dug emplacements ready for whomever needs them (pretty clever, yes?).
At bottom right you can see Lt Dillon's two M-1 Abrams.
Back on the Soviet baseline, looking north to south at the gap between Heffe (top left) and Weisse (far right), the enemy unit "Mech 3" comes on the table, seven BMPs with infantry mounted.
Looking west to east, the Soviets are now aware of the minefield (top right), as one of their BMPs was nice enough to point them out ;)
Looking north to south, the enemy BMPs of Mech 3 begin moving up cautiously (three in column at left, with three more in line at bottom left), looking to skirt the minefield to the left (east).
TOW1 is sitting atop Hill 23 (top right), licking their chops, but they wait for the tanks they know are sure to come...
Looking southeast to northwest, TOW2 (in the village of Schlitz, far right) hasn't received orders from Captain Phillips to fall back (he was busy shooting at the enemy helo) and they can't take it anymore, so they open fire with their missiles on the enemy's Mech 1, assaulting the village of Heffe (top left).
Looking north to south from behind Heffe, the first TOW misses, but cause the BMP to maneuver wildly and fire wildly while spitting out some smoke. A second BMP becomes a smoking hole in the ground, with its supporting rifle team taking heavy casualties.
The moment we've all been waiting for: looking north to south, the enemy unit "Tank 2" comes on the board near the village of Weisse (center, with TOW1 on Hill 23 just beyond).
Looking southwest to northeast, TOW1 opens up. They have two missile launchers and a .50 cal HMG...
Looking west to east on Tank 1, the HMG has no effect on the T-72 (there is a slight chance of forcing it to fall back or take evasive action), but the TOWs slam into the enemy tanks and knock two of them out!
At left, a T-72 moves up and fires on Hill 23, pinning the HMG team (top right).
Looking north to south, with Mech 2 at left and Tank 2 at right, Tank 1 comes on. Due to fears of mines they come straight up the road.
Looking west to east, Tank 1 (top left, with Weisse at bottom center) moves up, turns on TOW1 atop Hill 23 (far right), and lets go.
SF Team 1 takes heavy casualties (white bead), while a TOW is forced to fall back and hunker (red bead at far right, next to their transports, which are hidden behind the hill.
Looking north to south at the town of Heineken (US center rear position), Lt Dillon repositions his two tanks (top center, from bottom right) to engage the enemy tank units (off camera to top left, between Heffe and Weisse). Meanwhile, the Air Defense vehicle rallies (off camera to top).
You can see Captain Phillips at center left, with 3rd Mech Plt strewn across the left/top left.
Looking northwest to southeast, a T-72 of Tank 1 (bottom left) react fires on Lt Dillon's Abrams in Heineken (top right), but misses.
Lt Dillon's tanks (top right) open fire from Heineken on Tank 1 (bottom left, with Hill 23 at bottom center and Heffe at top left).
Two more enemy vehicles go up in flames (I rolled four 6s on four kill dice).
Thus ends Turn 1 (the Soviets have six turns to exit as many vehicles as possible off the southern edge of the map).
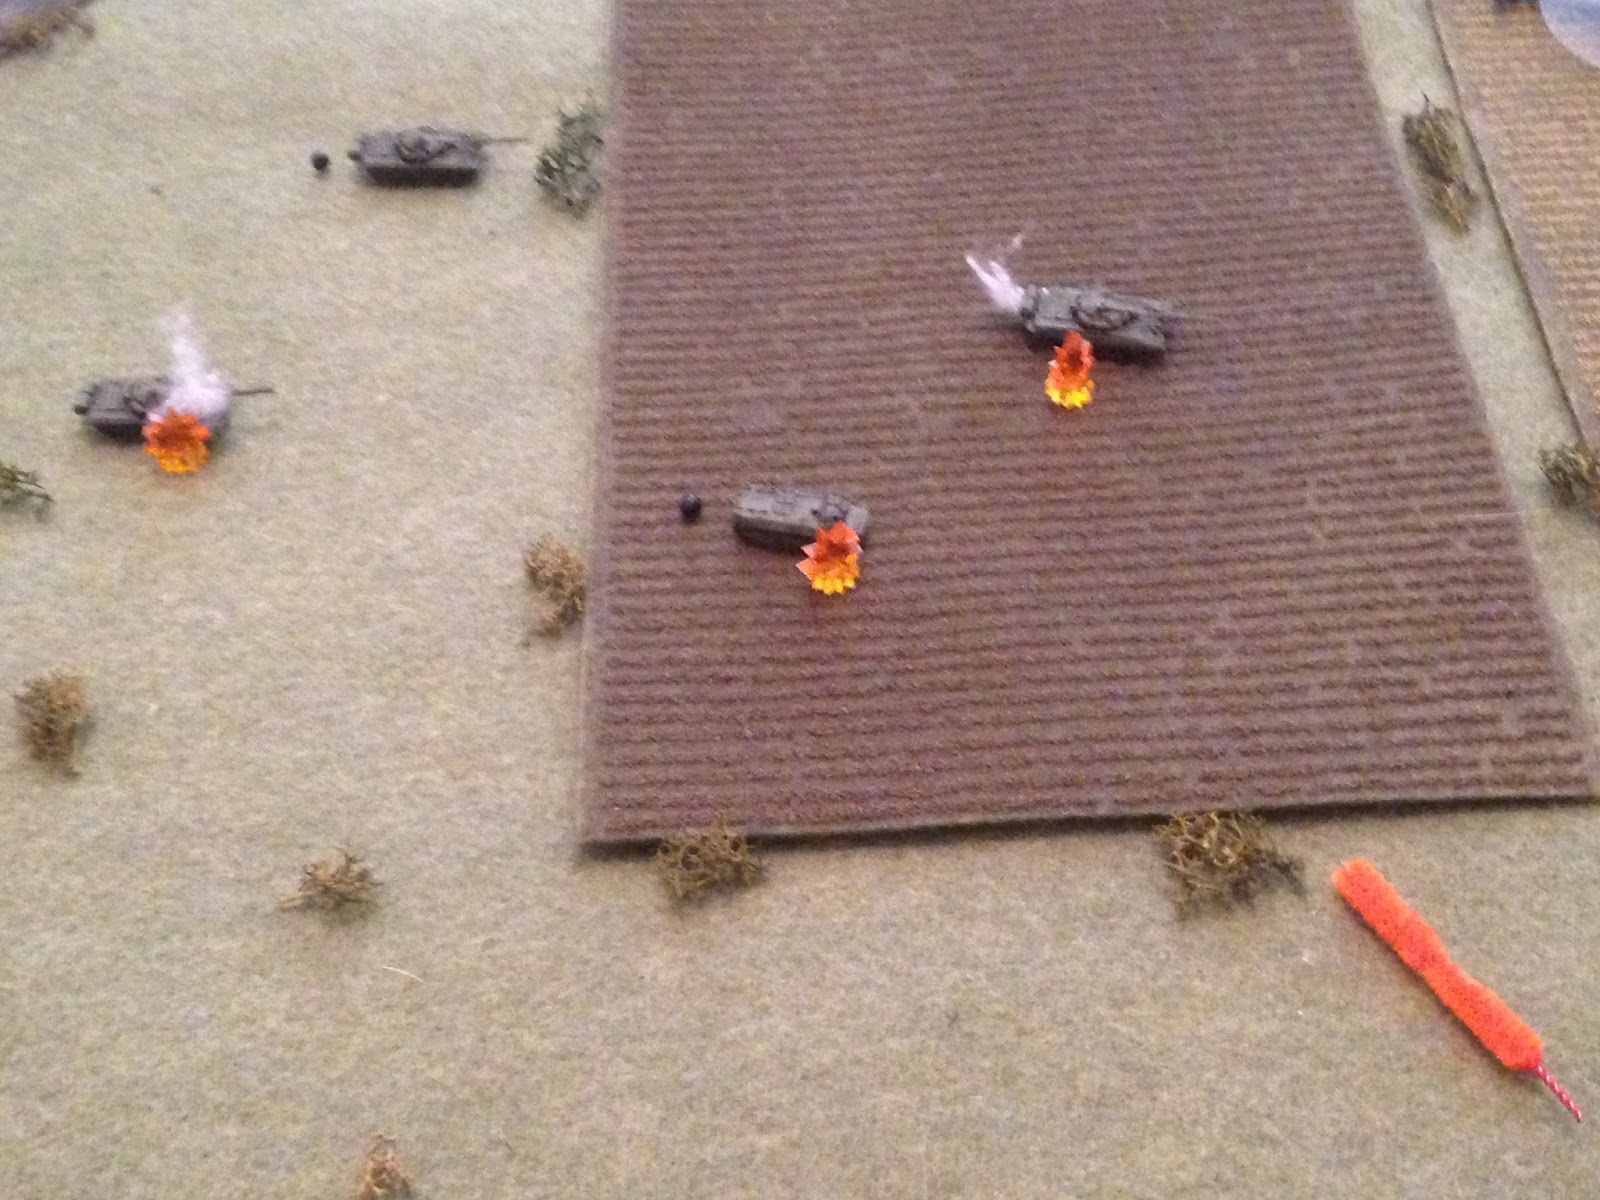
Looking west to east, Lt Dillon's tanks (top right, in Heineken) again fire on the Soviet 'Tank 1' (bottom left)...
They smite one tank and force another to fall back (red bead). A T-72 (bottom center) returns fire...
Knocking out Lt Dillon's partner!
Tank 1 has a T-72 suffer a mechanical problem and so that tank exits the map via its own baseline (far left), while the T-72 that knocked out Lt Dillon's partner fires again...
The enemy's 125mm round strikes home, unseating the M1's turret; Lt Dillon quickly orders his driver to take the vehicle ti the rear for repairs (far right, white bead, it was hit at top left. This photo is looking at Heineken west to east).
I can't believe Dillon survived this fight ;) But very quickly Team Whiskey's two tanks are out of the fight.
Two more T-72s of Tank 2 (top left) fire on Hill 23 (bottom right), but only manage to pin a TOW team (yellow bead, with a blue bead indicating they need to reload).
On the US far left, looking west to east at the village of Weisse, Lt Eirserbe rallies his command team and a rifle team, while a Bradley (far right) fires on a BMP (far left), but he misses!
And enemy return fire knocks out the Bradley. @#$%!!!
Still with 1st Mech Plt in Weisse, the Bradley at center right rallies a rifle team, who then moves up into the building just left of the road, drawing react fire from a BMP...
Which forces them to fall back and hunker (red bead, with Lt Eirserbe's command team at bottom center).
On of Lt Eirserbe's rifle teams runs back to Hill 23 (top right, from left near Bradley) and rallies the 1st Mech Plt rifle team there, as well as SF Team 1 (red and white bead, respectively).
The enemy's Mech 3, attacking 1st Mech Plt in Weisse, pushes ahead, with a BMP moving up (top left) and firing on Hill 23 (top right), while a rifle team rushes into a building and fires an RPG at one of 1st Mech Plt's Bradleys (far left). But both enemy shots (somehow) miss!
The Bradley (bottom right) returns fire with its chain gun, forcing the enemy rifle team (that just fired the RPG) to fall back and hunker (left, red bead, with US rifle team hunkering on the road).
Still in Weisse, the enemy moves a BMP and rifle team up on the far left (center), which fires and puts heavy casualties on a US rifle team (white bead at center).
I forgot and left the orange 'tracer' up there with the Bradley that returned fire, so please disregard. I did it in the next photo too.
At top left, the enemy Platoon Commander moves up behind his BMP (with burning tanks of Tank 2 in the background).
In the US center-rear position in the town of Heineken (looking south to north), Captain Phillips (the Company Commander, center) calls in the AH-64 Apache to strike enemy armor in the center (off camera to top), while the M-163 moves left (top center) and 3rd Mech Plt continues to move left.
Looking north to south, the enemy's Mech 1 pushes into the village of Heffe (far right). A BMP (bottom right) moves up and fires on TOW2 in Schlitz (top left)...
Forcing to one team to fall back (red bead, from explosion at center right).
Mech 3 continues to push into Heffe, where a US rifle team fires a LAW at a BMP and an MG team fires on the its supporting rifle team...
The BMP (center) is knocked out, and the rifle team forced to fall back (red bead at bottom right).
The enemy's PC moves over and rallies his men (foreground).
While in Schlitz, on the US far right, the M-113 rallies the hunkering TOW team of TOW2, then both TOW teams hop into the track...
Looking east to west, then the track (far left, on hard road, just off dirt road) hauls ass towards their fall back positions (at far left, with Schlitz abandoned at bottom right).
I certainly needed to get TOW2 back into their fall-backs, but I forgot that I really, really needed and meant to activate the Apache and get it in the fight ASAP.
Looking north to south from behind the Soviets, with Heffe on the left, Weisse just off camera to right, and Hill 23 at top right (where TOW1 sits, needing to leave for their fall back positions before they get overrun), the enemy's Mech 2 pushes ahead around the minefield at center (three in echelon right, just above the minefield, and three in line just left of the minefield).
On Hill 23, TOW2 tries rally. The TOW is good, but the HMG stays pinned. This is turning into a bit of a dilemma; I don't really want to leave the HMG there, but he can't move until he unpins, but I absolutely need to get those TOWs out of there (there's a second TOW team off camera to bottom left) before they get overrun by enemy tanks.
From north to south behind Soviets, with Mech 3's BMPs at far left, Tank 1 on the road at right center, and Tank 2 at far right, the enemy's Tank 3 (four T-72s, their Company Commander in a BTR-50, and their AA ZSU-23/4) comes on at bottom center.
And sprints dead ahead (box formation at center of photo). The HMG team on Hill 23 (top right) finally unpins.
Looking at Tank 1 from west to east, that formation is down from six T-72s to one combat effective and one hunkering (red bead). The functioning tank moves to the hunkering one and rallies him...
Then fires (far left) at TOW1 on Hill 23 (top right). The HE round explodes harmlessly, thankfully, as I just got them rallied and ready to move. Of course, if I'd have had them reload they could have returned fire and probably killed his ass...
On Hill 23, the HMG team and TOW team from the top emplacement run down the hill to their awaiting M-113s (far right), then try to rally the other TOW team (that's SF Team 1 and a rifle team from 1st Mech Plt at far left)...
The rally fails, and the TOW team runs from center to bottom right.
They load up in the track (from center) then race south (bottom right). They try again to rally the hunkered TOW team, but only get them up to pinned.
The Soviet Hind gets his marbles straight and makes another run for the LZ to drop the Spetznaz off; he scans for US air defense, but doesn't see anything, until a stream of 20mm tracers rises up from the M-163 (top left)...
The Hind is hit multiple times and once again waves off the LZ (far left, from top right).
SF Team 1, sitting atop Hill 23 (bottom center) is feeling the heat, and they are desperately trying to call in a 9-line brief (request for air support) for the A-10 to sortie on, but they're being jammed!
Looking southeast to northwest on the US right, SF Team 1 (bottom center) loads up into their M-113 (that's Heffe at top center-left).
Then sprint left and dismount (bottom center, from off camera to right) behind Heffe, looking at Soviet tanks and BMPs streaming into the gap between Heffe and Weisse, and rallying the 2nd Mech Plt rifle team there (red bead).
The AH-64 Apache storms onto the table, pulling in very low on the outskirts of Heineken (in the US center rear), the popping up and firing a salvo of Hellfires (bottom right) at Tank 3 (to left)...
One T-72 (center) is knocked out, while the ZSU (far left) returns fire ineffectually.
Looking south to north, frustrated the SF Teams can't get the air called in, Lt Ensmith of 2nd Mech Plt in Heffe gets on the radio and makes contact with the S-3 Air, who coordinates to get an A-10 sortie on the gap between Heffe and Weisse.
Meanwhile, one of Lt Ensmith's rifle teams fires a LAW at a nearby RPG from Mech 3. But they miss!
The targeted BMP (center left) returns fire, knocking out the rifle team and putting heavy casualties on the nearby MG team (white bead).
Looking from northeast to southwest at Heffe, a US MG team in the woods (top left) fires at Soviet infantry, but misses.
Thus ends Turn 2. The Soviets have taken a bit of casualties, and haven't gotten too far, but it looks like things are starting to open up for them in the center. Due to combat losses, the Soviet Tank 1 and 2 are now combined into a single command.
Back on the US far left, the fighting continues in Weisse between the Soviet Mech 3 and US 1st Mech Plt. The enemy PC moves up and rallies his men up to pin (top left), while a BMP storms forward and fires through a gap between the buildings on the exposed flank of a Bradley facing north. The Bradley's side armor is ripped open by 30mm shells, the crew killed.
On the west edge of Weisse, the BMP that squirted through the minefield moves up with its rifle team (bottom center). The rifle team eliminates the US 'men down' team (white bead) in close combat, while the BMP fires on Hill 23 (top right).
One US rifle team on Hill 23 is forced to fall back by the BMP's gunfire (top right, red bead), but more significantly, the BMP's rifle team moves up and captures Lt Eirserbe's command team and vehicle (left)!!!
The enemy rifle team from the BMP knocked out in the minefield near Weisse (bottom left) sprints forward (center), intent on launching an RPG, but the Bradley react fires and pins them. Nevertheless, it's about over for 1st Mech Plt in Weisse. But just as things are looking dark on the left...
The US Air Force A-10 (bottom right) rolls in on the enemy formations in the center, opening up with its 30mm cannon...
One BMP of Mech 2 is ripped open (center right), while another is forced to fall back, where it runs into the minefield (far left, red bead) and is blown up!
Not bad, two in one, but now the A-10 is gone (yep, just one sortie).
Sorry, just had to get another shot in of the Hog.
Looking southeast to northwest, TOW2 hauls butt (bottom center left from far right) and dismounts, having reloaded while enjoying their ride in the track.
To put it into perspective, they started off in Schlitz (off camera to center right), fired on enemy mechanized infantry entering Heffe (top center, with Weisse at top left), knocking out two BMPs, then fell back, where they now have a lane of fire to engage enemy armor shooting through the Heffe-Weisse gap (top center left), where the enemy will have to cross them laterally as they try to exit the southern edge of the board. Short story is, TOW2 has done a great job of punching, then falling back into great position to interdict the enemy's armored push in the center left of the line.

Looking west to east on the center, the enemy's Tank 3 (center) pushes forward. With TOW1 gone from Hill 23 (bottom right) they don't really have any good targets. They lob some ineffectual fire at the town of Heineken (off camera to top right). A big reason to push forward with Tank 3 was the need to get their air defense vehicle, the ZSU-23-4, further ahead in order to counter the US Apache.
Having said that, SF Team 1, on Hill 23, marks targets for the Apache.
Who pops up again (bottom right) and looses another salvo of Hellfires, this time on Tank 3...
The Hellfires miss (dammit!), but force one T-72 to fall back (far left, red bead).
The ZSU (center right) returns fire with its quad-23mm guns...
The Apache is driven off (to bottom right, near TOW2, from far left).
On the US left (looking south to north), TOW1 finally unpins (yellow bead) and loads up in the M-113.
Then they race to the rear to their fall-back positions (one track is at center, the other at bottom left). Just like TOW2, they punched (from Hill 23) and are now falling back to keep the range open on the enemy armor in the center (top right).
In the US center rear, looking south to north, the CO (far right) calls the Apache back in to take on Tank 3 (top center), while 3rd Mech Plt completes its displacement left (they've got teams in the two emplacements at far left, then a few teams in the trees and buildings at center).
The point here is that 3rd Mech Plt does not have long range anti-tank weapons, so they have to get extremely close to the enemy armor to take them on. With the way the enemy armor is moving, they are looking to bypass the town of Heineken (at right), they plan to drive right on by. So 3rd Mech Plt is doing the only thing it can: putting itself square in the path of the enemy's axis of advance.
Looking at Heffe in the US center, from southeast to northwest, Lt Ensmith moves up to rally the MG team (white bead at far left), but they stay down.
On the right side of Heffe, the rifle and MG team covering their right flank fall back (bottom center, black beads, from right center) after having expended their Light Anti-Tank Weapons (LAWs, which is what the blue bead shows).
Looking at Hill 23 from south to north, SF Team 1 moves over to rally the hunkering rifle team. The rally succeeds, but they draw fire from a nearby T-72...
Which pins the rifle team (center, yellow bead) and forces SF Tm1 to fall back (far left, red bead).
Looking west to east at the US far left in Weisse, where 1st Mech Plt is down to only one rifle team and one Bradley in the village (they also have two rifle teams on Hill 23 (off camera to top right), and the rifle is pinned at center right (red bead, with a BMP and Soviet rifle team at center bottom, with more enemy at top and left). The rifle team tries to rally, but remains hunkered...
Looking at the Heffe-Weisse gap from west to east (with Heffe at top center), Mech 2 pushes forward (center, down to four BMPs from seven, with Tank 3 at bottom).
Looking north to south at Heffe, the enemy's Mech 1 pushes hard into the village.
In the Heffe-Weisse gap (with Weisse at top right), looking north to south, Tank 1/2 is lagging, but reorganizes itself (scattered tanks at center and bottom center)...
Then push forward towards Hill 23 (top center, with Tank 3 at left and Mech 3 at right, moving into Weisse). The pinned US rifle on Hill 23 rallies.
The Hind makes its third push to drop off the Spetznaz, but still can't locate the US air defense vehicle (rolled a 1), which again cuts loose with its 6-barrelled, 20mm Gatling Gun...
Down goes Frazier!!! The M-163 knocks the Hind from the sky, taking the two Spetznaz teams with it! (that's a 6 on 1D6!)
And that ends Turn 3. The Soviets have gotten into position to exploit the Heffe-Weisse gap, but just lost their SOF and Helo, and the US TOWs are in great spots at each end of the US rear line.
Apparently I'm missing a picture: what happened next, according to my notes, is that TOW1 made it to their fall-back positions in the southwest, dismounted, and are ready to fire.
Looking west to east at the center of the board: Heffe is at top left, Heineken at far right, TOW2 is at top right, TOW1 is just off camera to bottom right, and Hill 23 is just off camera to bottom left.
The enemy's Mech 2, consisting of four BMPs, charges bravely ahead (center), firing ineffectually at Heineken (they didn't spot TOW1 or TOW2, both of whom just displaced to their new positions). This is pretty damn sneaky; you see, they saw the US 3rd Mech Plt fall back to positions just off camera to bottom right, so they figure the Heineken is lightly defended, if at all, and now their Platoon Commander's plan is drive right down main street.
This move also compelled the M-163 to fall back (far right) to avoid being overrun.
Looking southeast to northwest from TOW2's positions on the far American right-rear, TOW2 has to act on this new threat (as opposed to letting the BMPs pass then shooting up the following tanks), so they cut loose with both launchers on the BMPs of Mech 2...
Two BMPs get smoked, and a third is pinned (yellow bead). Hasn't been much luck for vehicle passengers; both rifle teams in the BMPs are knocked out.
Looking west to east at Weisse, with Hill 23 at top right, the enemy's Mech 3 looks to push forward into the village.
At left you can see enemy BMPs and infantry overrunning the village, putting the US rifle team there (red bead at left center) out of the fight. The Bradley falls back to Hill 23 (center top right, next to emplacement), while a BMP (far right) rushes ahead and captures SF Team 1, who was hunkered (red bead).
Looking north to south, having wrapped up Weisse and moving on Hill 23, the enemy's Mech 1 pushes further into Heffe. They send a BMP and rifle team left (top left), and so a US MG team moves over to counter them (in the trees next to the BMP).
Three more BMPs run straight up the road, forcing Lt Ensmith to fall back (top left, you can see the M-113s, one which is his, the other belonging to SF Tm 2). The enemy rifle (bottom right) follow their BMPs. The US MG team at top right (white bead) is captured.
But 2nd Mech Plt still has some fight in it: the MG team fires on the BMP's supporting infantry (bottom right; we are now looking from the opposite angle, south to north), pinning them.
A US rifle team moves up and fires on a BMP's infantry...
They pin the infantry, and the BMP, fearful of LAWs, which they don't know that team is out of, falls back (red bead).
Another 2nd Mech Plt MG team fires down the street, and they take out two enemy rifle teams! Lt Ensmith (bottom center) screams into the R/T, begging for the Apache to get in here and help stem the tide before 2nd Mech Plt is overrun.
And he gets it! This is looking south to north, with Heineken at bottom center and Heffe at top center. The problem is, for the Apache to get a look down the street at the three BMPs moving on the road in Heffe, he has to reposition (bottom left), which puts him close to the enemy's ZSU-23 (top center left), which promptly opens fire...
And the Apache (bottom left) goes down in a hail of 23mm rounds (with ZSU at top right).
Another 6 on 1D6. Very deflating, and no help for 2nd Mech Plt in Heffe.
Looking southeast to northwest, with Heffe at top right: with no supporting fires left to call, SF Tm2 moves south to close range with the enemy's Mech 2 and launches a LAW, knocking out a BMP!
Looking north to south, with Weisse at bottom right, Hill 23 at center right, and Heffe just off camera to left: the enemy's Tank 3 (box formation at center left) continues to push forward, firing ineffectually into Heineken (top left).
In the southwest, from the US far left-rear, TOW1 cuts loose with two missiles on Tank 3, while the HMG fires on the enemy's CO's BTR50...
The BTR50 is not effected, and returns fire ineffectually on TOW1, but two more T-72s are turned into scrap by TOW missiles!
I must admit, at this point, that my firing dice have been hot as hell.
And then Tank 1/2 goes up Hill 23, which, in actuality, was probably a tactical error, they probably should have skirted Hill 23 to the east, following in trace of Tank 3, but that's what the Soviet commander (my Course of Action dice) said he wanted to do. The Bradley opens fire on a T-72, while (I mistakenly let) a US rifle team fires a LAW at a BMP (which was not actually part of this action), and another US rifle team fires a LAW at a second T-72.
This is flat out melee atop Hill 23, with brass knuckles and blackjacks.
At center left, the LAW skips off the T-72, but pins it. At bottom left, the Bradley's chain gun immobilizes the T-72 and the crew bails. At center left, the rifle team's LAW missed the BMP, and their return fire missed too.
3rd Mech Platoon, in the emplacements and the outskirts of Heineken activates but has nothing to do, so this ends Turn 4. Two more to go.
Damn, the photographer must have been taking fire, which is why the pic is so blurry. On the US far left-rear, TOW1 reloads its missiles while the HMG and BTR50 (of Tank 3) again exchange ineffectual fire.
While on the US far right-rear, TOW2 also reloads.
Meanwhile, back on Hill 23 the remnants of 1st Mech Plt are fighting for their lives. The Bradley opens fire on an enemy BMP, while the rifle teams fire off the last of their LAWs. The Bradley misses this time, but both LAWs hit, so the enemy loses another BMP and T-72.
An enemy rifle team fires on the Bradley, pinning it, while a BMP (top left) fires on the rifles (white bead), causing heavy casualties.
Over behind Heffe in the US top center, SF Team 2 fires its last LAW and knocks out the last BMP of the enemy's Mech 2!
The enemy's Mech 3 comes to finish off the US 1st Mech Platoon atop Hill 23. The enemy PC's BMP fires its chain gun at the Bradley, knocking its turret out...
Then the enemy's PC dashes forward to capture the Bradley crew and rifle team.
Two BMPs move up to the other emplacement and open fire with their 30mm guns, knocking out the last 1st Mech Plt rifle team (top center right, in emplacement, with enemy PC at other emplacement).
1st Mech Plt is no more, but they put up a valiant fight, causing heavy casualties to the enemy's Mech 3 and Tank 1/2, seriously delaying their advance through Weisse and Hill 23.
Looking south to north in the US top center, with Heffe just off camera to top left, 2nd Mech Platoon continues its fight. An MG team opens fire on enemy infantry on their far right, with Lt Ensmith just left of the MG team.
The enemy infantry is eliminated, and, with the platoon out of LAWs, Lt Ensmith and his command team charge the now isolated BMP. The BMP react fires on the charging Yanks, but they run through the heavy fire...
Climb aboard the enemy armored vehicle...
And knock it out with hand grenades!!!
Inspired by the Lieutenant (who's just off camera to bottom left), a Sergeant leads his team into close combat against a pinned enemy rifle team (yellow bead)...
Outs them, them moves on to the frazzled BMP...
Knocks it out, then moves to the cover of a building! Holy Crap!!!
In the center-rear, the US 3rd Mech Platoon sits tight, awaiting the arrival of Soviet tanks. Meanwhile, the CO, Captain Phillips, decides it's time for him to take up station, so he moves over into one of the emplacements (center left, with the M-113, and enemy vehicles at top center coming through the Heffe-Weisse Gap, Hill 23 just off camera to top left).
Looking west to east at the center of the table, with Heffe at top left, the enemy's Mech 1 pushes its BMPs forward towards Heineken (off camera to right, with SF Tm2 sitting at center in the stream with no more LAWs).
While back in Heffe proper, the Soviet infantry surround then move on the US rifle team that just charged up the middle...
Well, he took two enemy teams with him!
Looking west to east on Hill 23 (at center left), the enemy's Tank 1/2 is down to two T-72s operational and one pinned (top left, yellow bead; three in action out of 12!!!). The two 'healthy' T-72s push forward, firing in the general direction of TOW1 (off camera to far right).
That's Tank 3's vehicles at center, Mech 3's vehicles and troops at far left, and the downed Apache at top right.
With Tank 1/2's two T-72s at bottom left, Tank 3, which is down to the enemy CO's BTR50 and a single T-72 (the ZSU is still alive as well, but remained in place off camera to left), pushes hard ahead, nearing the US CO with 3rd Mech Platoon's emplacements at far right. Tank 3 fires in their direction but doesn't hit anything.
This is the end of Turn 5. I'm happy to report that, in victory point turns, I've already won the game. The Soviets cannot win because I've killed more of their armored vehicles than they could possibly exit the southern edge of the table.
But I keep going because these Soviets know, just like their real-life counterparts, that they may get roughed up quite a bit, but that second wave of tanks and BMPs is not far behind them.
Turn 6 starts with TOW1, in the US far left-rear, cutting loose two missiles at two BMPs of Mech 3 atop Hill 23, while the HMG team also fires on a BMP (T-72s of Tank 1/2 at far right)...
Three more kills (bottom two explosions, one at top center).
Rack'em up, it's not even fair with how hot the dice are. I mean, I just knocked a BMP out, from the front, with a .50 cal. Of course it could happen, but the chances aren't that great, and it just happened. Not one weapon failed to kill.
And then, from the far US right-rear, TOW2 fires on the BMPs of Mech 1 which snaked through Heffe (top right, with Heineken at top left)...
Two more kills, it's not even fair.
And then the Soviets' last gasp...
All the Soviet tank units have been combined due to losses, and they push forward on 3rd Mech Platoon's emplacements, led by the indomitable Captain Phillips, who personally launches a LAW at an oncoming T-72...
Somehow I screwed the picture up: what you see here are two T-72s and the enemy CO's BTR50. There's actually another T-72 just off camera to left.
The enemy CO's BTR50 and a T-72 are smoked, but two T-72s actually survive to exit the southern edge of the board.
Though there are still a few Soviet vehicles straggling around out there, there is no way they can make it to the table edge, so I call the fight at this point, US Victory (yes, a capital 'V').
A look at the entire board from behind the US baseline, south to north. Every white piece of cotton is a destroyed armored vehicle or downed helicopter, so please take a moment to take in the absolute chaos and destruction that just occurred ;)
Another look, from west to east, just to the center line. The twin villages of Heffe (top center left) and Weisse (center bottom left), with Hill 23 just behind it to the south (right), were the scenes of heavy, vicious fighting at point blank range. But the key to victory was the TOWs; it was textbook how they were able to fire from Hill 23 and Schlitz (off camera to top center), then fall back to prepared defensive positions and re-engage the enemy armor pushing through the gap between the two villages. This almost fell apart when the Soviets were able to pin down TOW1 on Hill 23, then almost overrun them. But luck held out and I was able to get them into their tracks and back to the fall-back positions.
Having said that, it shouldn't be underestimated how much the loss of the Hind was, and how damaging its inability to insert the two Spetznaz teams was. On the one hand, the Spetznaz were there to seek out and destroy US anti-armor weapons. The Hind never even fired a shot; it tried three times to insert the Spetznaz. It was driven off twice, then destroyed the third time. So the Soviets not only didn't get the Spetznaz inserted to mess with the US TOWs (particularly in the southeast), but never got to use the weapons systems of the Hind. It was going to fire on the M-163, but made terrible spotting rolls twice in a row, and so was unable to acquire it. Of course, if the Spetznaz were on the ground, they would have communicated targets to the attack helicopter.
Don't worry, I'm not shedding any tears, I just wanted to point out that that was a pretty big deal to the overall fight.
A look at the mess in Weisse, where the entire US 1st Mech Plt was wiped out or captured.
A look (north to south) at Heffe, where 2nd Mech Platoon fought like devils just for a few of them to survive, but were ultimately simply run through by the enemy's BMPs. Though it must be pointed out that, by that time, 2nd Mech Plt had exhausted all its anti-tank weapons.

The mess atop Hill 23.
The fight was absolutely epic, with absolutely legendary fights in Heffe and atop Hill 23, textbook usage of the anti-tank missile teams on each flank, and the infantryman's worst nightmare: trying to stop tanks with bayonets. I was happy with the way the rules handled the Soviets' constant advance in the Heffe-Weisse gap, they simply got shot to pieces by the TOWs. And that, to be honest, while textbook, was more down to simply outrageous kill-dice rolling. I'll tell you this: if I was playing a 'live' opponent and he was rolling like that, I'd probably have been punching holes in the wall with my head.
While a tactical victory, in the overall scheme of things the Soviet horde rent holes all along the NATO front, and 11th Armored Cavalry Regiment, while holding its own, was forced to fall back in order to avoid being cut off and surrounded. Suddenly NATO was falling back from the border with Soviet armored columns running wild. In order to get a handle on the operational situation NATO turned to its battlefield reconnaissance assets to figure out where the Soviets were and what they were up to, and that's where the next scenario takes us.
The final tally of the fight:
Soviet Losses
12 T-72s destroyed
19 BMPs destroyed
1 BT50 destroyed
13 rifle teams destroyed (most while riding in their BMPs)
2 Spetznaz teams destroyed (while riding in their helo)
1 Mi-24 Hind destroyed
2 Platoon Commanders destroyed
1 Company Commander destroyed
US Losses
1 M1 Abrams destroyed, 1 damaged but taken off table
4 M3 Bradleys destroyed
8 rifle teams destroyed or captured
1 machine gun team captured
1 Special Forces team captured
1 Platoon Commander captured
1 AH-64 Apache destroyed
So I played this game on Saturday, took six hours, not including pre- and post-battle time. I'm writing it up on Sunday, and I've got the table set up for the next fight, which I'll do on Monday (a US holiday). Stay tuned, more Team Whiskey goodness to come.
**EDIT: I forgot to update my campaign roster, and properly recognize those that need it!**
Captain Phillips, CO of India Company, received the Bronze Star with 'V' for his overall command performance in the defense, for exposing himself to enemy fire to launch a Stinger that drove off an enemy attack helicopter, and for manning the last line of defense (in south center, just west of Heineken; he even fired a LAW at a T-72, but missed).
Lieutenant Ensmith, Commander of 2nd Mechanized Platoon, India Company, received the Silver Star for his dogged defense of the village of Heffe against overwhelming forces, to include his close assault of an enemy BMP.
Sergeant Johnson, KIA, Squad Leader, 2nd Mechanized Platoon, India Company, received the Distinguished Service Cross for gallantry which saw he and his team destroy a BMP with a LAW, close assault and destroy an enemy rifle team, close assault and destroy another enemy BMP, then be close assaulted by three enemy rifle teams, which saw his squad wiped out, but also eliminate two more enemy rifle squads.
Lieutenant Dillon, 1st Tank Platoon Commander, Charlie Company, received the Purple Heart for being lightly wounded when his tank was damaged by an enemy 125mm round.
All four TOW gunners and their assistants received the Bronze Star with 'V' for their heroic and skillful performance against the enemy's armored formations.
Lieutenant Eirserbe, Commander of 1st Mechanized Platoon, India Company, received the Bronze Star with 'V' for his desperate defense of Weisse, which saw him captured and his platoon wiped out.
Can't believe I forgot that! The Team Whiskey roster, here: http://blackhawkhet.blogspot.com/2015/08/team-whiskey-fulda-gap-roster.html?showComment=1441144326852#c2150453930140440200 , has been updated too.
V/R,
Jack


An epic battle AAR, Jack. Well done! What rules did you use? It appears that the scale of the minis is 6mm. Thanks.
ReplyDeleteClay
Clay,
DeleteThank you, Sir, I appreciate it. It was a blast, and I just finished the second game, and it's even better! I used a modified version of Ivan Sorenson's "5Core Company Command," which are my go-to rules for pretty much everything as they are so flexible. And yes, this was a 6mm fight, with everything but the M-163 being from GHQ (the M-163 is CinC).
V/R,
Jack
Very good love reading your AARS
ReplyDeleteTake care
Andrew,
DeleteThank you very much, Sir, I'm glad you liked it.
V/R,
Jack
Jack,
ReplyDeleteWhen you say a modified version of "5Corp Company Command", just how much have you modified it?...a little bit or a lot?
Clay,
DeleteSorry man, I'm not sure I can give you a percentage or anything ;) A lot of it is really just the 'optional rules' that I don't normally use in my Company Command games, specifically the multiplayer aspect of different units getting their own command roll (as opposed to one for the entire side), and extensive use of the 'platoon orders,' which I'd never used before.
There's a few other, relatively minor things, but I'm still ironing all the wrinkles out. But in the end, it's still 5Core Company Command. Again, an extraordinarily flexible system.
V/R,
Jack
Loved the microarmor carnage!
ReplyDeleteChris,
DeleteGlad you liked it man. If you like carnage, more is on the way, should be posted tomorrow evening.
V/R,
Jack
I have to read the batrep over 3 days,there was so much! Anyway, a large table and lots of action. Even though you could have go a bunch of smaller games in, you likely got more action on the larger table. Those TOWs were deadly! I'm off with the family for a 3 day trip to Melbourne for my best friend's birthday so you may not here from me until sometime next week. I see number 2 is posted and will get to it ASAP when I get back.
ReplyDeleteShaun,
DeleteWell, that's just you, isn't it? Never on time but always there ;) in all seriousness, I apprec you stopping by, it was a great fight. And I hope you and the family have a great trip.
V/R,
Jack