All,
It's 1000, 19 Sept 1939, and, having discovered the positions opposite them abandoned, KG Klink has moved north across the river to begin the grim process of reducing the Kutno pocket. The Poles are beat and they know it; they fought bravely to break through the German trap, but their men are exhausted and their equipment expended, and they are further disheartened as news of the Soviet betrayal (the Soviet invasion of Poland on 17 Sept 1939) has just reached them. The Poles are surrendering in droves, though some pockets of resistance remain.
One such pocket is at the village of Krowice (fictional), where KG Klink reconnaissance discovered dug-in enemy troops at approximately 0800 this morning. They promptly pulled back to higher ground to observe as the Poles were given a healthy dose of air and artillery, and no sooner had the last Stuka pulled out of its dive then elements of KG Klink were streaming forward to break the Polish position, looking to hit the Poles before they'd fully recovered from the supporting fires. It worked.
The opposing forces.
The Germans, with a star studded roster of no less than four holders of the Iron Cross 2nd Class: led by the Schutzen Company Comander, 1st Lt Freitag (Iron Cross), all of his 3rd Grenadier Platoon (led by 2nd Lt Tausch, Sgt Schlessinger's 1st Squad, Cpl Nader's 2nd Squad, Cpl Hauer - Iron Cross - 3rd Squad, and Cpl Kamphaus' 4th Squad), three squads from 4th Grenadier Platoon (acting platoon commander Sgt Mader - Iron Cross - with the HQ section, Cpl Kandler's 1st Squad, and Cpl Imhofe -Iron Cross - 3rd Squad), supported by two tanks of 2nd Panzer Platoon (acting Platoon Commander Sgt Grossman's Pz Mk III and LCpl Otjen's Pz Mk II) and Cpl Osswald's 80mm mortar.
The great irony here is that I made a colossal mistake: with four Iron Cross holders on the table at the same time, which I rate as 'heroes' in the rules, allowing them to to self rally their units without using an activation, AND giving +1 in close combat, I NEGLECTED TO PLACE THE HERO FIGURES ON THE BOARD, so those three units (the CO happens to be a hero, but I don't give COs any extra juice in the game, they already get to rally without using an action and provide +1 in CC, but I screwed Cpl Hauer, Sgt Mader, and Cpl Imhofe's squads). Luckily a new hero emerged, who pretty much single-handedly wrapped up the victory for KG Klink.
The Poles, with their CO, a Maxim .30-cal MG, a 37mm anti-tank gun, a 76mm field gun, and eight rifle squads, are dug-in but demoralized.
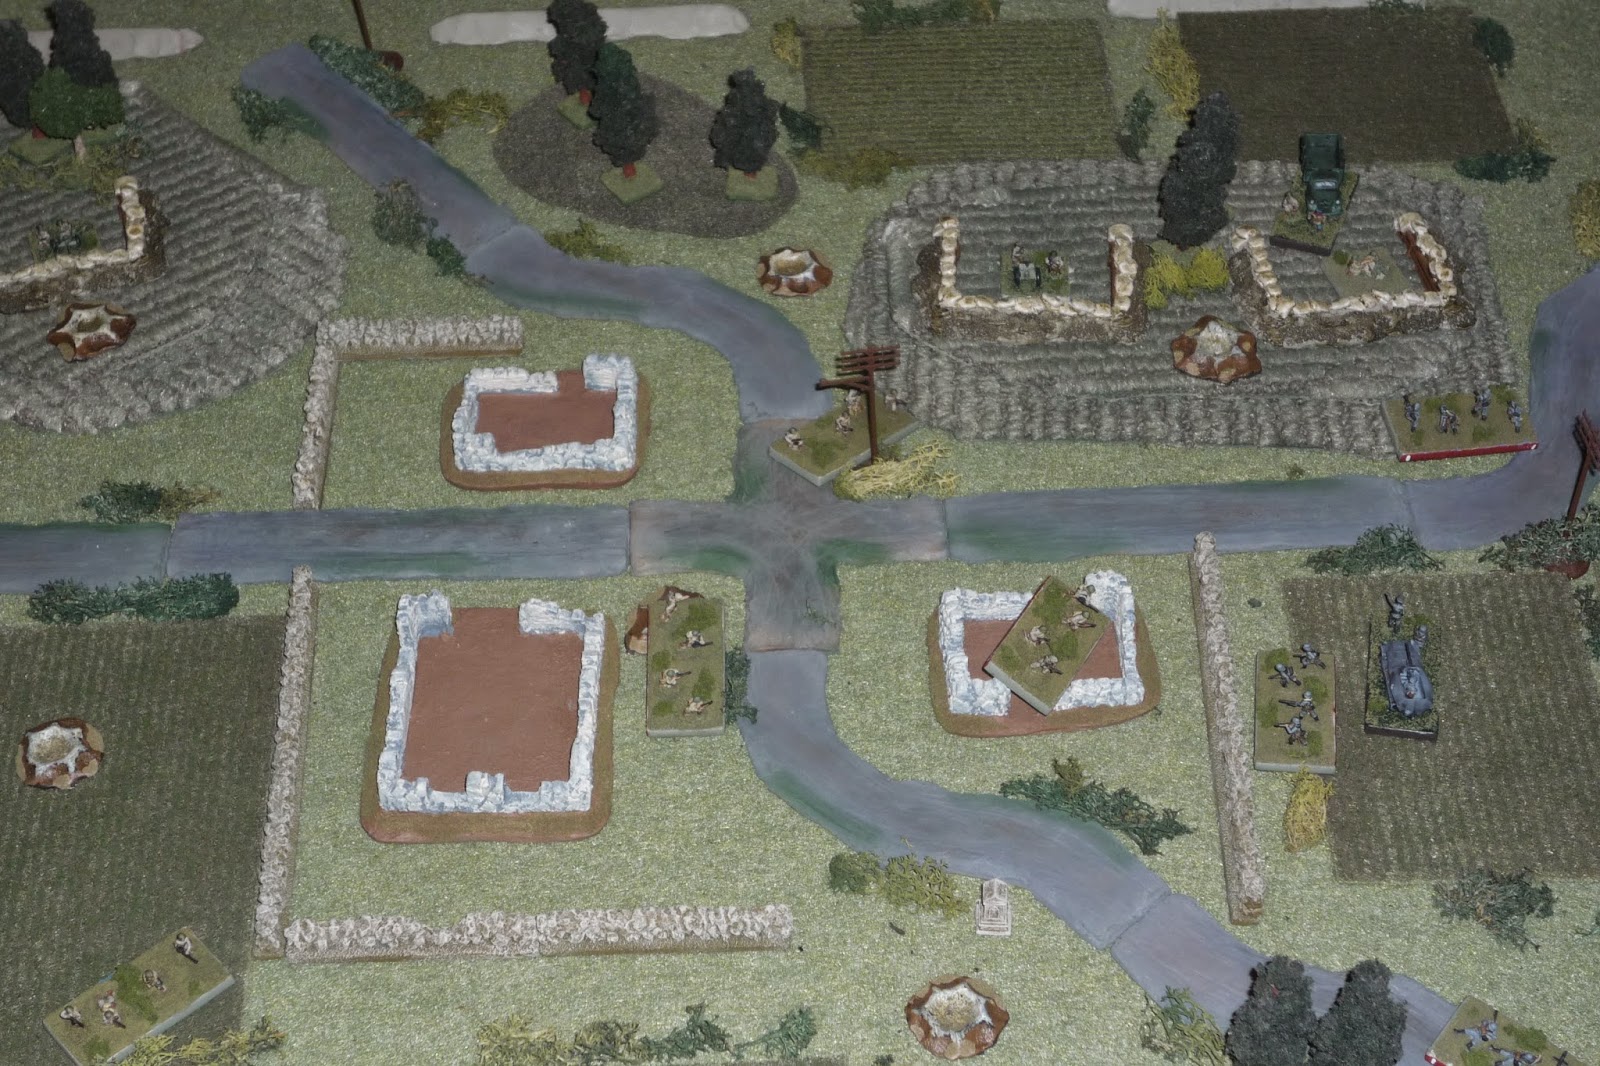
Overview, north is up, with Germans coming from the south and Poles dug-in in the north. Lt Freitag, the CO, is with Lt Tausch's 3rd Platoon in the center, 4th Platoon is moving up on the far right, and the two Panzers are at bottom left, having been late to the line of departure. The Poles are dug-in, but have been pounded for several hours, and the Germans are looking to close the distance rapidly to take advantage of the Poles shell-shocked state (note: I didn't do anything to penalize the Poles in the game, this is just narrative that fits after the fact of what happened on the tabletop, if that makes sense).
The German left, with Sgt Grossman and LCpl Otjen's panzers at bottom left, enemy across the top, and 3rd Gren Plt at top right, almost even with the Polish first line of defense.
The German right, with 3rd Gren Plt and CO at center left (mortar atop the hill at left) and 4th Gren Plt at far right, with Poles again across the top. On the right side the Polish line bends back a bit, to they're still in good stead, but the left side of the Polish line (looking from the German perspective) is already almost outflanked. This is simply how things worked out with the blinds.
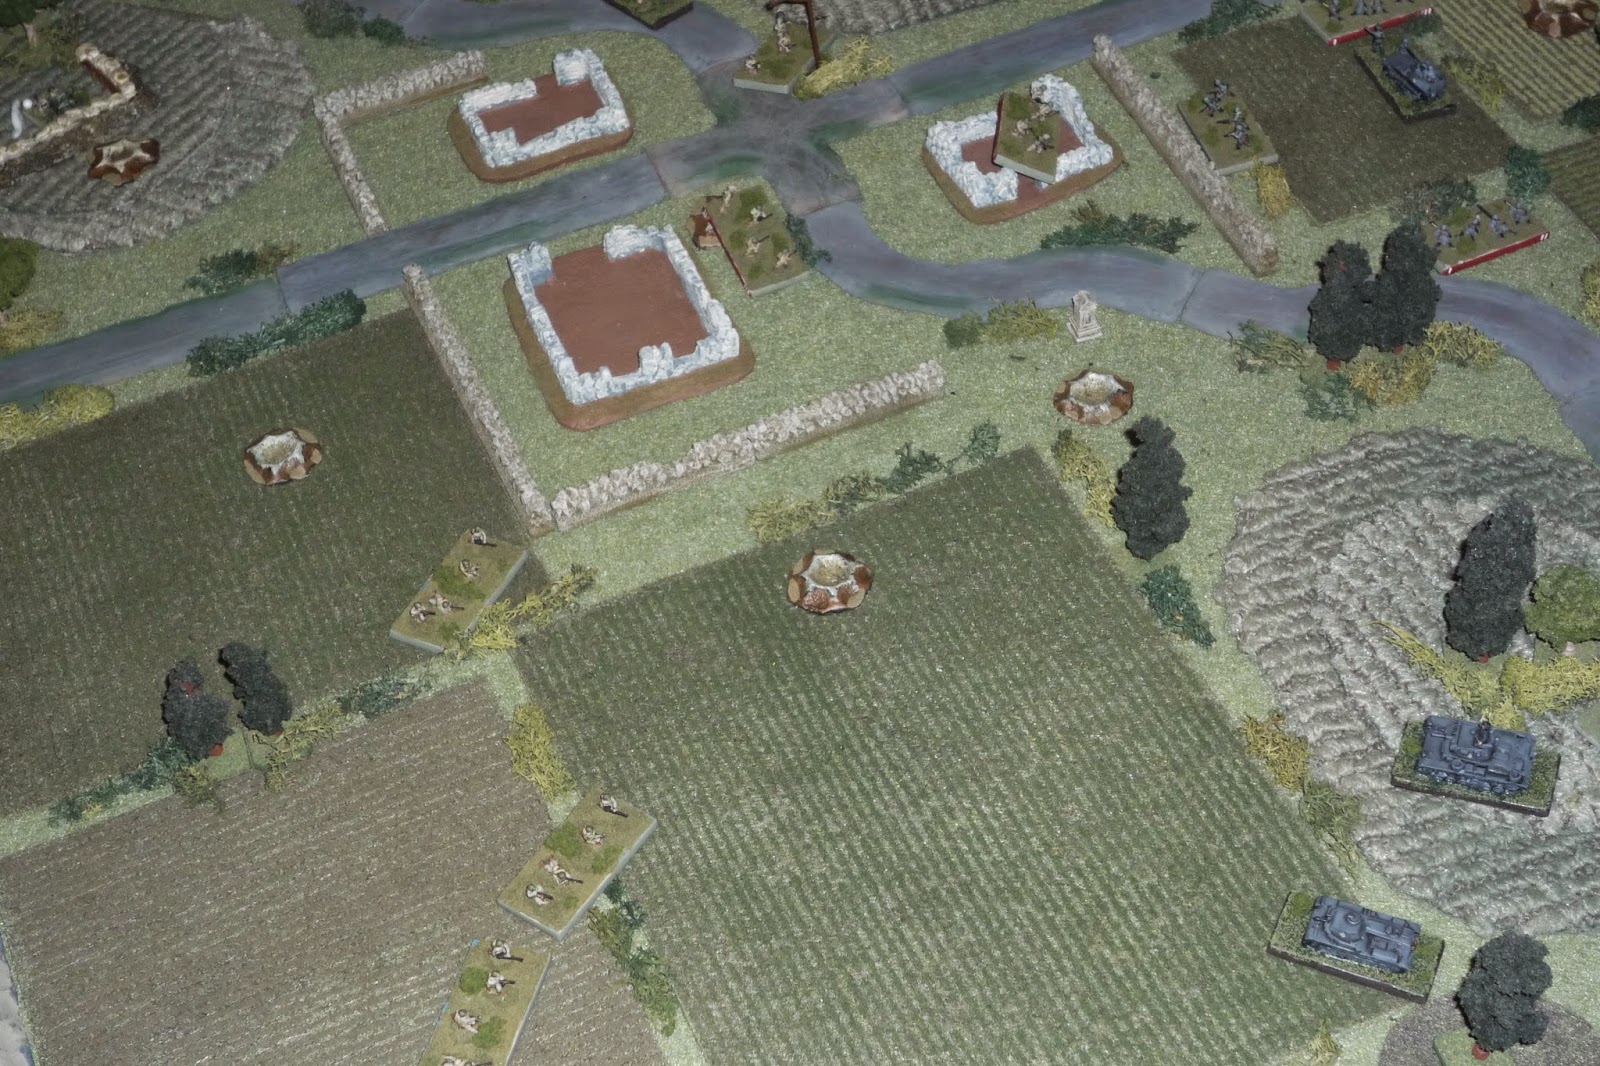
The left side of the map, showing the Polish right. They have three bunkers on the two hills (top left and to right), from left to right: anti-tank gun, field gun, machine gun. You can see two lines of infantry, each with three rifle squads, protecting the emplacements (mostly the ATG, I suppose), in this photo.
A look at the Poles on the right side of the table, with a better look at their two right-side hilltop positions, and the two rifle squads they have protecting them (bottom right).
The fight is on.
The game starts with a German firefight, which initially I thought was bad news (I even wrote a curse word in my notes), as I want to move up as quickly as possible, but it actually turned out fantastic. It starts with LCpl Otjen's Pz II (off camera to bottom left) firing on the enemy machine gun, forcing them to fall ack (bottom right, red bead). Then Lt Tausch's squad (off camera to bottom) fires on the enemy field gun, with only 1 shock die, and force them to fall back, abandoning the gun (crew at center, red bead). Then, Cpl Osswald's 80mm mortar fires on the enemy anti-tank gun (top left), getting 'man down.'
Amazing, all the enemy heavy weapons are temporarily out of the fight (though none were knocked out). It's about to be blitzkrieg up in here.
This photo is looking west, at the German far right, where 4th Platoon gets into it with the two Polish rifle squads on this flank. Cpl Kandler's squad is forced to fall back (bottom left, red bead), while one enemy squad is 'man down' (center right, white bead). The Poles got in a lucky shot that put Sgt Schlessinger's squad (from 3rd Plt) out of the fight (casualty figure at top center left).
Then the Poles roll a scurry, which should suck for them as they really need to use their firepower to beat the Germans back, except all their heavy weapons are in bad morale states, so the scurry actually helps them a great deal, as their ATG recovers from man down and their field gun crew rallies. The machine gun team is only able to upgrade from suppressed (hunker) to pin, but then their CO moves over and rallies them.
The Polish squad at center right (behind trees and bushes, just below crater) recovers from man down, as does Cpl Kandler's squad (off camera to bottom right).
And here's where things get glorious: the German infantry can see enemy forces that rallied, so they get to move, and they push forward very, very aggressively. 4th Gren Plt can be seen at bottom right, but the real action is on the left side where Lt Tausch and Cpl Nader lead their squads forward, penetrating the Polish defenses.
My Pz II (off camera to bottom left) is able to move up, but the Pz III can't see anything and so is unable to move.
But then the Germans roll a scurry!
Staying aggressive, 4th Gren Plt moves up on the right (Cpl Imhofe's squad at far right, in the open right next to a Polish rifle squad, with Cpl Kandler's squad at bottom right and Sgt Mader's squad between the two). But again the real action is with 3rd Gren Plt, where Lt Tausch is determined to carry the day. Look at the top left center of the photo: you should see two emplacements, both empty as German fire has driven back the enemy field gun and machine gun crews. If you look just below the right-hand emplacement, that's Lt Tausch's HQ section. Fantastic!
Below him you can see his other squads strung out behind him. Further great news is that the Polish field gun and machine gun crews are behind the hill, and thus can't see the Germans, and so they can't react.
I'm quite a bit nervous about this move, as it's going to leave them open to fire from the Polish ATG (top left) during their turn, but I move the panzers ahead (this photo is looking east-northeast).
But then the Poles roll a damned scurry! The defenders can feel things slipping away from them, so they decide to get aggressive as well.
On the far left, under the watch of their ATG (who can't fire because it's a scurry), the Poles decide to bolster their chances of taking out the German tanks by rushing two rifle squads forward into position to close assault the panzers.
But the panzers wisely fall back. This means it will take two turns for the Polish rifles (bottom left) to get into close assault, but the ATG (off camera to top left) is still an issue that needs to be dealt with, so falling back is only a 'good' move and not a brilliant one.
The Poles move another rifle squad forward towards the German tanks (bottom left, tanks off camera to bottom, the Polish infantry here are two moves from close combat with the tanks), while the Poles move all their other rifles right to deal with 3rd Gren Plt (Lt Tausch is at far right, just below the right-hand emplacement, with the rest of his platoon strung out below him).
The really suck part is that the field gun crew re-mans its gun in the left-hand emplacement, while the machine gun team re-mans the right emplacement.
The Germans on the right react, with 4th Gren Plt straightening its line (the blue bases on the right, which actually probably saved Cpl Imhofe's squad, which, if you recall, last turn was caught in the middle of the field on the right), while 3rd Gren Plt (red bases) consolidated a bit as well. Most interestingly (in my opinion) was Lt Tausch's HQ section.
Tausch's section was sitting right in front of the right-hand emplacement, recently reoccupied by the enemy MG team, so, rather than falling back down the hill, Tausch maneuvered the HQ section right (top center, on the road).
Finally someone rolls a 'normal' activation, and so the Germans are looking to kick a little butt.
The Germans open the turn by having Cpl Osswald's mortar pound the MG position, which forces the enemy MG to fall back again (red bead). Sensing his opportunity for glory, 2nd Lt Tausch orders his men to charge. They quickly put the enemy MG team out of its misery, and the enemy CO falls back (to the left).
Keeping the momentum, Lt Tausch leaves the MG emplacement (far right) and charges the field gun emplacement (center), easily eliminating the gun crew. But there he stopped, scared of pushing his luck too far (I could have charged the Polish rifle squad and CO at far/bottom left). Dammit; should I have gone?
Sgt Grossman's Pz III targets the enemy ATG (top left), getting 'man down' again.
An enemy rifle squad (bottom left) fires fires at Lt Tausch's squad (center), but misses. Of course the Polish CO was hoping to pin, or force Tausch's men to fall back, and then lead his other rifle squad into close combat to eliminate Tausch's men. But Tausch's men were unfazed by the rifle fire, and so the enemy CO had a big choice to make: sit tight, and leave Tausch's squad as a thorn in his rear, or assault an unpinned enemy squad, which is generally hazardous to one's health?
The dice said go, and so the enemy CO led a rifle squad up the hill and into close combat with Lt Tausch's squad.
The Germans (top right) win, but only barely, and so the Poles are not eliminated, simply sent packing back down the hill (far left).
The Poles are committed to seeing Tausch's men off, and so another Polish rifle squad (coming from bottom right) rushes the Germans atop the hill.
Lt Tauch's men defeat the Polish rifle squad in close combat, and I award them a 'hero' figure on the spot (that's the field gun knocked out in front of them, their most recent casualty at far left).
Then Cpl Nader's squad (bottom right) moves up and fires, eliminating the enemy squad at center left (in ruins). With this enemy unit eliminated (thus removing the enemy's capability for snap fire, as the rifle squad with the enemy CO at top left is suppressed), Lt Tausch's HQ section storms down the hill and into close combat once again!
Where they kill the enemy CO and his supporting rifle squad (far right). Tausch, with blood in his eyes, turns his men and they charge up the hill at the enemy anti-tank gun (far left).
And the enemy ATG is eliminated as well.
For those not taking notes, Lt Tausch's HQ section used scurries and reaction to enemy scurries to infiltrate all the way to the central enemy position of bunkers, then: close assaulted and beat an enemy machine gun team; close assaulted and beat an enemy field gun crew; was close assaulted and beat back the enemy CO and a rifle squad; was close assaulted and defeated an enemy rifle squad; left cover to charge down the hill to defeat the enemy CO and a rifle squad; then charged uphill and defeated an enemy anti-tank gun.
Cpl Osswald's mortar team (top right) then opened up on the enemy squads on the far left (bottom left), pinning one (yellow bead) and forcing one to fall back (red bead). Lt Tausch's squad is atop the hill off camera at top left.
On the far right, the two enemy rifle squads there opened up on 4th Gren Plt, pinning Cpl Kandler's squad (bottom left, yellow bead).
Then the Germans roll a scurry (another 1), which really pisses me off because anything else would have helped me finish the Poles off.
But maybe this will work. 4th Gren Plt and the CO envelop the Poles on the right.
While 3rd Gren Plt (from top left to top right, Lt Tausch, Cpl Nader, and Cpl Hauer's squads) and 2nd Panzer Platoon (bottom right) envelop the three remaining Polish rifle squads on the left (bottom left).
At this point, beaten and demoralized, the Poles threw in the towel, the remaining five rifle squads surrendering to KG Klink. I'm not too much a fan of major whoopin's like that, but it still didn't feel like a one-sided affair. At any point a single bad die roll could have seen Lt Tausch's squad eliminated, which more than likely would have bought time for the Poles to get their heavy weapons back in action. This could have had serious consequences as the rest of the German infantry were spread to kingdom come, and the enemy ATG could have easily dealt some bad blows to the two panzers, and the enemy had four rifle squads unmolested on the left to try to get into close combat with the tanks. So, it could have been a drastically different fight. But I'm happy with how it turned out ;)
Notes:
-2nd Lt Tausch (Plt Commander, 3rd Gren Plt), recommended for Iron Cross 1st and 2nd Class for leading close assaults which eliminated enemy central position, consisting of two field pieces, a machine gun, the enemy commanding officer, and two rifle squads.
-Sgt Schlessinger (1st Squad, 3rd Gren Plt), Wound Badge, Infantry Assault Badge, KIA.
-Lost ~10 KIA/WIA.
-Caused ~55 KIA/WIA, captured ~50 POW, destroyed MG, 76mm Field Gun, and a 37mm Anti-Tank Gun.
Thus, the campaign in Poland ends. Sure the kampfgruppe's was sent to the suburbs of Warsaw, where it saw some skirmishing in patrol actions, but this fight ended KG Klink's substantive actions in the campaign. I've got some administrative clean-up to do, and then I'm looking to mess with some other projects before I come back for France 1940. Stay tuned.
V/R,
Jack


A brilliant end. I still think the Poles would have lost. It started off well for the Germans. I think, barring a lot of 1s when you wanted firefights and 6s when you wanted to move, that the momentum was with the Germans. In our games, we would have renamed Tausch "Sgt Rock" (yes, I know Taucshis a Lt). It is an old thing from games we played in the early 80's when the lone figure seemed to last through many close combats, always to survive. Just like the comic.
ReplyDeleteThanks for the AARs. I think I have enjoyed your Polish campaign as much as you have!
Thanks Shaun, I was pretty happy with this fight as well, and it was a lot of fun. I wouldn't want something crazy like that happening too often, but 1 out of 16 ain't bad. I had a great time with Poland and I'm really stoked to start up France, but I'm waiting on a few more goodies to paint and base for it (couple ATGs for BEF, some stuff for command stands for French and BEF).
ReplyDeleteOh, and believe me, I know Sgt Rock! This was my second favorite comic book, with the first, of course, being "Fightin' Marines."
V/R,
Jack
LOL! So long as you read them as entertainment and not manuals :-)
Delete