All,
It's 0730, 18 Sept 1939, and the Battle of Kutno is reaching its climax, with this day seeing the heaviest fighting. The Poles had repeatedly frustrated the German attempt to close the pocket, and aerial reconnaissance had found yet another bridge not disclosed on any German map, so the Kampgruppe's new Executive Officer, 1st Lt Ost, led 1st Motorcycle and 4th Grenadier Platoons, along with two squads of attached engineers and two armored cars, to destroy the bridge. The intelligence section didn't expect much in the way of opposition; typically, they were wrong, as the Poles were poised to fiercely defend one of the few remaining avenues out of the pocket.
The opposing forces.
The Germans are led by Lt Ost, then have Lt Weider's 1st Motorcycle Platoon (of Sgt Gradl's 2nd Squad and Cpl Pankau's 3rd Squad), Officer Cadet Vetter's 4th Grenadier Platoon (with Sgt Mader's 1st Squad, Sgt Lehmkuhl's 2nd Squad, and Cpl Imhofe's 3rd Squad), Officer Cadet Distler and Sgt Keck's armored cars, and engineer squads led by Sgt Barkstrom and Sgt Hafl.
The Poles have their CO, an 82mm mortar, two .30 cal MGs, and seven rifle squads (three with anti-tank rifles).
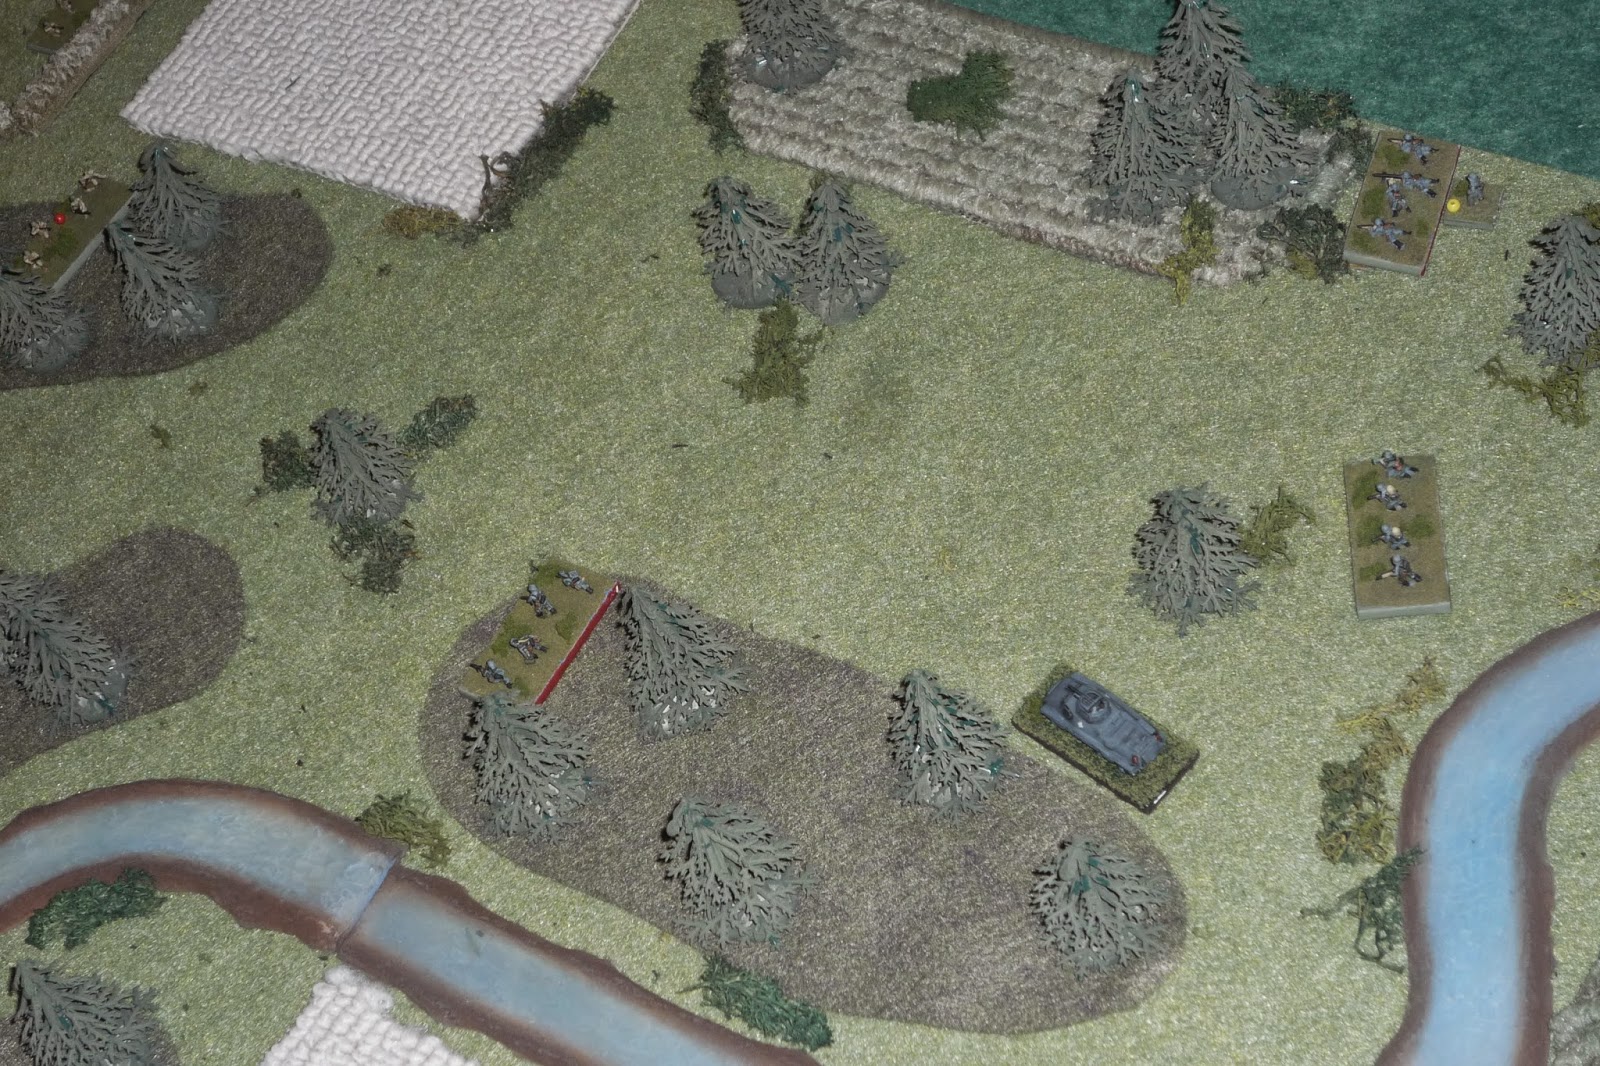
Overview, north is up, Germans are at bottom right (southeast), Poles are spread across the board on blinds (poker chips).
On the German right (east side of river), Off Cadet Distler's armored car supports Lt Weider's 1st MC Platoon and one of the engineer squads (Sgt Barkstrom).
On the west side of the river is the CO, Off Cadet Vetter's 4th Gren Plt, Sgt Keck's armored car, and the other engineer squad (Sgt Hafl).
I played this game a little different, where I left all the blinds in the center (rifle squads) on the table until the Germans got LOS to them. You can see a couple Polish rifle squads on the table at the start, and I put their mortar on the table too, so that it could fire every turn, as well as relatively strong forces guarding both sides of the bridge.
This is the top right (northeast) corner, where the Poles have a rifle squad guarding their mortar team.
And the bridge, with an MG and rifle squad to each side.
Sgt Mader's squad (center) moves up and fires (top left), no effect. This also causes the blind at bottom left to be flipped over, revealing an enemy rifle squad. Cpl Imhofe's squad (bottom center right) then moves up and fires, pinning the rifle squad at bottom left (yellow bead).
On right, Sgt Gradl's squad (top) moves up and fires, getting a 'man down' result (top left).
The enemy mortar fires (puff at center right), forcing Cpl Pankau's squad to fall back (bottom right, red bead), while the enemy rifle squad that was man down (top center) recovers. Another enemy rifle squad (left center) fires on Sgt Mader's squad (bottom left), and pins them.
Then things suck a bit, as Cpl Pankau, a hero, tries to rally his squad, but fails, and they run from the field of battle... Lt Weider (bottom right) moves his men up, and they fire at an enemy rifle squad, but only pin them, so Off Cad Distler's armored car moves up (center) and fires on them (puff at center left), and they fall back (top left).
The CO moves up and rallies Sgt Mader's squad, while Off Cad Vetter moves his squad up (top). The enemy (far left) guard fires, but misses, and Vetter's HQ section fires, getting man down.
Then the Poles roll a firefight. The enemy mortar fires on 4th Gren Plt, which is clustered nicely, but none of the stalwart German infantry are effected. The enemy rifle squad at top center (casualty figure) recovers from man down, but pretty much all of 4th Plt fires on them and they are eliminated.
On right, the suppressed enemy squad rallies.
On German left, Cpl Imhofe's squad (bottom right) moves up and fires at the enemy in the field, but misses, so Sgt Mader moves his squad up (center right) and fires, forcing the enemy to fall back (far left, red bead).
On the right, Lt Weider's squad sprints ahead (center left).
On left, enemy rifle tries to rally, upgrades from hunker to pin.
On right, rifle squad moves up (top right). Lt Weider's squad (top left) guard fires, but misses, while the enemy's aim is true, forcing Weider's squad to fall back. The enemy mortar fires, to no effect.
Sgt Gradl's squad (top right) moves up, and the enemy guard fires and gets a pin (yellow bead)... Off Cad Distler's vehicle moves up and fire, but misses...
On left, Cpl Imhofe's squad circles to west (bottom left, enemy at top left).
Then the Poles roll a scurry. Their rifle in the west rallies himself, while in the east the Polish rifle falls back into the woods (far left) to break LOS to the German armored car, which falls back to Lt Weider's squad and helps them to rally, while Sgt Gradl's quad (top right) rallies as well.
Cpl Imhofe's squad (far left) moves up and flanks the enemy rifle squad (top left), pinning them, while Sgt Mader's squad moves into the field and finishes them off. Sgt Keck's vehicle moves up (bottom right).
The enemy rifle squad in the east (top left) moves up, but Sgt Gradl's squad (top right) guard fires and pins them. But then the enemy mortar hits Gradl's squad and forces them to fall back (red bead).
Then the Germans roll a damn firefight, which really sucks as only Off Cad Distler's armored car can see anything... The armored car fires on the enemy rifle squad, forcing it back (far left, red bead). The enemy mortar targets the armored car, to no effect. If it's feeling like a stalemate in the east, where one enemy squad is calling in mortars to stymie the German advance on that side, don't worry, that's how I felt too...
Then the Poles rally that rifle, and call in mortars on the armored car again, pinning it.
Then the Germans roll a scurry. The armored car rallies itself, while Sgt Gradl's squad can only rally 'up' to a pin (yellow bead, top right). Lt Weider leads his squad (center left) up, while Sgt Barkstrom's engineer squad moves up (center right).
On the left, Sgt Mader and Cpl Imhofe's squads, as well as Sgt Keck's vehicle, move up (left is north).
While the CO, Off Cad Vetter, Sgt Lehmkuhl, and Sgt Hafl's squads move up in the center, hugging the river.
Then the Poles roll a scurry. This sucks for them as there's not a lot of movement they are looking to do, plus it means they don't get to fire their mortar. Their rifle in the east rallies.
And they flip over their last blind, a rifle squad in the center.
Then the Germans roll a firefight, but not one single unit has LOS to an enemy, so it becomes a scurry.
Sgt Mader and Cpl Imhofe's squads move up on the left with Sgt Keck's Sdkfz 221, while the CO, Off Cad Vetter, and Sgt Lehmkuhl's squads move up in the center (field), with Sgt Hafl's engineer squad brings up the rear (bottom right).
On the right, Lt Weider's squad dashes across the opening into another treeline (far left, with Polish rifle at top left), while Off Cad Distler's Sdfkz 231 inches forward. On the far right, Sgt Gradl can't manage to rally his squad (a hero, too!), but Sgt Barkstrom's engineer squad sprints forward.
The Poles get a normal roll plus a random event, which is "Report In," so the Polish CO can't take any actions this turn, which is not a big deal as he hasn't taken a single action in the game thus far (they are usually pivotal, and will be later, but so far the Germans have only been up against the Polish pickets). In the center, the Polish mortar drops rounds on Off Cadet Vetter's squad, getting man down (white bead; the mortars were 'danger close,' and I rolled shock dice on everyone, but no one else was effected). The Polish rifle squad decides to get aggressive, and charges! Sgt Lehmkuhl's squad (bottom left) snap fires, but misses, so the Polish charge lands home.

The Poles manage to knock out Off Cadet Vetter's squad, and the German CO falls back to Sgt Lehmkuhl's squad, but the Polish rifle squad keeps coming, and vanquishes them in close combat, too (bottom left)!!! Their blood up,the Poles continue their charge, looking to close with Sgt Hafl's engineer squad, but the Germans cut loose with their flamethrowers and get 'man down,' halting the rampaging Poles!
Sgt Hafl's squad then runs the Poles down (bottom right, casualty figure), before proceeding north to avenge their fallen comrades (far left, moving past two knocked out rifle squads and the German CO. It really sucks when you lose your CO...).
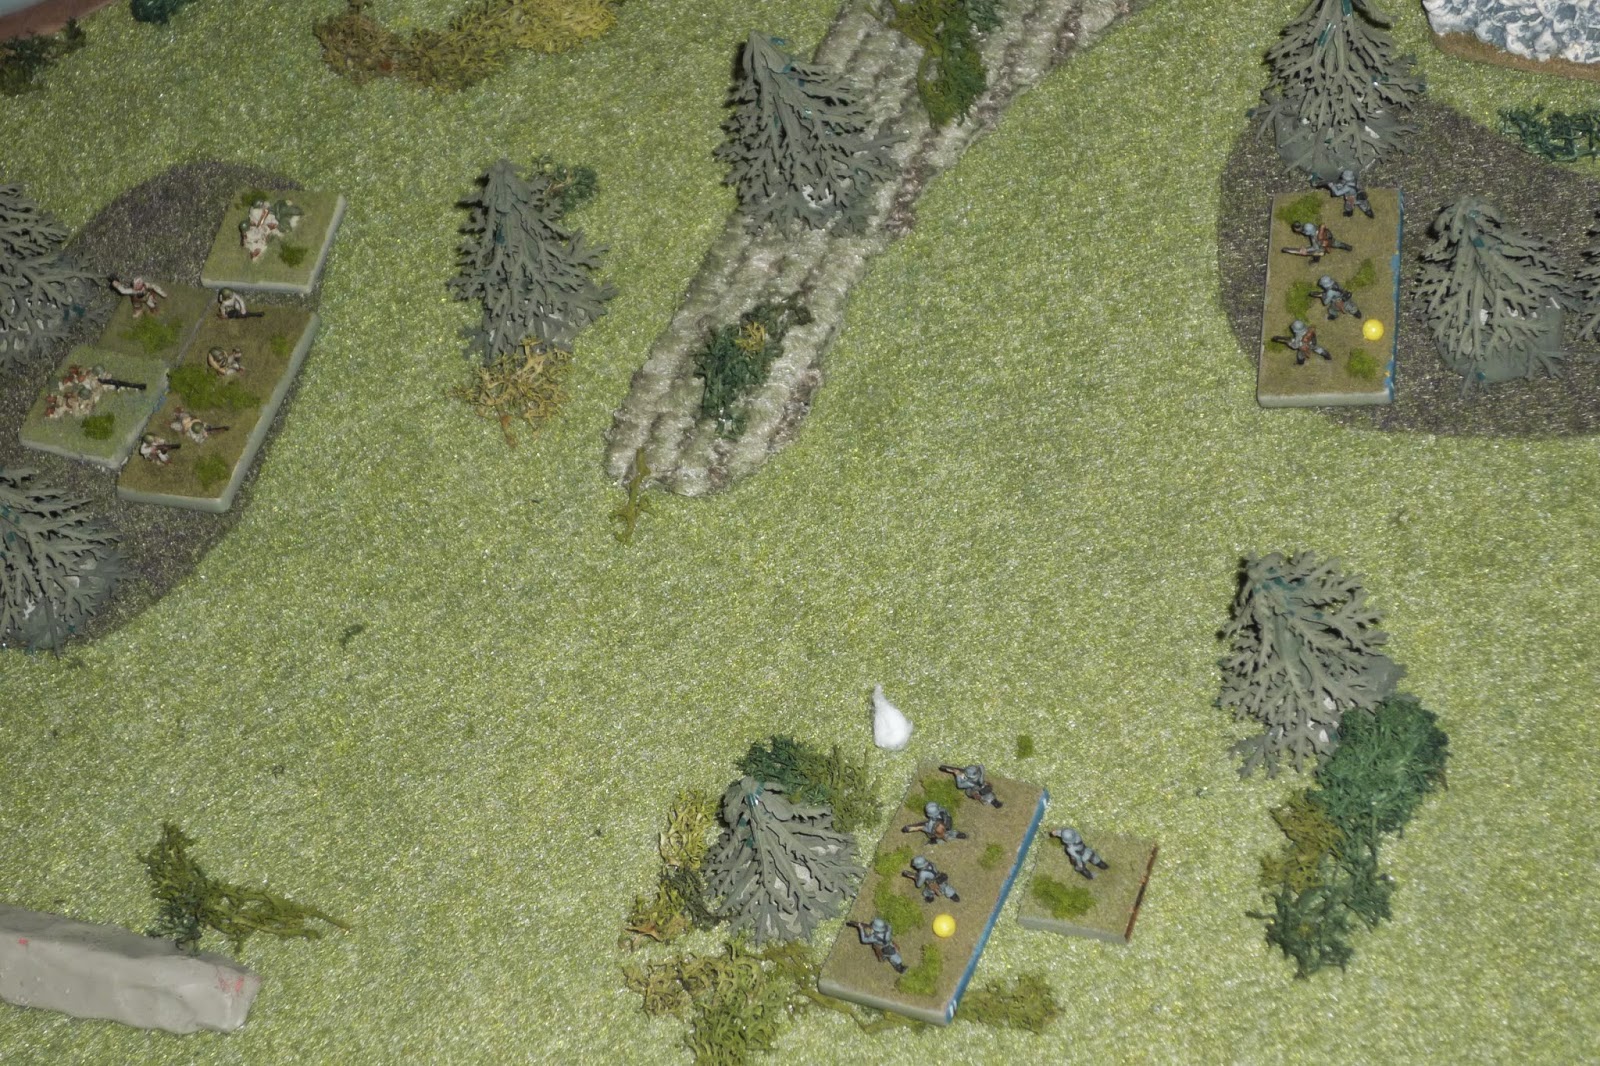
On the far left (top is looking east, north is left), Sgt Keck's vehicle dashes forward and fires on the enemy troops at far left, but misses. The enemy anti-tank rifle returns fire, forcing Keck's vehicle to fall back (far right, with red bead; they were at the white puff at center).
Still on the far left, the enemy mortar opens up, pinning Sgt Mader's squad (bottom center) and Cpl Imhofe's squad (top right). The enemy also rolled a random event, "A Hero Emerges," and so a hero was placed with the Polish rifle squad in the trees at far left.
On right, the Polish rifle squad (top left) moves up to the edge of the woods and fires on Lt Weider's squad (center left), to no effect. Then the Germans roll another scurry.
On left, Sgt Mader moves his squad over (bottom center) and rallies Cpl Imhofe's squad, which moves up (bottom center), while Sgt Hafl's squad moves out of the field at top right and into the treeline near the river (top center), creeping towards the enemy. Sgt Keck's armored car rallies.
On right, Lt Weider's squad (bottom left) turns to face up to the Polish rifle squad (center left), while Off Cad Vetter's vehicle moves up next to them, and Sgt Gradl and Sgt Barkstrom's squads sprint up the right side. The enemy rifle squad, seeing the forces arrayed against him, falls back into the heart of the woods.
That's the enemy mortar position at top right; a key question has been whether to push forces that way to take out the mortar, or stay focused on getting to the bridge. My mission was the bridge, so that's what I stuck with, knowing I couldn't afford to spend valuable, limited activations to send forces away from the bridge.
Then I catch a huge break when the Poles roll a scurry. They literally have no one to move, and have no one that needs rallying, so they literally do nothing this turn. They really got screwed there, but I'll not shed any tears...
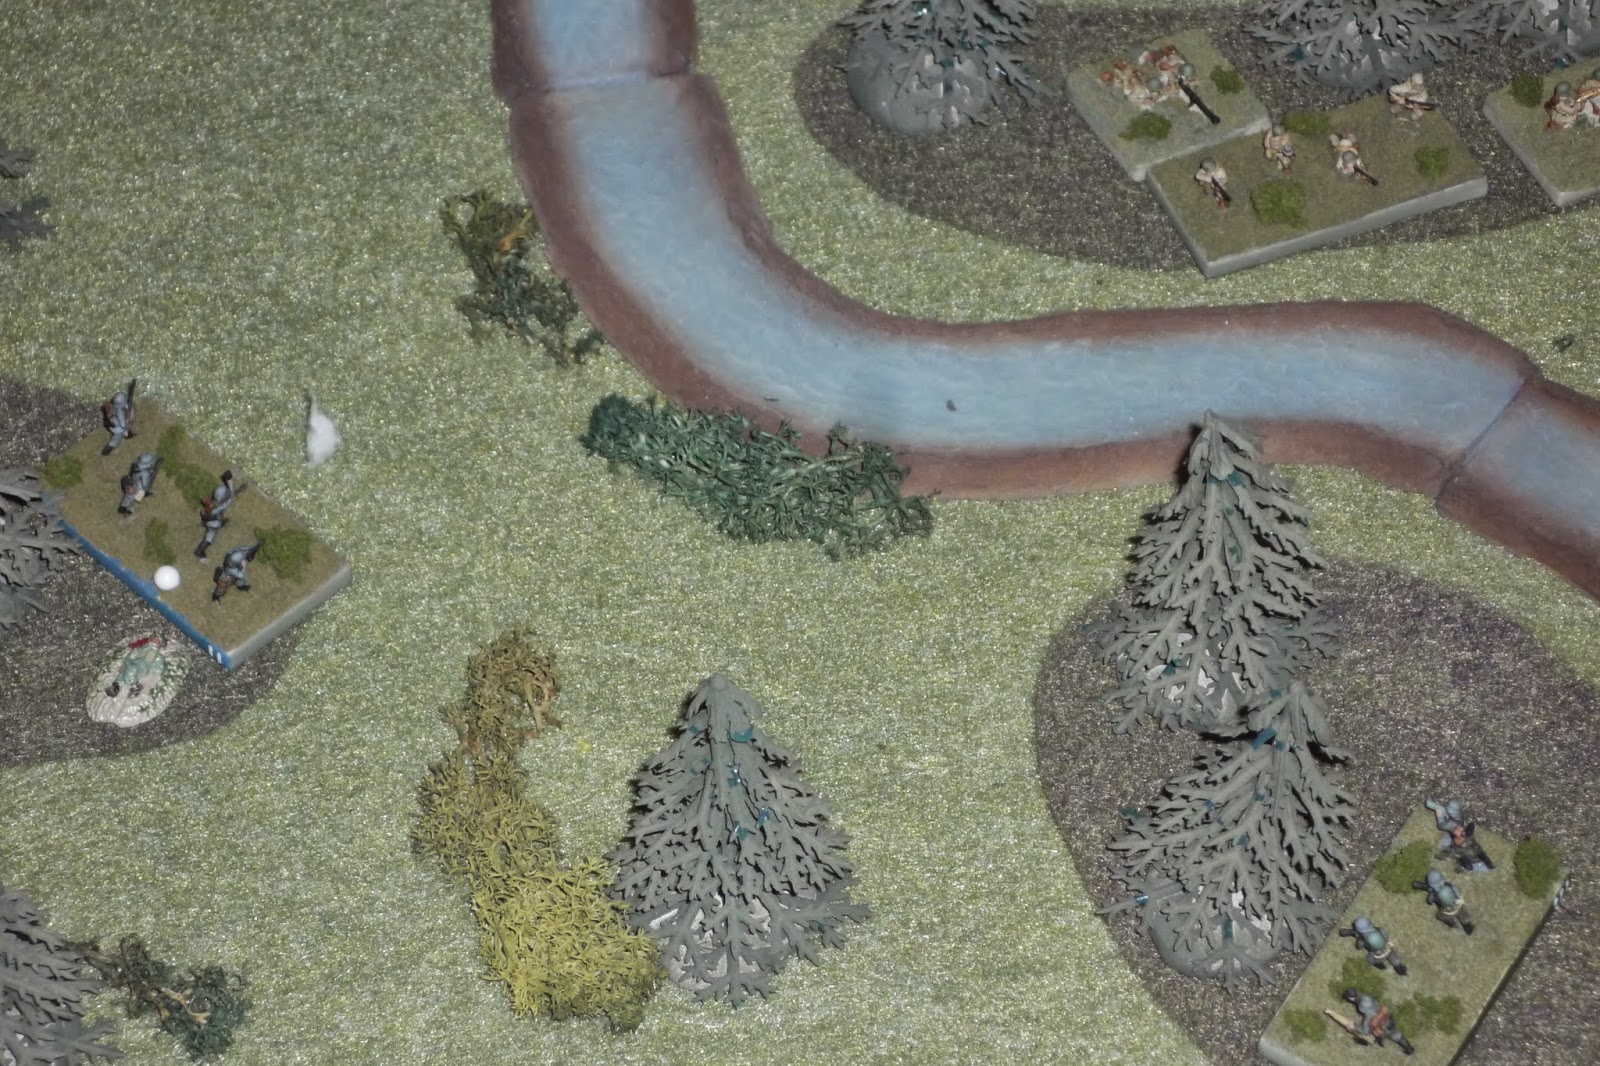
Sgt Keck maneuvered his vehicle forward and fired, getting 'man down' on the enemy rifle squad with ATR. Then Cpl Imhofe's squad (center left) charges (not really the plan, but I needed to take advantage of the 'man down' result, knowing that, since that squad has a Hero, it will be able to rally itself next turn). The enemy machine gun is masked by its friendly squad and can't see Imhofe's squad to snap fire.
Cpl Imhofe's squad is victorious, and sets its sights on the enemy machine gun. A key issue at this point was should the enemy CO support the close combat or not? The dice said no.
And so the enemy CO (top center) fell back over the bridge as Cpl Imhofe's squad (bottom left) savaged the enemy machine gun team (hopefully the same MG team from a few fights ago, the one that waxed my ass the whole game).
After much dithering on the right, and potential calamity in the center (which saw the Germans lose two rifle squads and their CO), finally things are looking up due to aggressive action on the left. And now the Poles are stuck with the conundrum of having two rifle squads and a mortar in the northeast corner, well away from the bridge, which is both sides' objective.
Apparently Cpl Imhofe's men (bottom left) were still celebrating their victory, as opposed to taking cover, when the enemy mortars hit, and they suffered 'man down' (Sgt Hafl's engineer squad at bottom right).
While on the right, an enemy rifle squad lunged forward (top center) and fired on Lt Weider's squad, pinning it.
Back on the left, Sgt Keck pulled his vehicle forward and helped Cpl Imhofe's squad rally, and opened up with their 20mm auto-cannon, getting man down on the enemy rifle squad in the center (white bead) and causing the MG to run (top right, red bead). Then Sgt Hafl's squad crept forward and unleashed the flamethrowers, knocking out the enemy rifle squad in the center.
With napalm still burning in the central defensive position, the enemy CO falls back to try to rally his machine gun team, but they run! The bridge is totally undefended.
The Poles begin moving their two northeast rifle squads west, with one getting a decent amount of the way (top left), but the other only getting to the wall (top right, with Off Cad Distler's vehicle and Lt Weider's squad at bottom center).
The Germans roll another firefight, but there is no LOS to enemy units, so it turns into a scurry.
The Poles manage to get a rifle squad and their CO back to their still burning defensive position, but Sgt Keck has gotten his vehicle onto the bridge, while Sgt Mader, Cpl Imhofe, and Sgt Hafl's squads move towards the bridge or take up supporting positions in the west.
While in the east, Sgt Gradl's squad (bottom right) moves up to contain the northeast corner, while Lt Weider and Sgt Barkstrom's squads, and Off Cad Distler's vehicle move toward the bridge (left).
The Poles roll another random event, and it's "Report In" again, so once again their CO can't take any actions, which probably saves his life, actually. The Polish mortar fires to bottom left, pinning Sgt Hafl's engineers, while the Polish rifle squad charges Sgt Keck's armored car on the bridge. The vehicle snap fires its machine guns, but the Poles manage to close the distance. However, Keck's crew is ready, springing forth with submachine guns, pistols, and hand grenades, and they fight off the Polish riflemen!
German forces approach from the east and west, and capture the enemy CO.
While Sgt Hafl's engineers plant explosives on the bridge.
Mission accomplished! Well, that game started off a little slow for me, but once the catastrophe in the center occurred (and I shudder to think what would have happened if Sgt Hafl's engineers hadn't stopped the berserker Polish riflemen with snap fire in the center) it was pretty action packed, and quite a bit of fun.
Notes:
-Officer Cadet Vetter (PC, 4th Gren Plt), Wound Badge, Infantry Assault Badge, killed in action.
-1st Lt Ost (Acting KG XO), Wound Badge, Infantry Assault Badge.
-Sgt Lehmkuhl (2nd Squad, 4th Gren Plt), Wound Badge, Infantry Assault Badge, Campaign.
-Cpl Pankau (3rd Squad, 1st MC Plt), reprimanded for cowardice (only his status as Iron Cross holder spared him the firing squad; Col Klink is not to be trifled with!).
-Cpl Imhofe (3rd Squad, 4th Gren Plt), recommended for Iron Cross 2nd Class for leading close assault which eliminated enemy western position, opening way for assault onto objective.
-Sgt Keck (V2, Arm Rec Plt), recommended for Iron Cross 2nd Class for placing his crew in mortal danger to secure, then defend the objective from enemy assault.
-Lost ~30 KIA/WIA.
-Caused ~55 KIA/WIA, captured ~10 personnel.
I've got three more write-ups to do. Notice I said three, because I played the final two games of the Poland campaign (I hope sixteen are enough!). Stay tuned for more write-ups, then I've got big plans for the upcoming 5Core Brigade Command, some air combat, a return to my FFL campaign, and a similar modern USMC campaign. I'm sure I won't get to all of that before I return to KG Klink for the France 1940 campaign.
V/R,
Jack


Thanks Jack. A most entertaining read. Looking forward to reading about their exploits in France.
ReplyDeleteCheers, Andy
Thanks Andy, I appreciate it! And I've got three more to write up in Poland, then a bit of a break (into other stuff), before we get to France. But I vow that France will fall!
ReplyDeleteV/R,
Jack
I think you've managed more games in the last two months than I've managed in the last two years! Really enjoying these reports and will have to get some games of Company Command in soon.
ReplyDeleteHey Gaz, thanks man, and glad you're enjoying the reports. My number of games is greatly aided by the fact I play quick games, and Company Command works great for this, and your Falklands' troops will work like a champ with these rules. I greatly look forward to seeing some of your fights.
ReplyDeleteV/R,
Jack