All,
Here's the next fight, our first action against NVA regulars in the hill country near the Cambodian border. Here's the situation: following the fight at Nam Pla 6, the battalion continued to focus most of its attention north of Dak To, seeking out the Viet Cong. It's October 9, 1967, and the squad (minus SSgt Bleier, who's recovering in Okinawa, and Pvt Greenwood, still at BAS) is scheduled to conduct another patrol to the north, trying to figure out where the VC went after being run out of Ap Bac and Nam Pla. However, Brigade called out with a FragO and the squad was diverted west. It seems one of the Division's Hueys went down about 6 klicks away, near Hill 98. A Bird Dog in the area gave it a look, doesn't look like there are any survivors, so the squad is just going out to destroy equipment and recover our folks.
The platoon had followed the trail network west and then north, and was now in the process of cutting back east to search the area around Hill 98.
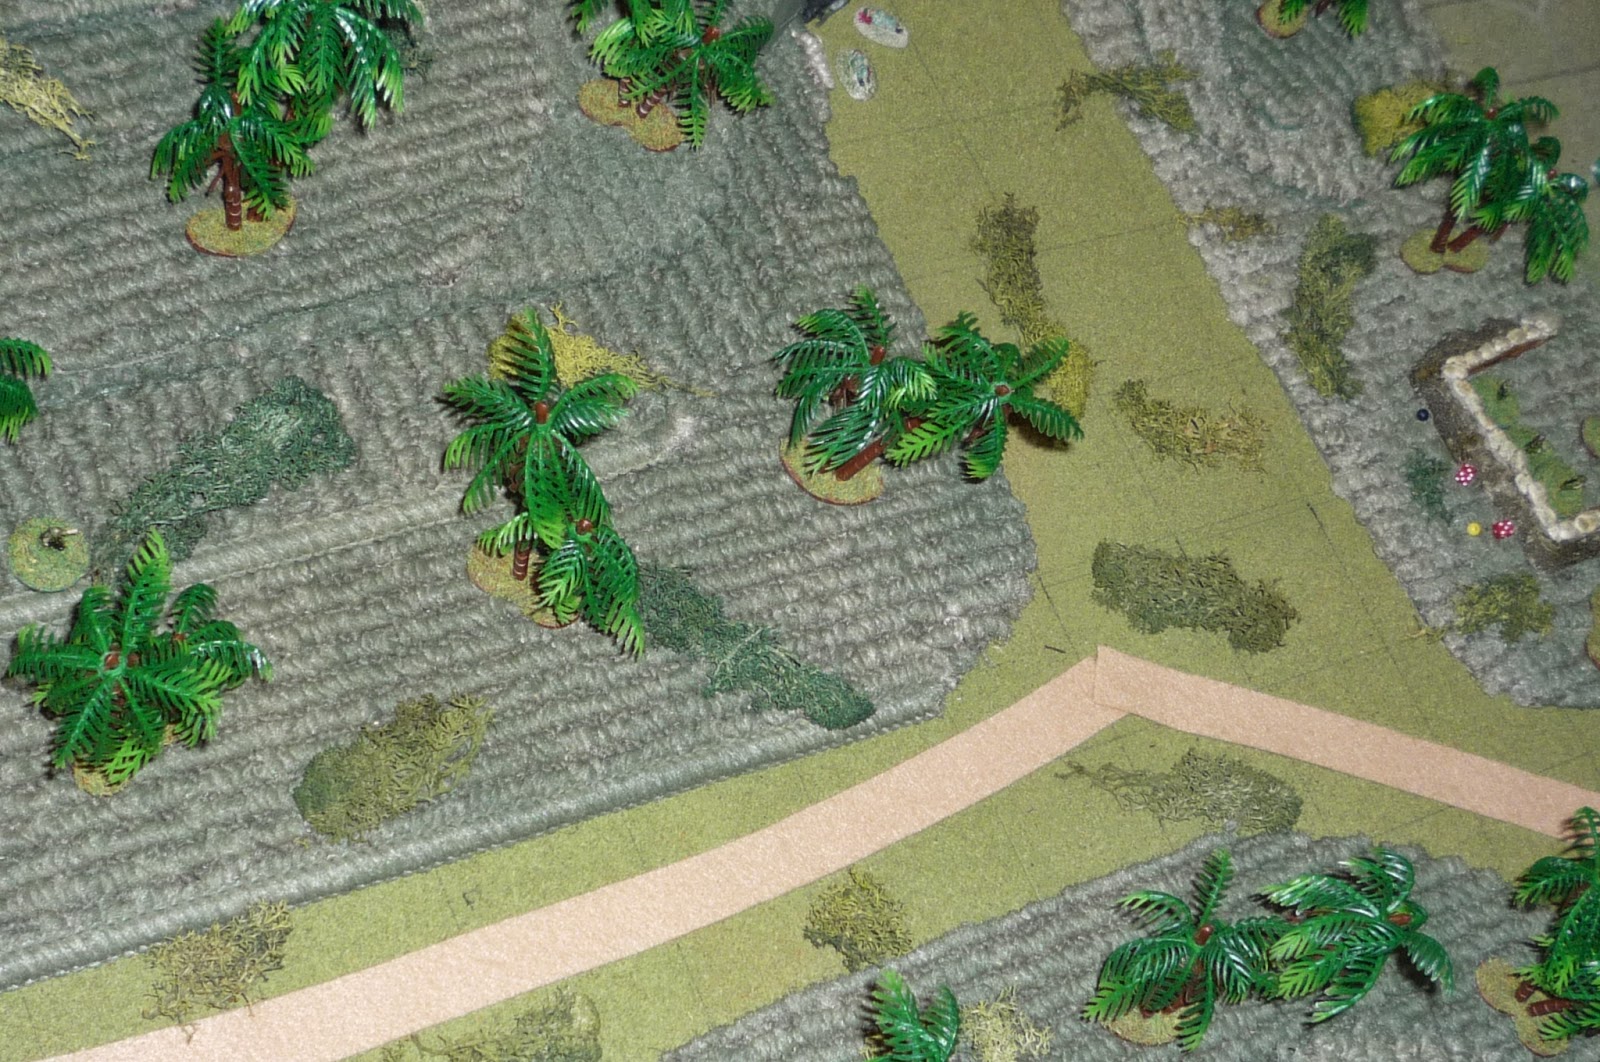
Overview, north is up. Left is US baseline, atop Lamyai Ridge. Top center is Hill 98, far right is Hill 50. You can see the helo wreck at top right. Bottom center is Hill 72. The enemy has a bunker at far right on Hill 50.
The downed Huey. The enemy has pulled the three crew out to search for intelligence information (violet beads means 'unspotted).
There are three enemy riflemen in the bunker at the east end of the trail. Their not all that alert, however, as no one was expecting trouble, especially from the west.
A waterbull and minder.
Looking west at US baseline, here's the US squad. What's happened so far is that the squad had just crested Lamyai Ridge when the pointman, Pvt Holmes, called a security halt. The acting squad leader, Sgt Banaszak, moved up to Holmes while the squad fanned out.
North of the trail, at far left is the M-60, Spec4 Harris, and his A-gunner, Swan. To their right (east) is Ham, a grenadier, and Doc White. To their right (far right) is Sgt Banaszak conferring with Holmes.
Looking southwest at the south side of the trail: at far left is Stallworth, center left is Sgt Russell, and at far right, up on the ridge, is Blount, the other grenadier.
So Holmes (bottom left) calls a security halt, and Banaszak comes up. "What's up, Holmes?" "Sarge, look up there, about 10 o'clock, you can see smoke coming up through the trees. I think we found our downed chopper." Movement to the right catches Holmes' eye. "Hey, what's a water buffalo doing way the hell out here? Holy crap!" Holmes shoulders his M-16 and fires twice at the enemy trooper (top right, behind the water bull), seriously wounding him. At the sound of the gunfire the water bull starts running east.
The three enemy troops in the bunker drop their rice bowls and cigarettes. "What the hell was that? Who's shooting?" Very quickly Holmes, Blount, Harris,Swan, and Russell are spotted (took two guys' activations to do so). The third enemy trooper goes on overwatch (the bunker is off camera to top, Holmes and Banaszak are at bottom left, wounded enemy troop is at top right).
Sgt Russell (bottom center left, above knoll) signals Stallworth (bottom center left, below knoll) to move up.
And he dashes up the right side (far right, near wounded enemy trooper, with Russell at far left). Stallworth calls out to Russell, "Hey Sarge, this cat's NVA!!!" "Whaaaaat? No way." Well, that explains the helo getting downed...
The three enemy troops at the downed helo scamper up Hill 98, taking up positions and going on overwatch. There are two AKs and an RPG (top left).
Rusell pops to a knee (top center, left of trail with red dice and green bead), which draws a near miss from the NVA in the bunker (foreground). Russell flops back down prone, but didn't see where the fire came from.
Blount, sitting to the left of the trail on Lamyai Ridge, here's the AK fire and goes prone, which draws overwatch fire from the NVA on Hill 98, which puts Blount out of the fight (you can see his body just left of the trail at top of pic). I let the the NVA go again (tested 4 x S&D -4 for second shot, rolled a 7), he fired at the machine gunner, Harris, but missed (top, just right of the trail, you can see the red 'stress' dice. NVA on Hill 98 are in foreground).
Harris (foreground, just left of trail, with Swan next to him) tests morale, passes, and lights into the bunker, hitting nothing, but adding a bunch of stress (top center, you can see the red dice. Banaszak and Holmes are down in front of Harris).
Harris' M-60 fire draws the attention of the NVA RPG gunner (bottom right center), who fires a rocket at the MG team. It hits just left of the trail (I put a cotton puff to show where it hit); nobody hurt, but some stress added to Harris.
Harris' assistant, Swan, takes all three actions but spots the two NVA atop Hill 98 (the RPG and leader, with a rifleman off camera to bottom right). Ham fires his M-79 at the NVA on the hilltop, but it lands short (bottom left cotton puff). Ham quickly reloads, then bloops another frag up the hill. He was aiming to hit between the two NVA and missed, but the grenade lands right at the NVA leader's feet (center cotton puff), putting him out of the fight and giving the RPG a light wound.
Banaszak (bottom left) goes prone, crawls forward, and spots the enemy rifleman on Hill 98 (far right, with RPG at top right). Banaszak is still unspotted.
Doc White (bottom center left) dropped prone and fired uphill at the RPG gunner (top right), missing twice but adding stress. Just to Doc's right is Holmes (base of tree), just to his right is Banaszak. Ham is somewhere in the top left (damn trees!). NVA rifleman is just off screen at right center (behind the yellow bush at right pic edge).
The jungle is filled with the sound of automatic weapons fire and RPG and grenade explosions. The bull is pissed and scared, and with my luck he turns left and charges northwest, getting very close to Doc White and Ham.
Doc hops up, sprints forward, and flops prone again (bottom center right, behind trees), while Ham (bottom center left, behind bush) moves up, fires uphill, and reloads. The grenade lands right on top of the RPG gunner (top center, cotton), putting him down!
The NVA rifleman on Hill 98 suddenly finds himself alone... He sprays AK fire at Doc and Ham (far left), then books it back past the helo (top right).
Spec4 Harris, the M-60 gunner, had taken a bit of fire, plus a near miss by the RPG (before the gunner's demise), so he has to take a morale test. Well, he doesn't do well at all, and decides it's time to leave town. Once again I cheat a little bit, and so I allow Harris to run forward and grab Blount (center right), and take the wounded man with him. Stallworth is more than a little hot at his partner leaving...
One of the rifleman in the bunker opens up, spraying wildly with his AK, putting stress on Holmes (top right), Russell (bottom right), and Stallworth (top left).
Banaszak (far left center) creeps up behind cover, then opens up on the bunker (far right), putting a light wound on one of them. The center NVA fails his morale test and runs for the hills, while the guy that just took the light wound drops prone.
Stallworth, alone on the far right, finishes the seriously wounded NVA (the one that was walking the waterbull) with his knife, then sprints up the right side (bottom center, with bunker at top center. Stallworth lines up a shot on the fleeing NVA rifleman (top left, near helo), and pops him, but manages only a light wound.
Russell (center right) opens up on the bunker, three misses, while Holmes (center left) and Swan both decide to drop prone and sit tight for a moment (see, forcing those morale tests works!).
The waterbull runs off the NW corner, never to be heard from again.
Holmes (far left, just above the trail) unloads on the bunker, forcing an NVA to test, which causes him to depart the game early. Russell (bottom left) opens up, putting down the last guy in the bunker. Suddenly it's quiet, and Russell cautiously gets up ("kneel, search and assess, stand, search and assess").
The last remaining NVA, lightly wounded up near the downed UH-1, passes his test and runs off his base edge. The NVA lost four men (and a water buffalo), while three got away, though one was lightly wounded.
Banaszak and Homes (bottom left) mosey up the middle...
While Stallworth, Ham, and Doc White check out Hill 98...
And Russell and Stallworth circle right (Holmes and Banaszak at top left, bunker at center right).
Security is set while the helo is rigged for demolition and Doc gets the bodies ready for extraction. Banaszak calls it in, and within minutes a Chinook is on the way.
The fight went very well, the squad is performing like a well-oiled machine and conducting itself (mostly, not counting Harris) as seasoned vets that have 'grown up' very quickly under fire. They accomplished their mission and gave the NVA, heretofore not known to be operating on this side of the border, a quick bloody nose. But Banaszak can't help but ponder on how lucky they were: once again, Holmes proves his worth as a pointman, but if that knucklhead with the buffalo hadn't stumbled into us, how might things have gone? Or if the NVA in the bunker had been a bit more vigilant (AKA, rolled better spotting dice), or if that RPG had put the M-60 team down, instead of missing by a couple yards?
Speaking of the M-60 team, someone needs to talk to Harris about his yellow streak... Blount took a round through his trap and will be spending the next 12 days in the hospital at China Beach.
Hope you had a good time, I sure did.
V/R,
Jack


Jack,
ReplyDeleteYou are really really getting in the swing of this. The AARs are engaging and I think I have said this before but your enthusiasm and enjoyment from these games comes through in the reports.
Vietnam is not my thing (and this came up in a previous comment on an earlier post) but I am finding it fascinating due to the characters. You really really make me want to start of a mini-ww2 campaign, even more than you did earlier in the year. I am very tempted to dig out Platoon Forward, make a travel pack with some simple grid rules and play some games.
Keep 'em coming. I am reading them jealously as I am not finding a lot of time to play at the moment. But you won't have much time soon either :-)
You gotta get into the campaign, it makes all the difference. I'll tell you that I can't stand to play 'one-off' games anymore, it seems like a waste of time, and I just don't have any attachment to what's happening on the table.
ReplyDeleteI'll second Platoon Forward, it's been great to me. I'll also recommend TFL's new "At the Sharp End," which doesn't have a lot of the cool stuff that Plt Fwd does, but it does show you a streamlined 'campaign' (what I would call an operation, but you could link operations together to form a campaign) in which you only follow the leaders, not every man in the unit. I think that's the way to go (that wouldn't work with "In Country," but would have made "All Americans" a lot easier.
And you're right, soon I won't have time to breathe. I think subconsciously that's why I'm knocking out so much painting and games right now. Take care man.
V/R,
Jack
I do like the idea of a campaign, and have already started on thinking how I can do one (likely ww2 on the eastern front). But I do not mind one-off games, especially playing as I do one side and then the other. I get very invested in what is going on, cheering for the units that seem to hang in there. And I do enjoy the narrative that comes out of these games.
DeleteI would only be following leaders and not individuals. But would need to track a units status (how many men, morale etc). I will have a look at At the Sharp End. I now have a copy of Chain of Command too but who knows when I will get around to playing it!
You take care too. Stay in denial of what it coming - it will do you good (until it hits!).
Shaun,
ReplyDeleteI look forward to seeing you put on a 'proper' campaign; you're series of fights has been a lot of fun to follow, and if you're already cheering for units, I can't imagine how much fun you'll have once you name them and their leaders and begin following them. Please do take a look at "At the Sharp End," it's much simpler than what I did with "All Americans" and what I'm doing with "In Country," much more akin with what I'm doing (in only one battle so far...) with "Odessa," just following the leaders and keeping track of losses.
At the Sharp End presents very easy ways to do both, I really think it will be right up your alley. And you need to start it by mid-June, as that's when my gaming will likely come to a screeching halt, so I'll be gaming vicariously through you!
V/R,
Jack
I will get "At the Sharp End" over the next month or so as I do really just want to follow the leaders and unit experience/losses.
DeleteI do have ideas for a campaign - maybe 6-8 games - but you may have to wait until the end of June before I play the first one. I think there is a few months you were be unable to play, so I may be there for the second half. Bit I do promise, with the usual get out of jail free card for Real Life interference, that you have got me intrigued enough to play a WW2 campaign. It will be in 6mm.
Sound great, and not only am I looking forward to it, I'm counting on you!
ReplyDeleteV/R,
Jack