All,
The first skirmishes of the 1952 war have taken place earlier this morning; it's 1000 on 4 March 1952 and Hakuna's Tiger Brigade and Matata's Umpulu Brigade are preparing to clash again at the Mashandane River (which serves as the border between the two countries in the east). The Hakuna Army got the better of the early morning fight, but as the opposing armored formations propel themselves at each other once again, each country's Air Force sends a four-ship flight over the battle-space to clear the way.
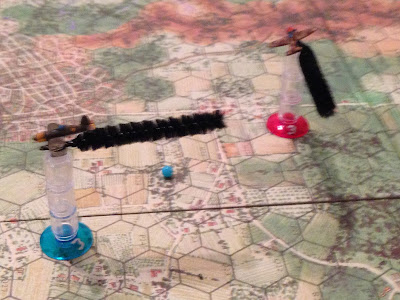
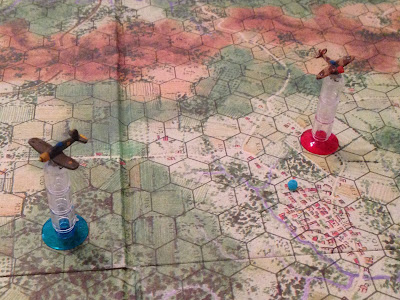
Overview of map, north is up and Hakuna in the west (left) and Matata in the east (right). Again, it's two flights of four:
Hakuna (Corsairs)
Blue 1: Captain Tzuzi, Deputy of the 401st Fighter Squadron
Blue 2: Lt Sosa
Blue 3: Lt Kowala
Blue 4: Lt Rafunzi
Matata (Spitfires)
Red 1: Captain Gurun, Deputy of the 232nd Fighter Squadron
Red 2: Lt Trono
Red 3: Lt Dayani
Red 4: Lt Kanu
The two sides close.
As before, I'll use a red bead (pictured at right) to show where a Matata aircraft started, and point out where it finished. I'll use a blue bead for Hakuna aircraft. We are now using a modified, largely simplified version of "Bag the Hun," with each individual aircraft on its own shoot and move cards. We are still not using altitude (don't worry, I'll get the boy there, give him time, he's only six!). ;)
So, individual maneuvers begin: Matata's Capt Gurun maneuvers Red 1 (center) ahead.
Hakuna's leader, Capt Tzuzi (center), in Blue 1, turns in to give chase.
In turn, Matata's Lt Kanu maneuvers Red 4 (center right) towards Blue 1 (bottom left).
Acting perhaps exceedingly bold, Hakuna's Lt Kowala (far right) maneuvers Blue 3 to go nose-to nose with Red 1.
Followed by Matata's Lt Dayani pushing Red 2 (bottom center left, just under Red 1) straight ahead.
Hakuna's Lt Sosa (top left) in Blue 2, sort of loiters above the fray, waiting to hop onto someone's tail. You can see Blue 1 and Blue 3 at bottom center.
But Matata's Lt Dayani (center left), in Red 3, doesn't take the bait and holds steady (Blue 2 at top left).
Lastly (in Turn 1 at least), Hakuna's Lt Rafunzi pushes Blue 4 (bottom center) straight ahead.
Somehow the movement cards came out 'red-blue-red-blue-red-blue-red-blue-red-blue.' What you don't know (because I didn't take notes and can't write here) is that most of the shooting cards have already come out, with no one being in position to take a shot.
Until now...
Red 1 and Blue 3 have ended up nose-to nose, and Matata's Captain Gurun is first on the trigger, cutting loose a long burst...
Which damages Lt Kowala's Blue 3.
Blue 2 turns in, splitting Red 3 (left) and Red 4 (right).
Though damaged, Blue 3 returns fire on Red 1, missing.
And then Capt Gurun pulls Red 1 (bottom left) over, now nose to nose with Blue 4, looking to pull off another head to head burst.
But first Lt Sosa in Blue 2 takes a deflection shot on Red 4...
And Hakuna has drawn first blood! Splash one bogey!
Though Lt Kanu is able to parachute to safety.
Blue 1 (bottom left) has its fire card come out, but can't shoot as his target is masked by Blue 3!!!
And then his move card comes out, so Capt Tzuzi maneuvers his Corsair (center) towards Red 3.
But Lt Dayani swings Red 3 around, looking to get on the tail of the Hakuna pilot that just shot down his wingman.
Finding himself in the middle of a furball and wanting some space, Lt Rafunzi maneuvers Blue 4 (bottom center) to the south.
But Red 2 (center left) kicks over to chase Capt Tzuzi in Blue 1.
While Lt Kowala pushes his wounded Blue 3 back around towards base, also hoping to get a lucky shot off on Red 2 and save his flight leader in Blue 1 (top center).
But Lt Trono is quicker on the trigger, and his Red 2 (left) rattles off a burst at Blue 1.
And now two of Hakuna's aircraft are damaged...
Blue 4 (bottom left) kicks over, hoping to line up a shot on red 1 (just above him).
Blue 2 (bottom right) pushes south (bottom) looking to get away from Red 3 (top center).
While Lt Kowala, in his damaged Blue 3, snaps off a burst at Red 2, but he misses again...
And Red 3 (center) pulls in behind Blue 2.
And Red 2 (left) escapes Blue 3 (bottom center) and turns into Blue 1 (center).
Lt Kowala rounds out his turn (left), nursing Blue 3 towards his base and hoping to not draw any enemy attention.
Red 3 opens up on Blue 2...
And now Hakuna has THREE damaged aircraft!
And Red 2 follows this up with a quick burst, at very short range, on Captain Tzuzi's Blue 1!
Captain Tzuzi slumps forward in the cockpit and rides his stricken Corsair into the lush jungle below...
Red 1 makes a hard turn, looking to get onto Blue 4's tail.
While Red 3 (bottom center) slides over onto Blue 3's tail.
Things are not looking good for the home team...
Red 2 (center left) opens fire at from Blue 2's front corner, but he misjudged the deflection and the rounds go wide!
While Lt Kowala pushes the damaged Blue 3 (bottom left) to get away from Red 3 (bottom right), hoping to nurse his bird back to base.
And Lt Sosa manages to pull his wounded Blue 2 (right) in behind Red 3, hoping to get a shot in on his way back to base.
In Blue 4 (bottom center), Lt Rafunzi, having already downed one enemy plane, stands on his triggers, taking a very long (and bad deflection) shot at Red 3...
Damaging him!
Red 2 (right) pulls around, looking to finish off Blue 2 (center).
While Captain Gurun in Red 1 (bottom center) turns left to line up a shot on Blue 4.
And he gets his shot, but misses the wiley Lt Rafunzi!
Lt Rafunzi then kicks it in the ass and pushes Blue 4 (center right) up into the scrum, lining up a shot on Red 2...
Lt Rafunzi (bottom center right) stands on his triggers, pouring .50 cal tracers into Red 2 (top center)...
The Spitfire bursts into flames and crashes in the jungle, carrying Lt Trono with it.
Lt Sosa, in Blue 2 (bottom left), is hot. He had lined up a perfect shot on Red 3 (center), but mistimed his approach and was forced past.
And Captain Gurun in Red 1 (bottom center) takes a long range shot on Sosa's Blue 2...
As the aircraft dives for the jungle floor, Lt Sosa bails out.
Lt Rafunzi turns Blue 4 (right) into Red 1 (bottom right), looking for retribution.
While Lt Dayani pushes Red 3 (center) into a right turn, looking to pull around 180 degrees and take his damaged bird back to the barn.
Captain Guru is lucky, and is able to maneuver Red 1 (center) up and into Lt Rafunzi's Blue 4 (right).
While Lt Kowala pushes Blue 3 (bottom left) towards home.
Red 1 and Blue 4 continue jockeying for position.
Blue 3 (left) has almost gotten off the table. Red 3 (top center) is working on doing the same, while Blue 4 and Red 1 are dueling (far right).
Blue 4 (bottom center) kicks around, hoping to get on Red 1's tail (right).
But Red 1 turns inside him.
Now if only he can get his fire card...
Lt Kowala safely gets Blue 3 to the exit.
Lt Rafunzi changes things up; rather than keep turning with Red 1 (bottom right), he moves Blue 4 (center) onto Red 3 (top center).
Lt Rafunzi's .50 cal machine guns pump rounds into Red 3...
As the Spitfire falls from the sky, its pilot, Lt Dayani, bails out.
Only Lt Rafunzi's Blue 4 and Captain Gurun's Red 1 remain on the table; five aircraft have been shot down and one damaged plane has escaped to its base. Rather than play this out forever, the boy and I decide to play three more turns, then the planes are bingo fuel and must return to base.
Blue 4 turns about, lining up a long-range shot on Red 1 (bottom right).
But Capt Gurun turns Red 1 (left) into him.
Before pulling around onto Lt Rafunzi's tale.
But Lt Rafunzi pulls right (bottom left)...
Then makes an outside turn to keep Red 1 in front of him.
Captain Gurun is up to the challenge and turns into Rafunzi.
But Rufunzi turns the table, pulling so close the opposing pilots can read the expletives on each other's lips...
But in the end, neither can line up a shot, and both safely return to base. The final tally is: Hakuna lost two airplanes destroyed, one aircraft damaged, and one pilot (Capt Tzuzi, the flight leader and Squadron Deputy Commander) killed in action. Matata has lost three aircraft destroyed and one pilot killed. Which makes Hakuna the winner of the dogfight; guess who's getting air support for the next fight ;)
That game was a ton of fun, and close as could be. I'm working on the ground batrep.
V/R,
Jack


That was great, I look forward to more. Love the bailout pilots & chutes, nice touch.
ReplyDeleteThanks Irish, glad you like them, and the accessories from 'Fights On' are great.
DeleteV/R,
Jack
Great work Jack! As Irishserb said, the chutes are a great touch, as are the damage & shooting indicators.
ReplyDeleteWhen you posted your OOBs I thought naming each individual pilot was a lot of work for little return, but now your writing your batreps, it does add to them to have the pilots named - good idea!
And now I've seen that your updating the pilot OOBs with their results!
Looking forward to the ground report!
Thanks man. It is a bit of work to draw up the Orders of Battles, AND throw names in there, but it's fun in the end. Particularly as I'll be following these guys not just through this war, but through follow-on wars as well.
DeleteV/R,
Jack
Great report Jack. I thought the Corsairs would out perform the Spits, depending on the quality of the pilots. It reminds me of the Football War, although that was Cavalier Mustangs rather than Spits.
ReplyDeleteInteresting rules too...they seem ideal for 1/600th scale.
All the best
Jim
Jim,
DeleteI'm just using a really simplified version of Bag the Hun, and regarding the Corsairs outperforming the Spits, I'm treating both aircraft exactly equal in all respects.
V/R,
Jack
i love reading this article so beautiful!!great job!
ReplyDeleteCan Dogs Eat Bacon