All,
It's 1600 on 5 August 1986, and Team Whiskey, as part of 11th Armored Cavalry Regiment, has successfully fought its rear-guard action to delay the Soviet advance, allowing it breathing space to fall back to its next defensive positions north of Frankfurt. 11th ACR is reforming and reorganizing, having suffered atrociously at the hands of the Soviets, who also know a thing or two about heavy losses. The Soviets have reorganized and pushed ahead, nipping at the heels of the retreating NATO troops.
Team (or, more appropriately, Task Force, but Team sounds cooler) Whiskey is in the process of reorganizing while serving as 11th ACR's reserve, when Soviet artillery begins falling on the NATO front lines. No one gave much attention to it, having become accustomed to the constant pounding of Soviet artillery, but then 11th ACR outposts began going off the air, and finally a mumbled, confused transmission was picked up that mentioned "...NBC-1..." which sent a chill down everyone's spine (an NBC-1 report is the initial alert sent out by a unit experiencing or witnessing a Nuclear, Biological, or Chemical attack; NBC-2 and 3 reports are typically put out by HQ or NBC units, providing further info friendly casualties, hot zone location, and type of agent, and an NBC-4 report is the 'final' report put out by the HQ NBC unit which consists of the survey of the hot zone).
Team Whiskey's CO, Lt Col Lacy, got off the radio, then turned to Captain Phillips, head of India Company. "The transmission that mentioned NBC-1 came from OP-3, but we can't raise them. Here's their grid," pointing at the map, as Lt Ensmith scribbled down the coordinates. "Get your company out there and figure out what the hell is going. Oh, and have have your men go to MOPP-2." (MOPP-2 is wearing chemical boots and overgarment, but not mask and gloves).
Captain Philliops acknowledged the order, then sprinted to his company and briefed them. "Mount up! And go to MOPP-4, Gas! Gas! Gas!"
The opposing forces: this is a smaller game, and the forces are identical (capability-wise). The big differentiation in the game will be random entry onto the table. Each side will start with their company commander (CC) on the table, but every other unit will have to roll to come on the table, with a 33% chance of success each turn.
For the US, this is Captain Phillips, the India Company commander, with Lt Ensmith's 2nd Platoon and Lt Macot's 3rd Platoon.
Both sides have an APC (M-113 for US, BTR-50 for Soviet) carrying their CC's command team, six IFVs( Bradleys for US, BMPs for Soviets), six rifle teams, and an MG team (riding with the PC).
Opposite view.
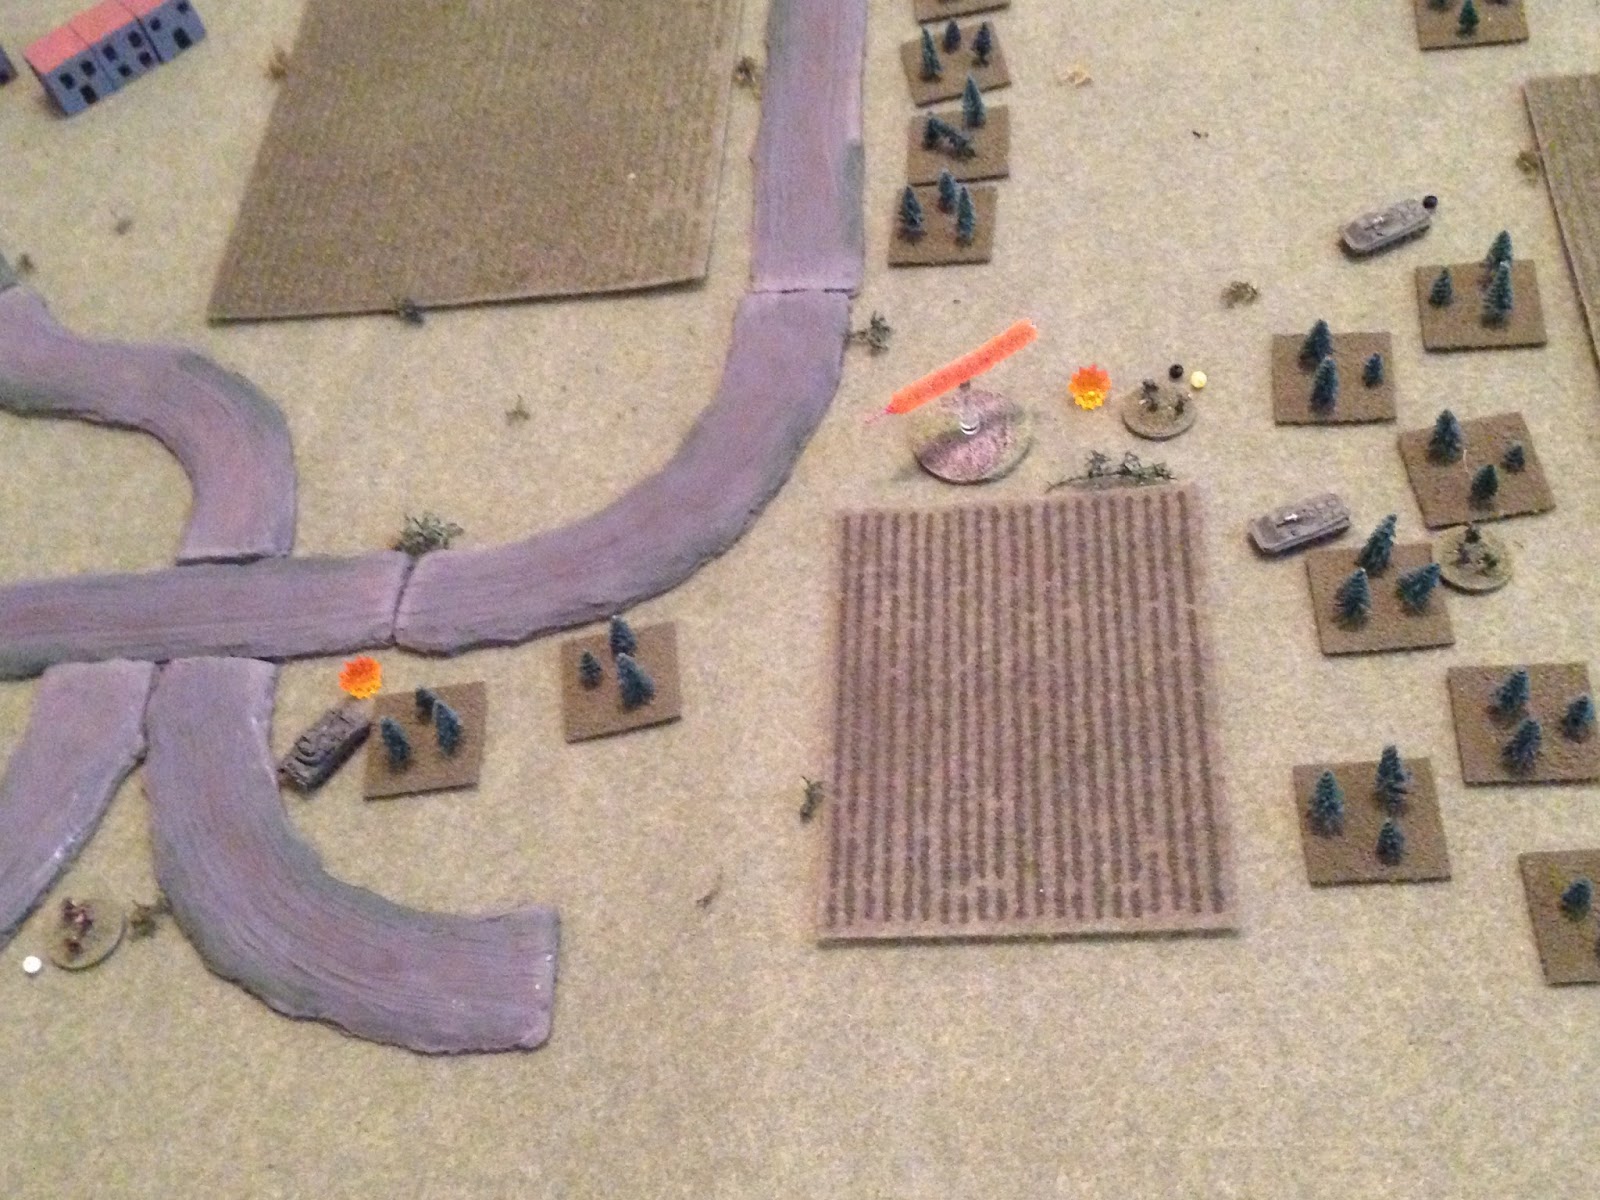
Overview of table, north is up, US baseline on left (west) and Soviet baseline on right (east). You can see the US M-113/CC at bottom left on the road, and the Soviet BTR-50/CC on the road at top right.
Table again, looking west to east. US CC at bottom right, Soviet CC at top left.
Game on!
Looking west to east, Captain Phillips coaches his track forward, then kicks out his MG team (they are hidden, purple bead). Another US card comes out, and so I roll to see if they are able to come on the table, but they fail.
Looking east to west, the Soviet CC moves south towards the buildings. US CC is at top left.
Looking south to north, the US succeeds in bringing a unit on. Captain Phillips is at bottom left, while Lt Ensmith, 2nd Mech Plt's commander, brings his Bradley on table (top left).
Still looking south to north with Capt Phillips at bottom left and Soviet CC at top right, you can see Lt Ensmith's Bradley move up (top center left).
Looking south to north, with US CC at bottom center and Soviet CC at top right, another of Lt Ensmith's vehicles is able to come on the table. It moves up to cover his PC (top left, behind building at left, covering the PC at top left, on top border).
The Soviets try and fail twice, then the US fails once, then the Soviets fail again, before succeeding...
Looking south to north at far right (east) table edge, with Soviet CC at top right and US 2nd Plt at to left, a BMP comes on at bottom right (southeast).
Looking southeast to northwest, the enemy BMP moves up and kicks out their rifle team, but they don't spot the US CC at top left.
The Soviets fail to bring units on two more times, and the US once.
But then, in the southwest (bottom left corner), Lt Macot, commander of the US 3rd Mech Inf Plt, comes on the table.
Macot pushes his Bradley forward (center right, looking west to east), but doesn't see anything (enemy BMP at top right, Soviet CC at top left), with US CC at bottom left.
Turn 1 is finished.
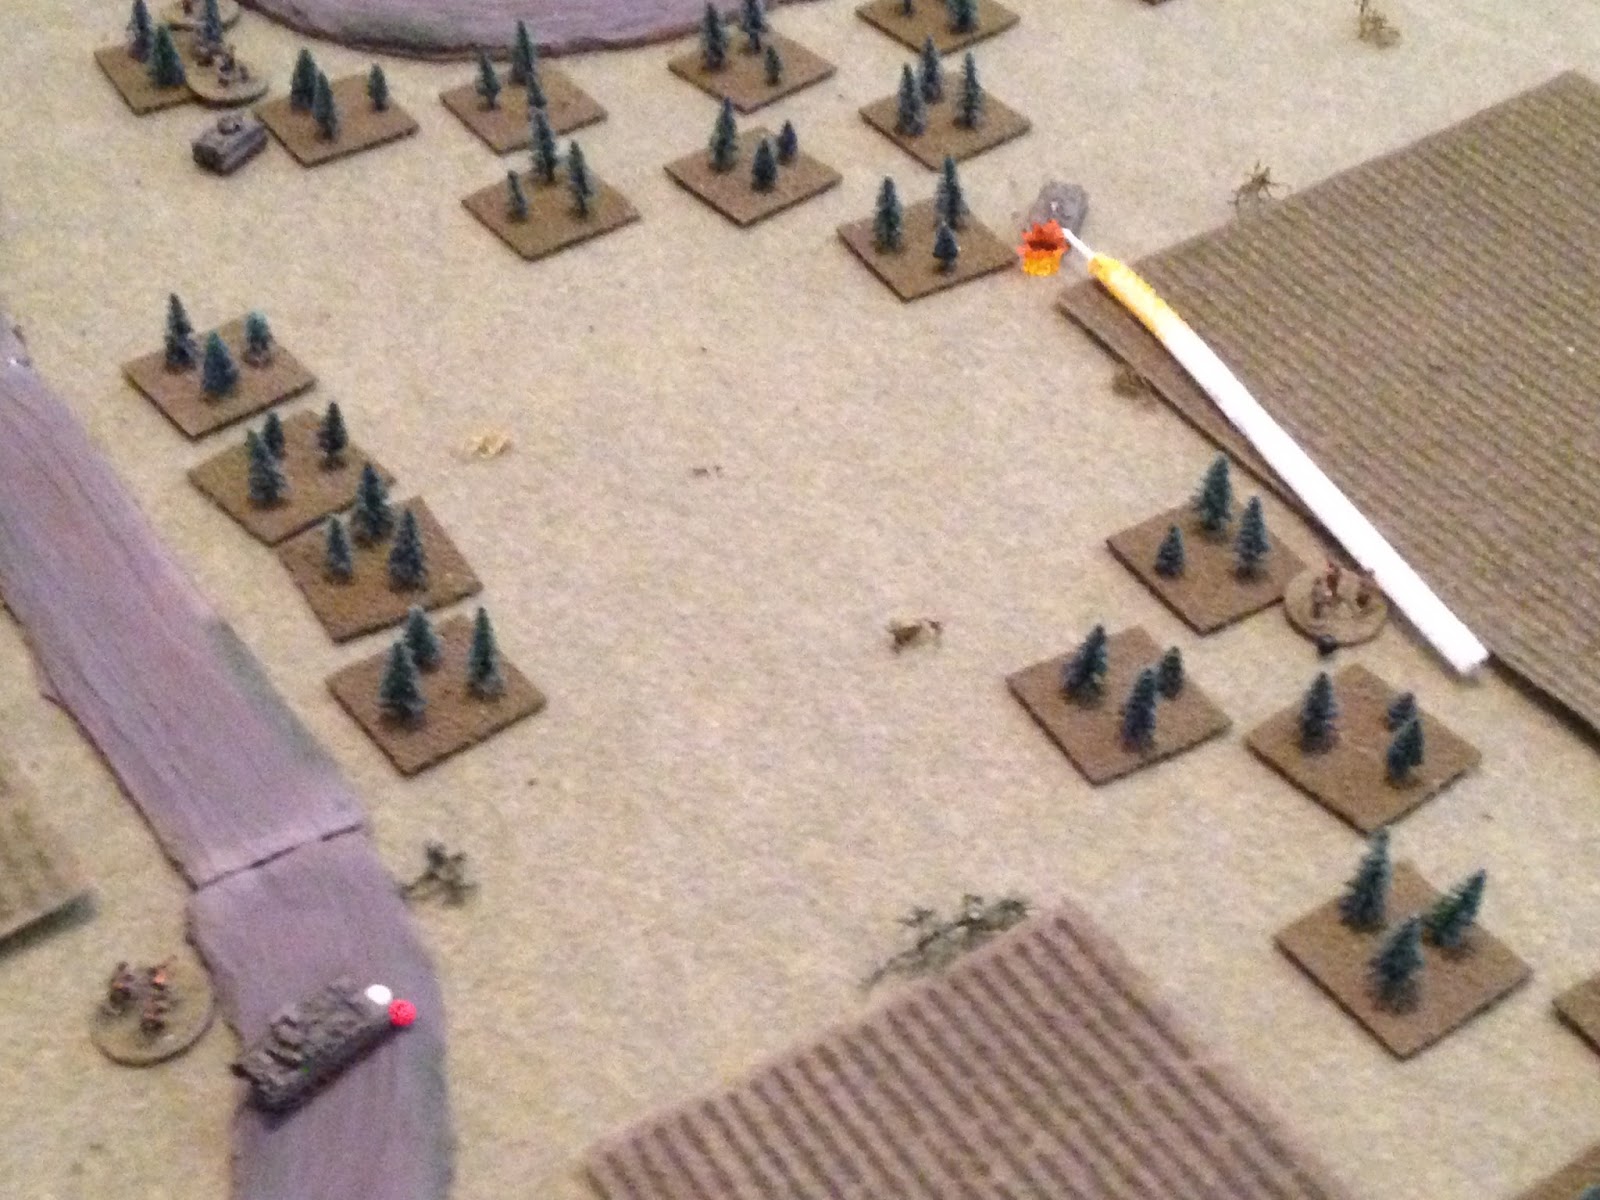
The US is up first, and Lt Ensmith pushes his Bradley forward into the treeline and kicks his command team out (center left, in trees, with other 2nd Plt vehicle at bottom right and Soviet CC at top left).
Looking east to west, the Soviet CC (far right) creeps forward then kicks their MG team out (atop big orange-roofed building at far right). They spot Lt Macot at top left, but not Capt Phillips at top center left, nor 2nd Mech Plt at top right.
Looking west to east, with US CC at bottom left and Soviet CC at top center, Lt Macot moves up (center right, with Soviet BMP/rifle at top right) and kicks out his command team.
The two rifle teams spot each other and exchange fire, with both infantry teams being pinned.
Looking west to east at the US center (2nd Mech Plt is off camera at left, 3rd Mech Plt is visible at top right, shooting it out with the Soviets there, and the Soviet CC is at top left): Captain Phillips leaves the MG team (bottom right) and pushes ahead, up to the buildings at center.
And then the US fails three deployment rolls in a row...
Looking northeast to southwest at the top right corner of the board (i.e., the Soviet northern baseline, with Soviet CC at orange building at far left, US CC at top center, Lt Ensmith at center right, and one of his Bradleys at top right): a Soviet BMP comes on the table (bottom left).
The BMP moves forward, but so far none of the Soviets have spotted Lt Ensmith's Bradley or command team (bottom right).
Looking south to north at the Soviet baseline, the Soviets succeed again and bring another BMP on in the southeast (Lt Macot at bottom left).
The newly arrived BMP moves up, kicks its infantry out, and then they both fire on Lt Macot's units.
The Soviet rifle fire drives Macot's command team to fall back (bottom left, from explosion at center left), but the Soviet BMP misses Lt Macot's Bradley, so he returns fire! But he misses too...
Then the Soviets fail three straight deployment rolls.
The other Soviet BMP moves up (center right), rallies its rifle team successfully (yellow bead at far right), then fires on Lt Macot's command team (bottom left), causing heavy casualties.
Looking west to east, with Lt Macot's units getting beat up at far right, the US MG team (bottom left) cuts loose, but doesn't hit a damn thing...
Back in the north, with Lt Ensmith's units in the treeline at top left, his other Bradley (on table, still one more off table) moves up (bottom left), spots the Soviet BMP in the north (top right), then opens fire with his 25mm chain gun.
The BMP is knocked out, but their rifle team is able to get out okay.
The 2nd Plt Bradley (bottom left) kicks out its dismounts.
Thus ends Turn 2.
Looking southeast to northwest, with Lt Macot at bottom left and Lt Ensmith at top right, the Soviet rifles in the southeast (bottom right) begin pushing forward, but the US MG (top left) again opens up, this time pinning one of the rifle teams (yellow bead).
And then the BMP fires on Lt Macot's Bradley again...
And he misses again, so Lt Macot's Bradley returns fire...
Which forces the BMP to fall back and hunker (top center, red bead, from explosion at center left).
The other Soviet rifle team moves up and fires an RPG at Lt Macot's Bradley. It doesn't hit, but it does pin the crew. This opens the door for the BMP at far right...
To sprint past the RPG shooters (bottom right) and fire into Lt Macot's Bradley at point blank range, knocking it out.
Back in the north, the Soviet MG (atop orange building at bottom right, with their CC just below them in BTR-50) opens fire on 2nd Mech Plt Bradley and rifle team (top left, though Lt Ensmith's vehicle and command team are still unspotted at top center left). The Soviet MG totally misses. What the hell is going on with the MGs missing everything???
Then the US fails a deployment roll, and the Soviets fail three times in a row.
The Soviet rifle team that survived getting blasted out of their BMP in the north (with Soviet MG at bottom center) sprints forward (center left, from far right). They broke LOS and are now unspotted (purple bead). Lt Ensmith is at top left, also unspotted.
Then the last Bradley of the US 2nd Mech Plt comes on (top left).
It shoots forward then kicks out its rifle team (bottom center, with the rest of 2nd Mech Plt spread to his left).
And then another US success, which sees a 3rd Mech Plt Bradley come on at far left, between two orange buildings, with the bottom building holding the US MG team. Lt Macot's command team is struggling at bottom center (white bead, meaning 'men down'), with a BMP right next to them and two rifle teams (far right) coming for them.
But the 3rd Plt Bradley pushes forward (bottom left, with MG at bottom center and Captain Phillips just above them), kicks the rifle team out, and they both open fire on the Soviets in the southeast (top right).
With Lt Macot's team at far left (white bead), the Bradley fires on the BMP (bottom center left) while the rifle team fires on the enemy infantry at bottom right (another enemy rifle team is pinned at far right).
Hellagood shooting, finally: the Brad knocks out the BMP with chain gun fire (bottom left), while the rifle team knocks out an enemy rifle team (center, explosion), and forces the other one to fall back (top right, red bead, from yellow bead).
At bottom left, Captain Phillips moves his M-113 forward, then dismounts and heads into the building, where he doesn't spot the Soviet CC or MG (far right), but he does spot the enemy infantry at center right (in the trees below the burning BMP at top center right)
Under the covering fire of one of his Bradleys and rifle teams (off camera to top left), Lt Macot rallies his command team.
With Lt Ensmith holding position (unspotted at top left, in case another enemy BMP or two arrives at top right), one of his Brads and rifle teams moves up and fires on the enemy infantry Capt Phillips just spotted, putting them out of the fight. The Soviets now have no troops on their right flank (though they have two BMPs and rifle teams still off-board).
Needing to make something happen, the enemy CO moves up (center), dismounts, then has his BTR-50 fire its HMG (not sure if its 12.7mm or 14.5mm, should look that up) at the US rifle team, whle the Soviet commander dismounts and fires an RPG at the Bradley.
The Bradley's turret is hit, and the crew bails, while the rifle team takes heavy casualties.
Looking west to east at the same mess (the Brad that just got hit by the RPG is at dead center, with smoke, Soviet CC at top right): Lt Ensmith moves his Bradley and command team over (top center left), where they rally the rifle team (white bead) then fire on the Soviet CC.
Looking south to north at the mess, with US 2nd Mech Plt at top left, the Soviet BTR-50 (center right) is knocked out, while their CC is forced back (bottom center right, from explosion with black bead at center).
End of Turn 3.
Turn 4 starts with the US failing to get a new unit on table, and then the Soviets rally their rifle team in the southeast (center right, red bead). They succeed, then go unspotted.
Until Lt Macot moves up (bottom left) and spots them (far right)!
The US MG (bottom left) cuts loose on them (top right, with Lt Macot at center right), but misses again...
You can see 3rd Mech Plt infantry at far left, just above the MG team at bottom left. They fell back (off camera to left) and loaded into their Bradley...
Which then pushed forward into the center (bottom left, with Capt Phillips at far left and US 2nd Mech Plt at top center left) and fires on the Soviet CC (top right), putting them 'men down.'
The Soviets then fail two deployment rolls.
In the north center, looking west to east, Lt Ensmith's command team and Bradley (center left, with buddies at bottom left and Soviet CC at far right) move forward and fire on the enemy MG (top center right), putting heavy casualties on them too.
Captain Phillips is just off camera to bottom center right.
Looking south to north, Captain Phillips mounts his M-113 then charges it forward, where it fires its .50 cal HMG directly into the mass of casualties that is the Soviet company command stand. The Soviet CC is knocked out!
Could've called the game there, as some folks' rules state the commander has to call in units to get them on table, but I'm having too much fun, so I'll let the Soviets keep trying to bring off-table units on. They fail a deployment roll.
The US is really pushing to eliminate the on-board Soviet forces; I'm letting the Soviets continue to fight, and try to bring units on table, so long as they have units on table. If the US can eliminate all the Soviet units on table, the fight is over. Right now, all the Soviets have is a 'men down' MG at center and a single BMP and rifle team in the southeast (the rifle just successfully rallied back into fighting shape, but the BMP is hunkering).
Looking northwest to southeast at the Soviet center, a US 2nd Mech Plt Bradley and rifle team move up and fire on the enemy MG, no effect.
From the opposite perspective, the US 2nd Mech Plt rifle team that had its Bradley shot up moves forward (top left) and fires on the enemy MG (bottom right), knocking it out.
The Soviet BMP in the southeast (far right, red bead) successfully rallies, with their rifle team at bottom center. These are the only Soviet units on the board at the end of Turn 4, with Lt Macot at bottom left, one of his Bradleys at top left, and the US CC and 2nd Mech Plt spread across top center-right.
Turn 5 starts with the US MG team firing on the last remaining Soviet rifle team (top right), and once again hitting nothing. The US MG team has fired three times, and managed only one pin...
But then Lt Macot leads his team forward and knocks the Soviet team out!
Lt Macot (bottom center) is followed by one of his Bradleys (far left), but the enemy BMP react fires. The Bradley's turret is knocked out; the crew stays, but needs to be rallied, while the rifle team hops out.
And then the Soviets get a @#$% BMP on (far right)!!!
The BMP moves up and kicks out his rifle team (far right), before firing on a 2nd Mech Plt Bradley, pinning it (top left, yellow bead).
The Soviets fail a deploy roll.
But Captain Phillips has gone @#$% nuts today! He moves up, dismounts, and has his M-113 fire its HMG at the Soviet infantry, while he calmly extends an M-66 LAW and fires on the enemy BMP.
The Ma Deuce mows the enemy riflemen down at short range (Capt Phillips at far left), while the LAW immobilizes the Soviet infantry fighting vehicle. The crew hops out and heads for the hills.
The only Soviet unit on the table is the BMP in the southeast (bottom right). The Soviets fail a deployment roll.
In the north, a 2nd Mech Plt rifle team moves up to rally its Bradley (yellow bead at far left, with Lt Ensmith at far right), but it fails...
The Bradley (far left, red bead) falls back, leaving its riflemen in the field at center. Friggin' Army... ;) The Brad successfully self rallies.
Lt Ensmith pushes rifles and a Bradley forward (left center, with Capt Phillips at bottom left, and last Soviet unit at bottom right).
The US fails a deployment roll, and that's it for Turn 5.
With a damaged Bradley at bottom left, Lt Macot orders his command team (far right) forward, and they fire a LAW at the last BMP...
But they miss, and return fire from the BMP mows down Lt Macot and his command team!!!
One of Lt Macot's rifle teams rallies the Bradley at bottom left, then moves up and takes a LAW shot of its own...
KA-BOOOOOMMMMM!!! Game over.
Well, that was a fun little game, took about 90 minutes to play out, which is more my norm. A lot of this came down to the ability to get troops on the board, where the US was successful in getting all but one Bradley and rifle team on board, while the Soviets failed to get two BMPs and rifle teams on board. It probably seems like more, but the problem was the US was able to push early advantage, then defeat enemy units coming on piecemeal as they came on.
Pretty cool game; to me the turning point was when the 3rd Mech Plt Bradley and rifle team came on and saved Lt Macot in the south (recall, the Soviets had two BMPs and two rifle teams, which had come forward and knocked out Macot's Bradley and put 'men down' on the command team) by knocking out a BMP and rifle team, then forcing the other rifle team to fall back and hunker. The US already had the advantage in the north (mostly due to Lt Ensmith's ability to move up and take position in the treeline unspotted), and so 3rd Mech Plt's reinforcement success gave the US freedom to advance on all fronts.
Captain Phillips was an animal, and is recognized as such with the award of the Silver Star for gallantry. Lt Macot was awarded the Bronze Star w/V, posthumously...
Casualties:
US
-2 M2/3 Bradleys destroyed, one damaged but recovered.
-One infantry team knocked out (Lt Macot's command team)
Soviet
-Four BMPs and one BTR-50 knocked out
-five rifle teams and their Company Commander's command team knocked out
Stand by, fight number six coming up soon!
V/R,
Jack


So did they detect chemicals, or was that a given that they were present?
ReplyDeleteChris,
DeleteYeah, I didn't put the stuff from the book, but it's set up like Team Yankee, where the patrol goes out and finds friendly units (I think an infantry platoon) dead in their holes.
V/R,
Jack