All,
This is the second part of my third Fulda Gap fight, starting at Turn 3. When last we spoke, Team Whiskey had two Mechanized Infantry platoons on the board, and the supporting tank platoon had just come on. Regarding the Mech Inf platoons, Captain Phillips' India Company had lost a couple Bradleys and 1st Platoon's infantry has pretty much been wiped out, while Captain Keepers' Kilo Company got the stuffins knocked out of it, down to two Brads and a five rifle teams.
It's Turn 3, and so the US side is able to bring in its AH-64 Apache for rotary attack support, but, to be honest, I'm a bit scared to call it up as the Soviets still have quite a few surface to air missile (SAM) systems on the table.
But the Soviets have suffered to, with their tank platoon decimated (one T-72 left) and half their SAMs gone, but they still have the majority of their infantry, and their four ATGMs are still in play.
Let's pick up the action.
Turn 3 starts in the Soviet center (looking east to west), with the two ATGMs there firing. One targets an M1 (right), while the other targets an India Co Bradley.
The India Co Bradley is cremated, taking the rifle team with is, while one of Kilo Company's Bradleys takes cover and hunkers (red bead).
While an M1 (bottom left) is also smoked. Another tank (top right) pops smoke and takes evasive action, hunkering behind the orange building.
And then the Soviet mortars (bottom left) begin dropping mortar rounds on the US center (top right), knocking out one of 2nd Plt, India Co's rifle teams.
Looking at the US right from south to north, Kilo Co's rifles begin moving up and take react fire from a Soviet machine gun...
Forcing them to fall back (far left, red bead, next to hunkering Bradley, from far right explosion). The good news is that Kilo's infantry that successfully moved up were able to spot a Soviet ATGM, two rifles, and a machine gun.
While in the southeast the Soviet ATGMs (blue beads) reload and stand by, ready to fire. They are unable to fire on activation (they just used their activation to reload), and they can't react fire this turn (already activated), but if they are fired on and missed they can return fire, or they are now able to fire next turn.
The top three units, and the one in the middle right (it's an MG) are the ones Kilo's dismounts just spotted.
The US fires its mortars (top left) at the recently spotted cluster of Soviet units in the southeast (bottom right): an ATGM is knocked out (the other is still unspotted) and a rifle team is pinned.
SF Tm2 moves onto the roof of the orange building. They spot the Soviet ATGMs in the center (the ones that just fired and knocked out a Brad and a tank), an MG, and two rifle teams. They also spot an enemy SA9 mobile SAM in the northwest (off camera to top right), but there are still two unspotted SAMs on the board.
This is looking at the area SF Tm2 was observing in the Soviet center, with the MG at bottom left, ATGM (blue bead) and two rifle teams in the center (there's also a command stand there), and two SA9s at top right, though one is unspotted.
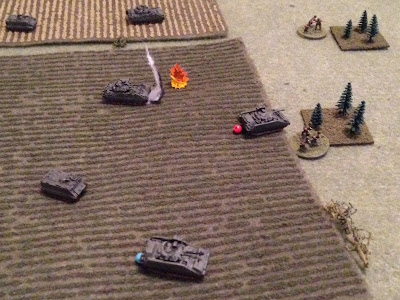
In the southeast, the last Soviet T-72 moves up and fires on the two M1s in the south.
The round strikes just short of the Abrams, forcing it to fall back and hunker (red bead at top left, from explosion at center). But Lt Travers' tank (center) returns fire...
Good grief, I'm good for 2-5 shaky pics a game, aren't I? Sorry folks...
In any case, Travers' round hits the turret of the Soviet vehicle, knocking it off its ring, effectively disabling the tank. But the crew bravely remains in the vehicle; this is interesting from a game perspective. If they can rally and get the tank off-board, they rob the US of a victory point for knocking it out. Of course, the US is going to work to get that victory point by popping it before it can exit.
In the southeast corner, the Soviet commander there moves to rally a pinned MG (top right), and he succeeds, while the other MG (bottom right) opens fire on India 2nd Plt dismounts (top left), knocking out a rifle team.
The rallied Soviet MG takes up position in the building (commander is at ground level).
On the Soviet far right/US left, the Manpad SAM there falls back (far left, black bead, from bottom right), scared a little bit by SF Tm 1's failed charge (SF Tm 1 moved up last turn to try to take them out, but was gunned down by Soviet rifle teams at top right.
On the US right, Kilo Company's Commander, Captain Keepers moves up in his M-113 to rally the rifle team and Lt Ditteaux's Bradley.
But both fail: the rifle team (far right, yellow bead) managed to rally up to pin, but Lt Ditteaux's Bradley falls back again (top left, red bead, near a hunkering M1 Abrams). Captain Keepers races his M-113 (center left, black bead) in chase, trying to get his company reorganized and back in the fight.
This is followed by Lt Ditteaux trying to rally his crew, but they fall back again!!! (far left red bead, from center explosion)
And then more disaster for Kilo Company; the US just spotted a bunch of Soviets in the southeast (bottom right), and their last tank's turret was just disabled, so there are plenty of targets there. Lt Tinman moves his Bradley (top left) over to get a TOW shot on the enemy tank, but a previously unspotted enemy rifle team (bottom center right, with green and black bead) launches an RPG...
And Lt Tinman's Bradley goes up in flames (a 6 on 1D6)...
Looking north to south at the US left/center (on right) and the Soviets on left, India's pathetically few remaining infantry of 1st (bottom right) and 2nd (top center left) Platoons moves forward. The rifle team at top center left spots an enemy SAM off camera to far left.
Looking northeast to southwest at the Soviet center (knocked out T-72s littering the center), the enemy MG at center left saw the US infantry move up and figures the Bradleys must be next, so he cuts loose on an India Co 2nd Plt vehicle, to no effect (top right).
On the US far left, Captain Phillips tries to rally his two pinned Bradleys. One is successful, but the other remains pinned. So that vehicle tries to self rally, and is still pinned! @#$%!!! That's I/1's last remaining rifle team at right.
I/1s Bradleys and CO (bottom right) move up (looking north to south), with one Brad opening fire on the MG that just shot at I/2.
The MG is knocked out (was at center left explosion), while the Manpad SAM behind it suffers heavy casualties (white bead), and a nearby rifle team falls back and hunkers (red bead).
That's some handy shooting with the 25mm chain gun!
In the US center, LtCol Lacy moves up and rallies the hunkering M1 Abrams. Those are India 2nd Plt Bradleys at top, and SF Tm2 in the building.
And then he leads India's 2nd Plt forward. One of the Brads can't pick up the Soviet ATGMs, but the other does and opens fire with its 25mm, knocking one ATGM out.
A little further right, the battalion XO, Major Kavscott (bottom center) leads I/3s Bradleys forward. He tries to rally a Kilo Co rifle team, but they remain pinned (that's the third damn time!!!), while one Brad fires its chain gun (bottom left) at the remaining Soviet center ATGM, and the other Brad launches a TOW at an SA-9 (top right), looking to help clear the way for the Apache.
The ATGM (far left, blue, white, and black beads) takes heavy casualties, while the SA-9 is smoked.
In the southwest, the hunkered M1 rallies up to pin (top center left, yellow bead, with Lt Ditteaux's Bradley at far left, hunkering), while Lt Travers' M1 (bottom right) is unable to act as he react fired at the T-72 that forced his partner to fall back.
Back in the center, Captain Lemmey leads his three M1s forward (bottom, looking west to east). The far left Abrams fires a sabot round at a Soviet SA-9 (top center)...
Holy @#$%!!! Did I mention 1s and 6s are good?
The targeted SA-9 (bottom center) goes up in a sheet of flame, the Soviet mortar battery suffers heavy casualties, and the other SA-9 (top center, red bead), is forced to retreat off the map (they are in the northwest corner; at bottom left and top left you can see the khak-colored sticks I'm using to mark the table edge)!
Captain Lemmey pushes his M1 right up next to I/2's Bradleys (center, with the battalion XO at far right). He fails to acquire the Soviet SA-9s just off camera to top right, so he fires at the remaining Soviet ATGM in the center (which is already 'men down').
The ATGM remains men down (far left, white/blue/black beads), while the enemy's commander is forced to fall back (top right, red bead, next to the SA-9 we still need to take out).
I am barely retaining the initiative in my counterattack, with my Mech Infantry forces shot to pieces. I do have most of my Abrams left, but the enemy still has some ATGMs and a whole lot of hidden, RPG-armed rifle teams lurking in various patches of woods, so I really feel like I need some help. On board, the Soviets are down to one remaining SA-9 (in good fighting order, seen at top right), and one Manpad SAM (off camera to top left), which is suppressed. If now is not the time, I don't know what it...
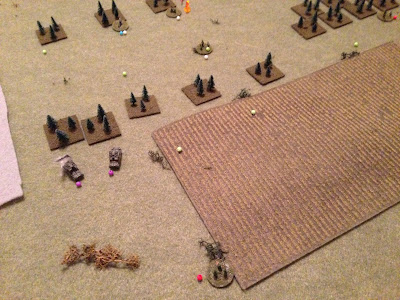
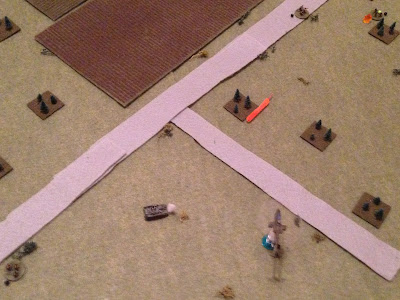
The AH-64 Apache zooms in just feet above the ground, slows to a hover, then pops up over the small knoll the US mortars (bottom center, at far left table edge) are sheltering behind.
It all comes down to the dice now...
Does the Apache (bottom left) acquire the SA-9 (off camera to top center, looking west to east)? No, he fails his spotting roll (it was a tough spot)! Does the SA-9 acquire the Apache? No, he fails his spotting roll (it was a pretty damn easy roll)! So the Apache turns on the Soviets in the southeast (top right), and looses a hail of 70mm Hydra rockets.
The Apache has moved forward and the SA-9 is now masked by trees. The Soviet commander had placed his SAMs in cover, with good firing lanes, but now that most of the SAMs are gone (knocked out, fled the table, or suppressed) there are serious gaps in coverage, meaning the SAMs are going to have to move, exposing themselves, to clear their lanes.
The rockets begin to land (ATGM at bottom left, MG at bottom right, rifle at far left and top left, commander at top right).
The MG team is knocked out (center), while the ATGM and a rifle team fall back (bottom right and far right red beads, respectively), while their commander is pinned (yellow bead at top right).
And that, my friends, is the end of Turn 3.
Turn 4 begins with the Apache swinging right (south, bottom left, Soviet southeastern positions at bottom right) to launch rockets at the Soviet center (top right). The enemy MG in the building at top right react fires, but has no effect on the US attack helicopter. Another volley of 70mm rockets are sent to the Soviets...
BS!!! The only 'hit' is the Soviet MG is forced to fall back and hunker (red bead at top center, from explosion at bottom left).
In the far southwest, Capt Keepers (top left center, M-113) rallis Lt Ditteaux's Bradley (far left, red bead) and, since he's there, the pinned M1 Abrams (center, yellow bead).
Captain Keepers then leads them forward (bottom left), where Lt Ditteaux's Bradley launches a TOW at the damaged T-72 in the southeast (top right).
The T-72's turret is hit again and damaged once more, but this time the crew bails out, so the vehicle is counted as KO'ed. The rifle team nearby is pinned (yellow bead).
In the far west (bottom left), the US mortar platoon leader looks around. "Last rounds, boys," and they fire off their last fire mission of HE rounds at the Soviet defenses in the center (top right).
A Soviet rifle team is knocked out and another pinned (center). The US mortars are out of HE rounds.
On the US far left (looking north to south), India's 1st Platoon acts. The pinned Bradley at bottom right finally self-rallies, while another Bradley darts over (far left, black bead) and opens fire with its chain gun on Soviet defenders in the center (top left). But the enemy is dug-in, and they duck the 25mm rounds.
The plan is not really working for either side, but the US is gaining ground finally. If you recall, the US planned to rush its Bradleys into the first 'band' of trees (far right), dismount its infantry, then push into the second band of trees (far left). But Soviet tanks and ATGMs ripped the Mech elements to pieces, knocking a lot of rifle teams out in their vehicles, then Soviet mortars and machine guns ripped quite a few more to pieces while the infantry was still bunched up. But the few remaining infantry have been able to press ahead and spot enemy infantry in their hides (with help from SF Tm2 in the orange building, and some great spotting rolls) so the Brads and tanks could move up and use their heavy weapons (alone, the US vehicles have a very small chance of spotting dug-in enemy infantry).
The Soviets hoped to get the US infantry and vehicles into close range (after having ate some of them up with their tanks and ATGMs) and shoot them to pieces with RPGs and small arms fire, but the great US spotting rolls identified most of the Soviet rifle teams, allowing the US to bring heavy weapons to bear, as we see here.
And then Captain Phillips and the other Bradley (bottom right, with the 'original' Brad at bottom center). The right-hand Brad now fires its 25mm gun at the same enemy rifle team.
Forcing them to fall back (top left, red bead, from center right explosions, with enemy commander at bottom left, hunkering).
In the US center, LtCol Lacy leads the India 2nd Platoon Bradleys (bottom left) in a dash straight into the enemy defensive positions in the center, opening up at point blank range with their 25mm gun (the MG was already hunkering, red bead)...
From the opposite direction, showing the results: the MG team takes heavy casualties (white bead at top center), and the enemy commander is again forced to fall back (red bead at bottom center, from center).
And then the two remaining Bradleys of India's 2nd Platoon kick out their infantry (the 'men down' MG at far right).
Dammit, I missed a photo here: on the US right, the XO, Maj Kavscott rallied a rifle team while the Bradleys moved up, with one firing a TOW at an SA-9 in the northeast.
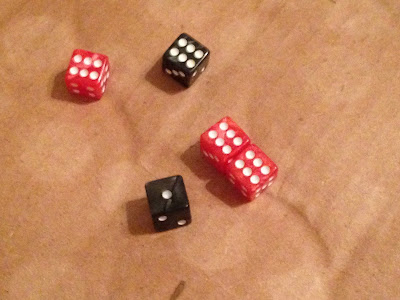
But I remembered to photo this? Sorry everyone. Well, just showing how my firing dice have been today, for the most part.
In the northeast, the other SA-9 (bottom left) is knocked out, while the Soviet commander in the center (top right, already forced to fall back twice) is forced to retreat off the map.
In this photo you can see what happened in the photo I missed, i.e., the India 3rd Platoon Bradley that moved up and fired its TOW, with the knocked out SA-9 at top right. Major Kavscott (far left) moved up, leading the other I/3 Bradley, who fired his 25mm gun at the enemy MG in the building at far right.
They were forced to fall back and hunker, next to their commander, who is pinned (this is the Soviet southeastern force).
Then India's 3rd Platoon kicks out its rifle teams.
Looking northeast to southwest at the Soviet right (right) and center (left), their whole force here is either pinned or suppressed (hunkered); they set about trying to self-rally (remember, they're CO just left town). At top left there is an MG, an ATGM, and a rifle team, all 'men down' (white beads). At bottom center is a hunkering rifle team, and at bottom right is a hunkering Manpad SAM (the last SAM on the board).
Except the MG, which melts away due to heavy casualties, all other successfully rally, but the tide has turned. The US clearly has the advantage now in numbers and firepower; it is now a race against time to knock out as many Soviet units as possible before falling back. Please remember that this was a limited counterattack, with the goal(s) being to 1) decisively defeat Soviet air defense elements in the area in order to make space for NATO tactical air, and 2) to punch Soviet armored elements in the mouth to keep them off balance, not to take and hold ground.
On the US far right (southwest), Lt Travers tank (bottom left) moves up and fires its main gun on Soviet infantry in the southeast (top right), managing only a pin.
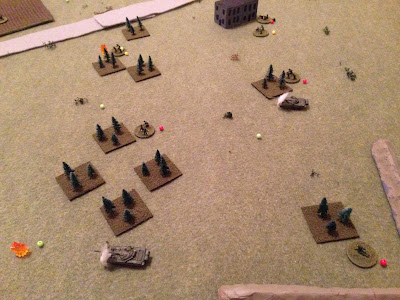
Travers' (whose tank is just off camera at bottom left) partner moves up (bottom left) and fires HE at the Soviet rifle team (top right) that knocked out Lt Tinman's Bradley (center, with Apache just to right).
The Soviet infantry are forced to fall back (bottom right, red bead, from bottom left). The rifle team that Lt Travers fired at and pinned is at top left.
I keep pushing them back, but all of a sudden I can't kill them...
In the center, one of Captain Lemmey's M1s (bottom right) moves up and fires at the Soviet center, knocking out a rifle team (top left, with India's 1st Plt visible at far left, and a lone Kilo rifle team at center right).
And then Captain Lemmey, being a bit of a firebrand, once again pushes his nose right up in the middle of things, taking his M1 into the center of India 2nd Plt's position and firing point blank with its coax MG at dug-in enemy infantry, but they are unaffected.
Off camera to top right, the Soviet mortars finally rally back into fighting shape, but they can see US armored vehicles nearby and are getting a bit nervous.
On the US far left, the last remaining India 1st Plt rifle team moves over and mounts up in the I/1 Bradley that was pinned and finally rallied.
In the center, India Company's infantry begin moving up. A rifle team presses forward and fires on the Soviet Manpad SAM, eliminating it.
From the opposite perspective, another rifle team moves up and fires on a Soviet rifle team...
Forcing them to fall back (far right, red bead, from explosion at center), while another rifle team moves into close combat with the 'men down' Soviet ATGM (bottom left), knocking them out of the fight.
They move up again (far right, from bottom left) into contact with a hunkering rifle team, knocking them out too.
And then they fall back into cover (top right), while another team moves up (bottom left).
One of Kilo Company's rifle teams moves up (team that just moved is at top center) and fires on a pinned Soviet rifle team in the southeast (bottom right), but misses.
The Soviet left, in the southeast, is in bad shape, with a hunkering rifle team at bottom left, a hunkering rifle team at far right, a pinned commander and hunkered MG team at top right, and the pinned rifle team that Kilo Co just fired on at top left. And actually, I missed it in the photo, but there's a Soviet ATGM team hunkering just off camera to bottom left.
With their commander pinned, they set about self-rallying. the rifle teams at top left and bottom left rally, the MG team at top right rallies up to pinned, the commander successfully rallies, and the far right rifle team falls back off the map.
It really sucks that the Soviets in the southeast were able to basically get back in fighting shape, as the US really wanted to push in there and knock a bunch of enemy units out.
But, in the south, Kilo Company keeps pushing ahead. A Kilo rifle team moves up (bottom left) and fires at an enemy rifle team, causing heavy casualties (top right).
While another (top left) moves up and fires, but misses.
One more Kilo rifle team (bottom left side) moves up and fires at that same enemy team, causing them heavy casualties, so two of the recently rallied Soviet rifle teams just went 'men down.' Those are Kilo rifle teams at bottom and top left.
The Soviet ATGM team in the southeast (bottom right) tries to self-rally, but fails and runs off the map (you can see the table edge marker at far right). The two enemy rifle teams that Kilo just put 'men down' are the white beads at left and top left.
From the US center-rear, SF Tm2 utilizes long range small arms fire against the enemy commander in the southeast (top right), causing heavy casualties!
And that is the end of Turn 4. At this point I figured it was time for the US to start skedaddling back towards home, so, with Soviet forces basically beat down in all sectors, I didn't follow my normal rules, I started 'hand waving' (pencil-whipping, if you like) certain actions on the US left.
So, on the US left (looking west to east at the US left (left) and center (right), the mortar platoon goes to work dropping smoke to cover the US withdrawal.
Looking southwest to northeast at the US center (bottom) and left (top), LtCol Lacy forms up India Company's 1st Platoon and starts them heading west, while Major Kavscott does the same with India's 2nd and 3rrd Platoons in the south, while Captain Lemmey's tanks hold Tail-End Charlie to cover them.
But in the southeast, Captain Keepers' Kilo Company, supported by two M1s under Lt Travers, keep pushing to reduce the Soviet pocket there. Lt Travers' tank (bottom left) fires his main gun on the enemy troops near the building (top right), eliminating the Soviet command section and keeping the MG pinned.
For this I went back to the normal rules, but then it looked so out of hand in the southeast that I just rolled it up.
So, with that, Kilo Company's infantry pushed aggressively (top center, top left, and center left) into the Soviet southeastern defensive positions, capturing the pinned enemy MG (top right, yellow bead) and the two 'men down' enemy rifle teams (far left and bottom center, white beads).
Wow, what a game. When I looked at the overwhelming US numbers, I was pretty confident of a US victory, but I had no idea it would come at such a cost, that the Soviet defense would be so effective. Team Whiskey made a successful counterattack, accomplishing both its mission objectives, but it wrecked itself on the Soviet defenses. These losses forced me to bring on the Apache (and it might seem like the Apache wasn't particularly effective; it's true it didn't eliminate many enemy units, but its rockets certainly had a great effect pinning/suppressing a lot of enemy units, which allowed the Mech forces to push ahead into the Soviet defenses) before all Soviet air defense units were eliminated, and, frankly, I was extraordinarily lucky that the damned helo wasn't shot down by that last SA-9, and that the Manpad SAM wasn't able to rally and shoot it down.
Here's how the losses panned out:
US casualties:1 M1
10 M2/3 Bradleys
9 Rifle Teams
1 SF Team
*Both Lt Webster (2nd Plt, Kilo Co) and Lt Tinman (3rd Plt, Kilo Co) were seriously wounded and are out of the campaign.
*Sergeant Bajers 3nd Plt, India Co) was awarded the Bronze Star with 'V' device for leading two close assaults that eliminated enemy rifle teams.
Soviet casualties:5 T-72
6 (of 8; one left, one forced to run off board) rifle teams
4 (of 4) machine gun teams
3 (of 4, one forced off table) ATGM teams
3 (of 4, one forced off table) MANPADS
3 (of 4, one forced off table) SA-9 Gaskins
2 (of 3, one forced off table) Command Stands
In the overall scheme of things, while Team Whiskey's counterattack was successful (though costly), 11th ACR, and indeed all of V Corps, has similarly been beat up, and so the Corps has begun an organized withdrawal to its next defensive line. 8th Guards Army has been beat up pretty bad as well, but their reconnaissance elements note the US withdrawal, and so 8th Guards Army again flips over again to the attack. Anxious to turn the US tactical situation from a withdrawal into a route, the Soviets launch armored columns forward, breaking out into tank country into pursuit of the withdrawing US forces.
More fighting will occur this weekend, hopefully two fights, but at least one, so please stay tuned. And thank you for sticking with me through multi-part batreps; I suppose it works, but I'm not a fan of it, so I'll try to keep it to a minimum. But real life, in the form of work, kids' schooling, and kids' extracurricular activities have a say in the matter, so if multi-part batreps is the best way to get the info to you guys, I'll look to keep that up, though it's not my preference.
V/R,
Jack










These are fun to read! Keep up the good work.
ReplyDeleteThanks man, glad you like them, and I'll do my best!
DeleteV/R,
Jack
I hear ya concerning the many other commitments. I game vicariously through others' AARs!
ReplyDeleteYeah, it's been tough with the kids getting back to school and extracurricular activities, but I'm really hoping to get two games in this weekend!
DeleteV/R,
Jack
Wow! A very bloody counter-attack. I am surprised Kyote made it through.
ReplyDeleteI am also glad I am not in a Bradley in any of these games!
Shaun,
DeleteSure, but if things keep going the way they've been going, soon we'll all be walking!
V/R,
Jack
Try being a teacher on top of that.. ; )
ReplyDeleteDon't worry about the two parters, just do them as you can. The fact you can find time to game and write lengthy reports is pretty amazing to me. I have to fight just to find time to play the occasional X-Wing or Ogre game with my boys now. So keep it up!
Randall,
DeleteThanks man, I appreciate the encouragement. And a teacher, eh? But you guys get the summer off! ;) Yeah, gaming time (to include the administrative aspects of set-up/tear-down, typing, posting, etc...) is getting relatively hard to come by, and I'm looking at my baby and thinking 'what extracurricular activities are YOU going to be into in a few years?'
Well, I do what I can, and I've been having a great time. More batreps to follow.
V/R,
Jack