All,
Okay, on to something new and different. I'm playtesting another set of rules, this time some air to air combat rules. In this, my first game with the rules, we have a flight of four USN F-18 Hornets taking on a flight of four Iraqi MiG-29s. For my purposes everything is equal: the planes are equally maneuverable, each carries four IR missiles, four radar missiles, and three sets of countermeasures, and the pilots are of equal quality (apparently these are the cream of the Iraqi Air Force, and a USN ROTC aerial club). In any case, the action picks up with each flight at opposite ends of the table, over barren Iraqi desert...
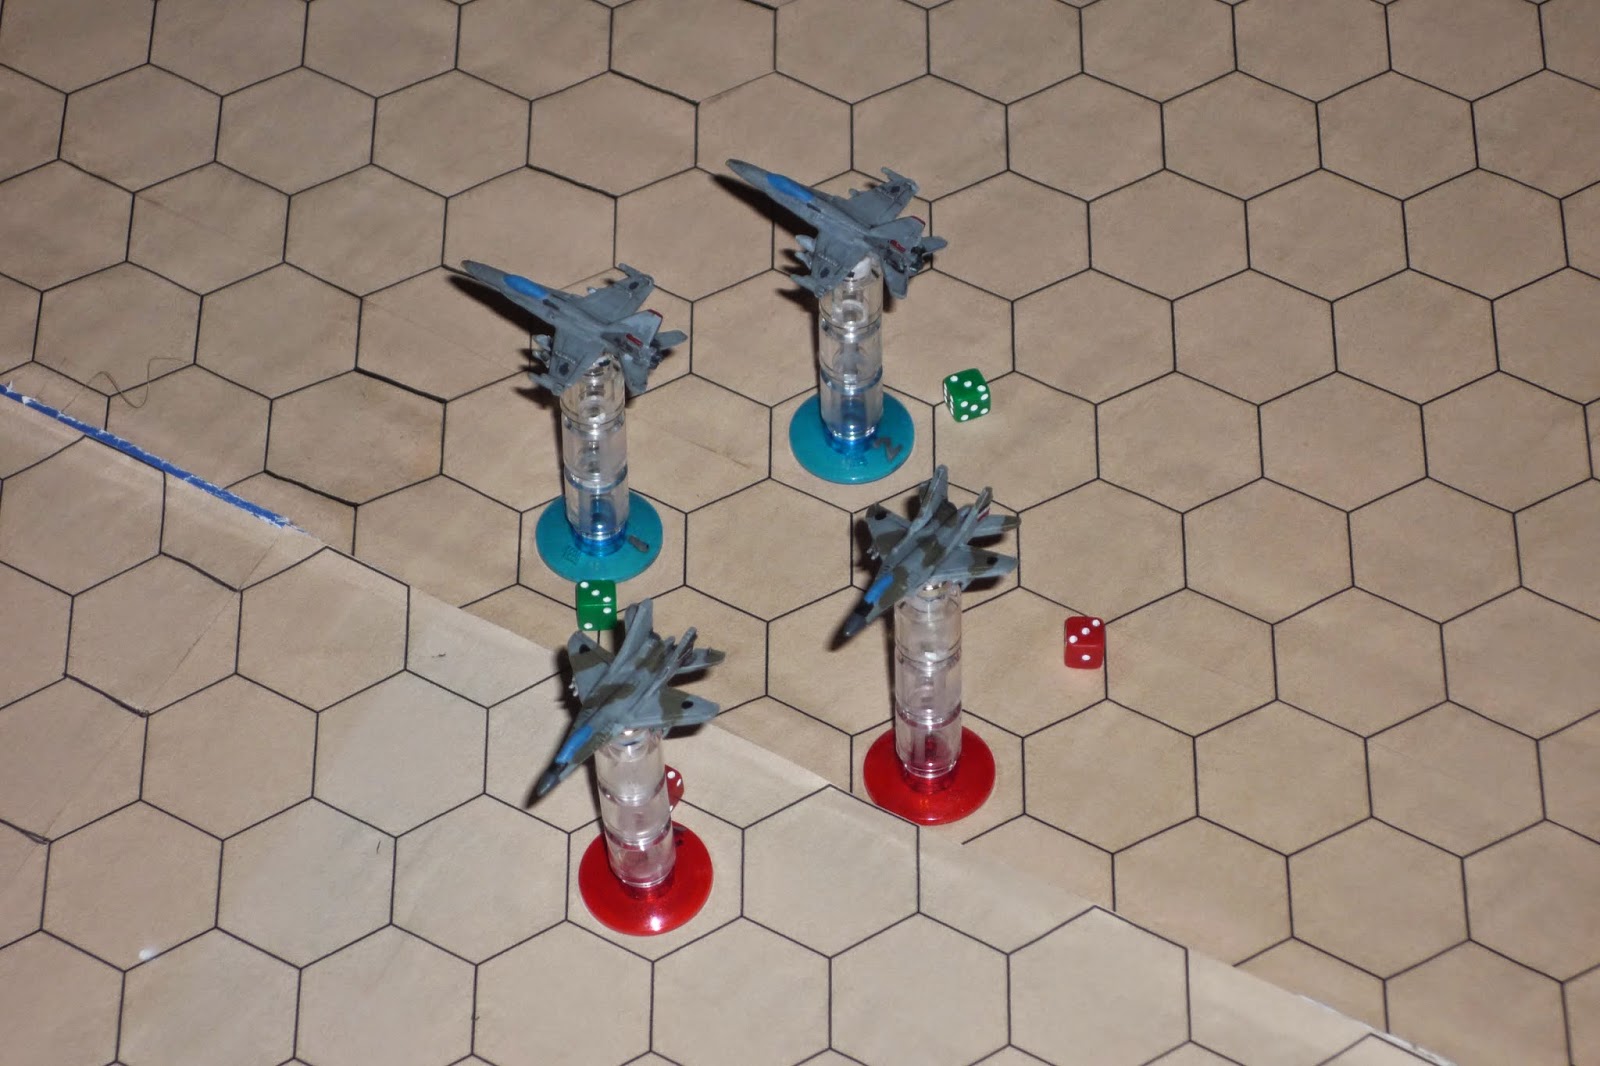
The table, north is up, USN on the western (left) edge, Iraqis on the eastern (right) edge.
The US Navy F-18s. From left to right you have Badge 04, 03, 01, and 02 in a loose finger four formation. They are at altitude level 4 (of 6), as marked by the green dice.
And the Iraqi MiG-29s are set up the same way, with (left to right) Romeo 04, 03, 01, and 02.
I give a 'straight up' D6 roll to see who will go first, and the Iraqis win.
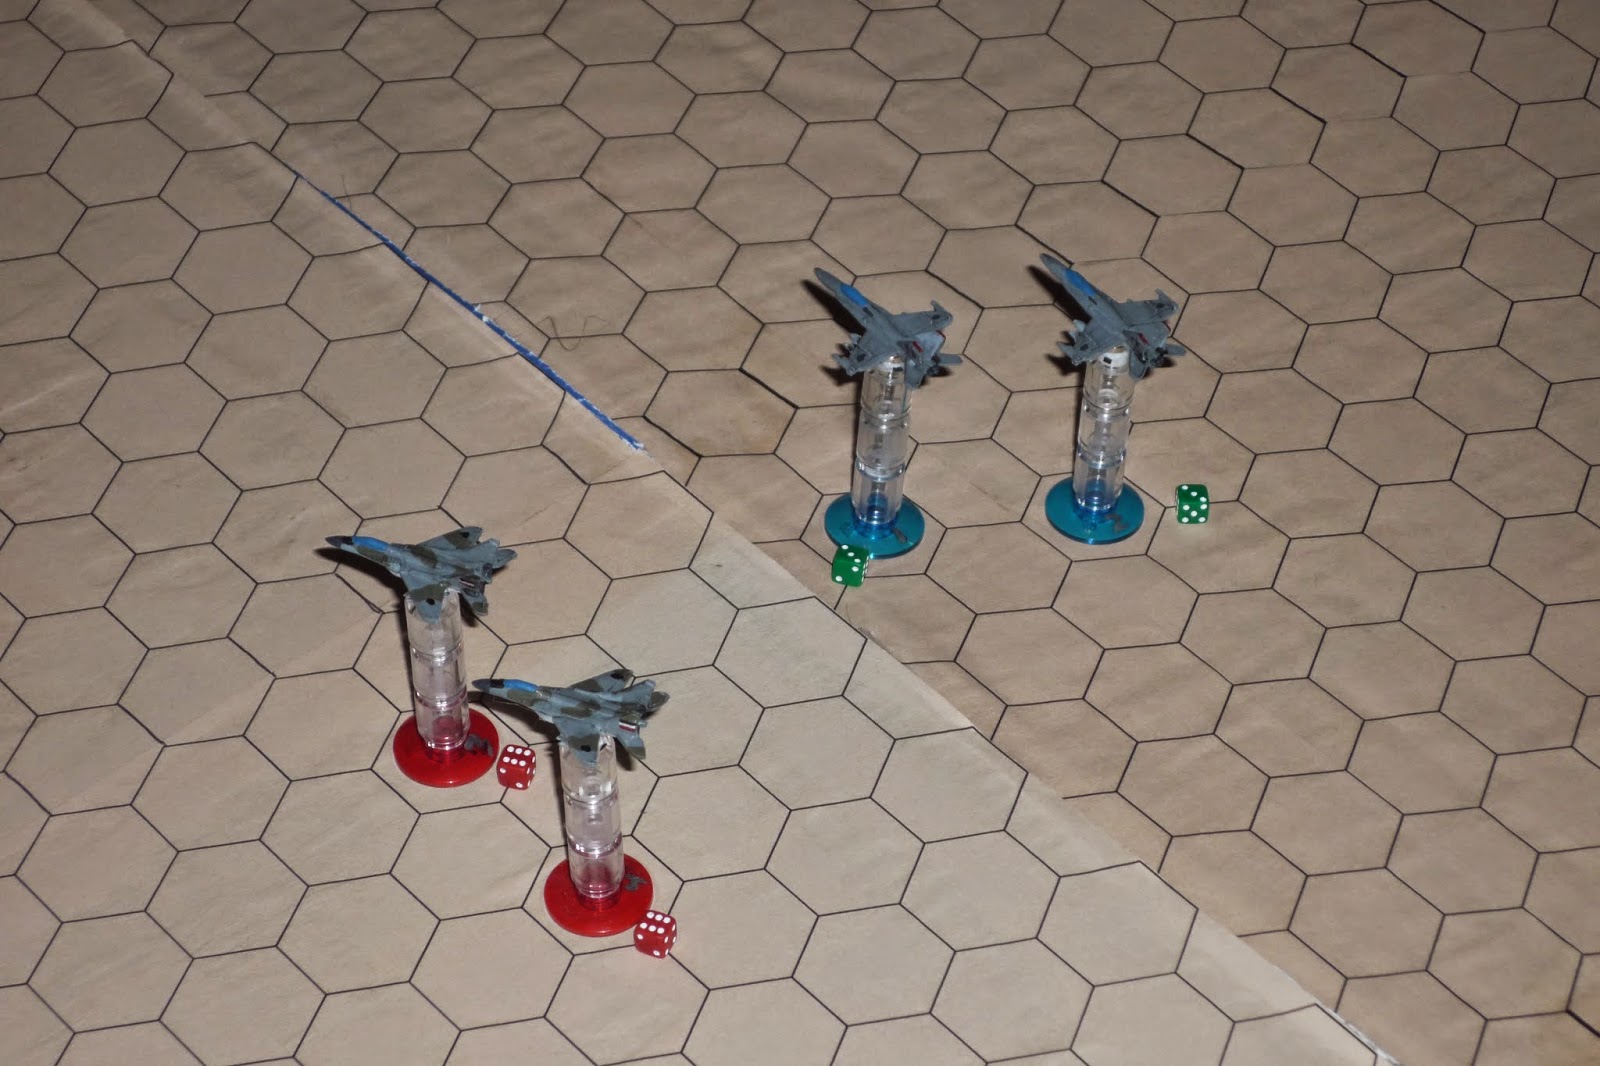
And the fight is afoot! Romeo 03 and 04 hit the afterburners, straight at the Yankees, dropping two altitude levels in the process.
While Romeos 01 and 02 veer right, climbing to alt 6.
The Yanks (bottom left) don't take the bait; the entire Badger flight moves straight ahead, climbing to alt 6.
Romeo 01 and 02 (top right) hit the burners, then round off to the left.
While Romeo 03 and 04 stay low and veer left (bottom left).
On to the chase: Badger 01 and 02 hit the burners (center) and drop down after Romeo 03 and 04 (top right).
While Badge 03 and 04 loiter (bottom left), staying high and left to keep an eye on Romeo 01 and 02 (top center).
Romeo 03 and 04 (bottom left) stay on burner, diving to the deck and turning into Badger 01 and 02 (top right).
While Romeo 01 and 02 (bottom right) remain noncommittal, staying high and right, waiting to see how the US pilots will react once Romeo 03/04 and Badger 01/02 make the merge.
But Badgers 01 and 02 show off some fancy footwork (bottom right), dropping down and hitting the brakes to line up on Romeo 03 and 04.
Badger 01 is a bit impatient and takes a really bad deflection shot, firing off a radar guided missile at Romeo 03.
Despite the bad angle, Romeo 03 decides to pop out flares and chaff anyway. The missile flies by harmlessly.
Badger 03 and 04 (bottom left) continue to hang back, waiting to see what Romeo 01 and 02 (top left) will do. There's a furball developing at far right, and though the Americans have taken a shot neither side is at advantage.
Romeo 03 and 04 were looking to lead the Badgers 01 and 02 away (in picture), showing their tails to Badgers 03 and 04, trying to lure them down into the chase so that Romeo 01 and 02 could then close on them. But the Yanks haven't taken the bait, so Romeo 03 and 04 commit to the dogfight, making a tight turn into Badgers 01 and 02 and climbing for a bit of altitude.
While Romeo 01 and 02 (top right) decide to force the issue, standing on the burner to close the distance with Badger 03 and 04 (top left).
Badger 03 and 04 work towards the merge with Romeo 01 and 02.
While Badger 01 and 02 climb and make a high-G left turn. Each side is maneuvering in the furball, seeking a viable shot.
But Romeo 03 and 04 aren't feeling it, so they climb all the way to alt 6 and turn to get on the tail of Badgers 03 and 03 (off camera at top left). So they've actually reversed their initial plan, which was for Romeo 03 and 04 to split off, engage a pair of Hornets, then show their tail to lure the other two Hornets (Badgers 03 and 04) in. But Badgers 03 and 04 didn't fall for it, they stayed high and closed with Romeos 01 and 02, so now Romeos 03 and 04 are saying 'to hell with the flanks' and they're heading for Badgers 03 and 04, hoping Badgers 01 and 02 (top right) can't catch up before the Iraqis get some tail-end shots off.

But the Iraqi flight commander chickened out; the better move would have been for Romeo 01 and 02 (top right) to stay right, getting Badger 03 and 04 (bottom left) to follow, so that Romeo 03 and 04 (off camera to bottom right) could work in behind these two Yanks. But the Iraqis started worrying about Badger 01 and 02 (also off camera to bottom right), and so Romeo 01 and 02 turned LEFT, into the other two US fighters, and dropping down a level.
This could help by getting Iraqi head-on shots at Badgers 01 and 02, probably forcing them off Romeo 03 and 04's tails, but Badgers 03 and 04 (bottom left) are sure to follow, thus royally screwing up Romeo 03 and 04's shots on them. I hope that's not too convoluted...
And once again the Yanks don't take the bait. Badger 03 and 04 (bottom left) say 'go ahead, take a head-on shot at Badgers 03 and 04 (off camera to bottom right), but we're going to loop around, get around on your tails, and flame you.' You can see Badgers 03 and 04 closing in on the tails of Romeos 01 and 02.
Once again Badgers 01 and 02 turn very tight to stay with Romeos 03 and 04, who are pointing in Badgers 03 and 04's direction (off camera to top left).
Romeos 03 and 04 (bottom left) show Badgers 01 and 02 (center right) their tails, hoping to lead them around...
For Romeos 01 and 02 (staying on burner at center, with Romeos 03 and 04 at bottom right, Badgers 01 and 02 at top right, and Badgers 03 and 04 at far left).
Badger 01 and 02 are finally able to move in and get into a tailing position.
And Badger 01 fires an IR missile at Romeo 4, who deploys countermeasures (CM). The initial roll is 'aircraft damaged,' so the Iraqi chooses the CM re-roll, which nets him a 'roll-off result.'
So Romeo 4 rolls three hexes to his left (center right), breaking up his formation with Romeo 3 (bottom center).
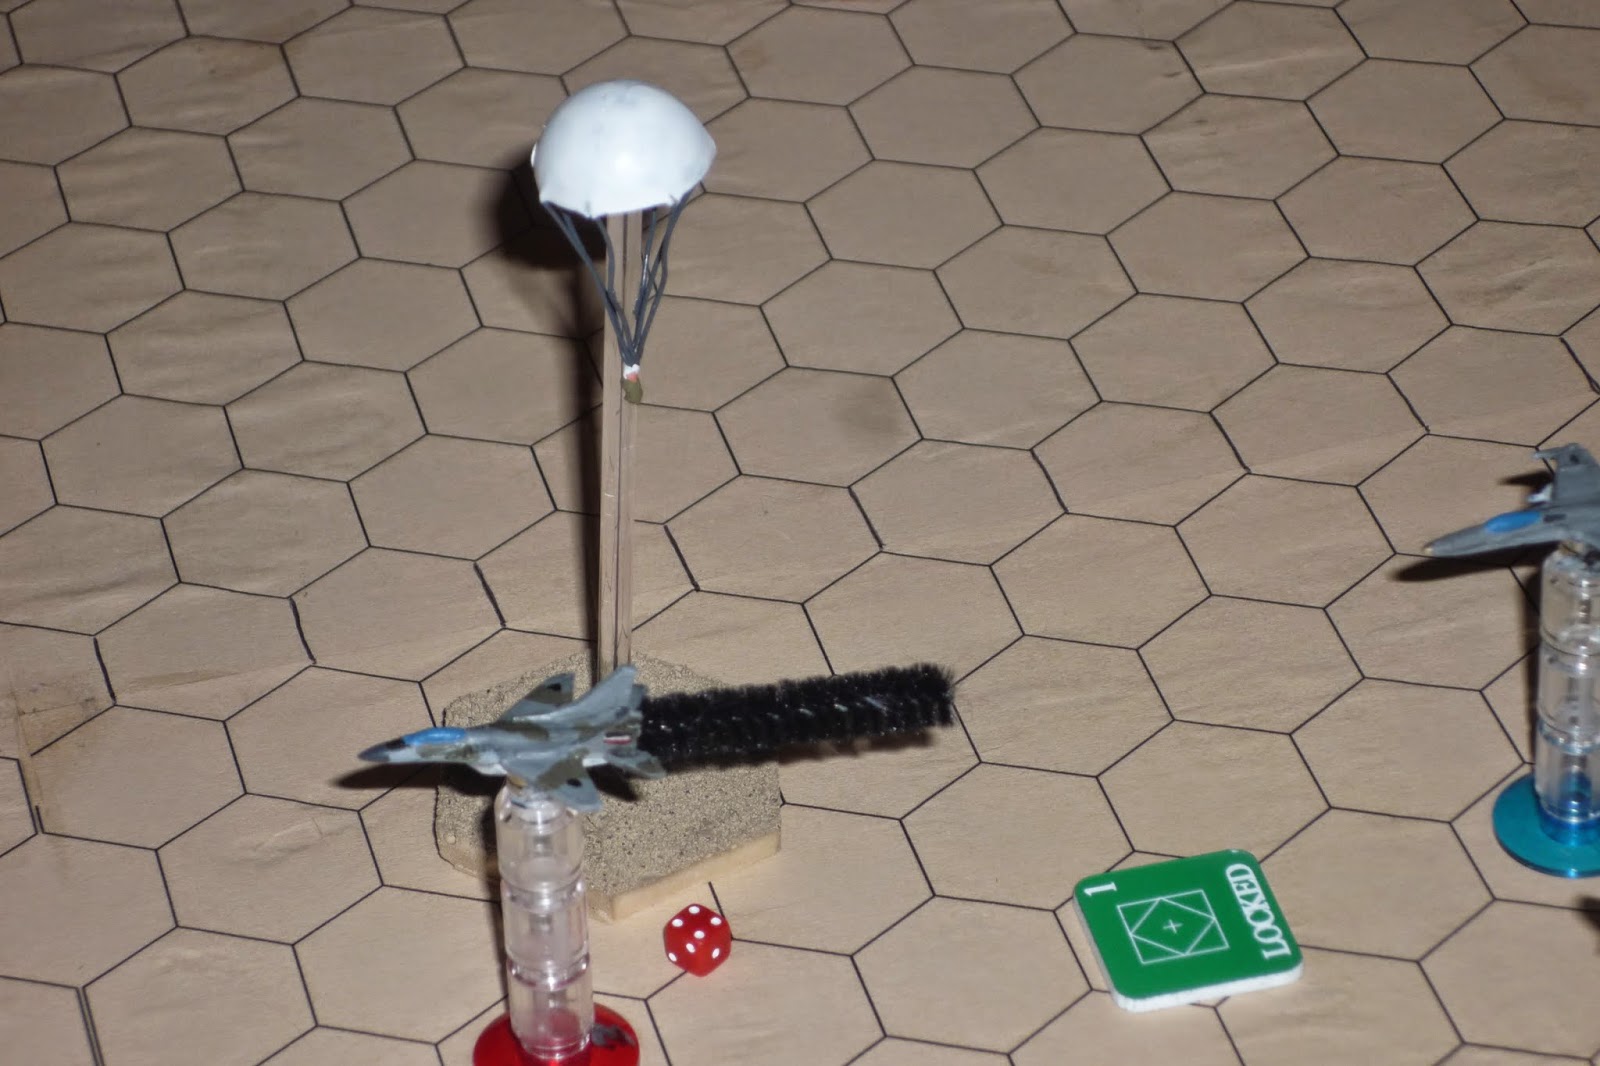
Badger 01 then takes a "Tailing" test and succeeds, locking onto Romeo 03's tail (the green 'Locked On' marker is between the two of them).
Then Badger 03 and 04 roll in on Romeo 01 and 02.
Badger 03 lines it up, "Fox One!" and looses a radar missile at Romeo 03, who punches out CM. The first roll is "damaged," the second is a miss. Badger 03 takes the tailing test but fails...
With Badger 01 locked onto Romeo 03 (bottom right), Romeo 01 and 02 (far left) really need to do something, so they close in on Badger 01's flank and take a terrible shot, hoping to break Badger 01 off Romeo 03's tail. Badger 03 punches out CM.
The first roll is a kill, but the CM re-roll turns it into a straight-up miss! The gambit failed, and now Romeo 03 is in big trouble.
Bear with me while I explain: at top left is Romeo 01 and 02, who fired a missile at Badger 01 (who deployed the CM at center right), and Badger 01 is now firing a missile at Romeo 03 (bottom left), who has deployed CM of his own.
The first roll is a kill, so the Iraqis hit the CM re-roll...
"Splash one bogey!" Romeo 03 is down, and its pilot safely ejected.
Romeo 04 pulls left, heading towards his base.
Badger 03 and 04 pull onto the tails of Romeo 01 and 02, then take separate tailing tests. Badger 03 fails, but Badger 04 is successful.
I'm not sure why I didn't shoot there, probably got caught up in the moment...
Meanwhile, Badger 01 and 02 (bottom center, with Romeo 04 at far right and Badgers 03/04 and Romeos 01/02 at top left) begin making a sweeping turn to their right. They are happy to let Romeo 04 escape while they work with Badgers 03 and 04 to box in Romeos 01 and 02.
In response (I forgot to take a photo), Romeo 04 turns hard left to get into position to break Badgers 03 and 04 off his comrades' tail, but he can't get locked on with his partners in the way and won't risk taking a shot. So Romeo 02 is in big trouble with Badger 04 locked on.
Badger 04 looses a Sidewinder, which ignores Romeo 02's CM...
And blasts his aircraft from the sky. Once again the pilot gets out.
Romeo 01 hits the deck and runs for base, which is really cowardly given the fact Romeo 04 could have done the same but didn't, turning into the Americans in an ineffectual attempt to break up Badger 04's lock...
With Romeo 01 on the run, Badgers 01 and 02 make a hard right to box in Romeo 04 (Romeo 01 off camera to top right, Badgers 03 and 04 off camera to top center left).
Badger 03 takes a normal move, straight and level (far left), while Badger 04 moves in and takes a head-on shot at Romeo 04, who deploys CM (Romeo 01 at top center left, Badgers 01 and 02 at bottom center).
The AMRAAM misses, but forces Romeo 04 to take evasive action, and he is now turned straight into Badgers 01 and 02.
It's the next Iraqi turn, and Romeo 01 makes good his escape (I remove his aircraft from play).
Due to having taken evasive action last turn, poor Romeo 04 is stuck making a normal move, straight and level, which sees him pass between Badgers 01 and 02.
And they continue on past him.
Badger 04 then turns in, splits Badgers 01 and 02, and fires a missile at Romeo 04, who deploys is last CM.
The shot misses, and Romeo 04 rolls right.
Then Badger 03 rolls in; "I'm too close, switching to guns!"
The 20mm rounds go wide of their target, but Badger 03 is able to successfully pass the tailing test, and so it's pretty much all over but the crying for Romeo 04. Might as well punch out now...
(Romeo 04 is at bottom left, green Locked On marker shows the successful Tailing test result)
Badger 03 looses a Sidewinder...
Straight up the tailpipe! Pilot gets out again.
So, Yankees 3, Iraqis 0.
The game took about ten minutes to set up (Good Lord I'm loving that!), but it took a lot longer to play than I expected (two hours and ten minutes!). Granted some of that was learning new rules, playing stuff I hadn't played before. I also had the issue of using the fantastic markers; it's not that they take a long time to put on and take off, but they take longer than 'regular' markers (beads you just sit next to the stand). There was also the issue of 'ergonomics;' I was playing on the floor (for some unknown reason) rather than at a table, so I had to keep scooting around from one side of the 'table' to the other, which took longer than just stepping over. Lastly, there was quite a bit of time before the shooting started.
I played on a surface that is about 42 inches by 36 inches (not sure how many hexes that is each way), which was certainly plenty of room for all the maneuvering you'd want to do, maybe even more than you need. So that took some time as well.
My usual rolling for enemy course of action takes a little time, but I really spent a lot of time 'analyzing' each move, working then re-working it each time (move one hex, move one hex and turn 45 degrees, move one hex, wait, how many hexes was that? Or move, look at it, 'nah, I don't like that,' do it again). I'm sure I'll get better about 'eye-balling' that type of stuff as I continue to play.
I thought the game was pretty fun, with the best way I can describe it being firstly it was totally up in the air as to who would be the victor, but once the first kill was had it really seemed like the situation was firmly in hand (though I could be wrong, and maybe a lucky dice roll could have swung it the other way).
Regarding the rules themselves:
Things I changed pretty much straight away:
1) If you're fired at and have to take evasive action, you are not marked as 'exhausted' afterwards (and not move during your next turn). Instead, you must make a 'Normal' move, straight and level, your next turn. It just felt better than having the jet sort of 'hang there' in the air.
2) I changed it so that a successful tailing test gave you +1K and 1S for shooting. I think if our guy is on the enemy's six, locked in, it should be pretty much game over. That may be a bit too lethal though, and I should probably try it as originally written.
Things I'm thinking about changing:
1) Take away "Zoom" as an option from "Normal" activation, just stick with Normal (then shoot, if eligible), then Wingman or Evasive (and not shoot).
2) I'm thinking about taking away CM. They slow the game down with the re-rolls, plus it seems kind of silly with planes running out of CM (though I don't know, maybe that can happen). It seems to me it may be better to just assume CM is already factored in to the Kill and Shock dice. Though I'm thinking maybe to give the target a 'react' move where he can make an Evasive Maneuver (gives the CM re-roll?), but then he has to take a 'Normal, Straight and Level' during his turn.
We'll see, though I'd love to hear what you guys think.
Stay tuned, and thanks for looking.
V/R,
Jack


Interesting write up though while your planes look great, the game isn't very photogenic compared to your normal setups :-)
ReplyDeleteWith so many variables and very step-by-step movement, you might need a bit more of a loose touch for solo gaming.
Ha-ha, you looked! I was wondering if you were gonna swing by.
ReplyDeleteNot photogenic!? Are you saying you miss my rug-hills? That can be arranged.
Whaddaya mean with 'loose touch for solo gaming?'
Eh, I'll send ya an e-mail, I want to ask you some other stuff anyway.
V/R,
Jack
I do feel a Jack Report without some carpet is like an alcohol free beer.
ReplyDeleteBastard...
DeleteHey, I like your hills. You talk to yo mama with that mouth? :)
DeleteOccasionally...
ReplyDeleteCheck your e-mail.
V/R,
Jack
I play a spaceship game and you bag me for straying. Three words: pot, kettle, black.
ReplyDelete:-)
First, historical (or at least quasi-historical) beats Sci-Fi every day of the week, and twice on Sunday ;)
ReplyDeleteSecond, no one bagged you for going to spaceships, it was going for that nonsense you call 'Ancients' ;)
Anyway, of course I'm kidding, and I keep thinking about both X-Wing and Dux Bellorum, I just don't have time! I hope all is well Shaun.
V/R,
Jack
Jack.
DeleteI have to apologise - i actually do not think it was you on the spaceships, but Panda-John! The Ancients bagging I can take as it comes from someone that plays Napoleonics :-)
Don't play X-Wing! It is very addictive. I played on a cruise a few years ago and have so far resisted. Luckily a friend has given me his Wings of War (the WW1 game that lead to X-Wing). I have played that a few times over the Christmas break (with friends so non-solo) so I can get my fix that way.
All is well except I cannot seem to find time to do any gaming. Having fun with family etc but I just cannot seem to find time to push a figure. I am starting to twitch.
Well, don't be too hard on the Panda, he is a modeler and not a wargamer after all, and that sort is much more sensitive. And hey, at least Napoleonic troops have guns!
DeleteI'm afraid X-Wing can't be avoided, but at least I'll not make excuses about family taking up too much time, I'll take photos and post them! And it seems you're forgetting the point of 'small troops on a small table,' especially your brilliant 'game in a drawer.'
I will say, to my shame, I've never done that, never played a 'piece' of a game, walked away, then come back to it later. Despite being inspired by your setup, I still end up only playing if I have time to do the whole game at once...
And I know exactly what you mean about the twitches. My wife knows she has to let me play every now and again or I become even more of a @#$% than usual...
I'm glad you left it at 'having fun with the family,' and didn't go into spending time on tropical islands again ;)
Good luck with the games, and take care.
V/R,
Jack