All,
JCSOG was called to its first action last weekend, though I'm only now getting around to writing it up.
Situation: A meeting is set to occur at 1000 local time between JCSOG Intelligence Officers Sparky and Slick and their asset, Halfstep. The plan is to establish contact at a local open air cafe then move via automobile to a secure location to collect Halfstep's information. JCSOG expects Halfstep to provide information regarding an OTW weapons cache to be used in an upcoming terrorist attack.
Mission: JCSOG is assigned as security for the intelligence collection, with all four teams in support. Team 1 is being split: two Tm1 men infiltrated the area overnight to perform 'green-side' reconnaissance and surveillance (R&S), while the other two Tm1 men will drive/provide security for Sparky and Slick in a locally procured automobile. All four Tm4 members infiltrated the local area on foot (in civilian attire, weapons concealed) and took up positions near the initial contact point not later than 0945. Teams 2 and 3 are on standby at a local airfield as the Quick Reaction Force (QRF) in two MH-60 Blackhawks. Sparky and Slick will establish contact with Halfstep, get him to their automobile, and drive him to a nearby safehouse for debriefing. As they exfiltrate the area Tm4 and the two 'green-side' R&S men from Tm1 will collapse back to the QRF location. Due to the area being highly populated by indigenous locals, there will be no supporting fires available.
Unit Roster:
Platoon Commander - HONCHO, John J. Baxter, USA SFOD-D
Team 1
1. HAMMER, Blaine B. Chalmers, USA Special Forces
2. THISTLE, William H. Halbeard, UK Royal Marine
3. SCORECARD, Dov A. Stenkman, Israel Mista'arvim
4. DERBY, Ronald M. Whitsell, Australia SAS
Team 2
1. MACE, Ivan A. Chernenko, CIS Spetsnaz
2. LANCER, Wen Lee Jiang, China PLA Special Reconnaissance
3. TUMBLER, Raymond D. Albert, USMC MARSOC
4. DRAGON, Julio C. Aleaga, Brazil Brigada de Operacoea Especiais
Team 3
1. CORKSCREW, Thomas H. Atkins, UK SAS
2. FOGHORN, Dieter Steinkamp, Germany GSG-9
3. BALLPARK, Chance A. Vought, USA Ranger
4. TRANSIT, Pierre C. Charleroi, France Foreign Legion
Team 4
1. TORCH, Sylvester A. Rockingham, USN DEVGRU
2. PESO, Rene E. Tourne, France GIGN
3. SNAPSHOT, Mahmoud A. Shalabi, Jordan JSOC SF Brigade
4. APOLLO, Eirik C. Morgensen, Norway Forsvarets Spesialkommando
Overview, with bad guy 'hotspots' (1-6), buildings, bridges, Hill 25, and Initial Contact Point (ICP) labelled. North is up.
East side of board.
West side of board.
Friendly forces, clockwise from top left: Slick and Sparky at top left with locally procured auto, Tm1 (split, two in civvies, two cammied up), Tm 4 (all four in civvies), Tm3 with Helo 1, Tm4 with Honcho and Helo 2.
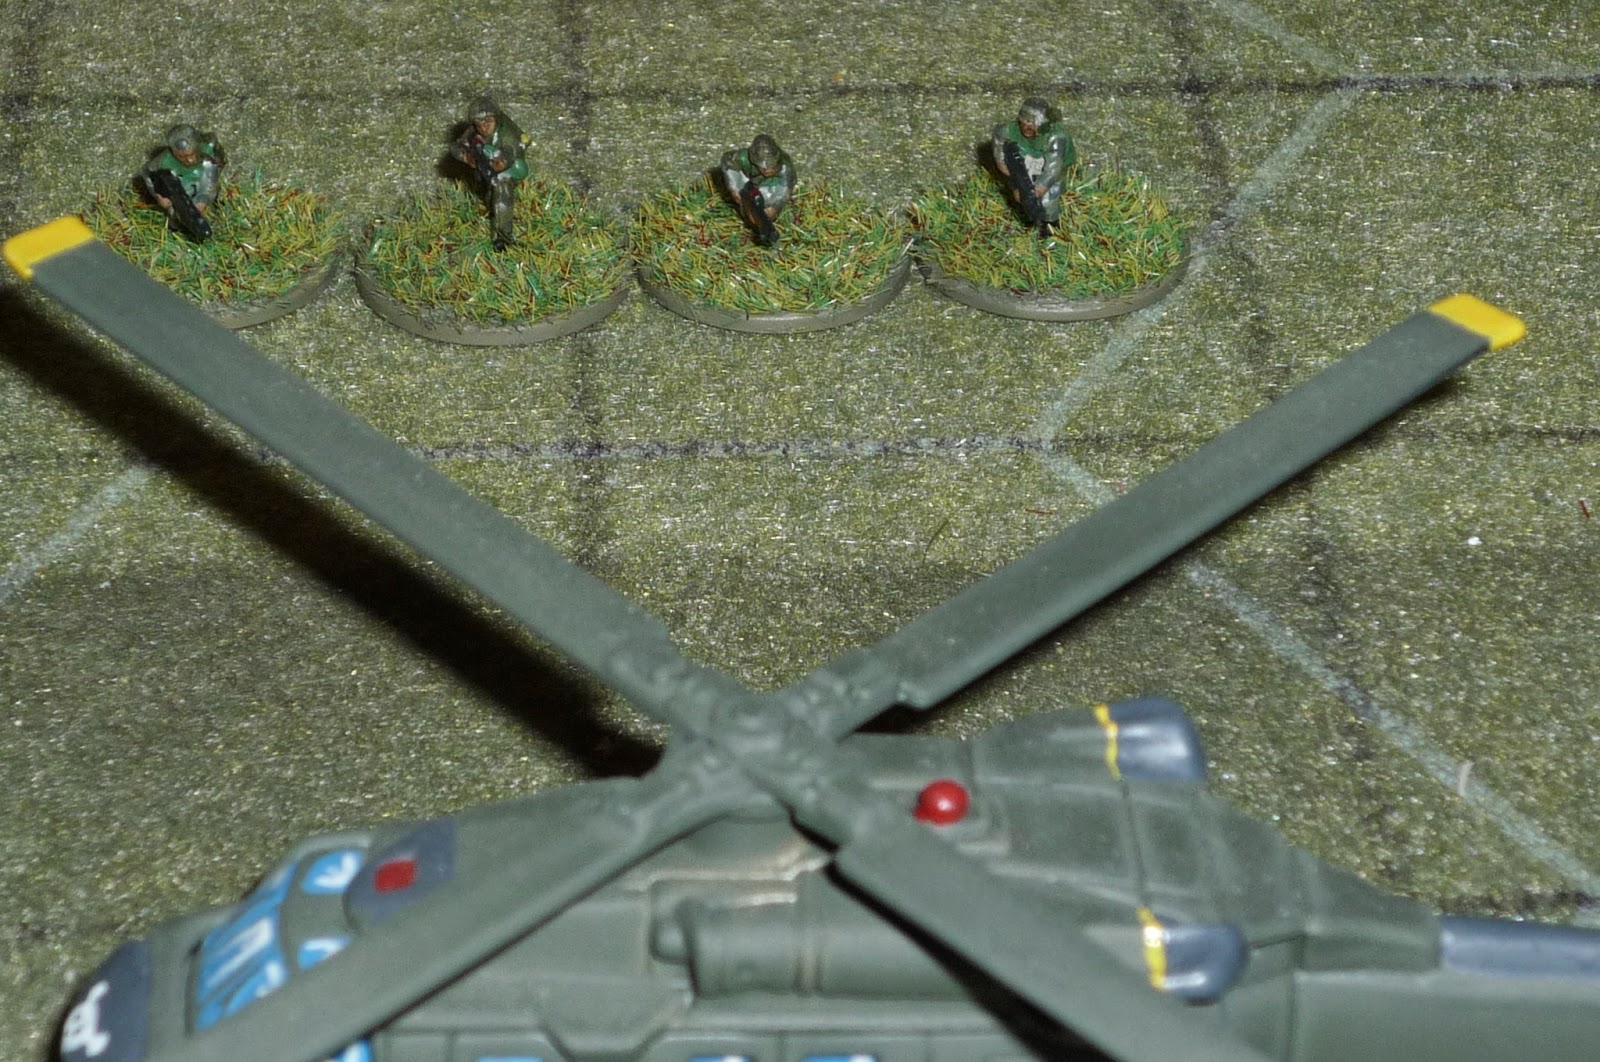
Slick and Spark with car, with Hammer and Thistle directly behind them, and Scorecard and Derby to their right (with the green faces and hands). I know this will be confusing, but please ignore the guys in the last line; their bases are marked so I know who everyone is, but I'm using other figures for certain guys doing 'different' missions, i.e., the two Tm1 guys driving the Intel officers and the two Tm1 guys that crawled in overnight and are going to be lying in the bush.
Honcho, with Tm2 behind.
Tm3.
Tm4 (again, I've put their 'normal' figures behind them so I could figure out who was who since they're wearing civvies).
Scorecard, dead center, watching the auto bridge from his hide just below hill 25, looking NE.
Derby, in his hide looking NE at the railroad bridge.
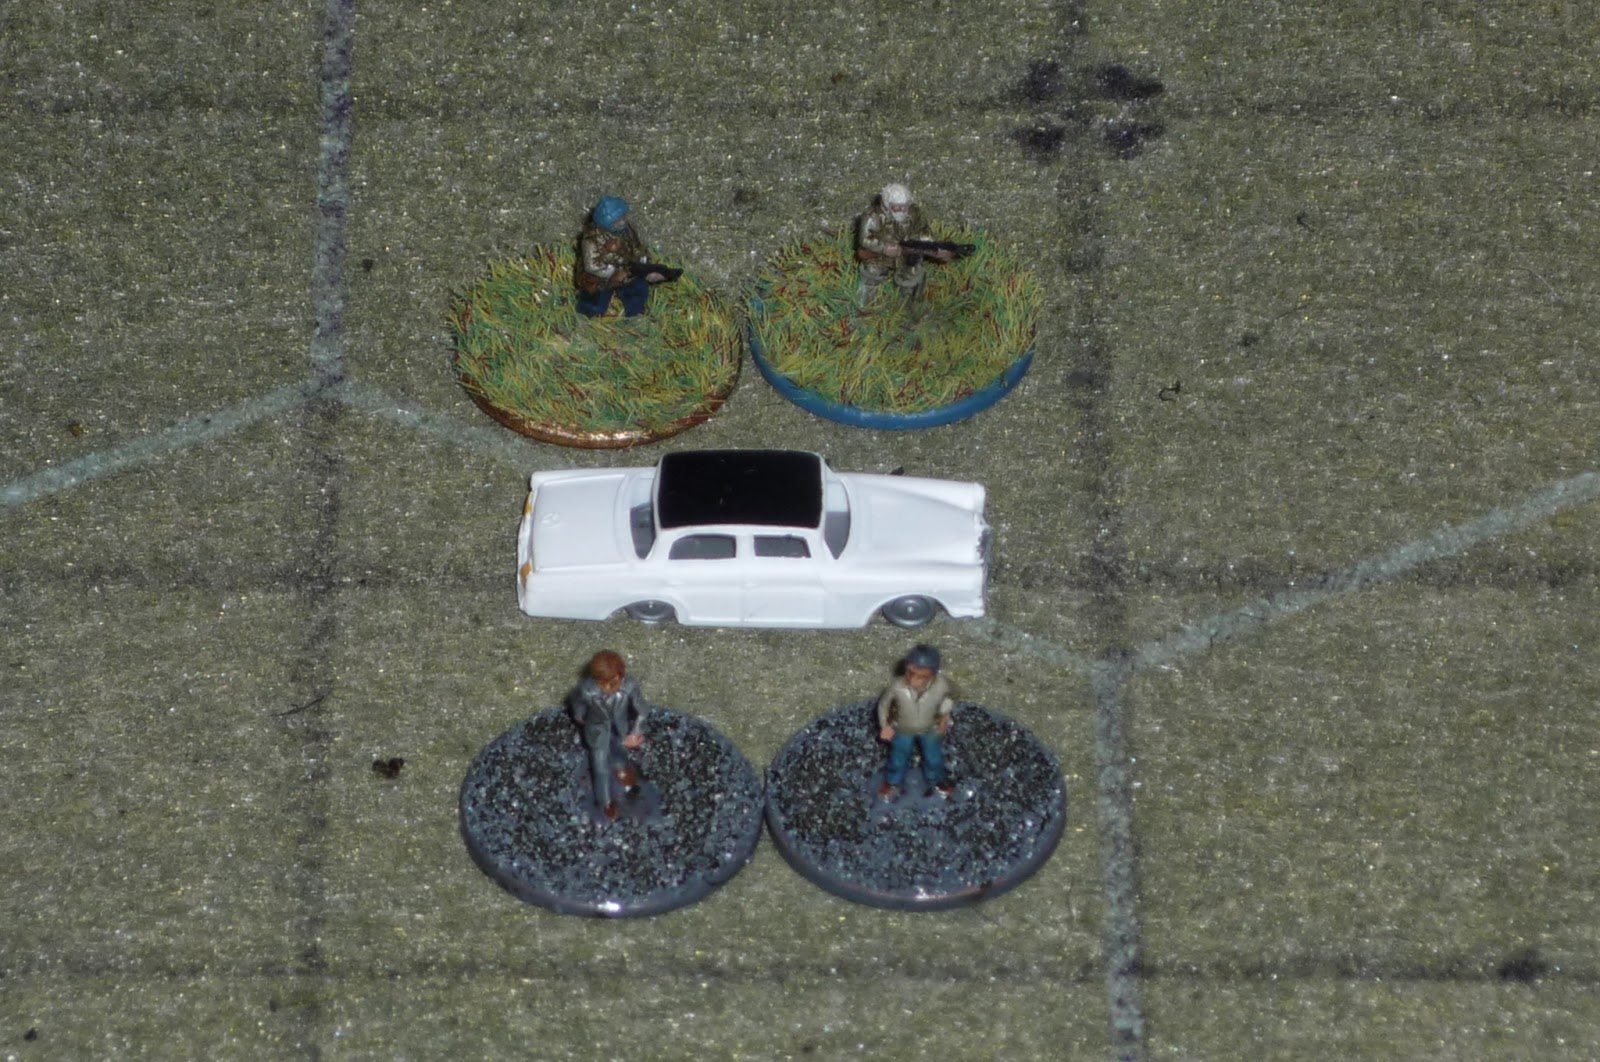
Tm4's deployment near the asset, Halfstep (bottom center with gray base). Torch is at top right behind wall, Peso is at top left behind wall, Snapshot is at mid-right behind building, and Apollo is at center left behind fountain.
The locally procured auto, with (clockwise from top left) Hammer, Thistle, Sparky, and Slick.
0955, and the auto driven by Hammer and carrying the two JCSOG Intel guys is on the way to the ICP.
Approaching the auto bridge, a red auto darts ahead of Hammer's vehicle (you can see Scorecard in the bushes).
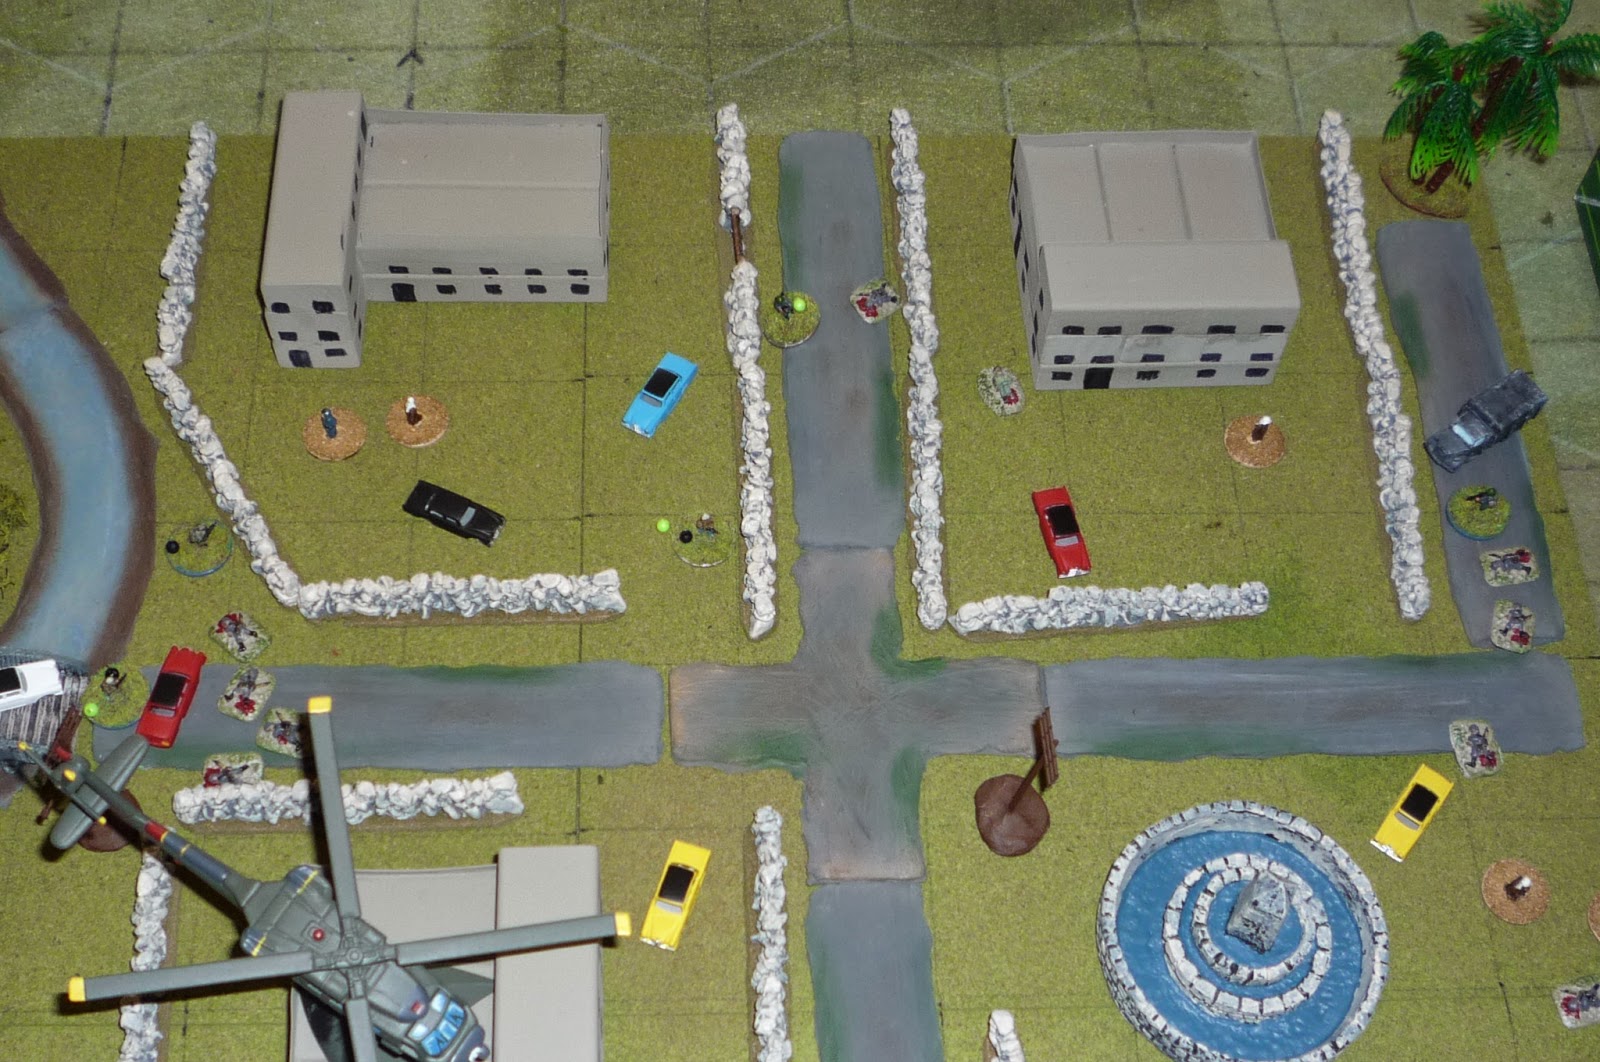
As soon as it crossed the bridge, the red auto slams on its breaks! Scorecard (bottom left) and Torch (top right) both mutter profanities as it's about to hit the fan...
Simultaneously, a truck arrives at hotspot 3 (that's Snapshot at center left)...
And another at hotspot 5 (with Derby at bottom left and Peso at top left).
As soon as the red auto hit the breaks and pops the door, Hammer is doing the same, shouting an order to dismount and engage as four 'Oscars' exit the red auto.
At the SE corner (hotspot 5), four Oscars pop out of the truck near the RR bridge.
While four more Oscars pop out of the truck at the NE corner (hotspot 3), and begin moving south. Clearly there has been a compromise as they are heading directly towards JCSOG's asset, Halfstep.
At the auto bridge, an Oscar gets off the first shot, narrowly missing Hammer, who returns fire, putting two Oscars down, while Thistle darts across the bridge and takes shots at both remaining Oscars, missing both! Sparky takes off running back to the west, away from the fight. He is an intel guy... Meanwhile, Scorecard, in the bushes, puts down another Oscar. The remaining Oscar shoots at Hammer and Thistle, missing both.
At the ICP, an Oscar gets to Halfstep and grabs him! At the fountain, Apollo sees this and realizes he must take immediate action to safeguard the asset.
So he dashes forward to the black auto, pops the Oscar that grabbed Halfstep, and another to the north.
The Oscar LMG (center right) fires at Snapshot (behind bldg at center), missing, while his partner fires and gets a pin on Torch. Snapshot returns fire and takes the Oscar LMG out.
The Oscars at the RR bridge (bottom right) open up on Peso (top center), unleashing a torrent that ultimately puts him down (JCSOG's first casualty)! Derby (bottom left) hops the tracks to get in better position, and pops one of the Oscars.
Torch (center left) fires at the Oscars at the RR bridge (bottom right), getting one, while one Oscar moves to the wall near the fountain, setting up for a shot on Apollo (top center at black auto).
At the NW corner, Slick falls back to join Sparky, just as an Oscar shows up at hotspot 1.
Another Oscar comes on at hotspot 2, between Torch and Snapshot. He fires at Snapshot but misses.
Another Oscar comes on at hotspot 4, right next to Apollo and Halfstep.
Things start to head a bit south in Turn 2... The Oscar at HS2 fires at Snapshot, but his body armor saves him! However, the Oscar at HS3 (far right) is some sort of dead-eye, and he quickly puts down Snapshot and puts a second pin on Torch...
While in the NW corner at HS1, the Oscar opens up, putting Slick down.
At top right, the Oscars at the wall put down Apollo in a torrent of gunfire, leaving Halfstep once again unprotected. Also, the Oscar RPG gunner at the wall faces about and fires at Derby (bottom left), to no effect.
At the auto bridge, the Oscar opens up on Hammer and Thistle, getting a pin on Thistle and putting Hammer down, while Thistle's return fire is inaccurate. Scorecard moves up to the white auto and misses the Oscar...
The activation system in these rules are card-driven, and what you have just witnessed is about seven bad guy cards in a row, combined with some pretty good dice rolling for shooting by the bad guys. Then some pretty poor dice rolling for shooting by the good guys...
Meanwhile, two Oscars arrive at HS 6, and one each at HS2 and HS4, Derby put down another Oscar near the ICP, Sparky was able to dispatch the Oscar at HS1 (the one that shot Slick, his partner), and another Oscar came on at HS3. Lastly, Torch managed to rally one of his own pins off (bringing him back down to one).
And then the cavalry arrived! Helo 1, carrying Tm3, swooped in and came to a hover over Hill 25, while Helo 2, carrying Tm2 and Honcho, did the same over Bldg 4.
On the auto bridge, Scorecard moves up to the wall near Bldg 1, while Torch fires at the two Oscars in the street at HS2 (between Bldgs 1 and 2), getting one, while Thistle, still at the bridge, fires across the board to HS1, putting one Oscar down.
The Oscar LMG at HS4 (near the asset, Halfstep), fired at Helo 2, but missed, while one of his partners hopped the stone wall and moved towards Halfstep as Honcho and Tm2 fastrope out of Helo 2 onto the roof of Bldg 4 (far left). Mace fired a grenade at the cluster of Oscars at the wall near the asset (center), dropping two of them, then fired his rifle at the Oscar next to Halfstep, putting him down!
Oscars at HS3 (top right) fire at Tm2 on Bldg4, to no effect, and Lancer returns fire, missing one but dropping an Oscar at HS2 next to Torch and Honcho moved to Torch.
And Tm3 fastroped out of Helo 1 onto Hill 25. One of the Oscars at HS6 (bottom left) moved up but was unable to fire, and Ballpark put a pin on him before Transit dropped him and put a pin on the remaining Oscar, who returned fire to no effect as Ballpark and Transit were in cover behind the wall atop Hill 25 at center.
At the RR bridge, Derby crossed over, reaching the Oscar truck and killing HS5, while Corkscrew and Foghorn sprint down Hill 25, almost reaching the RR bridge.
An Oscar came aboard at HS1 (far left), so Sparky picked up Slick (center right) and began moving east up Hill 25 to link up with Tm3.
Another Oscar comes on at HS2 and takes a shot at Torch (center left, with Honcho next to him), but the round travels wide. Atop Bldg 4, Dragon returns fire, putting a pin on the the Oscar that just shot as well as one of the Oscars at HS3 (top right).
A flood of bad guys show up at HS3 (top right) and HS4 (bottom right); from HS4, one of the Oscars hops the stone wall, runs over to Halfstep, grabs him, and drags him back to the stone wall, while from HS3, an RPG shrieks in and slams into Bldg 4, but miraculously no one from Tm2 is injured, and Tumbler's return fire silences the RPG gunner. More Oscars rifle fire comes in on Tm2 from HS3, to no effect.
The Oscar at HS1 (top left) takes a shot at Sparky (center, carrying the wounded Slick), and gets a pin (green bead), but Transit opens up and takes him and the Oscar at HS1 (bottom left) down.
Mace bloops another grenade out, this time on HS3 (top right), putting two Oscars down and putting a second pin on another, while Honcho unpins Torch (top left center) and takes a shot at the Oscars at in the street at HS2 (top center), but misses. Fire from HS3 is directed at Torch, to no effect, while Scorecard (top left) hops wall and moves up towards Bldg 1.
Meanwhile, Derby moves east towards Bldg 3, firing at the Oscar holding Halfstep on the north side of the wall, pinning him and closing HS4. An RPG comes on at HS3 and fires, hitting Bldg 4 again, putting a pin on Lancer, who returns fire, putting the RPG gunner down.
Then Torch loses his mind and decides to hop over the stone wall into the street with the two Oscars at HS2, and put them both down.
Corkscrew and Foghorn make their way over the RR bridge and move forward towards Bldg 3, which Derby has mounted. Once he did that, Derby then took out the Oscar holding Halfstep captive.
More bad guys keep showing up at HS6 (bottom left), and Ballpark and Transit (center) continue to lay them down as Sparky drags Slick over to link up with them on Hill 25.
Corkscrew and Foghorn rush up to the wall and take control of the asset, Halfstep. "It's about damned time, are you trying to get me killed?" That's Derby at bottom center, atop Bldg 3.
Corkscrew and Transit quickly haul Halfstep south to the (formerly) Oscar truck and get him in.
Torch (center left) goes for a vehicle while Thistle (far right) provides overwatch for Honcho and Scorecard to round up casualties (center).
Ballpark, Transit, and Sparky moved Slick down to the SW Helicopter Landing Zone (HLZ), just as Derby, Corkscrew, and Foghorn showed up in the truck with Halfstep.
Tm2 withdrew to the NW HLZ, meeting up with Honcho, Torch, Thistle, and Scorecard bringing in the wounded in the blue auto.
And the Helos set down at the HLZ's for extraction, mission complete.
Mission accomplished, insofar as Halfstep was located, taken into control, and extracted for debrief, along with every other JCSOG member. However, Honcho is not happy as clearly there is a leak, which lead to the ambush, Halfstep's cover is blown, and Hammer, Peso, Snapshot, Apollo, and Slick went down in the fight. Having said that, the special operations teams engaged a reinforced platoon's worth of OTW troopers, who incurred thirty known casualties.
Once they get back to base we'll be able to figure out the status of the injured men. I've got another report to write up, but I've been having some @#$% internet connectivity issues...
V/R,
Jack


Nice report with a splendid terrain!
ReplyDelete