All,
A list of stuff I want to accomplish before I spend another dime on buying new lead, in no particular order:
1. Finish 20mm Elhiem Modern skirmish troops.
2. Finish 20mm terrain for them.
3. Finish 20mm Valiant US (need ATGs).
4. Finish 20mm Valiant Brits (need ATGs).
5. Finish 20mm Valiant Germans.
6. Finish 20mm PSC US/Brit vehicles (need to buy another set of Shermans).
7. Finish 20mm PSC German vehicles.
8. Finish Winter US 10mm.
9. Finish Winter German 10mm Early Winter.
10. Finish Winter German 10mm Late Winter.
11. Finish Winter Russian 10mm.
12. Finish Early War Brits 10mm.
13. Finish Desert War Brits 10mm.
14. Finish Desert War Germans 10mm.
15. Rebase Modern FFL 10mm.
16. Rebase Modern USMC 10mm.
17. Rebase Modern WarPac 10mm.
18. Repaint Falklands Brit 10mm.
19. Rebase Falklands Argentinian 10mm.
20. Rebase Modern Irregulars 10mm.
21. Paint and base Modern 6mm WarPac (green).
22. Paint and base Modern 6mm WarPac (khaki).
23. Paint and base Modern 6mm NATO.
24. Finish Modern 6mm aircraft (need magnets).
25. Figure out what to do with all my 10mm La Petit Armee troops, to include the spare crap I have in a box in the garage.
26. Figure out what to do with all my 10mm GHQ ACW troops.
27. Finish my Vietnam US 10mm.
28. Finish my Vietnam NVA 10mm.
29. Finish my Vietnam VC 10mm.
30. Finish painting my 6mm HR WWII infantry, and base them.
31. Rebase my 6mm WWII vehicles.
Stuff I want to get to/get back to/keep going (that I pretty much already have):
1. Keep going with KG Klink, WWII.
2. Get back to All Americans, WWII.
3. Get back to FFL, Modern.
4. Start Solomons Campaign, WWII, with land, air, sea (capital ships), and sea (torpedo boats).
5. Start USMC, Modern.
6. Get back to In Country, Vietnam, at company level.
7. Get back to Battle of Britain campaign I started years ago...
8. Cuba Libre!
9. Start Confederated Baltic States campaign between Liberals and Sirellists at squad, company, and brigade level with three sets of rules in three scales (20mm, 10mm, and 6mm). Maybe even throw in some 3mm air gaming?
10. Once my FFL campaign catches up, get into an Armageddon-style (US, Brit, France, and Israel all fighting various Islamist forces) fight in Perplakistan.
11. Play some serious Caen, WWII, using Britton Publishers books (Jupiter, Bourgebus Ridge [Sp?], and one more who's name I can't remember) for the Brits, maybe the US too (Unternehmen Luttich and Arracourt). Maybe 10mm, maybe 6mm, dunno.
12. Hell on Wheels, probably in 6mm with higher echelon bases to get it moving faster. Or play smaller fights...
Stuff I'd like to do that I don't have gear for:
1. Some sort of modern/Cold War-era Naval stuff, probably in 1/3000.
2. Some sort of Israeli stuff, probably in 3mm, maybe 67, 73, or 82, or maybe even a fictional.
3. Some sort of US vs Soviet, in the US, maybe 6mm or 3mm, using older stuff, like M-60s vs T-62s, the campaign played out on a map of the States ("dammit, Iowa just fell to the Russkies!"), with air gaming as well.
4. Some sort of re-fight of the Falklands, except it has brutal, drawn out fighting.
5. Some sort of re-fight of Desert Storm, except is has brutal, drawn out fighting.
6. Some massive fictionalized American Civil War, but with Napoleonic troops (weapons, uniforms). Don't know if 10mm or 6mm for this.
7. Some big ass Colonial campaign, probably in 10mm, but possibly 6mm, that hits them all: NW Frontier, Sudan, Egypt, Zulus, Boers, hell, maybe just make some up, but follow some unit through all of them.
8. I'd like to get into 28mm Pulp (20's and 30's era) stuff at some point, maybe 30's Gangsters too. Maybe 60's spy stuff as well... My kids dig it whenever I look on the net, and I think the wife would like it too.
9. Someday I've got to get into the Peter Pig classic AK-47 Republic. I don't mean with those rules necessarily (probably not, I've got too many sets I'm already comfortable with), and maybe not in Africa, maybe "Banana Republic" in South/Central America, but the concept: real old to real new gear, multiple factions, shifting alliances/allegiances, various non-military aspects affecting the fighting (monetary, religious, political, fame, etc...). The only thing that bothers me about this is that I seem set on doing it with PP 15mm, and I hate 15mm! But those PP modern lines look so damned good, and it needs to be bigger than my usual 10mm (or 6mm) as I want to be able to see the characters. I'd thought about 20mm (still am, I guess), but I want lots of stuff on the table, and I probably can't afford it in 20mm...
There will be more to come, this list will be updated.
V/R,
Jack
Sunday, January 25, 2015

Saturday, January 24, 2015
KG Klink, Poland, Game 10
All,
It's 1400, 14 Sept 1939, and, following its success in repelling a local Polish penetration on 12 September, the KG has been busy shoring up its cordon and patrolling aggressively to determin enemy strength, dispositions, and intentions. 10th Army HQ iterated several threats to 4th Pz Div that never really materialized, and then patrols determined the enemy had seized the town of Lokoshawo (fictional); Col Klink was determined to get there the 'firstest with the mostest' (i.e., a hasty attack using forces immediately to hand, as opposed to a deliberate assault), and so he launched a detachment to clean the enemy out of the town, dispatching the bulk of the 2nd and 3rd Grenadier Platoons, along with two tanks of 4th Panzer Platoon, let by the Schutzen Company commander, 1Lt Freitag (wearer of the Iron Cross 2nd Class).
 The opposing forces: a small infantry force armed with several anti-tank rifles supported by a single medium tank, versus a largely German infantry force backed by a pair of tanks.
 The Germans: 1st Lt Freitag commanding, Sgt Mangold's Pz Mk IV, Cpl Graebner's Pz Mk II, and LCpl Steinkamp's MG34 supporting three squads of 2nd Lt Tausch's 3rd Platoon (Sgt Schlesssinger, Cpl Nader, and Cpl Hauer), and three 2nd Platoon Squads (Sgt Aust, Sgt Haas, holder of the Iron Cross 2nd Class, and LCpl Axthelm).
 The Poles: CO, 7TP medium tank (which looks suspiciously like a Soviet T-26, though they actually do look quite similar), six rifle squads, and four ATRs (which are not separate units, but attached to the rifle squads).
 Overview, north is up, Poles on the left (west, still on blinds, AKA poker chips), and Germans on the right (east). The Germans have 2nd Plt with the Pz II in the north, and the CO, 3rd Plt, the MG, and the Pz IV in the south.
 Germans in the north.
 Germans in the south.
 Poles in the north, very sparse, only two rifle squads (bottom left), one with ATR (German 2nd Plt at top right).
 Poles in the south, opposite 3rd Platoon (off camera to right).
 The fight starts with LCpl Steinkamp (bottom right) moves hit MG34 into position and gets it set up, while Lt Tausch moves his men forward (those are Poles at far left).
 The Poles roll a 'scurry' and aggressively move forward into the park, essentially looking to swarm the German Pz IV and overwhelm it.
 The Germans in the south react by straightening their lines and assigning field of fire to take on the Polish swarm.
 In the north the Poles (far left) move up a bit less rashly, but the Germans, having quite a numerical advantage, push aggressively ahead.
 Then the Germans roll a @#$% scurry (I really needed a firefight, or at least a 'normal' activation)... The Germans don't really have anywhere to go, but the Poles continue their advance in the south.
 While both sides (Poles at center/top center, Germans surrounding from bottom center to right) dance in the north, getting very close to each other, meaning a very quick and violent fight is likely to ensue. In retrospect, the Poles, at least in the north, should probably have been a bit more cautious, trading space for time, but the knowledge the German tank would simply chase them down and pin them for the German infantry to eliminate meant a 'cast of the die' approach not seem all that bad; go big or stay home, right?
All hell is about to break loose, and here's a spoiler alert: this was the shortest (time-wise) fight I've had. The enemies are practically on top of each other, so things happened real quick (minus my bad dice rolling).
 The Poles continue with their rashness: the Polish tank knows the German Pz IV is hiding behind the building, but he's out for blood and charges to point blank range! I decide to reserve my firing dice for return fire (assuming I survive the Polish fire), vice snap fire, and it pays off! The Polish tank moves up and fires, missing Sgt Mangold's Pz IV lurking in the side street. Mangold's gunner calmly lays the gun and fires, and the Polish tank is brewed up! But then a Polish ATR (far left) fires on Mangold's tank, and the rounds are effective enough to pin the crew.
 Then the Germans roll up a firefight; perfect! Everyone fires, but not a single Polish team is eliminated... But everyone in the south is hit: one Polish squad is 'man down' (white bead), two fall back (red beads), and one is pinned (yellow bead).
 In the north (Poles on left, Germans on right/top), everyone fires (the tank and three rifle squads), but manage only a pin. Polish fire pins Sgt Aust's squad...
Then the Poles roll a normal activation, plus a random event: 'Lull,' meaning all their units recover. Uh oh... That's a 'man down,' two hunkers, and two pins that just got back to fighting trim. BS!!!!
 An ATR pops several rounds at Mangold's Pz IV, to no effect, and so another Polish squad moves up (far left); Cpl Nader's squad 'guard fires,' but misses, and so the Poles fire their ATR at Mangold's tank, causing it to fall back and hunker (far right)!!! The Poles are very close to forcing the Pz IV to leave the table...
 Lt Freitag (off camera to right) tries to rally Sgt Mangold's tank, and gets them up from hunker to pin, while Steikamp's MG34 (bottom right) fires on the two enemy squads at the fountain, forcing one to fall back (top left) and pinning the other. Meanwhile, Cpl Hauer's squad (bottom center) moves up and fires, pinning the enemy squad opposite them.
 In the north, Cpl Graebner advanced his Pz II and fired on the enemy squad with the ATR, getting a 'man down' result (but no morale effect on the other squad, center; my dice rolling is really sucking!).
The Poles roll up a normal activation, but another random event, and this time it goes against them. They roll up 'confusion,' one unit may not act this turn. I assign a number to each unit and roll a dice, and it ends up that it's the Polish CO. Not killer, but it does mean they don't get a 'free' shot at rallying/recovering a unit.
 In the south, LCpl Steinkamp's MG34 receives fire (far right in building), but is none the worse for wear, while Cpl Hauer's squad (bottom center) is pinned.
Then the Germans roll a firefight. Since the CO is next to Sgt Mangold's Pz IV, I allow him to try to rally the tank. I roll a '6' which is great, right? Not in these rules (when you're rolling to rally/recover you want to roll 2-5); apparently Sgt Mangold's had taken some damage from the enemy tank and/or the various shots by the enemy anti-tank rifles, for he wheeled his vehicle on one track then rushed away to the rear (Klink should have severely chastised him, or worse, but Mangold and his crew had just knocked out the enemy tank, so we cut him some slack).
 Back to the firefight, and my dice finally come around: Cpl Hauer's squad (bottom center) unleashes a hellacious fire and knocks out the enemy squad opposite them, Steinkamp's MG (just off camera to right) fires and gets man down (top center left), while Cpl Nader's squad (just seen at far right) fires and KO's another Polish squad (at fountain). Lt Tausch and Sgt Schlessinger's squads (top right) fire and force the last enemy squad to fall back (red bead at top left). The enemy has no one to react with in the south.
 And in the north, Cpl Graebner's Pz II forces one enemy squad to fall back (bottom center), while the concentrated fire of Sgt Haas and LCpl Axthelm's squads eliminates the other enemy squad (far left, casualty figure next to the telephone pole).
The Poles are now officially in bad shape: they have their CO, a rifle squad that's 'man down,' and a rifle squad that is hunkered (can't move or shoot) in the south, and they have a rifle squad that's hunkered in the north. The Germans had their Pz IV leave the scene, but otherwise have not lost any units, so this fight is about over.

The Polish CO tries to recover the man-down squad, but fails, so they do it themselves (meaning they are rallied, but they don't get to act this turn), and the other squad in the south rallied itself.
Then, apparently I didn't take any more pictures. But it's okay, but it was pretty straightforward: in the south, 3rd Platoon moved forward and fired, knocking out one of the three Polish squads, which was enough for the Polish CO to grab his last two squads and head for the hills.
Notes:
-Sgt Mangold (Vehicle 2, 4th Pz Plt) knocked out an enemy tank (F10).
-Lost ~10 WIA/KIA
-Caused ~40 WIA/KIA and destroyed one medium (7TP) tank.
That fight was quick, the quickest I've played yet, about thirty-five minutes. so it actually took longer to set up the fight than to carry out the fight, and mostly I think this was due to the Poles really working to close distance quickly. I had two issues, if you will: 1) I rolled up 'urban' for the table's terrain, but I didn't mean to set it up as a damned city, it just sort of happened. I wish I'd have kept it a bit more open, or forced it to house to house fighting (rather than the mad Polish rush through the park in the south). I toyed with the idea of leaving the defenders on blinds (poker chits) until spotted, but that didn't feel like it would have worked out very well.
So, not that it was a bad fight (hell, I won), it's just that I think it would have been a bit more tough and satisfying if the Poles had sold themselves a bit more dearly. Don't worry, the next one was incredibly brutal, bloody, and bananas, I mean, absolutely ridiculous!!!
V/R,
Jack
It's 1400, 14 Sept 1939, and, following its success in repelling a local Polish penetration on 12 September, the KG has been busy shoring up its cordon and patrolling aggressively to determin enemy strength, dispositions, and intentions. 10th Army HQ iterated several threats to 4th Pz Div that never really materialized, and then patrols determined the enemy had seized the town of Lokoshawo (fictional); Col Klink was determined to get there the 'firstest with the mostest' (i.e., a hasty attack using forces immediately to hand, as opposed to a deliberate assault), and so he launched a detachment to clean the enemy out of the town, dispatching the bulk of the 2nd and 3rd Grenadier Platoons, along with two tanks of 4th Panzer Platoon, let by the Schutzen Company commander, 1Lt Freitag (wearer of the Iron Cross 2nd Class).
All hell is about to break loose, and here's a spoiler alert: this was the shortest (time-wise) fight I've had. The enemies are practically on top of each other, so things happened real quick (minus my bad dice rolling).
Then the Poles roll a normal activation, plus a random event: 'Lull,' meaning all their units recover. Uh oh... That's a 'man down,' two hunkers, and two pins that just got back to fighting trim. BS!!!!
The Poles roll up a normal activation, but another random event, and this time it goes against them. They roll up 'confusion,' one unit may not act this turn. I assign a number to each unit and roll a dice, and it ends up that it's the Polish CO. Not killer, but it does mean they don't get a 'free' shot at rallying/recovering a unit.
Then the Germans roll a firefight. Since the CO is next to Sgt Mangold's Pz IV, I allow him to try to rally the tank. I roll a '6' which is great, right? Not in these rules (when you're rolling to rally/recover you want to roll 2-5); apparently Sgt Mangold's had taken some damage from the enemy tank and/or the various shots by the enemy anti-tank rifles, for he wheeled his vehicle on one track then rushed away to the rear (Klink should have severely chastised him, or worse, but Mangold and his crew had just knocked out the enemy tank, so we cut him some slack).
The Poles are now officially in bad shape: they have their CO, a rifle squad that's 'man down,' and a rifle squad that is hunkered (can't move or shoot) in the south, and they have a rifle squad that's hunkered in the north. The Germans had their Pz IV leave the scene, but otherwise have not lost any units, so this fight is about over.
The Polish CO tries to recover the man-down squad, but fails, so they do it themselves (meaning they are rallied, but they don't get to act this turn), and the other squad in the south rallied itself.
Then, apparently I didn't take any more pictures. But it's okay, but it was pretty straightforward: in the south, 3rd Platoon moved forward and fired, knocking out one of the three Polish squads, which was enough for the Polish CO to grab his last two squads and head for the hills.
Notes:
-Sgt Mangold (Vehicle 2, 4th Pz Plt) knocked out an enemy tank (F10).
-Lost ~10 WIA/KIA
-Caused ~40 WIA/KIA and destroyed one medium (7TP) tank.
That fight was quick, the quickest I've played yet, about thirty-five minutes. so it actually took longer to set up the fight than to carry out the fight, and mostly I think this was due to the Poles really working to close distance quickly. I had two issues, if you will: 1) I rolled up 'urban' for the table's terrain, but I didn't mean to set it up as a damned city, it just sort of happened. I wish I'd have kept it a bit more open, or forced it to house to house fighting (rather than the mad Polish rush through the park in the south). I toyed with the idea of leaving the defenders on blinds (poker chits) until spotted, but that didn't feel like it would have worked out very well.
So, not that it was a bad fight (hell, I won), it's just that I think it would have been a bit more tough and satisfying if the Poles had sold themselves a bit more dearly. Don't worry, the next one was incredibly brutal, bloody, and bananas, I mean, absolutely ridiculous!!!
V/R,
Jack
Thursday, January 22, 2015
KG Klink, Poland Game 9
All,
It's 1500, 12 Sept 1939, and KG Klink has rushed west from the Wola suburb of Warsaw, back to the juncture of the Vistula and Bzura rivers, where the Polish Pomorze and Poznan Armies have fought from north (through Guderian's troops) and west (through Von Kluge's troops) to reach each other, then counterattack northeast to relieve Warsaw, while simultaneously fighting southeast to reach the Romanian corridor. With a mix of two German armies and two Polish armies fighting into and out of the pocket at the juncture of the two rivers, and arriving from all points of the compass, the fighting is necessarily confused, and, as the Poles are fighting for their very survival, necessarily fierce.
The situation is such: KG Klink is on the east bank of the Bzura river, where elements of various Polish units are seeking crossings to attack and breakthrough the tightening German noose. 2nd Lt Weider's 1st Motorcycle Platoon was dispatched west along the river, where it found the enemy; a call for reinforcements was immediately made, and 2nd Lt Wehner, the acting Reconnaissance Company Commander led 2nd Lt Wendt's 2nd Motorcycle Platoon to reinforce them, and several tanks of 2nd Lt Gerhart's 3rd Panzer Platoon were dispatched from KG positions further south. The Poles are moving directly towards Lt Weider's 1st M/C Plt, and Lt Wendt's 2nd M/C Plt has just arrived as we pick up the action.
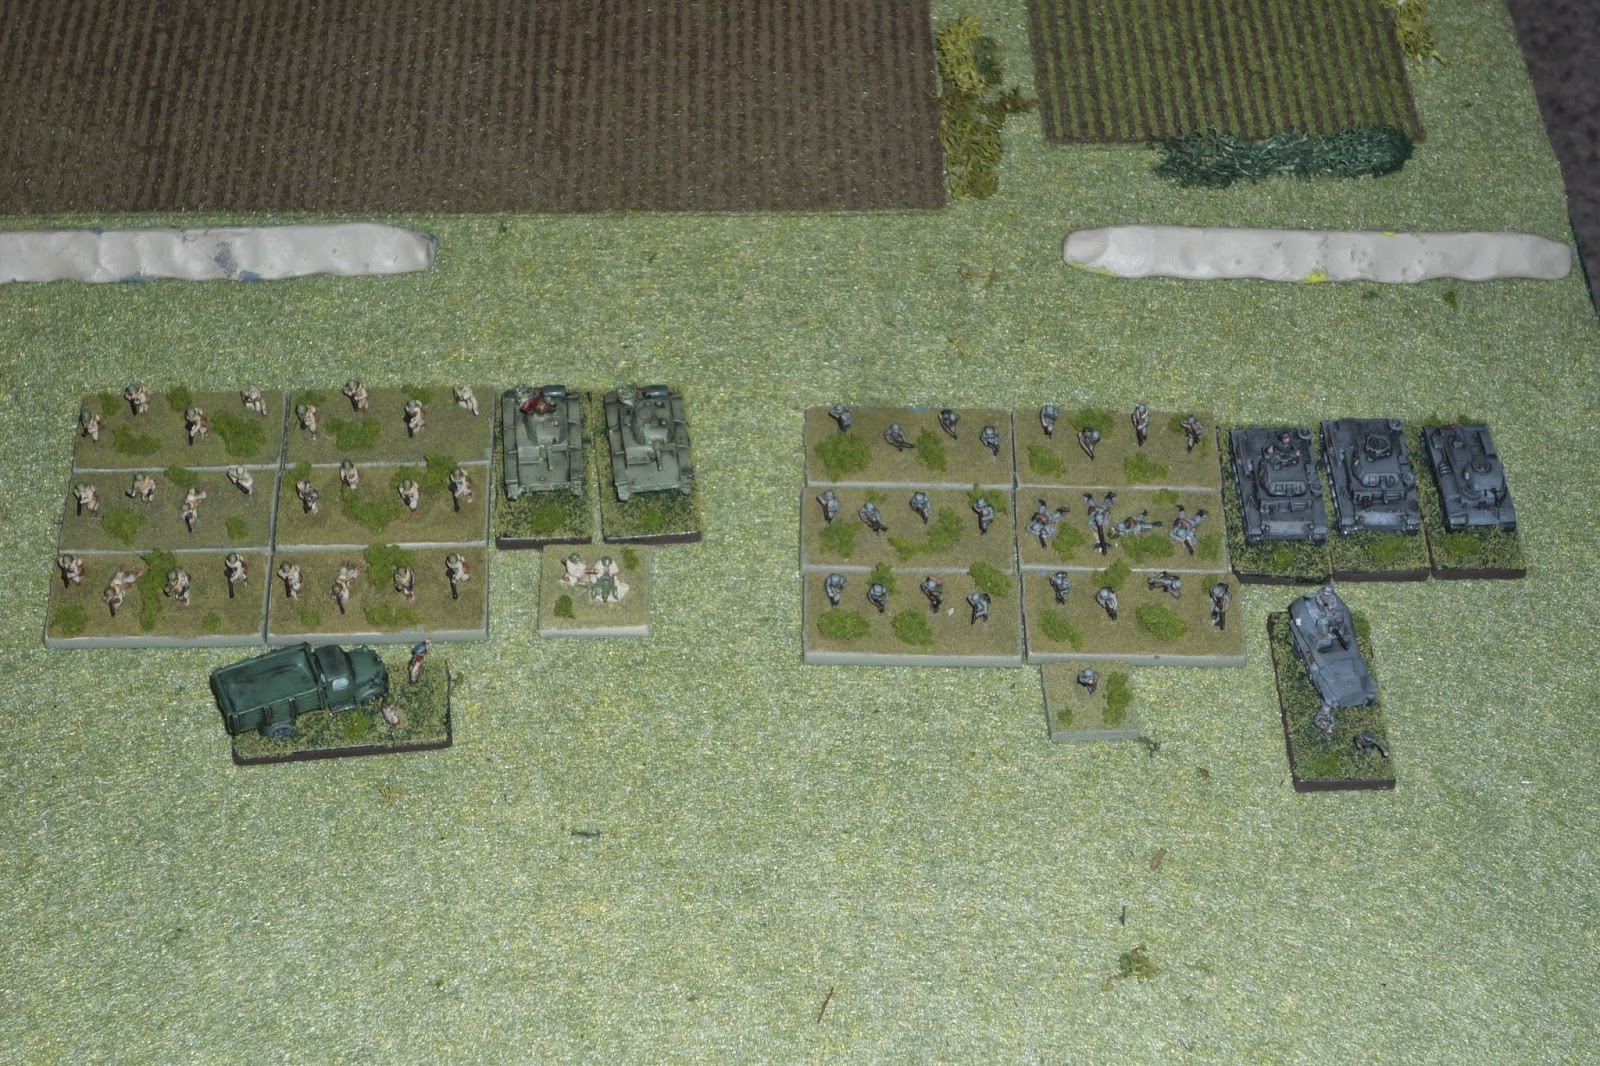 The opposing forces.
 The Germans have two understrength Motorcycle Platoons, and an understrength Panzer Platoon.
 The Poles have six rifle squads, a .30 cal. MG, and two medium tanks.
 Overview, north is up, Poles are on the left (west) and Germans on the right (east). The Poles have one MG and some infantry in the woods at top left (that MG would cause serious problems throughout the entire fight), several squads south of the ford, and two tanks coming across the ford presently. 1st M/C Plt is in the buildings at top right, and 2nd M/C Plt is just pulling in, still mounted. The German 3rd Panzer Plt has just entered the area at bottom right. The German infantry has no heavy weapons and no means for dealing with the enemy tanks, save close combat.
 Looking west at 1st M/C Plt in the buildings and 2nd M/C/ Plt on the road near the river. The CO is on the road below the buildings.
 Lt Gerhart leading two of his panzers forward. They'd have a hard time getting into the fight, and didn't fare so well once they did...
 Closeup of the Polish starting positions, with that damned MG at far right.
 Let the games begin! The action starts with Lt Wendt's motorcycles moving up (far right) and dismounting.
 Then the enemy MG (far left) went to work, laying down a ferocious fire that eliminated Lt Wendt's squad and forced Sgt Behrendt's squad to fall back (casualty figure and red bead at top right), while two of their rifle squads rushed forward.
 The CO, Lt Wehner, moved back and rallied Sgt Behrendt's squad (off camera to top right), while Sgt Sachs's squad (bottom right, from 1st M/C Plt) moves up and fires, forcing a Polish rifle squad to fall back (bottom left) and Sgt Janke's squad (center) moves up and fires, to no effect.
 The enemy gun promptly goes into action again, forcing Sgt Janke and his men back (far right, red bead). The Polish CO tries to rally a rifle squad, but fails (does get them from hunker to pin though), while the Polish tanks get through the ford and begin moving south.
 Sgt Janke rallies his men, and his squad and Sgt Behrendt's squad move up and open fire, eliminating the Polish rifle in the trees at center left. Both sides have lost a unit, so both sides are down to activating only two units on a normal turn.
 Looking east: the Polish CO again tries to rally his troops, and again fails (bottom left), while the Polish tanks deploy to take on the German tanks (top right).
 Then the tank fight gets hot: Lt Gerhart pulls his Panzer III forward, and the enemy (far left) snap fires, immobilizing Gerhart's tank and causing the crew to bail (far right, cotton on tank)! Sgt Friessler pulls his vehicle forward (bottom right) and fires, pinning the Polish tank.
 The Polish tank at far left fires on Friessler's vehicle (bottom center) missing, and Friessler's return fire gets an engine kill, forcing the Poles to bail! I roll it up and the Poles are being very aggressive, so the other Polish tank moves forward to the road (top center, exposing his flank to 1st Motorcycle Plt at top right in the buildings), but it pays off: he acquires Cpl Harms' Pz II (bottom right) and promptly knocks it out...
 Sgt Friessler advances his vehicle then halts behind Lt Gerharts knocked out tank, in place for a flank shot: the enemy tank is immobilized, and its crew bails! I want to be happy about Sgt Friessler's performance, but I already lost Lt Gerhart and Cpl Harms' vehicles...
 Sgt Sachs' squad (bottom right) moves up and fires at the MG (finally someone is in range), but misses.
 And the MG (top left) made them pay, forcing Sgt Sachs, Sgt Janke, and Sgt Behrendt's squads to fall back (top right). Yes, one MG just forced back three German squads... The Polish CO moves up (center left) and rallies the rifle squad there, then leads them forward, where they fire on Lt Weider's squad, forcing them to fall back (they were in the buildings, now they are on the road to the right of the buildings). This is crap!!!!!!!
 Sgt Janke and Sgt Behrendt's squads rally (Janke is a 'Hero,' wearer of the Iron Cross), while Sgt Gradl's squad and Sgt Friessler's tank (bottom center) link up.
 The Poles roll up a firefight, and the MG (top left) fires again, forcing Sgt Janke's squad to fall back again (far right). No other Poles can shoot, and no Germans can return fire, as all the rifles are out of range, and the German tank can't see anything.
 Then the Germans roll a scurry, which is alright with me (I get to try to rally everyone that needs it, and move everyone else without drawing reaction fire), and I also roll a random event: reinforcements arrive (strictly speaking they were supposed to be infantry, but as all the rifle squads in this fight are from the motorcycle platoons, I made them Cpl Zuckert and Cpl Pankau's motorcycle squads)! Unfortunately they don't get to act this turn, which would have been very handy with the scurry... But they did give me more units, which gave allowed me to activate a third unit each turn.
 Sgt Janke rallied his squad and the CO rallied Sgt Sachs' squad, then Lt Weider rallied his squad, while Sgt Gradl and his squad led Sgt Friessler's tank forward. In the north, the CO led Sgt Behrendt and Sgt Sachs' squad forward. The Poles straighten their line in the north, and maneuver aggressively in the center (three squads at far left).
 Then the Poles roll another firefight (good grief): the @#$% MG (far left) rattles, and Sgt Behrendt and Sgt Sachs' squads are thrown back (top right) again!!!
 And then poor Sgt Gradl's squad, leading the panzer, finds itself in the open, staring down three Polish rifle squads. The German rifle squad is eliminated, but the German tank roars back, getting a 'man down' and and pinning the other two Polish squads (yellow beads).
 Then the Germans roll a damn firefight! The tank is the only one who can fire, so he shoots at a rifle squad (top left), managing only a pin... There is no return fire as the Polish MG has already pushed all the German rifle squads out of the area.
 Then the Poles roll a scurry (that's quite a few 1s and 6s in a row, eh?), and the Poles decide to move on Sgt Friessler's isolated tank (they can't rush it on a scurry, but they can use the scurry to get close without drawing fire). At bottom left, on rifle squad upins, the 'man down' squad recovers, but the other pinned squad runs for the hills!
 In reaction, Lt Weider (top right) moves south in the buildings, and Sgt Friessler decides discretion is the better part of valor (his tank is now at center right, having fallen back from bottom left, where those Polish troops are). A lot of my troops can't react because they've fallen back so far they couldn't see any Polish movement...
 The two reinforcing motorcycle squads move up and dismount to support the panzer.
 Then the Poles rolled a regular activation and a random event, smokescreen. So I dropped a massive smokescreen in the center, figuring this would allow the Poles to move up and try to overwhelm the Germans there, while their MG covered the northern sector. The Polish CO leads three rifle squads forward (center/far left).
 Then I get extraordinarily lucky: the Germans roll a scurry! Seeing what's up, Lt Wehner maneuvers all but a small holding force south to counter the Poles' thrust, and the beauty is that, because of their own smokescreen, the Poles can't see anything and thus are unable to react during the scurry!
 The Poles move a squad forward (bottom center), rounding the smokescreen, where they run into Cpl Pankau's squad, which spots them and snap fires, eliminating them (1D6, rolled a 6)!
 The smoke lifts, and it's a slaughter: Sgt Friessler's panzer opens up, knocking out an enemy squad forcing another back. Cpl Pankau's squad (bottom center) chases after them. The Polish CO decides this is where he'll make his stand, and so close combat ensues (Poles are -1 to roll, Germans +1). Good roll for me, bad for the Poles, and the rifle squad and Polish CO are eliminated! The rifle squad at top right surrendered, but that damned enemy machine gun (off camera to top left) slipped away back across the ford.
Notes:
-Sgt Friessler (V2, 3rd Pz Plt) mentioned in dispatches for destroying two enemy tanks.
-Cpl Pankau (1st Squad, 3rd M/C Plt) recommended for Iron Cross 2nd Class for eliminating enemy commander and two rifle squads in close combat.
-2nd Lt Wendt (Plt Cmdr, 2nd M/C Plt) Wound Badge, KIA, F9
-2nd Lt Gerhart (Plt Cmdr, 3rd Pz Plt) Wound Badge, Panzer Assault Badge, KIA, F9
-Lost ~30 KIA/WIA, 1 Pz III, and 1 Pz II
-Caused ~60 KIA/WIA, two 7TP medium tanks
I'm telling you these fights just keep getting better and better. That damned MG, it stopped me cold in the north, the tank fight was quick and violent, and finished with a charge; what's not to like?
More to follow.
V/R,
Jack
It's 1500, 12 Sept 1939, and KG Klink has rushed west from the Wola suburb of Warsaw, back to the juncture of the Vistula and Bzura rivers, where the Polish Pomorze and Poznan Armies have fought from north (through Guderian's troops) and west (through Von Kluge's troops) to reach each other, then counterattack northeast to relieve Warsaw, while simultaneously fighting southeast to reach the Romanian corridor. With a mix of two German armies and two Polish armies fighting into and out of the pocket at the juncture of the two rivers, and arriving from all points of the compass, the fighting is necessarily confused, and, as the Poles are fighting for their very survival, necessarily fierce.
The situation is such: KG Klink is on the east bank of the Bzura river, where elements of various Polish units are seeking crossings to attack and breakthrough the tightening German noose. 2nd Lt Weider's 1st Motorcycle Platoon was dispatched west along the river, where it found the enemy; a call for reinforcements was immediately made, and 2nd Lt Wehner, the acting Reconnaissance Company Commander led 2nd Lt Wendt's 2nd Motorcycle Platoon to reinforce them, and several tanks of 2nd Lt Gerhart's 3rd Panzer Platoon were dispatched from KG positions further south. The Poles are moving directly towards Lt Weider's 1st M/C Plt, and Lt Wendt's 2nd M/C Plt has just arrived as we pick up the action.
Notes:
-Sgt Friessler (V2, 3rd Pz Plt) mentioned in dispatches for destroying two enemy tanks.
-Cpl Pankau (1st Squad, 3rd M/C Plt) recommended for Iron Cross 2nd Class for eliminating enemy commander and two rifle squads in close combat.
-2nd Lt Wendt (Plt Cmdr, 2nd M/C Plt) Wound Badge, KIA, F9
-2nd Lt Gerhart (Plt Cmdr, 3rd Pz Plt) Wound Badge, Panzer Assault Badge, KIA, F9
-Lost ~30 KIA/WIA, 1 Pz III, and 1 Pz II
-Caused ~60 KIA/WIA, two 7TP medium tanks
I'm telling you these fights just keep getting better and better. That damned MG, it stopped me cold in the north, the tank fight was quick and violent, and finished with a charge; what's not to like?
More to follow.
V/R,
Jack
Subscribe to:
Posts (Atom)