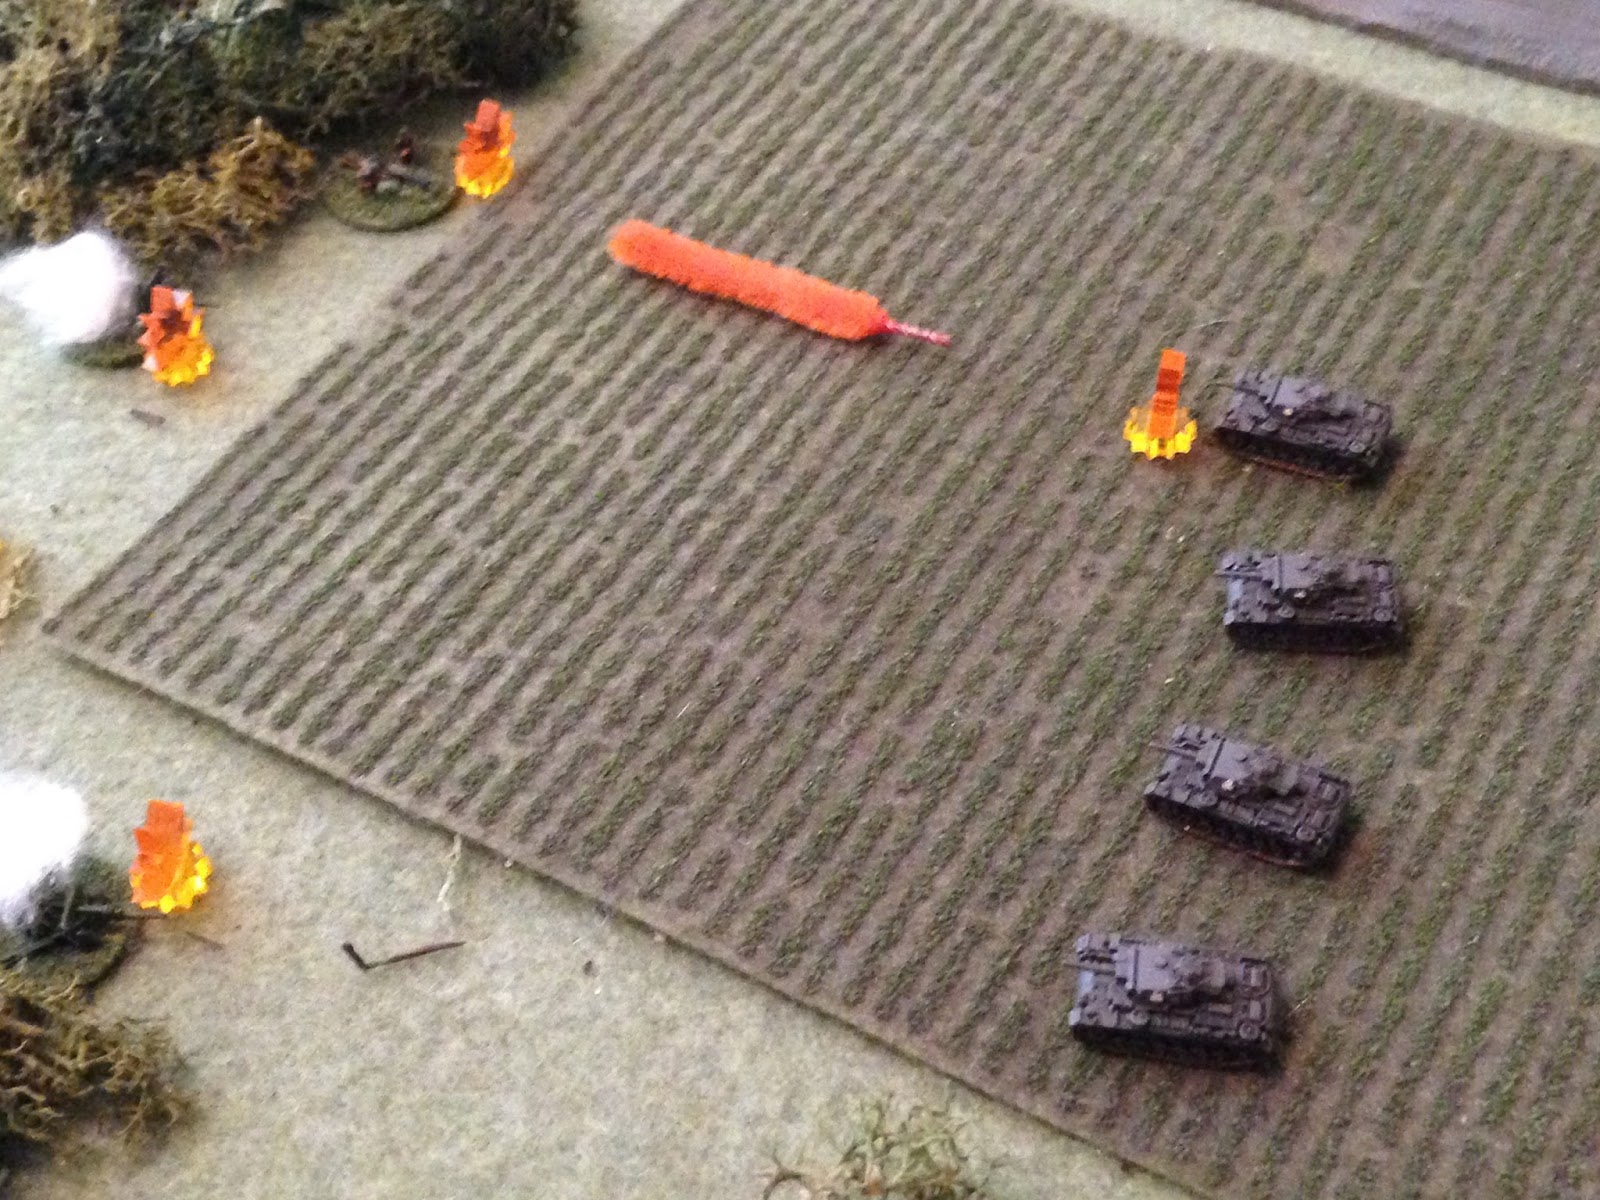
The Wehrmacht is pushing east relentlessly, its men snatching sleep an hour or two at a time. It's 0930 on June 24, 1941, the third day of the invasion. The brothers Mueller have led their platoon onward at speed; following the initial fight on D-Day, they haven't had any real contact. The few Soviets they've seen were either dead (from airstrikes), doggedly retreating, or surrendering, and the platoon paid them no mind, pushing forward towards the bridge serving as the objective for the initial thrust. All four Panzer IIIs are in good fighting order, crews looking for a fight. Good thing, as aerial reconnaissance has reported a strong Soviet presence near the bridge.
Once again this fight is in 6mm Microarmor from GHQ, using Two-Hour Wargames' "Hell Hath No Fury" rules, which I have modified to add in infantry, anti-tank guns, trucks, and armored cars.

As a quick aside, I've gotten questions regarding my PEF table, so here's what I've been doing:
-I use the PEF resolution table from the rules (i.e., the 1D6 roll to determine how many enemy units will come on the board).
-Then I roll 2D6 for force type:
2-5=Tanks
6-8=Infantry
9-10=Anti-Tank Guns
11-12=Truck Convoy
Then I roll 2D6 on the type table (keep in mind these are for Barbarossa and will change as the war goes on):
Tanks
2 = T-34
3 = KV-1
4-6 = BT-5/7
7-10 = T-26
11-12 = BA-10
Infantry
2 = Rifle + Tank(s)*
3-4 = Rifle + Armored Car(s)*
5-7 = Rifle +ATG(s)*
8-12 = Rifle/Anti-Tank Rifles
*When I roll these I come up with a decent (in my mind) mix between the two based on the number of enemy units. For example, if I rolled there will five enemy units, then I roll "Infantry," then I roll "Infantry + Tanks," I will either give the enemy four rifle squads and one tank (if it's a heavier tank), or three rifle squads and two tanks (if they are lighter tanks).
Anti-Tank Guns
2-4 = ATGs + Tank(s)*
5-7 = ATGs + Armored Car(s)*
8-9 = ATGs + Rifle Squad(s)*
10-12 = ATGs
Truck Convoy
2 = Trucks + Tank(s)*
3-4 = Trucks + Armored Car(s)*
5-7 = ATG Convoy; Trucks towing ATGs
8-10 = Infantry Convoy; Trucks carrying rifle squads
11-12 = Dead Meat; a truck convoy carrying supplies of food, ammo, and fuel
Hope that helps.


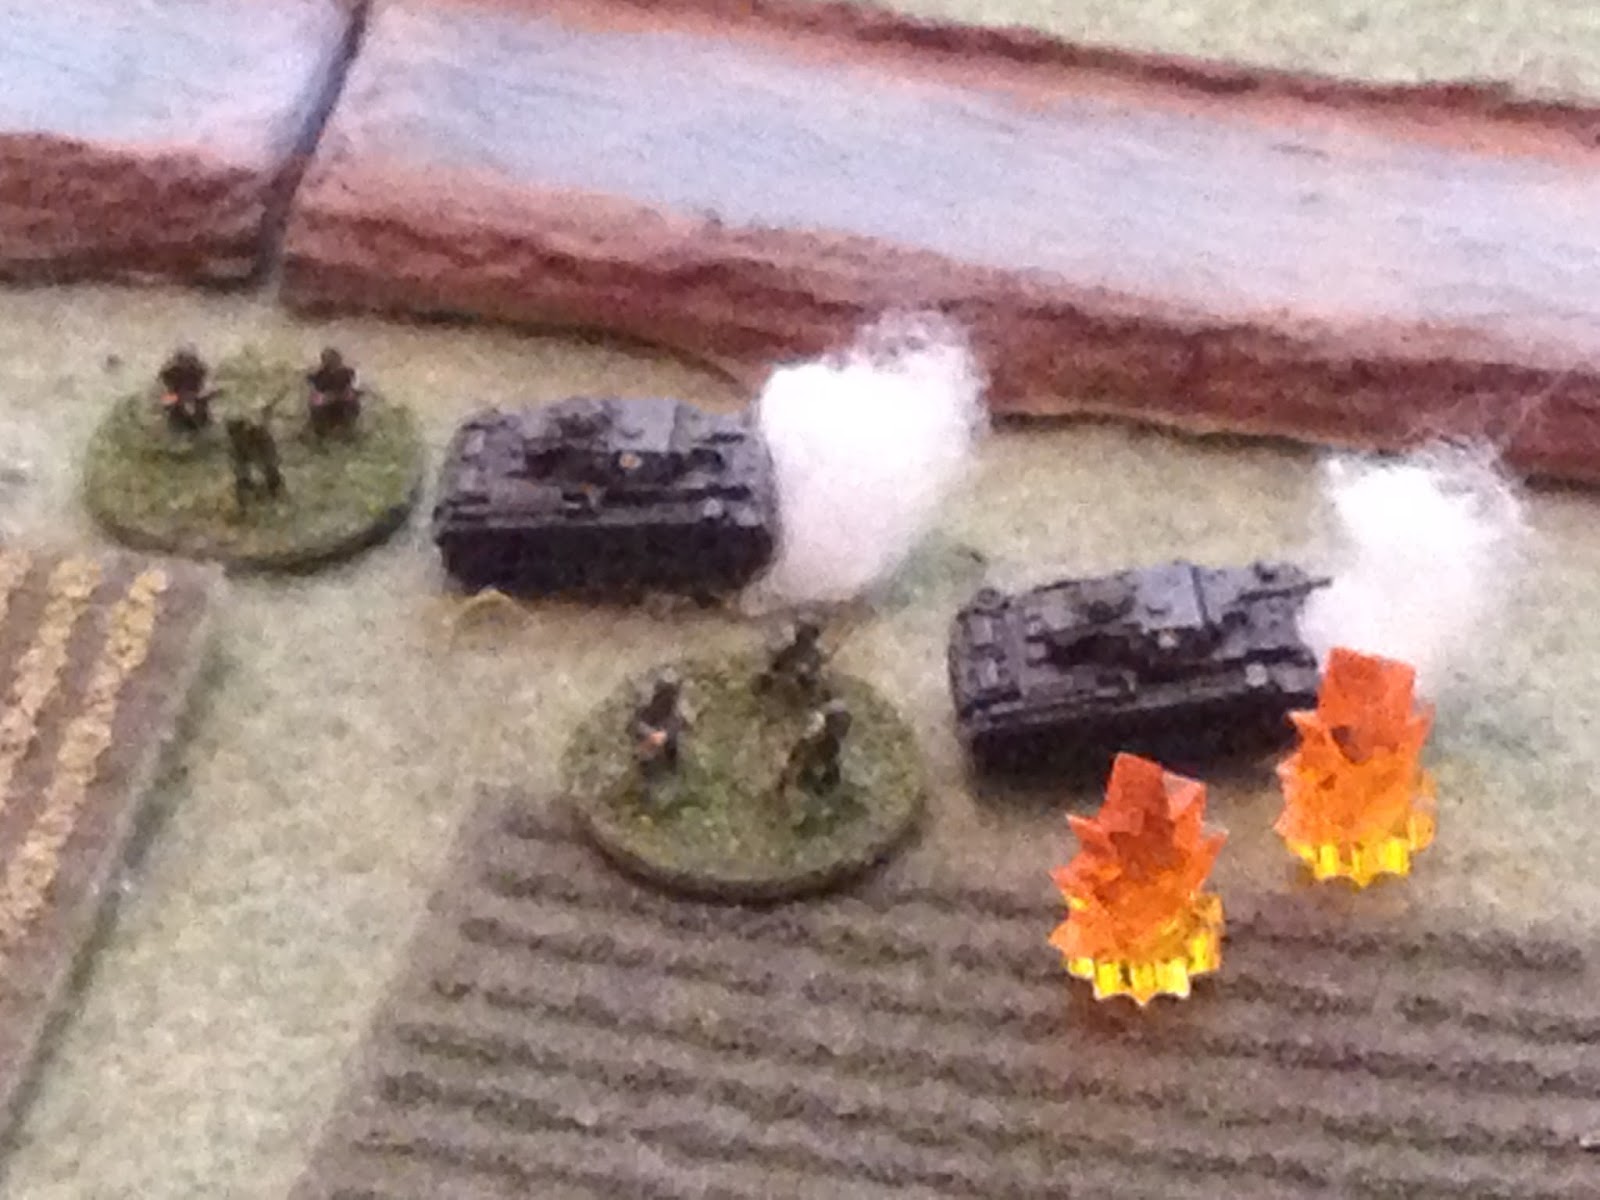
Three shots, three kills. Of course, 201's gunner is a REP 4, as is 203's, and he's also a "crack shot," so REF 5 for all intents and purposes. 202 and 204's gunners are only REP 3, but 202 got lucky I guess. That would soon change...

**Firing at enemy infantry and ATGs, I've got to admit I really don't differentiate in the rules between using HE or coax machine guns if the troops are in the open or woods, only stone buildings or emplacements. I conduct the normal 2D6 gunnery roll; in the open, pass 1 or 2 and the squad/gun is knocked out. If in cover you must pass 2 to knock out a gun or squad. Very quick and simple.

But wait...


Things are not looking good. The PEF is almost on top of us, there's a lone ATR in a rear (off camera to left), and we already know there is more than likely going to be something very ugly on the bridge...


I missed a picture somehow... Sgt Mueller: "Quit screwing around, show some damn discipline! Engage!" 201 fires an AP round at the nearest armored car...

Damn, I missed another pic: brave (and super aggressive) little Cpl Mueller pushes 203 ahead and fires an AP round at the flank of the massive Soviet beast sitting astride the objective...


The only good news is that the KV is slow to reload...


201 (top right) fires on the KV; the round strikes the turret and careens off into the sky. But it was a solid hit and forces the KV-1 to test morale ("Crisis Test")... which it passes with flying colors. Incredible, as the have a REP of 3 (not good).


And then we fail our activation roll, which is pretty hard to do as the two Mueller's are REP 5... Being unable to act this turn means I can't order a withdrawal to at least save 201 and 202...


Oh, and that's after the KV's REP 3 loader passed two dice to reload the gun...
What happened is the Soviet gunner, on REP 3, passed two dice. I then went to the penetration table, and it's not even close/not even fire. I suppose what should have happened is 202 just blew to sky-high without a roll, because the difference between the gun and the rear armor of the Pz III was something like 7, so not even a roll. So I decided to let the Pz III roll something, just to see what happened, without even a thought to what I might do. Well, the kid rolled snake-eyes; not sure what that would mean, but I took it as a sign, sort of like the 'hands of fate' shot when a gun incapable of penetrating a tank rolls snake-eyes it actually accomplishes something. So we rolled snake-eyes and I allowed 202 to survive.


So, 201, 203, and 204 were all knocked out, with 202 surviving only by the grace of God. We really just ran into a buzzsaw, it was too much! I was worried enough just about having to face off against the KV-1, but then we had six ATGs, four rifle squads, and two armored cars to deal with, in addition to that damned KV-1. But it was still fun! I sound bitter because I (and the boy, too) don't like to lose, but I enjoyed it. It was fun, it's realistic to run up against no-win situations, and it makes a great story. We did our best and came up (quite) a bit short. We'll get'em next time!
So, miraculously, Sgt and Cpl Mueller were able to police up most of their crews and make their way west, back to German lines, dodging Soviet patrols and stragglers. Here's the current status of the platoon:
201: Tank destroyed, TC and Driver okay, Gunner WIA, Loader KIA.
202: The only runner (pun intended), and crew all in good condition.
203: Tank destroyed, TC, Gunner, and Driver WIA, Loader KIA.
204: Tank destroyed, crew KIA.
Under normal circumstances we'd have to figure out how to re-crew the vehicles, but as we're out three vehicles we're just going to have to wait a bit on the Division Depot to provide new vehicles and replacement crew members. But soon enough we'll be back in the fight, and the boys are hot for revenge.
V/R,
Jack
Thank you for the report and, more importantly, the insight into how you run your games!
ReplyDeleteOf course the next post must contain the game stats for the various vehicles, weapons and squads. Or I shall hound you relentlessly :)
Kap'n,
DeleteThanks, and no problem. Sure, next post I'll throw in the stats I made up for the various vehicles, no need for hounding ;)
V/R,
Jack
Good game!
ReplyDeletePzIII vs KV1 is just plain scary! With it sitting on that bridge there wasn't much you could do. I am surprised you didn't move back around that last bit of forest to engage the ATGs without having to worry about the KV while doing so. Might have tempted it off of its perch. Hindsight though...
DSG,
DeleteThanks man, and yeah, it was scary. Or really sucked... ;)
Regarding swinging back to the west (bottom of table) to put the wood between the Panzers and KV, remember we didn't spot the second group of ATGs and the KV until we swung around the wood, almost on top of them. I wasn't too keen on trying to screw around, maneuvering in front of them, so we kind of just charged in. Not to mention, the only way to beat the KV was to get practically on top of it.
We hit it several times, but only once were we able to force a Crisis Test, which it promptly passed with flying colors... So we took our ass-whoopin'... Not the end of the world, and we'll be back in the fight this coming weekend.
V/R,
Jack
I am with DSG - a KV-1 would be scary stuff to come up against in '41. And passing 2d6 on REP 3 - how dare they? :-)
ReplyDeleteI do like the way you gave 202 a chance and snake-eyes definitely deserved a reduction from a KO. i have done this occasionally in some games of WarHammer Quest with the children where their character has a chance of being knocked unconscious rather than being dead.
Yeah, that fight sucked, there's no other way to put it. I need to get set up so we can play #3 tomorrow.
DeleteHurry up with your Op Jupiter batreps, or at least play some more!
V/R,
Jack