All,
Because I love you so much, and you've been so patient, I present a battle report in its entirety, not split into two parts. But the next one will be in two parts. Probably the last one too ;)
It's 1530 on 8 August 1986, and Team Whiskey has taken the better part of the day to recover survivors from the northern bank of the Main River and get reorganized while other elements of V Corps man the ramparts against the Red horde. However, by mid-afternoon the Soviets have broken through in several places. Team Whiskey is once again called upon to stem the bleeding. The Soviets are on the south/west bank of the Main River, in the face of Frankfurt. It quickly becomes evident the Soviets do not intend on entering the city, choosing instead to conduct a double envelopment to by-pass and cut off the Frankfurt en route to the Rhine.
Team Whiskey, with much of its armor remaining (none committed to the fight at the Main River bridge), rushes a powerful force to the suburbs of Frankfurt to blunt the enemy's northern thrust, with Whiskey's commanding officer, Lt Col Lacy, in personal command of the mission, leading both mechanized infantry companies and a platoon of his tanks into the fray. Both infantry companies are understrength (only two platoons each), with a company commander, platoon commander, and one platoon coming over from the recently disbanded (due to casualties/losses) 1st Squadron, 11th ACR. Additionally, the 81mm mortar platoon is out of the fight as they attempt scrounge new mortar tubes and ammo, having fired off all their ammo, spiked their tubes, then swam the Main River to get back to friendly lines in the last fight.
Captain Bronshtein's Kilo Company (with TOW, MG, and sniper attachments) arrived first, setting up in the southern sector, while Captain Phillips' India Company, still mounted in their Bradleys, swings further north, with Lt Travers' 2nd Tank Platoon swinging north further still.
Overview of the forces, with the usual overwhelming Soviet horde on the left, and the NATO troops on the right, though I must admit Team Whiskey has more than I'm used to, so this is gonna be interesting.
Almost all of Team Whiskey is present in this photo (missing only Lt Roberts consolidated 3rd Tank Platoon and some attachments from Weapons Company): the CO (LtCol Lacy), Lt Travers' 4 M1 Abrams, Capt Bronshtein's two platoons plussed up with an MG, two TOWs, and a sniper, then Capt Phillips's two platoons in their Bradleys. The three blue beads are Claymore mines.
The Soviets, with 18 BMPs and rifle teams, four more APCs and command teams, and ten T-72s.
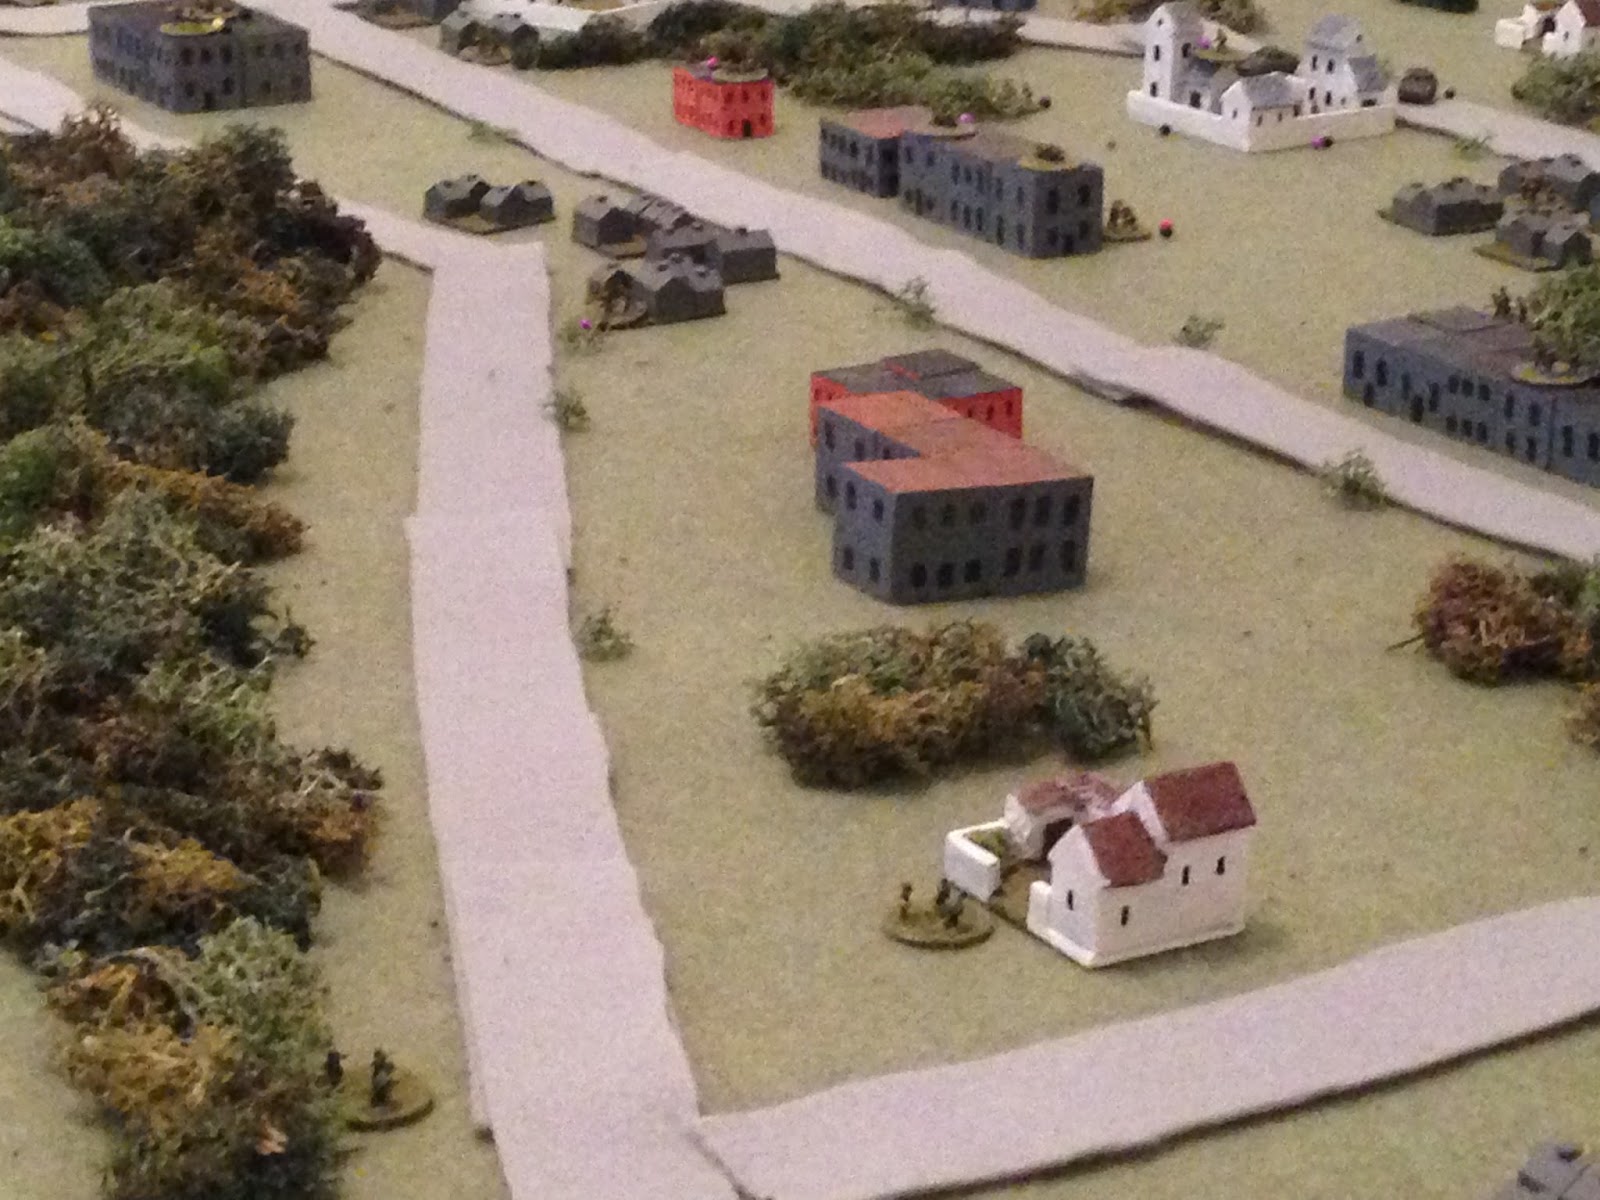
The table, looking west to east from the US baseline. The tan line across the top is actually a rail line atop a raised embankment, and is key to this scenario. The embankment is impassable to vehicles EXCEPT in the northeast east (top left) corner. So the Soviets are kinda screwed in that they have a bunch of armor on hand, but it's all forced to come through a severe bottleneck. Capt Bronshtein and Kil Company are dug-in in and around the big, black-roofed building at center right, just below the treeline. Capt Phillips and India will be coming on the board in Bradleys at bottom center (they and Lt Travers' tank platoon are off table right now), and Lt Travers tank platoon will come on at bottom left.
The Soviet plan is shock and awe, to hit as hard and as fast as possible to try to get their vehicles through that damn bottleneck at to left. The Soviets are running their usual three Mech formations (7 BMPs, 1 command team, and 6 rifle teams each), and they are key to the opening phase. The infantry from two of the mech formations (2 x command team, 12 x rifle team) stand detached, visible at top right on the railroad tracks. The infantry from the third mech formation are dismounted at the bottleneck (top left), and all Soviet vehicles are stacked behind them. The plan is for all the Soviet infantry to move forward to spot and engage US infantry and anti-tank weapons, and for the armored vehicles (top left and top center) to move through the gap like they were shot out of a cannon, then spread out to provide fire support to the infantry and envelop the US positions.
The Soviets are hoping to storm the southern (right) portion of the US defense with the bulk of their infantry, while their armor spreads out to meet US armor (the Soviets don't know where US forces will enter). The US knows two very important things: 1) the Soviets have lots of armor, but it's restricted to entry to the battlespace at the bottleneck in the northeast; and 2) the Soviets are looking for a way south, so they will be coming in from the northeast then swinging south (from the US perspective, moving left to right across their front). So the US plan is to use Capt Bronshtein's infantry and TOWs as the anvil, then swing Capt Phillips' and Lt Travers' forces as a mechanized hammer to slam into the Soviet right flank.

The right flank of the US position, where Capt Bronshtein's Kilo Company is set up, with the good Captain being located (with a rifle squad) in the black-roofed building at center top. There are rifles to his right and rear, as well as to his left, with the two TOW teams at far left and the sniper at bottom left. You can see the Claymores (blue beads) spread across the top, near the treeline.
On the left is K/1st Plt under Captain Sighe, and on the right is K/2nd Plt under Lt Ensmith.
And, backing out a bit, you can see the mass of Soviet infantry atop the railroad embankment, though both sides are unseen to the other.
Showing the US baseline, with the US forces off table. There's Lt Travers' tank platoon and LtCol Lacy at bottom left, I/1st Plt (under Lt Candersen) at bottom center left, Captain Phillips at bottom center, and I/2nd Plt (under Sgt Bajers) at bottom right.
Looking at the Soviet baseline, specifically the northeast corner, from east to west, with Capt Bronshtein's Kilo Co just visible at far left. The Soviets have infantry dismounted here to push into the suburbs, then plan on launching BMPs forward, then tanks, then having the other two formations' BMPs push through then turn south (left) to link up with their infantry.
Looking south to north at the infantry of our protagonists preparing to face off. You're looking at the Soviet infantry of Mech 1 (bottom right) and Mech 2 (top right). Their BMPs are off camera to top, and will shoot through the bottleneck (off camera to top right) then turn and sprint south to come back and link up with the infantry.
Another look, where this time you can see Soviet Mech 2's infantry at bottom center on the railroad tracks, as well as the traffic jam of Soviet armor that has to transit the bottleneck at top center.
Looking south to north at the US rear, showing India Co and Lt Travers' platoon waiting to come on, with some of Capt Bronshtein's troops at center right.
Closer view of southwest corner, looking south to north.
Looking west to east at Mech 1 (left) and Mech 2 (right) infantry preparing to advance through the forest, right into Capt Bronshtein's Kilo Company.
I'm sure you won't believe me, but I set this up with blinds and this is how the Soviet deployment shook out. It's going to be a bloodbath ;) Lets' get this party started.
Looking at the southern portion of the board, with Kilo Company at right, Lt Ensmith's Bradleys come on the board and dump their infantry out (bottom left).
While further north (this is looking west to east, with Lt Ensmith's guys at bottom right) Capt Sighe brings up his 1st Platoon of India Company and dismounts (far left), while their CO, Capt Phillips pulls up on their right in his command track.
Looking east to west at Capt Sighe's platoon, the dismounts move up, with purple beads showing they are hidden.
And then it starts.
In the south, Soviet infantry of Mech 2 suddenly pop out of the treeline opposite Lt Candersen's 1st Platoon of Kilo Co. The grunts are so taken aback they forget to pop the Claymore; the enemy spots them and opens fire.
Forcing Lt Candersen's team to fall back and pinning another team (yellow bead, with a hidden TOW at far left).
Looking west to east at the south (with explosions signalling the fight K/1 is in at top center), Lt Ensmith's I/2 infantry move up (far left in the 'short' houses, in the ville at center, and in the treeline just to the right of it).
Just south of Lt Candersen's platoon, the US MG opens up, putting heavy casualties on one enemy team (white bead).
Looking west to east, the US sniper (bottom center, with I/2 team just to his right, and the US MG just above them, TOW to their left, Lt Candersen at top left, and Sgt Bajers at top right) fires on Soviet Mech 2's commander, but misses. The bad guys are unable to spot him.
And then Soviet Mech 1's infantry come busting through the brush opposite Sgt Bajers' boys, who are ready and waiting and pop both their Claymores.
The Claymores wreak havoc: two teams take heavy casualties (white beads), one is forced to fall back and hunker (red bead at top center), and two more are pinned (yellow beads). The Soviets spot the US infantry and open fire, pinning two teams (far left, bottom right).
The US hunkered team (top left, red bead) tries to self rally as the last Claymore is blown, forcing one Soviet team to fall back and hunker (red bead at right center).
Looking west to east at the same area, you can see Lt Candersen's team (top left, yellow bead) successfully self-rallies, but the hunkered team fails and fall back (bottom left, from red bead at center left). Soviet Mech 2 infantry are at top right, MG at right, and TOWs in the building just above the team that fell back.
And then the rest of Kilo Company opens fire (Capt Bronshtein ias at bottom center) on Soviet Mech 1 infantry.
The point blank fire is devastating (even Army couldn't miss): two enemy teams are knocked out, two are 'men down,' and two are forced to fall back.
Sgt Bajers, commander of Kilo Company's 2nd Platoon, takes decisive action. Seeing so many enemy teams suffering negative morale, he leads his team in a charge. The command team draws react fire from a nearby enemy team (in good shape)...
But Bajers doggedly leads his men through the hail of fire and into close combat. They quickly beat them an move to the next.
The Yanks beat a second team and move to the next (the explosions show the close combat wins).
Another win, then move on for one more.
They put a fourth enemy team out then move south to their buddies and rally them. One of the victims of this little tirade was the enemy commander of Mech 1.
Captain Bronshtein moves up (center) and rallies the pinned team there.
Because of very heavy casualties and the loss of a commander, all the Soviet infantry in the south (belonging to Mech 1 and 2) are combined into one force under the Mech 2 commander.
Looking north to south at the bottleneck in the northeast, Soviet Mech 3 rifles and commander move forward.
They don't really spot anybody, but their commander marks the US MG's building for arty (orange building at top center). And the Soviets make a great roll...
Arty begins falling immediately (Capt Bronshstein at bottom right, Lt Candersen's platoon at top center, Lt Ensmith's platoon at left, Sgt Bajers' platoon at bottom center, and TOWs at top center left).
The arty does a rough job on the US troops: the MG team takes heavy casualties (white bead at bottom right), and a TOW if forced to fall back and hunker (center, red bead), as is one of Lt Ensmith's teams (bottom left, red bead).
Meanwhile, back in the northeast looking north to south, Soviet Mech 3's BMPs push forward with their infantry, looking to clear room for the rest of the Soviet armor behind them.
With one of Lt Candersen's teams hunkering nearby, the 'good' TOW drops down to rally his buddy, shaken up by the arty barrage. It works, so they're both in fighting shape, but this screws things up. You've always got to think ahead with the TOWs as it takes a turn to fire and displace, a turn to reload, a turn to get into a new shooting position, then another turn to fire and displace.
But the Soviets can't afford to wait, so they push their first tank formation ahead (next in the queue, at top left, is Mech 1 BMPs, then Tank 2, then Mech 2 BMPs).
Followed by the Soviet CO and Mech 1 BMPs.
Boy I wish I had an A-10, or an Apache, or even some arty...
But then Lt Travers tanks come on (looking west to east at northwestern corner, with Capt Sighe's men and vehicles at right). They immediately spot the gaggle of Soviet vehicles and begin launching 105mm sabot rounds down the corridor.
The first round knocks out a tank and puts a rifle team men down (top right), while the second round knocks out a BMP and pins another (left).
The next to US tanks move up and fire.
Lt Travers' tank hits a T-72, immobilizing it, but the crew stays, while it forces another tank to fall back and hunker (red bead at top left), while the other round, targeting a BMP, completely misses!
So the BMP launches a Spandrel anti-tank missile in return.
The missile strikes next to the tank, forcing it to find cover and hunker. LtCol Lacy, in his M577 command track, chases after him with the intent to rally,
Looking east to west at the bottleneck, Soviet Tank 2 and Mech 2 creeps forward, hoping to get into the fight and becoming aware of the effectiveness of US tank fire, and that's how Turn 1 ends.
Turn 2 starts with Col Lacy trying to rally the hunkering Abrams.
The attempt fails; the tank falls back (from center left) to bottom left, while Col Lacy moves his track south (far right on the road). The hunkering tank tries to self rally, but fails and falls back off the map!
Two of the US tanks cut loose again.
Lt Travers' gunner finishes the job on the tank he immobilized last turn, and the resulting explosion pins another tank (yellow bead at center left), while the other round knocks out another BMP (center) and puts heavy casualties on a nearby rifle team.
All three remaining US tanks move (center, from bottom left), and the third opens fire on a pinned BMP.
Another BMP is knocked out, and another rifle team is men down. Two rounds of fire from the US tanks has knocked out two T-72s and three BMPs; not bad shooting.
In the south, the Soviet infantry work on getting rallied and into the fight. The Soviet commander also marks Sgt Bajers' position at bottom center for arty.
All that Soviet rifle fire only pinned one team (yellow bead on building), and then most of them fall back to reorganize.
A just rallied team moves down the railroad tracks to rally a buddy (center right, two stands together, one with red bead).
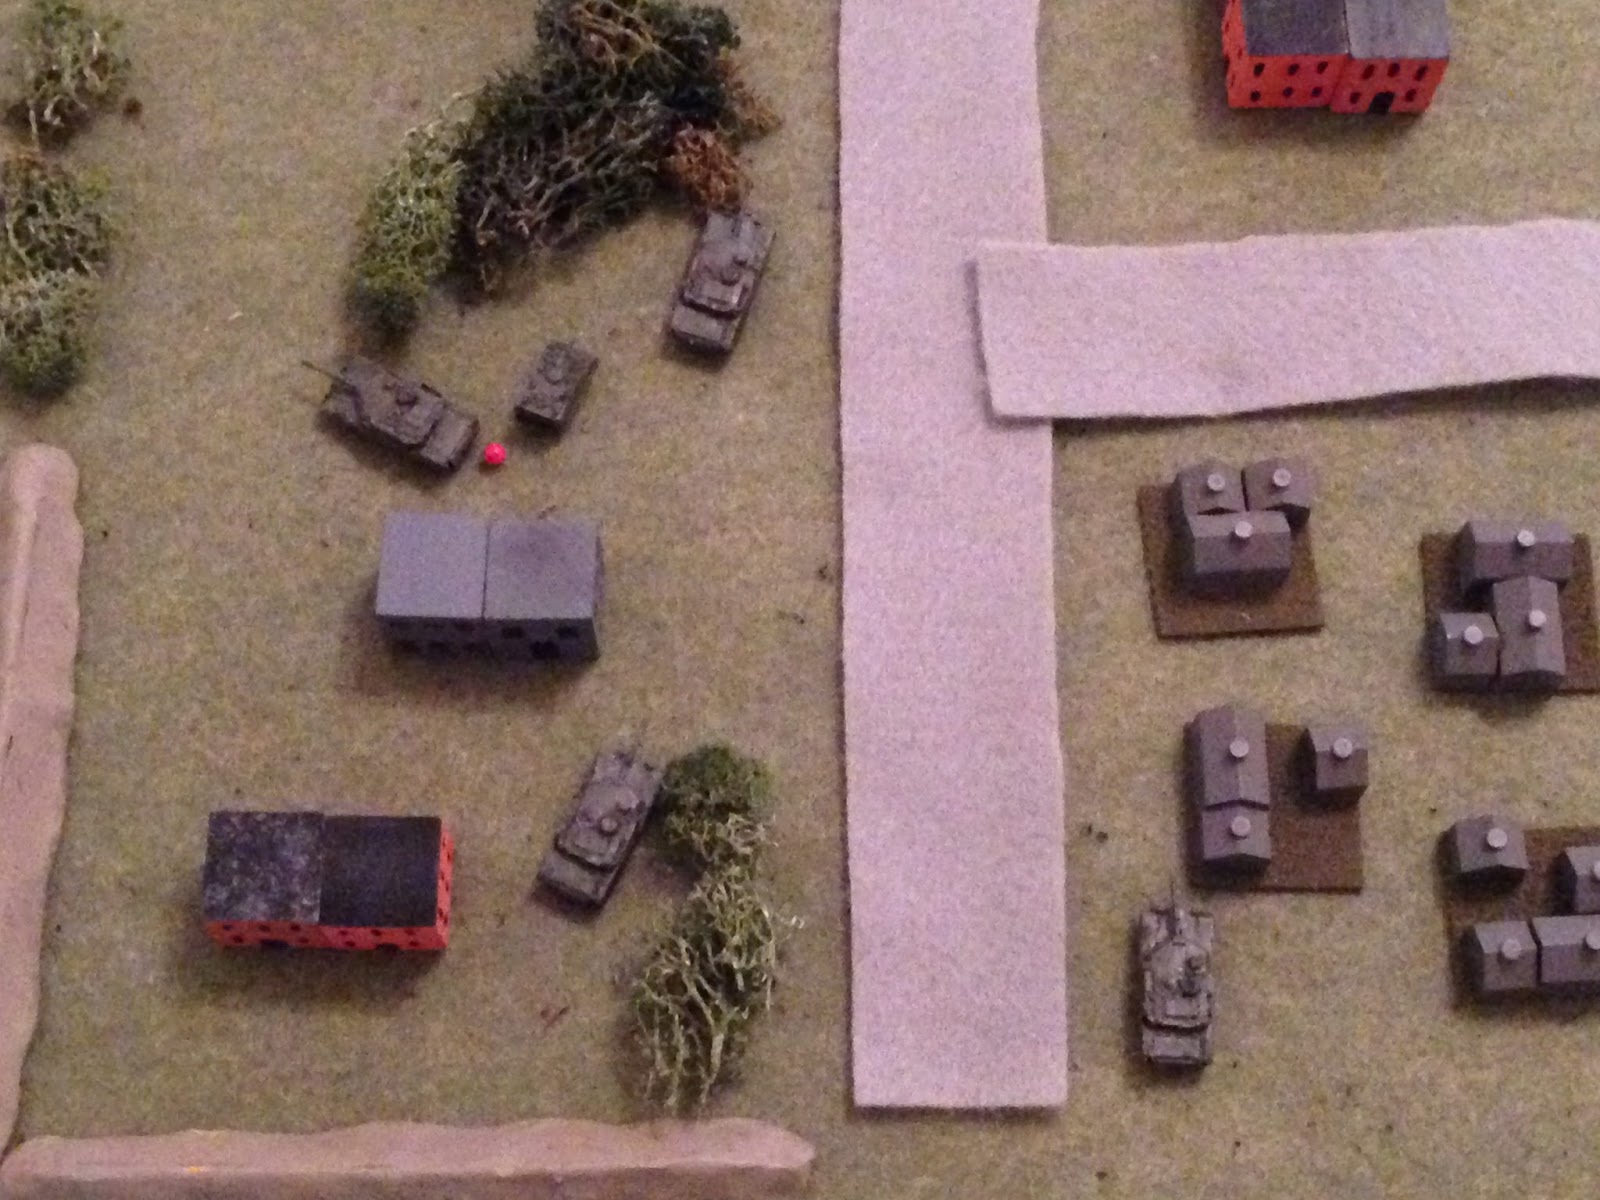
Back in the north, looking west to east, Capt Sighe's dismounts of I/1 creep forward. The Soviet armored wreck is at top left, with the road at left being the one the Abrams were firing down. The Abrams and this platoons Bradleys are off camera to bottom center/left and bottom right, respectively.
BMPs of Mech 3 move up and volley fire at the only visible US tank.
But all they manage is to force it to fall back and hunker (bottom left red bead, from explosions at left). Of course, the last time they did this the tank fell back off the table...
You can see the Colonel on the road at bottom center, Capt Sighe's Bradleys at bottom right, and Capt Sighes dismounts at center/center right.
The US MG team self rallies successfully.
Looking south to north (US tanks at left, Capt Sighe's dismounts at center, Lt Candersen's platoon at bottom right), Capt Sighe's Bradleys move east (right) then turn north. One of the Brads looses a TOW at the flank of the BMPs that just forced the Abrams to fall back.
That means 'miss.'
So the enemy pivots and cuts loose with his 30mm gun, but he misses too.
Looking west to east at the south (Capt Bronshtein's Kilo Company), Lt Ensmith's Bradleys, looking to get into position to face down the Soviet armor coming south, moves south (on road at bottom right) to loop around. That is, the US is feeling pretty good about having decimated Soviet Mech 1 and 2 infantry and don't really see them as a threat, so we're trying to get anti-tank weapons into an L-shaped defense. The tanks and Sighe's Brads are off camera to left, facing down enemy armor moving west (down) and looking at the flank of enemy armor moving south (right); the TOWs are at left, in position to fire north (left) at enemy armor moving south or into the flank of enemy armor moving west (down). These Brads are looking to follow the road to the trees then turn left to fire north into enemy armor, bolstering the TOWs, who take a long time to reload and re-position.

Back at the bottleneck, looking north to south, the commander of Mech 3 rallies some of his boys while others move forward, running into a rifle team of Capt Sighe's, who snap fires (top right).
The US fire puts heavy casualties on the enemy team, while the Mech 3 (bottom left) and Soviet CO (far left) continue rallying troops.
The team the CO tried to rally has taken too many casualties and melts away (white bead at far left), but the one the Mech 3 commander rallied moves up and fires on the US rifle team, pinning them.
Capt Bronshtein (in building at center) rallies the pinned team while other troops under his command fire on the last enemy rifle team in view (the rest fell back to top right). But the US fire misses...
But luckily the team that just got rallied opens fire and eliminates the enemy riflemen.
Lt Ensmith has a team shook up bu Soviet arty (center right, red bead), so he moves to them and rallies them.
And the move up (center right, in bush next to white buildings with red roofs, from center).
A T-72 of Soviet Tank 1 falls back to rally his pinned buddy, good.
And he falls back and rallies his hunkering buddy (red and black beads at center, from bottom center).
He scoots forward, so that Tank 1 is back in formation, or at least the remains are (the other two are knocked out on the road at right).
Mech 1's BMPs stay in column and try to worm their way south between the wrecks of Mech 3's BMPs on the right and Tank 1's tanks on their left. But it's painfully slow trying to get through the bottleneck, and there are still five tanks and seven BMPs staged on the other side of the railroad tracks at top left, not even close to being in the fight.
And the tanks and BMPs we just discussed move up in the queue.
And here comes the Soviet arty, falling Sgt Bajers' position.
One of Bajers' rifle teams is knocked out, and his team is forced to fall back (far left red bead, from bottom right). Captain Bronshtein and two rifle teams are in the main building at center.
The US sniper decides to move up for a better look (single figure stand on road at center), and the TOWs take up firing positions, hidden (two teams at center).
End of Turn 2.
Back in the north (looking north to south) at the bottleneck, Soviet infantry of Mech 3 move forward (bottom center and right, top center), again drawing react fire from one of Capt Sighe's squads.
The enemy tries to rally their 'men down' team at top left, but it fails and the team is out, while the rest open fire on Capt Sighe's platoon.
One US team is pinned (yellow bead) and one is men down (white bead). Capt Sighe calls up his Bradleys (off camera to right).
And the Bradley that missed with a TOW earlier fires his other one (he's off camera to top; don't ask me why I didn't get him in the picture). The target BMP is knocked out, and another is forced to fall back (bottom left, red bead).
Sighe's other two Brads pull up to help, but one (bottom center) draws react fire from the 30mm cannon of a BMP (center left), which immobilizes the vehicle, though the crew stays with it. The other Bradley fires its 25mm gun at enemy infantry, but misses.
The hunkering BMP at bottom left-center tries to self-rally, while another BMP moves up (center left) and fires at a Bradley (the immobilized Brad is at top right)
The rallying BMP failed and had to fall back again (bottom left, from bottom center), while the firing BMP's rounds strike home, immobilizing another Bradley, but this time the crew bails and the nearby rifle team is again pinned.
In the south, the Soviets have gotten their remaining infantry in fighting shape and in position in the south (bottom right, across from Capt Bronshtein's Kilo Company). Mech 1 and 2 are down to 1 command team and 6 rifle teams from 2 command teams and 12 rifle teams, so exactly 50%. But this 50% is ready to get back in the game. Next turn anyway...
Looking north to south at the bottleneck again, Mech 1's BMPs came through the gap and turned south (up) last turn, and now they move south a bit then turn west (right), looking to help their beleaguered brethren in their BMPs. They break into two columns (one with 4 BMPs, the other with 3), and the lead vehicle of the southern column spots some of Capt Sighe's troops and opens fire, but misses.
So the doggies reply with a LAW.
The shooter (far right) is quite pleased. While the target is only immobilized, and the crew stayed in the vehicle, another BMP fell back (top center) and one was pinned (yellow bead at center left).
Lt Travers tank (left, behind orange building) fires a Mech 3's BMPs (top left, with the kerfuffle between Captain Sighe's boys and Mech 1's BMPs at top center). The hunkering tank (bottom center-left) successfully self rallies.
The target BMP is knocked out, and a nearby rifle team is pinned (yellow bead at center left).
The third US tank moves left (bottom left) and fires, covering Colonel Lacy (center right), who moved up to rally some troops. The men down rifle team next to him (white bead) stayed men down, but the immobilized Bradley successfully rallied. It can't move, but they can engage targets.
But the Abrams' round missed, only pinning the target BMP (bottom left, yellow bead), CO at top right with immobilized Bradley he just rallied.
The three runners of Soviet Tank 1 move west (they are at center, three tanks in a row moving right between two sets of houses. They started at center left, next to the foliage).
This helps to clear some room for Soviet Tank 2 (left, sitting atop the railroad tracks).
Soviet Tank 2 files onto the road, with the mess of Tank 1's T-72s and Mech 1 and Mech 3's BMPs scattered all around them.
Looking south to north, this is when the US TOWs finally get into the game. The forward team fires on a T-72 of Tank 1 while the rear team fires on the lead T-72 of Tank 2, who just moved onto the road.
The forward TOW gets a two for one! The target tank (bottom center explosion) is blown sky high, which damages the turret of the tank behind him, which causes the crew to bail out. Additionally, the rifle team in the building in front of them (bottom right) takes heavy casualties from the secondary explosions.
The rear team doesn't do nearly as well, but they hit the lead tank of Tank 2 (top left), immobilizing it and causing the crew to bail.
Looking west to east, you can see the TOWs (bottom center and left with blue beads) have fallen back (from the purple beads atop the buildings at top center).
That was some pretty fancy shooting.
Back at the bottleneck, Mech 2's BMPs (bottom left) move up, just ahead of the rail line.
While in the south, Soviet arty starts falling on the Capt Bronshtein and his rifle teams (with Soviet infantry at bottom right).
One rifle team take heavy casualties (white bead), while Capt Bronshtein's team and the other rifle team are pinned.
Lt Ensmith's Bradleys continue to push east, stopping to rally Sgt Bajers' team (red bead).
In the main building (targeted by arty), the troops go about self rallying. The 'men down' rifle team and Capt Bronshtein's team are successful, but the other team fails and falls back (center left, red bead). Sgt Bajers moves his team back into position (bottom right).
Looking south to north at Lt Candersen's platoon, they rally some troops and reposition to meet Soviet armor coming from the northeast (top right).
At center left, you can see Lt Ensmith leading his three teams forward, near the hunkering rifle team from Sgt Bajers' platoon.
Back in the north (looking southwest to northeast), Capt Sighe moves his team forward to rally his 'men down' team (center), and they open fire on an enemy rifle team they caught in the street (top left). The rally succeeds and the enemy team is knocked out.
With Captain Sighe at bottom center (next to Colonel Lacy, actually), the just-rallied team moves up to rally the pinned team, while opening fire on the enemy team looking to get up to rally their men down team, and probably the crew of the immobilized BMP (center right), too.
The rally fails and the team falls back (bottom right red bead, from center, with Capt Sighe and CO to their left). But the firing puts heavy casualties on the enemy riflemen (top left). The hunkered US rifle team successfully self rallies.
Looking west to east with the bottleneck at top left, the US sniper sprints northeast (center, between orange building and Bradley with blue and black beads, with Lt Candersen's platoon at right and Capt Sighe's platoon at left), while India Company's commander, Captain Phillips, fires his .50 cal (bottom right M-113) at a BMP (top left)
Forcing the BMP to fall back (red and black bead at bottom left, next to another hunkering BMP) from top right).
Turn 3 is fini.
Turn 4 starts with several of Soviet Mech 1's BMPs self rallying: the hunkered BMP at center top is rallied, while the pinned BMP to its left has a buddy rally the pin off. But then one of Capt Sighe's teams bounces a LAW off a BMP, managing only to pin it.
Slightly different perspective here: the US team that just fired the LAW is at bottom center (just below destroyed Bradley, with blue bead), and the BMP he pinned has the yellow bead just left of them. Another Mech 1 BMP moves up and fires while the BMP that just got buddy rallied moves up (top center), but he draws a LAW in react fire from one of Lt Candersen's teams.
The BMP at top is immobilized and the crew bails, and the shot pins the two BMPs immediately behind it. But the BMP fire at bottom knocks out one US rifle team and puts heavy casualties on another of Capt Sighe's teams (white bead at far right).
Another BMP moves up (far left explosion, with explosion at center right showing the US team that just got KOed and the explosion at center right showing the BMP that just got knocked out, with the US sniper just below it), and a Bradley react fires with its 25mm gun (far right, blue beads).
The BMP (bottom center) is riddled with 25mm rounds, immobilizing it and the crew bails out. The immobilized BMP at top center tries to self rally, but they lose their nerve and bail out too!
With the wreckage of Tank 1, Mech 1, and Mech 3 strewn throughout the bottleneck, the BMPs of Mech 2 stream south (up) on the road, trying to weed through the mess to better ground. But honestly, minus an unexpected breakthrough by the Soviet infantry in south, it's too late as the US has dealt the southern Soviet infantry a heavy blow and has faced north to meet Soviet armor coming down the road. This, combined with the US tanks in the northwest and India Company spread between, makes it pretty ugly for the Russkies.
Having driven one BMP back with his .50 cal HMG, Captain Phillips (bottom right) opens up on another enemy IFV (center left).
The .50 cal rounds damage the turret of the BMP (top center), and so the crew bails out, while LtCol Lacy (bottom center) rallies Captain Sighe's platoon.
Newly rallied, Capt Sighe leads the two teams forward, where they open up on Soviet Mech 3's commander, pinning him. It's kind of a bad omen that Capt Sighe's team is taking cover in the exact spot where one of hit squads was just mown down moments before.
Then I'm not sure what he was doing, but the good Colonel pushed his M577 track up past Captain Sighe's boys, right into the middle of all those Soviet vehicles and men. A BMP snap fires with its gun.
Please note that 3 of the 4 BMPs in line there are already knocked out, and the one firing is pinned, with two 'men down' rifles and a pinned command stand nearby, so ripe for the pickin'.
The M577 (center right explosion) is immobilized, but LtCol Lacy and his men hit the ground running and climb all over the BMP that shot his vehicle up (explosion at center). Lacy and his men stuff frags into the BMP, blowing it up, then move to an enemy team already suffering heavy casualties.
The Colone's team puts them out then moves to the next enemy team.
Another enemy team out and now LtCol Lacy's team moves on the Soviet Mech 3 commander, who hastily opens fire. Lacy leads his men through the storm of fire and into close combat, where they knock out another enemy team (that's a BMP, two rifle teams, and a command team so far).
The Colonel takes a look around and, not seeing any more enemy within charging range, leads his men into cover in the building at top left...
But as soon as they get in there they see the column of BMPs from Mech 2 streaming by, so they fire a LAW at the exposed flank...
The LAW rocket knocks out the target BMP, and the BMP ahead of it is immobilized by secondary explosions and the crew bails!!!
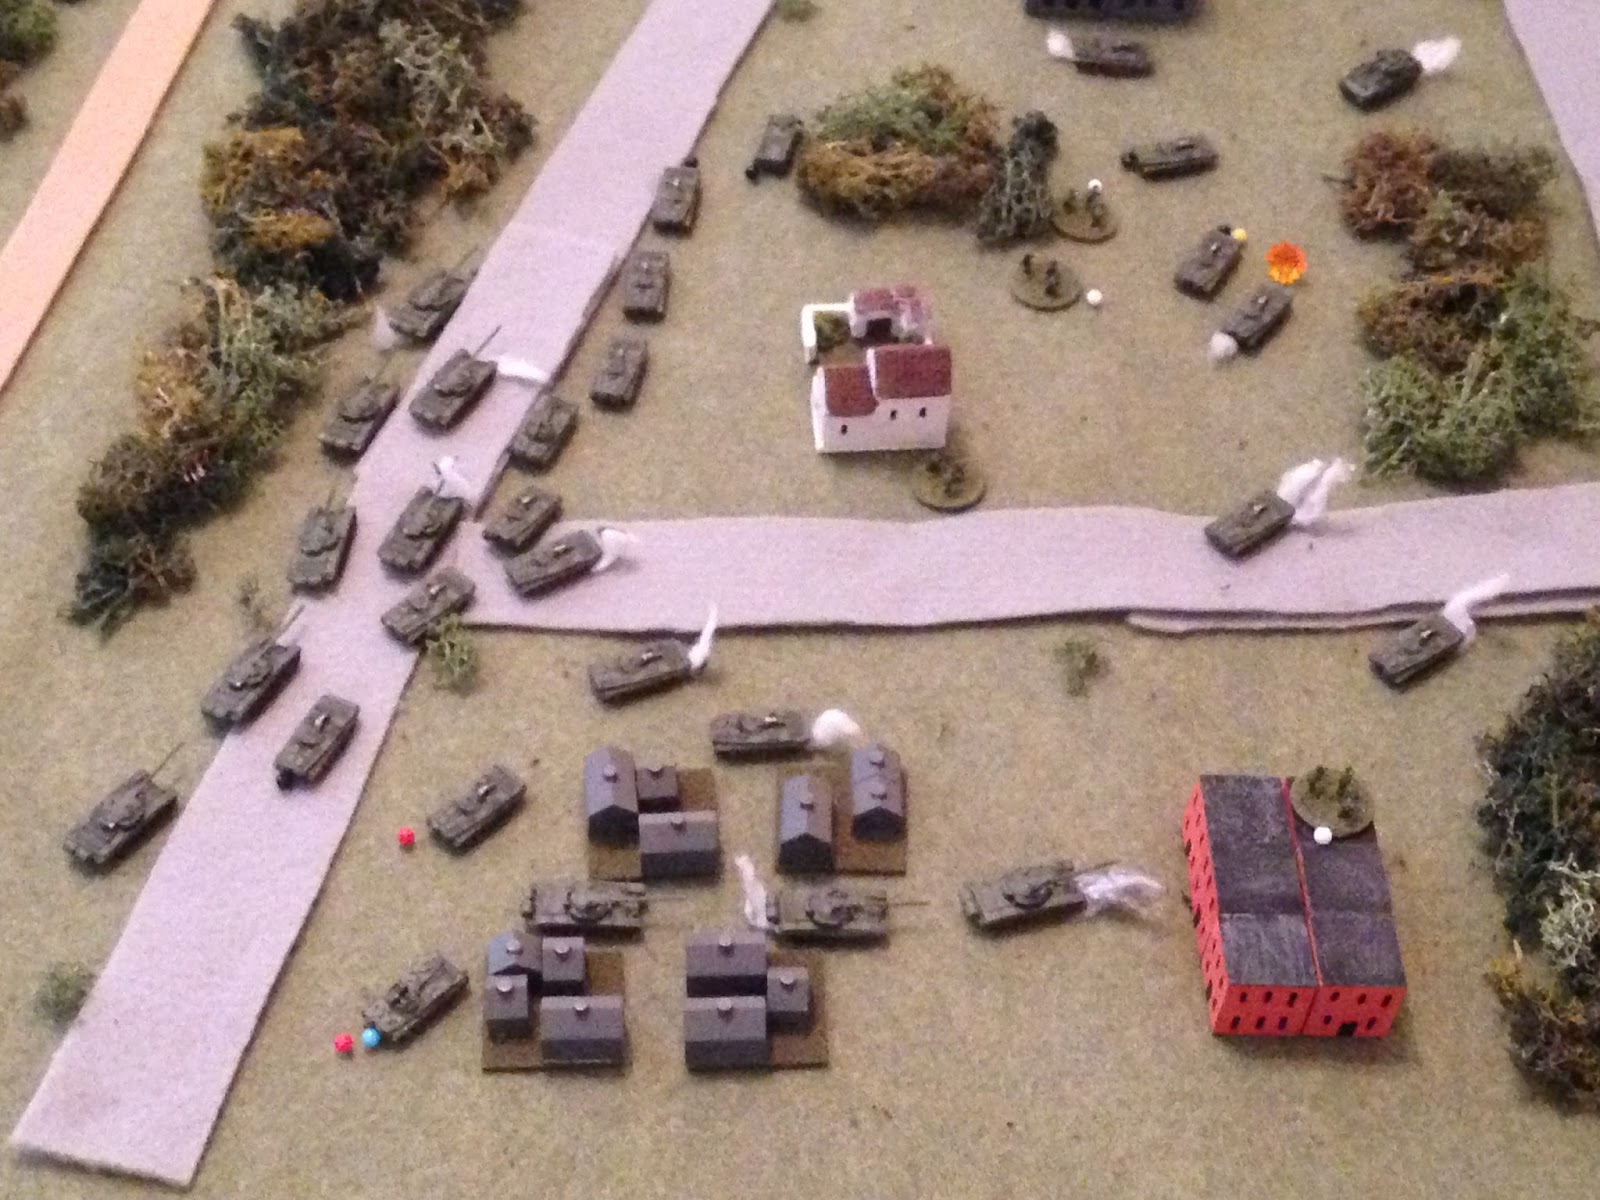
Then, dammit, I missed a photograph; sorry, sometimes I get all worked up, I guess... In any case, if you recall, Lt Ensmith had been working his India Company, 2nd Platoon Bradleys around the corner in the south, to get into position to fire north up the road into the Soviet armor in the bottleneck. Well, Lt Ensmith's three Bradleys got into position (next to the building occupied by Captain Bronshtein in the south, where all the infantry fighting occurred), and each fired a TOW north at the Soviet armor.
At top right, the first TOW slammed into a BMP, knocking it out. The BMP next to it was immobilized and the crew bailed. At center, the target BMP was hit and immobilized, and once again the crew bailed. Right next to it, the Soviet CO's BTR-50 was damaged but the crew stayed. The last TOW struck the T-72 at left, knocking one tank out and immobilizing the tank behind it, though the crew stayed with the vehicle (white and red beads at bottom left).
To add insult to injury, Lt Travers began walking his tanks up the road (bottom right) towards the bottleneck, firing on two BMPs and a T-72.
Lt Travers' gunner knocked out the tank at left, which also caused another tank to fall back (red bead at top center). The next round struck the BMP at right, blowing it up and damaging the turret of the BMP in front of it (red and white beads at right; the red and white beads at center left are from one of Lt Ensmith's Bradleys), though the crew stays with the vehicle. The third round hit just short of the BMP at center, pinning it (yellow bead).
Pretty good shooting.
Back in the south (looking south to north) at the main building, Capt Bronshtein is once again subjected to Soviet artillery. And here you can also see Lt Ensmith's three Bradleys that just fired their TOWs north (up) into the bottleneck to savage effect.
Capt Bronshtein's command team is 'men down,' while the rifle team is forced to fall back (left, red bead). Not all that impressive a performance by Soviet arty today (thankfully)...
In the US center, the TOWs reload out of sight.
Looking southwest to northeast at the bottleneck, please survey the carnage. Captain Sighe's platoon is at left, Lt Candersen's platoon is just off camera to bottom right, and Lt Travers are just off camera to left. Anyway, the US sniper (center) moves up into position to take a look around.
With the situation having moved well past the sh!t-sandwich phase, the Soviet commander plays the only card he has left to try to salvage the situation...
The infantry of combined Mech 1 and 2 once again pass through the treeline in the south, but there's simply too much US firepower waiting for them (taking into account their first ground assault and four successive arty fire missions only knocked out a single US rifle team). The US teams react fire.
One Soviet team is knocked out and three are forced to fall back. So two enemy rifle team return fire with small arms, and a third launches and RPG at a nearby Bradley.
But things just aren't going the Soviets' way: the RPG misses, and so the Brad returns fire. Meanwhile, enemy small arms fire pushes back Sgt Bajers' team (bottom left) and puts heavy casualties on one of Lt Ensmith's teams (white bead at left).
The 25mm rounds from the Bradley cause heavy casualties on one enemy team and pin another.
Lt Ensmith leads his men forward to rally some buddies (center and bottom left); both attempts are successful.
The K/2 team that was just rallied by Lt Ensmith hops back in the building and rallies Capt Bronshtein's team, then opens fire on the Soviet Mech 2 commander. But they miss.
But then the Company Commander's team fires and knocks out his counterpart.
Bronshtein follows that up with a hearty scream and leads his men in a charge, and the enemy react fires...
But the fire is ineffective and so melee is joined.
And rapidly two more enemy teams are put out of action.
And thus the fight ended, with the Soviets running for the hills, culminating with a little lead officer figure pulling out a little lead Makarov... Wow, what an ass-whooping! And Ben is going to love me ;) To show just how lop-sided this was, nothing ca beat the tally of the casualties.
US
2 Bradley IFVs knocked out
2 Rifle teams knocked out
Soviet
3 Command teams
13 Rifle teams
16 BMPs
7 T-72s
Before you ask, yes, those numbers are correct. The US had two Bradleys knocked out and lost probably about 40 men total (just because units are not knocked out doesn't mean casualties weren't suffered). The Soviets lost 7 tanks, 16 IFVs, and probably about 200 men WIA/KIA/MIA. So, wow, what I fight for Team Whiskey, we certainly needed the win, for morale purposes alone. It don't mean a hill of beans in the overall scheme of things; sure Team Whiskey blunted the enemy's advance at this particular spot, but the Soviet juggernaut rolls on, and NATO V Corps continues to conduct its fighting withdrawal, praying the REFORGER units will make it across the Atlantic and into the fight.
Regarding the fight, I keep trying to tackle what could have worked better from the Soviet perspective in terms of their plan of attack. With the bottleneck being what it is, I really don't see another way. With things as they are, they needed better luck: they needed their arty to hit harder, they needed their firing dice to hit harder (I recall a volley of three AT5s scoring only a fall back when targeting a single M1 Abrams), they needed US firing dice to not hit so hard (there were so many times US tank rounds and TOWs scored multiple kills, i.e., the target was KOed and the vehicle in front of it was immobilized and the crew bailed, so a bunch of 'two-for ones'), and they needed a little luck with the activation cards (you're probably not aware, but in the first turn the US and Soviets were holding and holding and holding their tanks back, waiting for the enemy to commit first, and it ended up the Soviets ran out of cards before the Americans, so the Soviets had to push their tanks forward, and right behind that the US tanks came on and ripped into the Soviets. Had the US been forced on before the Soviets, it wouldn't have been as bad for the US as they could have hidden amongst the buildings, but the Soviets would have been able to push through the bottleneck faster.).
So, with regards to playing the scenario, as crazy as it sounds because of the Soviet numbers advantage, I'd probably be inclined to step up firepower for the Soviets a bit. I could see giving them another 2S1 SPG, and I'd probably even give them an Mi24 Hind. It's just so damn hard squeezing all those vehicles through the damn bottleneck. Conversely, I could see reducing the size of each force proportionally working out well (I believe that is what Ben did in his game), or opening up the size of the bottleneck.
Anyway, I had a lot of fun; that's the best win I've had. Hell, maybe the only win I've had! But let's get to our heroes:
-LtCol Lacy, Commanding Officer of Team Whiskey, for conspicuous gallantry, is awarded the Medal of Honor for exposing himself to torrents of enemy fire to rally pinned numerous tanks, Bradleys, and infantry teams, then storming his command vehicle into the center of a firefight, where the command vehicle was shot out from under him. Lacy then lead his men into close combat, destroying a BMP, two rifle teams, and a command team, before taking up position in a nearby building where he and his men destroyed two more BMPs with a single LAW rocket.
-Sgt Bajers, Kilo Company, 2nd Platoon commander, was awarded the Distinguished Service Cross for closing with the enemy and destroying a Soviet command team and four rifle teams in close combat. Sgt Bajers also received the Purple Heart for being lightly wounded.
-Captain Bronshtein, Commander, Kilo Company, was awarded the Silver Star for leading his men into close combat which destroyed one enemy command team and two rifle teams. Capt Bronshtein also received the Purple Heart for being lightly wounded.
On to fight number 9, stay tuned!
V/R,
Jack


Mmmm, bayonet goodness... With the southern dismounted "infiltration" failing so badly, being forced to push a traffic jam through a shooting gallery was not going to go well...
ReplyDeleteOr, conversely, with the bottleneck not being cleared the dismounted assault was going to be painful :D
If either had worked (e.g. the U.S. Hadn't got so many "double kills") both would have stood a chance. Nice one Team Whisky, never give a sucker an even fight, and nice to see the Abrams really cutting loose!
TP,
DeleteThanks man, good to see ya! And you're absolutely right: it's not that the infantry infiltration or bottleneck blitz couldn't work, it's just that when one got severely roughed up it adversely impacted the other. But in the game, (as the US commander) I was really scared that the Soviets would push the US off the main building in the south, then storm a bunch of BMPs down to reinforce them, which would have given them the ability to put a double envelopment India Company and Travers' tanks. And it was good to see the US tanks finally do some serious damage.
I'm almost ready to post part 1 of batrep 9, so stand by.
V/R,
Jack
Another great report, and I am not just saying that because i am in it and did not die!. I am no longer surprised that you win. In fact, I think i only get surprised when you don't :-)
ReplyDeleteActually, it seems that (and you point this out) a little bit more luck going the Soviet's way and they could win. if they could just get enough infantry over the embankment for a breakthrough, or enough tanks at the other end for a breakthough on that side, and you would be stuffed.
Shaun,
DeleteThanks man, I appreciate it!
"...i am in it and did not die!."
Relax, it's still early.
"...I think i only get surprised when you don't."
Well, I am a brilliant strategist, tactician, battlefield leader, and warrior, all rolled into one ;)
Yeah, the Soviets had the chance to pull of their usual steamroller, but the Team got some good (lucky?) shots in and stemmed the flow long enough to defeat each pincer piecemeal.
I've still got to finish the write-up for batrep 9, and I"m about to go upstairs and play the last fight!
V/R,
Jack