All,
This is the finale of batrep #7. So, first off, please accept my humble apologies for the delay since my last post; real life has been kicking my butt. In any case, when we last spoke, NATO is trying to hold a bridge over the Main River for as long as possible, and while NATO has taken heavy casualties, they are also exacting an atrocious toll on the advancing Soviets. The fight is really on a knife's edge, where Team Whiskey physically can't stand to take any more casualties lest it cease to exist as a combat unit, whereas if the Soviets suffer any more casualties they won't have the strength to push across the river and hold until the bridgehead can be reinforced. So, this is about as tight as the fight can get.
The previous batrep showed Turns 1 through 3, so we pick up the action with Turn 4, and the Soviets activate first.
Looking north to south at the US left, the commander of the Soviet Mech 1 formation moves his BMP up (center right) then dismounts his command and MG teams.
While the 'other' Mech 1 BMP moves over (other meaning, Mech 1, 2, and 3 each started with 7 BMPs, and Mech 1 is now down to 2 BMPs) and fires on Lt LaManchew's command team (blue bead signifying they are out of LAWs), getting heavy casualties on them (white bead).
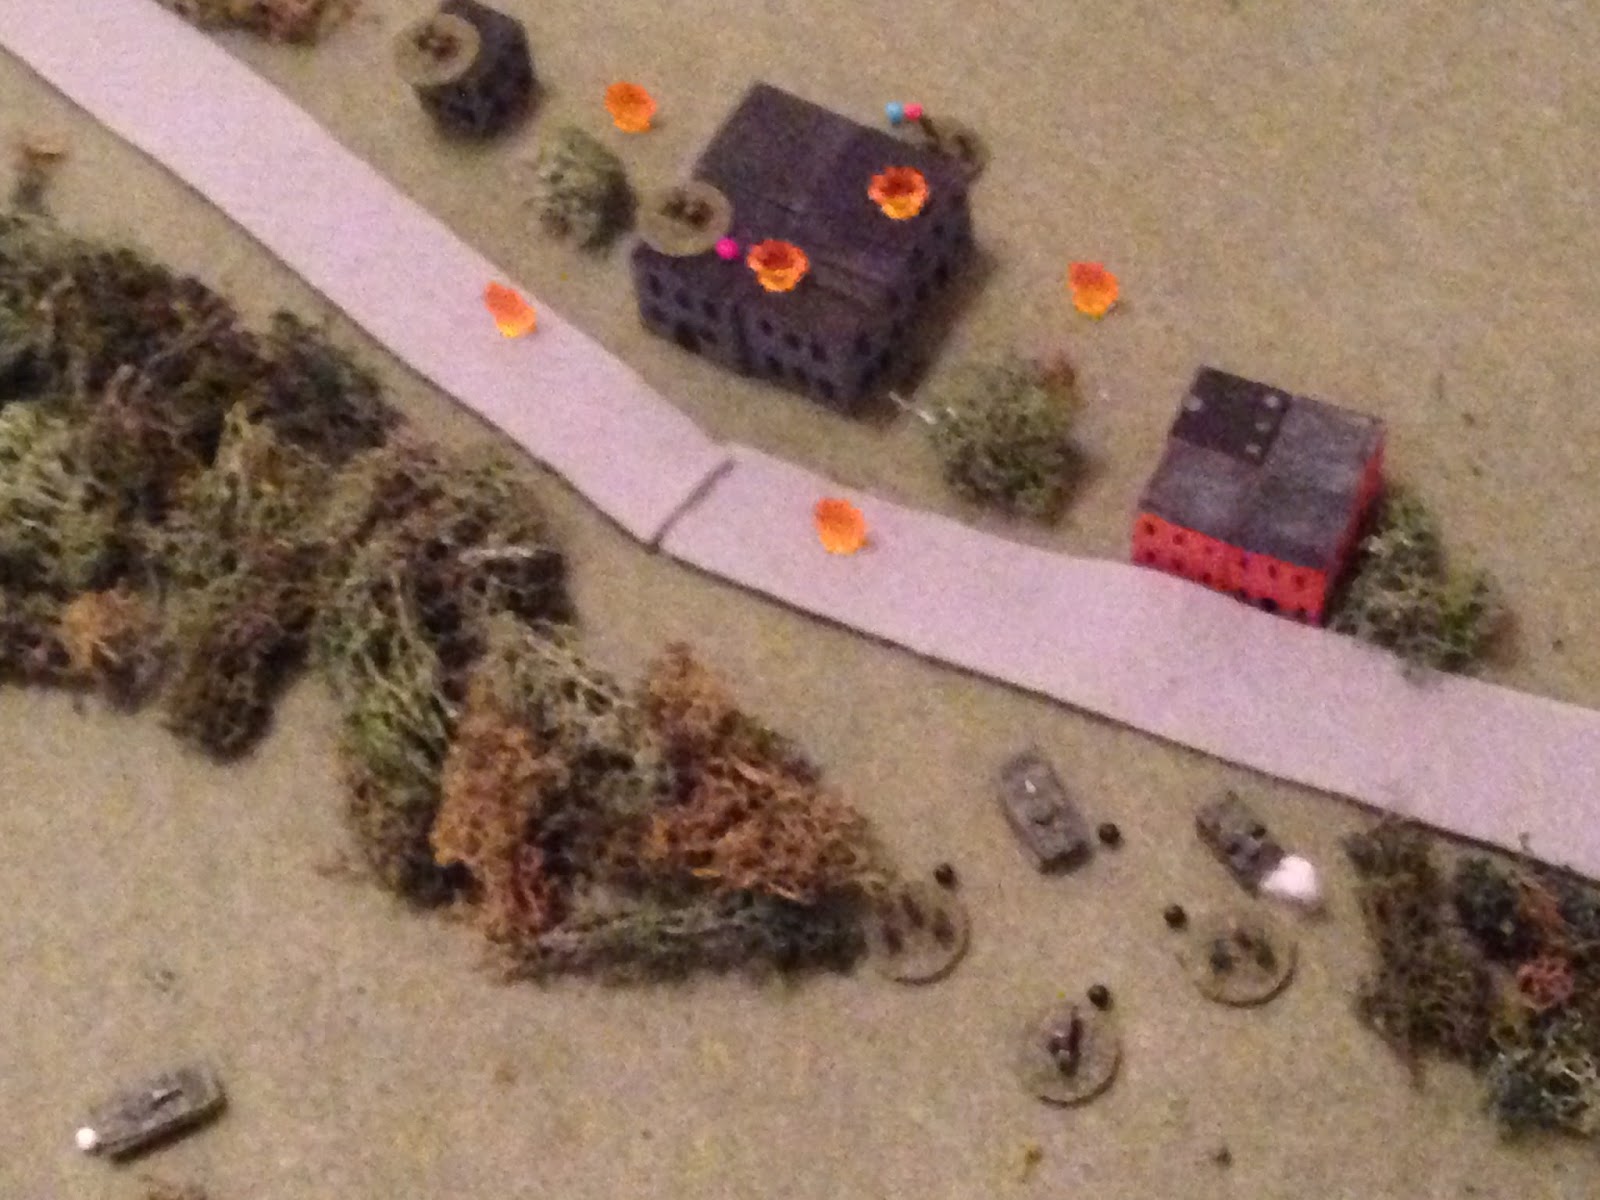
This is looking north to south just west of the last photo, with Lt LaManchew's command team is at center, with explosion in treeline: from the US far left, TOW1 (bottom right) launches their missiles, one at the BMP belonging to Mech 1's commander (center), and one at a BMP from Mech 2 (far left).
At center, Mech 1's BMP is knocked out while their command team is 'men down,' while Mech 2's BMP (far left) is also knocked out, pinning the BMP ahead of it (yellow bead). But there is an immobilized BMP at bottom left, and he returns fire on the two TOW teams (top right)...
Looking south to north this time, the BMP fire (from top right) impacts on TOW1's positions (top left), knocking one team out and forcing the other to fall back (far left, with red, black, and blue bead). You can see a team from TOW2 at far right, atop the building with the blue bead, with Lt Lamanchew's team above them in the bush.
Soviet Mech 1's commander (white bead at bottom left) self rallies, while one of his rifle teams fires on Lt LaManchew's team (center-top left) and his MG team fires on the US MG team in the area (far right, already pinned with a yellow bead, which is what kept them from falling back and being in this vulnerable position to begin with).
LaManchew's command team remains 'men down' (explosion at center left), but the US MG team is eliminated (bottom right). The only good news is that Lt LaManchew is able to quickly rally his men, and the Soviets don't spot the TOW team in the building at top right. However, a hunkering US rifle team tries to rally but fails and has to fall back (they are the red bead at top right, having fallen back there from the blue bead next to the road at center right).
Looking north to south at the center of the table, the BMPs of the Soviet Mech 3 push ahead (Mech 2 is at bottom right, with Captain Sighe's platoon at top center, just left of the road, and a US MG and TOW team at top right). The pinned BMP on the road (yellow bead) rallies.
The infantry of Mech 3 moves up, and while TOW2 (top right) is not spotted, Captain Sighe's boys (purple beads at top left) are...
The Soviet commander is at center left, atop the orange building with black roof, with his BTR-50 just below him. He tries to rally a pinned BMP but fails, so it falls back (red bead at bottom left, from the yellow bead next to the CO). That BMP self-rallies while the CO marks Capt Sighe's position (top center right) for an airstrike.
In the Soviet center, Mech 2 BMPs set about rallying themselves (center left yellow bead and center right red/white bead), and are successful. The Mech 2 commander's BMP is immobilized (center left, white bead behind it), so it can't move and can't see anything.
Looking south to north from behind the US center, the remaining US MG (center right, red and purple beads) rallies itself. It's unspotted, but was hunkering because Soviet artillery had roughed them up in the last turn. Soviet Mech 1 is at top left, Mech 2 at top center, and Mech 3 at top right.
The Soviet MiG-23 streaks in low over the T-72s, just east of the main road...
Dropping its (roughly) 1100-pound bomb on Captain Sighe's platoon.
Captain Sighe's command team is pinned (yellow bead at center left), while his two remaining rifle teams are forced to fall back (red beads at center right). His other two rifle teams were KO'ed by Soviet artillery. Having the two rifle teams fall back is not a disaster as they are very near their intended fall back positions. Of course, they were supposed to hit the Soviets AND THEN fall back to their pre-dug holes (the green beads), and they abandoned their platoon commander (friggin' Army). And they need to rally and move into the fighting holes before the Soviet BMPs simply steamroll them...
Overall, pretty surprised (lucky) there were no kills.
Looking south to north, in retribution the US 81mm mortars (bottom right) fire on the infantry and BMPs of Soviet Mech 3 on the road (top center left, with the Soviet tanks at top right).
But the US mortars must be suffering from bad chow, or bad ammo, something! I'm assuming this based on the fact they once again had almost no impact, in this case forcing one enemy rifle team to fall back and hunker (red bead).
Captain Sighe's platoon activates, and so all three teams conduct a self rally: the command team (center, black bead) is good to go, but both hunkered rifle teams only manage to get up to pinned (yellow beads at bottom right). That's two D6 rolls to rally, and two 1s rolled; BS!!!
In the center with Soviet Mech 2, their MG tries to rally but stays pinned (yellow bead at center left), while the pinned and men down rifle teams to the MG's left both successfully self rally. Another enemy rifle team moves up, and Lt LaManchew's command team (far right) snap fires but misses.
The Soviet rifle team dodges the rounds and fires, forcing Lt LaManchew's team to fall back (top right, from explosion at center). TOW2 (blue beads atop two buildings at top right) still isn't spotted. That's great, but they still need two turns: one to reload, then one to fire, and the enemy is getting perilously close.
Looking northeast to southwest, the T-72s move up on the far Soviet left, with Mech 3 on the road at far right.
And just to make sure, the Soviets drop some 122mm rounds on Captain Sighe's identified positions...
Which puts heavy casualties on Capt Sighe's team (top right), and forces one of the pinned rifle teams to fall back and hunker (bottom left, from center).
At center, TOW2 manages to reload.
And Turn 4 concludes with their air defense vehicle moving up.
So the Yankees lost an MG and a TOW team, while the Soviets lost two BMPs. Both sides have several teams in bad morale states, needing to be rallied. TOW2 is ready to fire, but has Soviet infantry and vehicles right on their doorstep, and TOW1 is out of the fight for the moment, with one team knocked out and the other hunkering AND needing to reload, then get into a firing position.
Turn 5 starts with the battered remnants of Soviet Mech 1's infantry, on the Soviet far right, moving forward. They acquire Lt Lamanchew's command team and open fire, mowing the hapless Americans down as they tended to their wounded. But then things get really bad when the Mech 1 commander spots a TOW atop the gray building, which he promptly calls for artillery on.
The Soviet SP Arty is not ready yet (despite the two guns being in direct support), and so the last BMP of Mech 1 and the ZSU move up. The BMP fires on the TOW team...
Hahahahaha; if only 5s were good in this game!
But just as the TOW team pauses to catch its breath from laughing, Soviet 122mm rounds begin falling (Danger Close for Mech 1 and 2, I might add!).
The high explosive shells put heavy casualties on one TOW team (top center, white bead), while the other and a nearby rifle team are forced to fall back and hunker (red bead at bottom center). The US MG team that was earlier forced back by enemy arty and just rallied last turn is at far right.
I would really love to get someone up there to rally the TOW team in the building, but there's really no one left, and so chances are not good for them. Instead, the US MG team moves over (to center, from big bush at right) and tries to rally the two hunkering teams there. The TOW team fails and falls back (bottom left), while the rifle team succeeds.
In the Soviet center, Mech 2's MG self rallies (yellow bead at bottom left, near an immobilized BMP (bottom center, white bead behind it, with another immobilized BMP just off camera below the MG team) while the rest of the Mech 2 infantry move forward into the bush. The 'men down' TOW team is at top right).
Mech 2 is down to four (from seven) BMPs, but two of those are immobilized. The two runners move up (one at bottom left, carrying a rifle team, the other at top center, with Mech 1 units just to his left).
The Soviet CO packs up (from bottom left) and moves up the road (BTR-50 at center).
On the US left, having just been rallied by the MG team (bottom left), and instead of doing the smart thing and falling back into pre-dug fighting holes, the rifle team darts forward and rallies the 'men down' TOW team, right under the nose of the Soviets.
The gambit is successful, though it really means I traded a rifle team for a TOW team.
With BMPs of Mech 1 and 2 too close, and Mech 3 (on the road) obscured, the just-rallied TOW team (bottom left) turns right and fires on Soviet tanks on the far right (Captain Sighe's team is just at bottom right, the white bead showing they're 'men down').
The guided missile immolates one tank (center), and forces two others to fall back and hunker (red beads at bottom right and top left).
The firing TOW team then fell back (center, from top left), leaving the rifle team that saved them. The other TOW team from TOW2 (bottom right) tried to self rally but only got up to pin (yellow bead). There is also one team from TOW1 hunkering off camera to bottom left.
The Apache then swung right, keeping low and firing Hellfires at the BMPs of Mech 3.
Another BMP (top right) becomes a smoking hole in the ground, whilst a second falls back (bottom left, red bead).
Captain Sighe's three teams rally back into fighting shape (top right, center right, center-bottom left).
Looking west to east, the remaining team from TOW1 (bottom left) self rallies, but only gets up to pinned. TOW2 and the MG are at center, with Capt Sighe's platoon is at top center right.
Back on the road, a lagging BMP of Mech 3 moves up to the hunkering BMP at bottom left (red bead) and rallies them, while two more BMPs push ahead (top right, with a BMP of Mech 2 at bottom right).
The just-rallied BMP moves up (top right) and tries to rally a rifle team, but fails and they fall back (center left, red bead).
The lead BMP spots Capt Sighe's command team and fires, but the 30mm rounds miss.
So Sighe's boys return fire with their LAWs, but all they manage to do is pin the BMP! Dammit!!!
Soviet Mech 3 rifles begin moving up, rallying the team at bottom left and following their BMPs forward (top right).
Once again the US mortars fire on Mech 3: last time they forced one enemy rifle team to fall back. This time they put one enemy rifle team 'men down.' Nice shooting Army...
The two hunkering Soviet tanks (red beads) rally while the rest move up. The Soviet arty doesn't have any viable targets, and thus Turn 5 ends.
Turn 6 begins with infantry of Soviet Mech 2 infiltrating via the heavy foliage in the center and firing on the US rifle team that so selflessly rushed forward to save the cowering TOW team, which fired then fell back to bottom right. The Soviets see them and the MG team, and mark them for another Danger Close arty fire mission.
Another Soviet card comes out, but their arty isn't yet ready to fire, so they shift to the center, where the Soviet CO and BMPs of Mech 3 set about rallying folks to get back in fighting shape.
The Mech 3 BMPs aggressively push forward, with one pulling up short to fire on Captain Sighe (top center), with two more pushing deep. They manage to spot TOW2 (far and bottom left), but they miss the US rifle teams at far right, despite the fact those teams are not even in their fighting holes!
Capt Sighe's team is forced to fall back (center, red bead, from explosion at top right).
While one of the TOW teams is also forced to fall back (bottom left, from explosion at center).
Capt Sighe tries to rally his team (far right) while the two rifle teams rush forward and volley fire LAWs at the two BMPs...
Sighe's cowards fail and fall back (in the woods at bottom right, you can just see the blue and red beads) while one BMP is knocked out and the other is forced to fall back (top left).
Another Soviet card and their arty is still not ready, so the infantry of Mech 3 rally the team roughed up last turn by the US mortars, and the rest push forward. You can see some of Capt Sighe's men at top right, next to the BMP they just knocked out (the BMP they forced to fall back is the red bead at center right).
Mech 3 infantry keep pushing forward.
And then the Soviet arty hits, knocking out the last US MG team and pinning the TOW team there. The other TOW team would have gotten roughed up (it was just off camera below the explosions) if it hadn't been forced to fall back by BMP fire (it's just off screen at bottom left).
A US card comes out, and the Apache creeps forward.
You can see Captain Sighe and his command team hiding in the bushes to the helo's 4 o'clock.
The Apache pops up over the trees (bottom left) and fires the last of its Hellfires at the Soviet tank formation (top right).
And it's a good one: two T-72s are turned into funeral pyres, one is forced to fall back (top right), and one is pinned (bottom right).
And then the US mortars (bottom right) fire off their last few 81mm rounds, pounding the infantry of Soviet Mech 1 (top left, with the carnage the Apache just wrought on the Soviet tanks at center).
Wait; did I say pounded? Perhaps that's the wrong word. The US mortars managed to pin exactly one enemy infantry team. Not knock out, cause heavy casualties to, or force to fall back. Pin. One team...
The US mortars spike their tubes then fall back through the forest to the Main River, look to find a crossing, then link up with friendly forces later.
All three US TOW teams (top left, bottom left, far right) successfully self rally.
The Soviet tanks fall back to regroup and rally their buddies, which is successful.
So they get themselves back into formation, ready to push on through and break the back of the US defense.
The last rifle team from Lt LaManchew's platoon is 'men down,' and so they try to self rally, but stay men down. The Soviets lay down cover fire with their MG...
And then close assault the US team, putting it out of the fight.
The ZSU and last BMP from Mech 1 move up and fire on a TOW team, putting heavy casualties on them.
In the bottom left, Soviet Mech 2 tries to rally itself, with not much success. That yellow bead at left is Mech 2's MG team, and they've failed three rally attempts in a row.
They failed again, falling back to hunker in the bottom left corner...
Meanwhile, Mech 1 infantry come down from the building where they just knocked out a US rifle team to capture the 'men down' TOW team.
At which point the remaining two TOW teams (bottom left and bottom right), being the only US units left in the center and left, decide it's time to make their break and run for it. They're plan is to move through the dense foliage, make their way to the river, then find a crossing to link up with NATO forces.
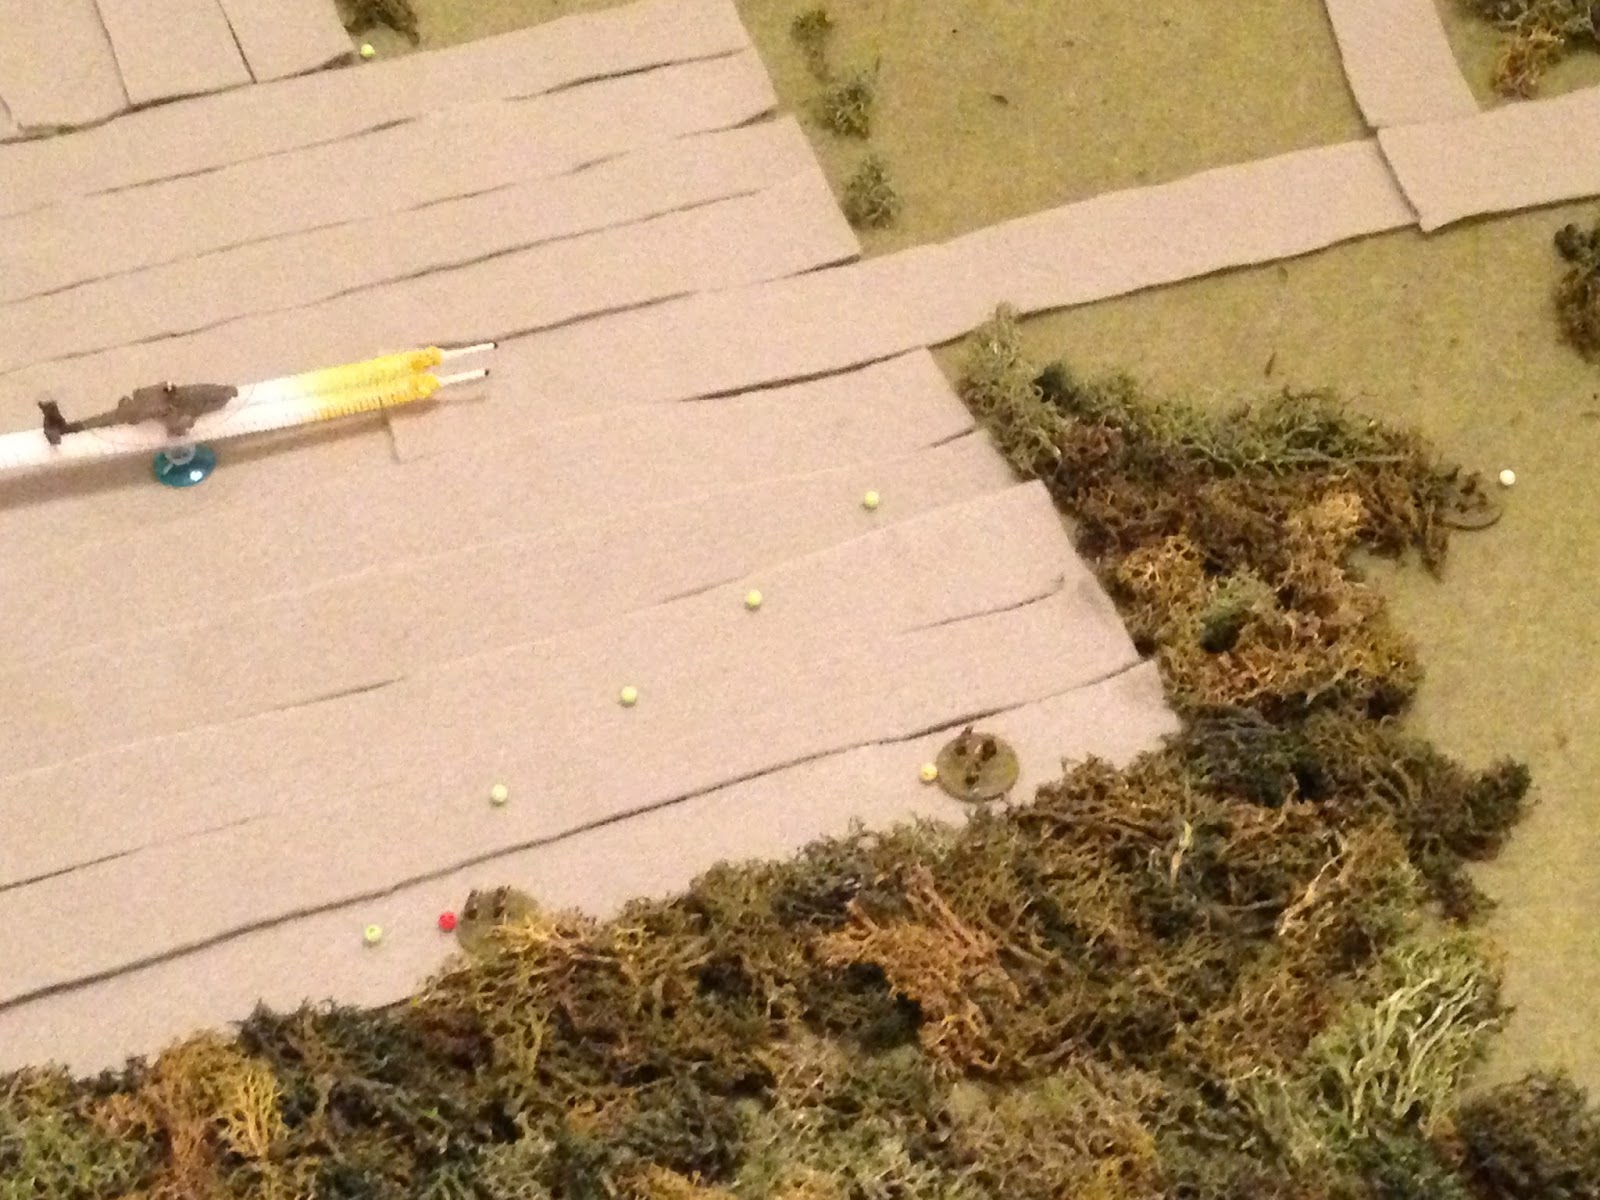
While in our last photo, clearly an action shot, you see Captain Sighe's platoon moving into the bush to E&E their way across the river as the Apache turns for home and Soviet forces push forward towards the bridge (all across the top).
Phew, we made it. I came out of the fight not feeling too bad. I mean, there was no way I (as the US commander) was going to stop the Soviets from accomplishing their goal of getting to and crossing the river. The whole point was to hold as long as possible, and make the Soviets pay dearly. The victory conditions were primarily about keeping Soviet vehicles from getting off the map (with the US retreating, I counted all Soviet operational vehicles on the board, minus the ZSU, as victory points for the Soviets). The Soviets started with over thirty vehicles, and so I was pretty happy/comfortable in the knowledge I had knocked out a whole bunch of them, immobilized a few (which clearly weren't crossing any rivers today), and even forced a few to retreat back off the Soviet baseline.
What I wasn't thinking about was the fact that, while the Soviet victory conditions didn't take into account US casualties, the US did have a bunch of fighting positions, and the Soviets got victory points for capturing them. So, as I'm reading the victory conditions in the book, I started thinking, how do I handle this? Well, the US forces retreated off the map, which logically means the Soviet survivors control the entire map, which logically means the Soviets captured all the US fighting positions. So, when counting up the points, I got my ass kicked!!! Dammit!!! I thought I had it in the bag, was feeling real good about how many vehicles I'd knocked out. I'm not displeased with the fight or how I handled it; I still see it as perfectly logical that the US fell back, rather than choosing to die in place. We just didn't knock out enough vehicles. Though it seems that if the Soviets capture all the US positions, I pretty much needed to knock out all their vehicles.
Obviously the true issue was to get troops to survive long enough to make it to the fall back positions then have them hang on until the time limit (game turns) ran out, thereby knocking out lots of Soviet vehicles but also holding some ground. In my defense, that as the plan. But, as they say, the enemy gets a say in the matter, and Soviet arty proved mighty effective at getting pins/hunkers/men down on my teams, making it impossible for me to have them fall back in an orderly manner, and even having to rush forward and sacrifice certain units to save others...
Casualties:
US:
Major Kavscott received the Bronze Star with 'V' for valor, posthumously of course, for his heroics in trying to reach and rally troops under heavy enemy fire.
Lt Dillon is listed as MIA, having been seen escaping from his tank and blending in with a herd of local sheep, never to be seen again. He was, however, busted down to Private for his extraordinarily terrible handling of his tank platoon in this fight...
Lt LaManchew received the Bronze Star with 'V' for valor, also posthumously, for his gallantry and combat leadership on the US left, which proved to be a significant obstacle to the Soviet 1st and 2nd Mechanized formations.
6 Rifle teams
2 MG teams
2 TOW teams
2 Command teams
1 M577 command vehicle
4 M1 Abrams
Soviets:
8 Rifle teams
1 MG team
1 Command team
10 BMPs
5 T-72s
So, fight number 7 is finally in the books. I've actually fought fight number 8 already, just need to write it up and get it posted. Again, sorry for the delay, but it's been rough; I wouldn't have even got this done today but for the fact our baseball game got rained out. These games are taking a tremendous amount of time; research, set up, play, take down, write up, and post is averaging about ten hours per fight. I've got two more left to go for this campaign. They've been a lot of fun, but, to be honest, I'm looking forward to getting back to my smaller-scale fights. Which is funny, because the cool thing about the scenario book is that it's scaleable to what you want to fight: the problem is me! Anyone that's paying attention on TMP or TWW will notice that Mr. Ben Lacy is playing out these same scenarios, but his fights have far fewer troops and vehicles. We all have our own picture in our mind's eye, and for me I wanted to do Cold War on relatively large scale (for me), so that's why the Soviets usually have about thirty vehicles and 20-something infantry stands. 'Tis what I wanted, and lots of fun, but it's wearing me out! ;)
So, stay tuned and I'll get fight number 8 posted ASAP, and I'll look to fight out scenario 9 this weekend and 10 next. Hope you guys are having a good time.
V/R,
Jack


Hello Jack!
ReplyDeleteAnother excellent report. I have been working my way through some Cold War-ish fiction such as Red Storm Rising, Team Yankee, Red Army, Ghost Fleet and Armageddon (5 books!). Your reports read just like theirs but with pictures as well! So well done and keep going. I believe you have played number 9. Only 1 to go and then you can have a rest by getting back into what I like to think of as real wargaming :-) (small tables for fast, fun and furious).
Hey buddy, thanks for taking a look. That's high praise, and certainly undeserved, but I still like it ;)
DeleteI am indeed ready for a break. I'm actually looking forward to some painting, and then getting back to 'real wargaming' ;)
Hope all is well.
V/R,
Jack