All,
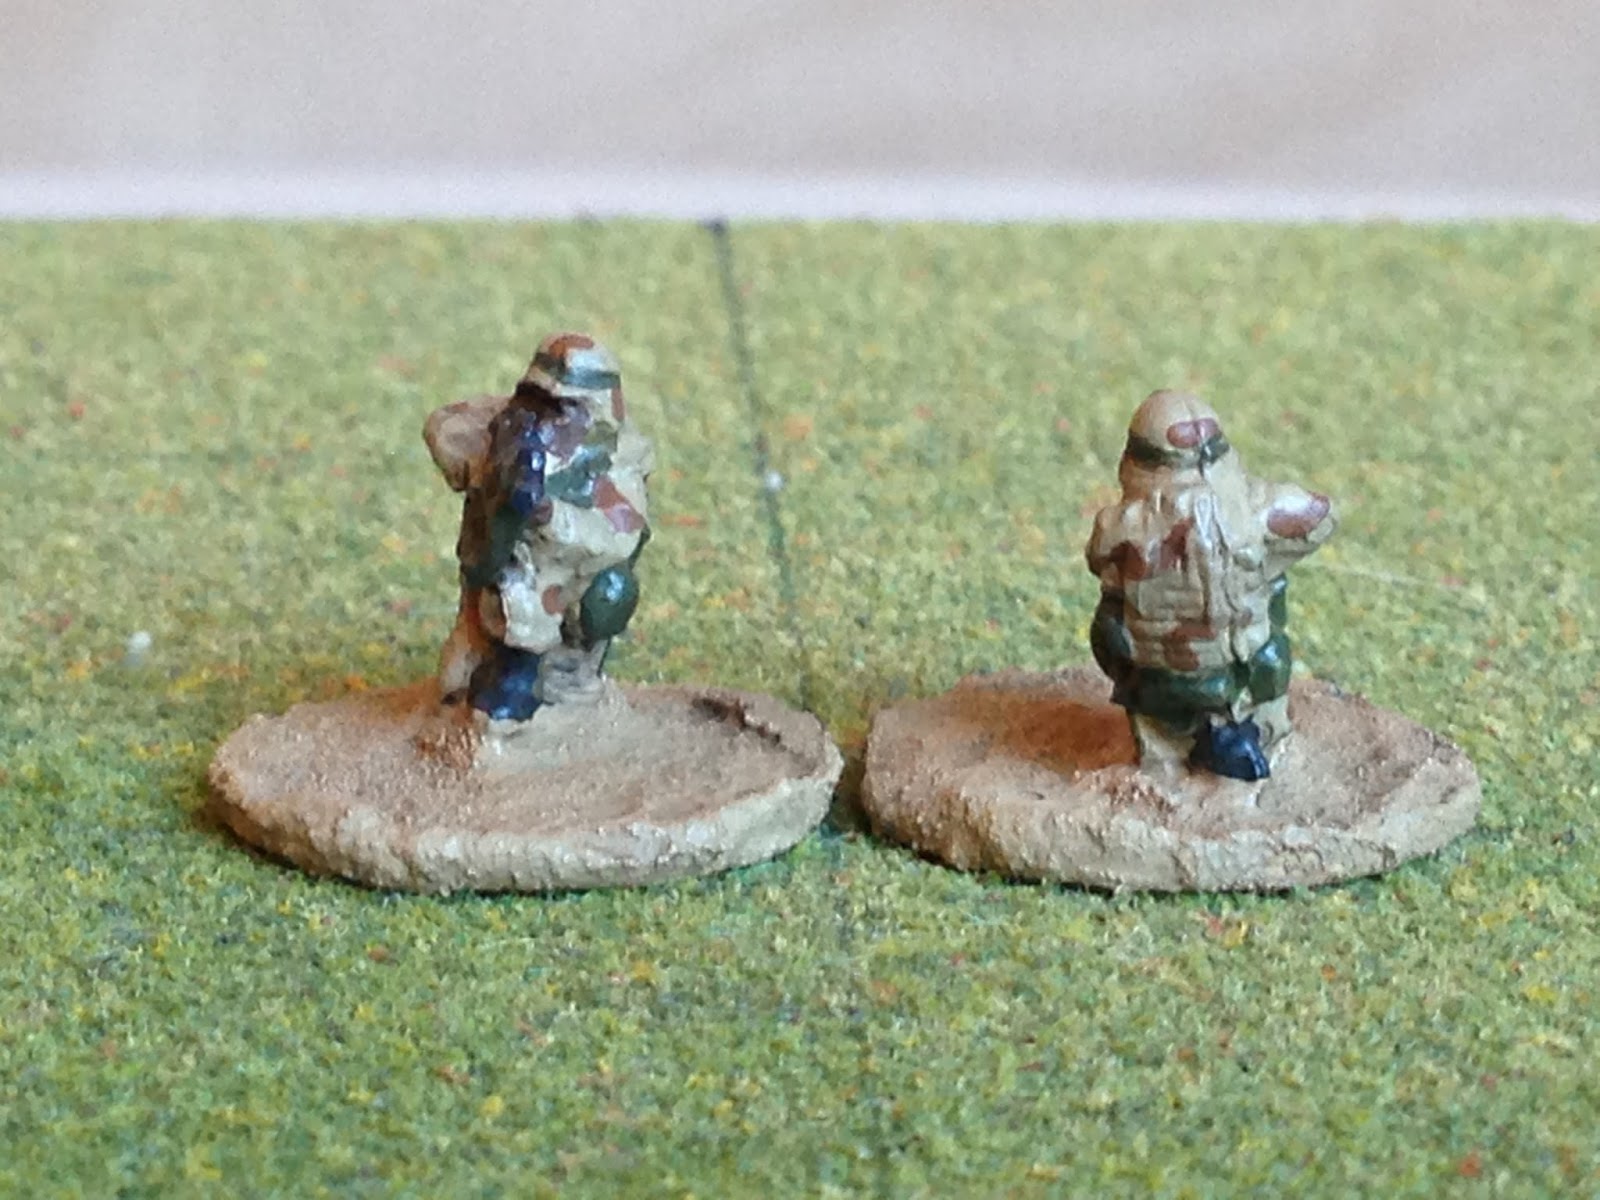
I knocked out another modern 15mm force, this time some US troops from the Desert Storm/Somalia era, and I did them up in a very simple rendition of the old 'chocolate chip' pattern, to include the flak jacket covers and ruck sack covers. These guys are from QRF, and they're some pretty old models, discontinued as a matter of fact; if anyone knows a way, I'd love to get my hands on about another thirty of them in a mix of rifles, SAWs, and 203s.
If we're honest, the figures are not the best, most crisp sculpts around, but they are favorites of mine. Why? Because the poses have a lot of character, and they have 'The Look.' What look? Well, I was in the US Marines from 94-04, and later we got the MARPAT uniforms with MOLLE gear, but up until about 2001 we looked just like these guys. I love the giant packs, the bulky gear, the bulky uniforms; every time I see these guys I can picture us coming off a -53 of out of a track, humping all out crap in some foreign land (or even some domestic training area!). So I really love these QRF "Old" Modern US Infantry, and would love to get enough to do up a force in woodland camo.
The whole force, 27 badasses looking to rock and roll. I only have enough of these guys to do up one force, and I was really torn whether to go desert or woodland; ultimately I went desert, figuring I'd get more use out of them with all the modern-ish stuff going on in desert climes.
Another look at the whole force. I think I've got three M-203s, four SAWs, and the rest have M-16A2s. Most of them are wearing packs, which I love; wish all of them were.
First up are the NCOs with M-203s, kneeling, signalling with one arm and holding binos in the other hand. Good character, and you can see I did my now usual variations on skin tone.
Reverse, plus some side shots. Note the big, bulky packs. Now, for the keen-eyed amongst you, you may notice that these guys don't have the correct gear for the time period I painted them up for. These guys actually have the Vector (vice ALICE) packs and LBVs (vice H-harnesses). But I'll get over it; in C/1/2 we got the Vector packs and LBVs in 96 or 97; they didn't last long. I actually went back to the ALICE pack and H-harness, taking them both with me to Afghanistan and Iraq (in 2004! Because of multiple deployments and the transition to the 'career issue' I missed the bulk issue of the MOLLE gear.
Three more NCO types, this time with M-16s. Here you get a better look at the LBVs (sorry, Load Bearing Vests), as well as the gas mask carrier on the left hip.
Reverse, plus some side shots. Look at the bulk, I love it! That's what we looked like, loaded down like sherpas. I can't put it any other way than to say the poses have 'the look.'
Two of the SAW gunners.
Looking fore and aft. You can also see I painted these guys up as Marines; that is, they're still wearing black boots, rather than the desert jungle boots.
The other two SAW gunners. Guess I didn't do a fore and aft pose...
Two riflemen in a good kneeling position, though the guy on the right's muzzle is a bit clipped.
Fore and aft.
Two more rifleman, this time off-hand. Now, these guys have something under the muzzle, and I'm not sure what it is. It doesn't go far enough back (along the upper receiver) to be an M-203, but flashlight attachments back then were very rare (I only remember seeing the Force guys with them, and even then I think those were on carbines).
Fore and aft.
Two riflemen with their weapons slung.
Reverse and side.
Two more riflemen, with weapons at the alert (sort of), and the right guy's muzzle is clipped.
Fore and aft.
Three more riflemen, with something in his left hand. I can't really tell what it is, but with the way he's standing, my guess would be he's using a compass to shoot an azimuth (yes, we didn't have GPSs back then, and had to do land nav with maps and compasses!).
Reverse and sides; one of the few guys without a pack.
Three more riflemen; they look pretty close to a pose seen already, but they are a little different.
Reverse/sides.
Another set of riflemen, guy on left's muzzle is clipped. You can see these guys also don't have packs, though on the guy on the left you can see he's got his E-tool on his utility belt (the case on his butt). That kinda cracked me up, as the only time I recall doing that or even seeing it was in Boot Camp. After that it always went on the outside (right side, high) of our packs.
Fore and aft.
Well, that's the whole force, really wish I had enough for a woodland camo version. I've got some more forces that I've finished and need to photo/post, and my son and I played two games this past weekend, so stay tuned.
V/R,
Jack
Tuesday, February 16, 2016
Sunday, February 14, 2016
Operation Jupiter Campaign Plan and Roster
All,
I've had Ben Lacy's fantastic scenario book, "Operation Jupiter," which covers British fighting near Caen in July 1944, for several years now. I've always wanted to play through the whole book, and have played a couple of the scenarios but got off track with other projects and then was putting it off to use with my KG Klink. But then my Aussie buddy, Mr. Shaun Travers has been playing and posting them, and I've got a hankering for some fighting in Normandy that just won't wait, certainly not as long as it's going to take for KG Klink to get there!
So my plan is to follow a fictional British Battalion and German Battalion (the book is well researched and actually uses various British and German units/formations, but I want to follow specific units to make it more personal) through approximately thirty fights included in the scenario book. As is often my custom, I will be be playing these in 10mm (Pendraken) using Ivan's excellent "5Core Company Command" rules. But there is a dramatic departure from the norm: I will not be playing these solo! I will be playing against my 6-year old son, Nik, already a veteran of half a dozen 5Core fights. I will serve as the British battalion commander, and he the German.
The 5th Westchesterfords North Riding Rangers of the Highland Coldshire Guards (5th WNRRHCG)
Officer Commanding: Colonel "Strapping Jack" McDaniel
A Company - Major Dillon, WIA, decorated for valor, and evacuated (F6)
2iC - Lt Cooman
(F1) Victory, 20 WIA/KIA, one Sherman immobilized but recovered.
(F6) Defeat, 45 WIA/KIA, two Shermans knocked out, three Universal Carriers knocked out.
B Company - Major Travers
2iC - Lt Rownan
(F2) Defeat, 25 WIA/KIA, 10 POW, and one Sherman knocked out.
(F7) Victory, 20 WIA/KIA, one M4 Sherman knocked out, one M10 Wolverine knocked out, and one Bren Carrier knocked out.
C Company - Major Lemmuel
2iC - Lt Boggler
(F3) Victory, 10 KIA/WIA.
(F8) Defeat, 20 WIA/KIA, one M4 Sherman knocked out.
D Company - Major Phillips
2iC - Lt Canham, decorated for valor (F4)
(F4) Victory, 6 KIA/WIA.
(F5) Victory, 30 KIA/WIA, one M4 Sherman destroyed, one M4 Sherman damaged (main gun).
The tank commanders of the Firefly and T3 were decorated for valor, the crews were mentioned in dispatches.
The 457th PanzerGrenadier Abteilung
Commanding Officer: Oberst Kanicke
1st Company - Captain Sorensen, WIA, decorated for valor, and evacuated (F6)
2iC - Lt Weidthaus
(F1) Defeat, 30 WIA/KIA, two PaK-40s lost.
(F6) Victory, 20 KIA/WIA, one Sdkfz 251/22 destroyed.
2nd Company - Captain Keipers, decorated for valor (F2).
2iC - Lt Teigner, decorated for valor (F2).
(F2) Victory, 15 WIA/KIA.
(F7) Defeat, 15 WIA/KIA, 5 POW, one Panther knocked out, one Pz Mk IV knocked out.
3rd Company - Captain Rolfbertsen
2iC - Lt Eichtoriel
(F3) Defeat, 20 KIA/WIA, 5 POW.
(F4) Defeat, 3 KIA/WIA.
(F8) Victory, 30 WIA/KIA, two Stug IIIs knocked out, two Sdkfz 251s knocked out.
4th Company - Captain Eireserb
2iC - Lt Tokapiksee
(F5) Defeat, 35 KIA/WIA, 5 POW, two PaK-40 ATGs destroyed.
I've had Ben Lacy's fantastic scenario book, "Operation Jupiter," which covers British fighting near Caen in July 1944, for several years now. I've always wanted to play through the whole book, and have played a couple of the scenarios but got off track with other projects and then was putting it off to use with my KG Klink. But then my Aussie buddy, Mr. Shaun Travers has been playing and posting them, and I've got a hankering for some fighting in Normandy that just won't wait, certainly not as long as it's going to take for KG Klink to get there!
So my plan is to follow a fictional British Battalion and German Battalion (the book is well researched and actually uses various British and German units/formations, but I want to follow specific units to make it more personal) through approximately thirty fights included in the scenario book. As is often my custom, I will be be playing these in 10mm (Pendraken) using Ivan's excellent "5Core Company Command" rules. But there is a dramatic departure from the norm: I will not be playing these solo! I will be playing against my 6-year old son, Nik, already a veteran of half a dozen 5Core fights. I will serve as the British battalion commander, and he the German.
The 5th Westchesterfords North Riding Rangers of the Highland Coldshire Guards (5th WNRRHCG)
Officer Commanding: Colonel "Strapping Jack" McDaniel
A Company - Major Dillon, WIA, decorated for valor, and evacuated (F6)
2iC - Lt Cooman
(F1) Victory, 20 WIA/KIA, one Sherman immobilized but recovered.
(F6) Defeat, 45 WIA/KIA, two Shermans knocked out, three Universal Carriers knocked out.
B Company - Major Travers
2iC - Lt Rownan
(F2) Defeat, 25 WIA/KIA, 10 POW, and one Sherman knocked out.
(F7) Victory, 20 WIA/KIA, one M4 Sherman knocked out, one M10 Wolverine knocked out, and one Bren Carrier knocked out.
C Company - Major Lemmuel
2iC - Lt Boggler
(F3) Victory, 10 KIA/WIA.
(F8) Defeat, 20 WIA/KIA, one M4 Sherman knocked out.
D Company - Major Phillips
2iC - Lt Canham, decorated for valor (F4)
(F4) Victory, 6 KIA/WIA.
(F5) Victory, 30 KIA/WIA, one M4 Sherman destroyed, one M4 Sherman damaged (main gun).
The tank commanders of the Firefly and T3 were decorated for valor, the crews were mentioned in dispatches.
The 457th PanzerGrenadier Abteilung
Commanding Officer: Oberst Kanicke
1st Company - Captain Sorensen, WIA, decorated for valor, and evacuated (F6)
2iC - Lt Weidthaus
(F1) Defeat, 30 WIA/KIA, two PaK-40s lost.
(F6) Victory, 20 KIA/WIA, one Sdkfz 251/22 destroyed.
2nd Company - Captain Keipers, decorated for valor (F2).
2iC - Lt Teigner, decorated for valor (F2).
(F2) Victory, 15 WIA/KIA.
(F7) Defeat, 15 WIA/KIA, 5 POW, one Panther knocked out, one Pz Mk IV knocked out.
3rd Company - Captain Rolfbertsen
2iC - Lt Eichtoriel
(F3) Defeat, 20 KIA/WIA, 5 POW.
(F4) Defeat, 3 KIA/WIA.
(F8) Victory, 30 WIA/KIA, two Stug IIIs knocked out, two Sdkfz 251s knocked out.
4th Company - Captain Eireserb
2iC - Lt Tokapiksee
(F5) Defeat, 35 KIA/WIA, 5 POW, two PaK-40 ATGs destroyed.
Thursday, February 11, 2016
Test Troops for WW2 15mm USMC
All,
I didn't get anything wargaming related done this past weekend, we were out of town for a funeral again. And I've missed work the past couple days being sick; being out sick is usually an opportunity to get some painting done, but this crud has really had me out of it. I've spent about 90% of my waking hours lying on the couch with the baby. I did, however, manage to get up and paint up a trio of test troops for an upcoming campaign I have planned.
I recently ordered some 15mm Peter Pig WW2 USMC from Brookhurst Hobbies (they've been fantastic); my plan is to follow a fictional platoon or company (still need to nail that down) from a fictional battalion from the first offensive at Guadalcanal up through the end of the war. I'm breaking it down into three phases: Gudalcanal-Tulagi-Florida, Climbing the Solomon Islands Chain to the Bismark Archipelago, and Across the Central Pacific.
Each of the three phases has its own unique uniform; I intend on essentially using the same troops for the whole campaign, just repainting them for each phase. So this update is simply to show my test figure for each phase, and for me to sketch out a rough draft for the campaign.
Here are the three troops, all the same pose of a Peter Pig 15mm US Marine Corps rifleman. They are in chronological order from right to left, with right being the Guadalcanal Marine, center being the Climbing the Solomons Marine, and left being the Central Pacific Marine.
All three Marines here are armed with the M-1 Garand; this is problematic for our Guadalcanal Marine as the troops of the 1st Marine Division (and attachments from the 2nd Marine Division) landed at Guadalcanal on 7 August 1942 equipped with the Springfield 03 bolt action rifle, not the Garand. The problem is, no one does troops in 15mm with M1 helmets and Springfields. So, my little Guadalcanal Marines will have M-1 Garands proxying as Springfields. I won't use any M-1 Carbines until the second phase, which is causing me problems for my mortar crews (the Peter Pig mortar crews all have M-1 Carbines, so I had to place another order for the gun crews, which don't appear to have rifles, so I'll use them as mortar crews for Guadalcanal). The Marines on Guadalcanal had two types of submachine guns: the classic Tommy Gun, as well as a major POS known as the Reising Gun. I haven't seen any Reisings in 15mm, but I'm not sweating it as Peter Pig has some excellent Tommy Gunners. The only problem with them is they have the 20-round box magazines (good for later war), as opposed to the early war 50-round drum magazines. Oh well...
The Guadalcanal Marine: simple olive green dungarees, brown boondockers (leather shoes), his M-1/Springfield, M1 helmet without cover, and basic web gear in a khaki that came out a little too yellowish, but not too bad.
Reverse. I put heavy grass on the base for Guadalcanal.
Moving on to our Solomon Islands Marine: here he's got the new duck-hunter, 'green-side out' camouflage uniform with matching helmet cover, an actual M-1 Garand, still got his brown boondockers on (though some poses will have leggings on as well), and the same khaki/yellow web gear. M-1 Carbines will appear during this period, as well as flamethrowers.
Reverse: I also gave the Solomons Marine heavy grass on his base, to work in places like Kolombangara, Choiseul, Rendova, New Ireland, New Britain, Bougainville, etc...
And on to our final guy, the Central Pacific Marine. Back to olive dungarees (though some stalwart veterans will probably keep the green-side out cammie blouses), khaki-yellow web gear, khaki-yellow leggings over their brown boondockers, and everyone will have their brown-side out helmet covers on. Also sporting an actual M-1 Garand. This crew will add the 2.36" bazooka to its stable of weapons.
Reverse: A little grass on the base, with a lot of sand showing through. Should be good for places like Tarawa, the Marshall Islands (Kwajalein, Eniwetok), the Marianas (Guam, Saipan, Tinian), Pelelieu, and Okinawa. I can't do Iwo Jima, not sure how to pull off a black sand island, plus the Japanese were underground the whole fight (certainly a feature of battles in the Central Pacific, but not nearly as much so as Iwo Jima).
The three guys running to and fro, just to give you a sense of their proportions. I really like how robust they are, can't stand flat figures.
Okay, so what's the plan you ask? Not sure, I need to map it out, but here's what I'm thinking:
Phase 1
-Start 7 Aug 1942 on Tulagi (heavy fighting there unlike Guadalcanal on D-Day). Screw around there for a bit, secure Florida, then finally move over to The Canal, probably in September.
-Sep-Nov 1942 on Guadalcanal. I'll play a couple defensive fights, but mostly USMC patrols and offensives. I even have an M-3 Stuart for this!
Phase 2
-The Russells (21 Feb 1943)
-New Georgia (30 June - 24 August 1943)
-Choiseul (28 October - 3 November 1943)
-Bougainville (1 November - 15 December 1943)
-Cape Gloucester on New Britain (26 December 1943- 4 May 1944; Volupai?),
Phase 3
-I'd like to move over to Tarawa (20-23 Nov 1943), but dates conflict with Bougainville, and wouldn't make sense to go to Tarawa in Central Pacific then back to SW Pacific for New Britain...
-Hit the Marshalls (Roi-Namur 31 January 1944; Engebi 18-19 Feb 1944, Eniwetok 19-21 February 1944, Parry Island 22 February 1944)
-Hit the Marianas (Guam 21 July - 10 August 1944; Saipan 15 June - 9 July 1944; Tinian 24 July - 1 August 1944)
-Peleliu (15 September - 27 November 1944)
-Okinawa (1 April - 22 June 1945)
Yes, this would be horrific amount of fighting for one unit, but it's just wargaming, and that's why I use fictional units, so I don't have the dead time of R&R real units need/had. So, let me know if I'm forgetting anything ;)
I'm also looking at some air gaming with 1/600 USN/USMC vs IJA/IJN, which is all ready to go except for some later US aircraft; some torpedo boat action (I have a bunch of USN and IJN stuff that needs to be assembled and painted); and some surface action (I have a bunch of Axis and Allies War at Sea prepaints ready to go). Coming soon.
V/R,
Jack
I didn't get anything wargaming related done this past weekend, we were out of town for a funeral again. And I've missed work the past couple days being sick; being out sick is usually an opportunity to get some painting done, but this crud has really had me out of it. I've spent about 90% of my waking hours lying on the couch with the baby. I did, however, manage to get up and paint up a trio of test troops for an upcoming campaign I have planned.
I recently ordered some 15mm Peter Pig WW2 USMC from Brookhurst Hobbies (they've been fantastic); my plan is to follow a fictional platoon or company (still need to nail that down) from a fictional battalion from the first offensive at Guadalcanal up through the end of the war. I'm breaking it down into three phases: Gudalcanal-Tulagi-Florida, Climbing the Solomon Islands Chain to the Bismark Archipelago, and Across the Central Pacific.
Each of the three phases has its own unique uniform; I intend on essentially using the same troops for the whole campaign, just repainting them for each phase. So this update is simply to show my test figure for each phase, and for me to sketch out a rough draft for the campaign.
Here are the three troops, all the same pose of a Peter Pig 15mm US Marine Corps rifleman. They are in chronological order from right to left, with right being the Guadalcanal Marine, center being the Climbing the Solomons Marine, and left being the Central Pacific Marine.
All three Marines here are armed with the M-1 Garand; this is problematic for our Guadalcanal Marine as the troops of the 1st Marine Division (and attachments from the 2nd Marine Division) landed at Guadalcanal on 7 August 1942 equipped with the Springfield 03 bolt action rifle, not the Garand. The problem is, no one does troops in 15mm with M1 helmets and Springfields. So, my little Guadalcanal Marines will have M-1 Garands proxying as Springfields. I won't use any M-1 Carbines until the second phase, which is causing me problems for my mortar crews (the Peter Pig mortar crews all have M-1 Carbines, so I had to place another order for the gun crews, which don't appear to have rifles, so I'll use them as mortar crews for Guadalcanal). The Marines on Guadalcanal had two types of submachine guns: the classic Tommy Gun, as well as a major POS known as the Reising Gun. I haven't seen any Reisings in 15mm, but I'm not sweating it as Peter Pig has some excellent Tommy Gunners. The only problem with them is they have the 20-round box magazines (good for later war), as opposed to the early war 50-round drum magazines. Oh well...
The Guadalcanal Marine: simple olive green dungarees, brown boondockers (leather shoes), his M-1/Springfield, M1 helmet without cover, and basic web gear in a khaki that came out a little too yellowish, but not too bad.
Reverse. I put heavy grass on the base for Guadalcanal.
Moving on to our Solomon Islands Marine: here he's got the new duck-hunter, 'green-side out' camouflage uniform with matching helmet cover, an actual M-1 Garand, still got his brown boondockers on (though some poses will have leggings on as well), and the same khaki/yellow web gear. M-1 Carbines will appear during this period, as well as flamethrowers.
Reverse: I also gave the Solomons Marine heavy grass on his base, to work in places like Kolombangara, Choiseul, Rendova, New Ireland, New Britain, Bougainville, etc...
And on to our final guy, the Central Pacific Marine. Back to olive dungarees (though some stalwart veterans will probably keep the green-side out cammie blouses), khaki-yellow web gear, khaki-yellow leggings over their brown boondockers, and everyone will have their brown-side out helmet covers on. Also sporting an actual M-1 Garand. This crew will add the 2.36" bazooka to its stable of weapons.
Reverse: A little grass on the base, with a lot of sand showing through. Should be good for places like Tarawa, the Marshall Islands (Kwajalein, Eniwetok), the Marianas (Guam, Saipan, Tinian), Pelelieu, and Okinawa. I can't do Iwo Jima, not sure how to pull off a black sand island, plus the Japanese were underground the whole fight (certainly a feature of battles in the Central Pacific, but not nearly as much so as Iwo Jima).
The three guys running to and fro, just to give you a sense of their proportions. I really like how robust they are, can't stand flat figures.
Okay, so what's the plan you ask? Not sure, I need to map it out, but here's what I'm thinking:
Phase 1
-Start 7 Aug 1942 on Tulagi (heavy fighting there unlike Guadalcanal on D-Day). Screw around there for a bit, secure Florida, then finally move over to The Canal, probably in September.
-Sep-Nov 1942 on Guadalcanal. I'll play a couple defensive fights, but mostly USMC patrols and offensives. I even have an M-3 Stuart for this!
Phase 2
-The Russells (21 Feb 1943)
-New Georgia (30 June - 24 August 1943)
-Choiseul (28 October - 3 November 1943)
-Bougainville (1 November - 15 December 1943)
-Cape Gloucester on New Britain (26 December 1943- 4 May 1944; Volupai?),
Phase 3
-I'd like to move over to Tarawa (20-23 Nov 1943), but dates conflict with Bougainville, and wouldn't make sense to go to Tarawa in Central Pacific then back to SW Pacific for New Britain...
-Hit the Marshalls (Roi-Namur 31 January 1944; Engebi 18-19 Feb 1944, Eniwetok 19-21 February 1944, Parry Island 22 February 1944)
-Hit the Marianas (Guam 21 July - 10 August 1944; Saipan 15 June - 9 July 1944; Tinian 24 July - 1 August 1944)
-Peleliu (15 September - 27 November 1944)
-Okinawa (1 April - 22 June 1945)
Yes, this would be horrific amount of fighting for one unit, but it's just wargaming, and that's why I use fictional units, so I don't have the dead time of R&R real units need/had. So, let me know if I'm forgetting anything ;)
I'm also looking at some air gaming with 1/600 USN/USMC vs IJA/IJN, which is all ready to go except for some later US aircraft; some torpedo boat action (I have a bunch of USN and IJN stuff that needs to be assembled and painted); and some surface action (I have a bunch of Axis and Allies War at Sea prepaints ready to go). Coming soon.
V/R,
Jack
Monday, February 1, 2016
15mm Crescent Root Town Set
All,
My birthday presents arrived!!! I picked up the brand new 15mm Crescent Root Town Set, and it's absolutely beautiful. I can't wait to get them on the table; when I got home from work to find the box waiting on me I couldn't help but set them up to take a look. My older son played with them for a good hour.
But let's get to them.
Here's how they came. I love the fact that something so big and so beautiful can easily be put right back in here for storage.
Now for the unveiling...
Ta-daa!!! Awesome!!! I'm so happy I made this purchase! Panda and Slavin look out, I'm comin' for ya. Okay, maybe not, but this is a big step in that direction (for me, at least). This is the whole set, which comes pre-painted AND pre-assembled. You just pull it out of the box and BAM! You're ready to go.
Sorry, some of the buildings (bottom left) are skewed off their base from my boy playing with them. Still beautiful ;)
The whole set comprises the following:
-2' x 2' mat that's printed on mousepad type material.
-Five buildings with detachable roofs and floors (each story comes apart).
-A textured base for each building.
-Each building comes with at least one separate 'bombed out' story. Ugh, I just realized I didn't take photos of any of the bombed out sections...
Some close-ups. I can't stop looking at them.
Another closeup. The printed mat is really vibrant looking and looks to be quite durable.
Grandma's house with a fenced in front yard (garden for you Brits).
The other side of Grandma's house.
A look down main street.
One of the buildings with the roofs removed. Again, each story can be removed as well. I really like the fact that the building interiors are finished as well.
That same building, all pulled apart.
I recently finished up some cool Rebel Minis government agents, haven't posted them yet, so consider this a sneak preview. In any case, I wanted to show some 15mm guys next to the buildings to give a sense of scale. The buildings are big enough I think you can actually get away with using them for 20mm too, and you know I'll be using them for 10mm fights.
Agent Smith searching the lot for Neo.
Joined by a buddy.
Dammit, I just can't have a post without a blurry pic in it! Anyway, there's the missus come to water her hedges. Please ignore the giant, chrome-plated pistol in her left hand, she's sweet as can be.
One last look. I feel like a little kid when I'm looking at this, just marveling at it. I almost pushed my boy out of the way and started moving the figures around, making little shooty sounds. But a man must maintain some semblance of pride; I only make shooty sounds when I'm upstairs by myself ;)
On a side note, I also received my 15mm Eureka Minis WWII Japanese troops and some Battlefront 15mm OH-6 helos. Quite a day!
Stay tuned, more posts of finished 15mm troops to come.
V/R,
Jack
My birthday presents arrived!!! I picked up the brand new 15mm Crescent Root Town Set, and it's absolutely beautiful. I can't wait to get them on the table; when I got home from work to find the box waiting on me I couldn't help but set them up to take a look. My older son played with them for a good hour.
But let's get to them.
Here's how they came. I love the fact that something so big and so beautiful can easily be put right back in here for storage.
Now for the unveiling...
Ta-daa!!! Awesome!!! I'm so happy I made this purchase! Panda and Slavin look out, I'm comin' for ya. Okay, maybe not, but this is a big step in that direction (for me, at least). This is the whole set, which comes pre-painted AND pre-assembled. You just pull it out of the box and BAM! You're ready to go.
Sorry, some of the buildings (bottom left) are skewed off their base from my boy playing with them. Still beautiful ;)
The whole set comprises the following:
-2' x 2' mat that's printed on mousepad type material.
-Five buildings with detachable roofs and floors (each story comes apart).
-A textured base for each building.
-Each building comes with at least one separate 'bombed out' story. Ugh, I just realized I didn't take photos of any of the bombed out sections...
Some close-ups. I can't stop looking at them.
Another closeup. The printed mat is really vibrant looking and looks to be quite durable.
Grandma's house with a fenced in front yard (garden for you Brits).
The other side of Grandma's house.
A look down main street.
One of the buildings with the roofs removed. Again, each story can be removed as well. I really like the fact that the building interiors are finished as well.
That same building, all pulled apart.
I recently finished up some cool Rebel Minis government agents, haven't posted them yet, so consider this a sneak preview. In any case, I wanted to show some 15mm guys next to the buildings to give a sense of scale. The buildings are big enough I think you can actually get away with using them for 20mm too, and you know I'll be using them for 10mm fights.
Agent Smith searching the lot for Neo.
Joined by a buddy.
Dammit, I just can't have a post without a blurry pic in it! Anyway, there's the missus come to water her hedges. Please ignore the giant, chrome-plated pistol in her left hand, she's sweet as can be.
One last look. I feel like a little kid when I'm looking at this, just marveling at it. I almost pushed my boy out of the way and started moving the figures around, making little shooty sounds. But a man must maintain some semblance of pride; I only make shooty sounds when I'm upstairs by myself ;)
On a side note, I also received my 15mm Eureka Minis WWII Japanese troops and some Battlefront 15mm OH-6 helos. Quite a day!
Stay tuned, more posts of finished 15mm troops to come.
V/R,
Jack
Sunday, January 31, 2016
BF Team Yankee 15mm US Mech Platoon
All,
Well, I'm officially sick of myself... After photographing these troops I went to put them away and discovered I'm out of storage space. Which is a clear indicator that I've gone way too far with my 15mm 'side' project. A quick rundown:
-African government troops with a PMC team
-African insurgents with a 1st World Special Forces team
-French Foreign Legion (temperate camo)
-UN troops in blue helmets (Rebel Minis' Chinese)
-US 90s infantry (temperate camo) (these guys)
-Modern Aussies (temperate camo)
-Modern Chechens
-Modern Russians (Eureka Minis, temperate camo)
-Modern Russians (Peter Pig, temperate camo)
-Modern US infantry (in multicam)
-Modern Brit infantry (desert)
-Modern desert insurgents
-Modern desert Fedayeen/ISIS
-Modern Western SOF (temperate)
-Modern Western SOF (desert)
-Modern US desert (QRF, haven't posted these yet)
-Modern Third World desert
-Vietnam US Marines
-Vietnam US SEALs
-Vietnam Viet Cong
-WWII Brits (NW Europe)
-WWII Germans (BF)
-WWII Germans (Command Decision)
-WWII US (NW Europe, Command Decision)
-WWII USMC (Peter Pig, just received)
-WWII Japanese (Peter Pig, on the way)
**I haven't posted any of the WWII stuff, some of which I've had for about seven years.
I'm probably forgetting some. In any case, so much for a side project.
Anyway, I wanted a US force in temperate (Woodland) for the 90s; I really wanted some of the 'old' QRF Modern US infantry, but I've had a hard time securing some, so I went with Battlefront's new US Mechanized Infantry for Team Yankee. Good, crisp sculpts with no flash; I have some issues with some of the poses, but in aggregate they look great and I'm happy to have them. Having said that, if any of you out in internet land have between 20 and 30 old QRF US infantry lying around, I'd love to get my hands on them. I'll trade you these guys (not trying to get rid of them, it's just that I only need one US 90s era platoon in woodland camo), or I'll pay cash, then have to offload these on Kyote ;)
The whole group, 27 troops. There are two officer looking figures, two RTOs, four Dragon gunners, four M-203 grenadiers, three SAW gunners, and the rest are riflemen with M-16A2s (four also carry M-72 LAWs). You see I did them up with some brown dirt and grass on the bases, and they're all in 80s/90s-era US Woodland cammies with PASGT helmets, flak jackets, and H-harnesses (which always cracked me up, they're actually a Y-harness, but for some reason we called them H-harnesses).
Again. On to the sculpts.
First up is one of my favorite poses, two guys moving forward with M-47 Dragons on their back. Sort of an iconic Cold War image for me.
Once again my pics suck, and I apologize. The 'new painting spot' I found with good light apparently only has good light in the late afternoon, and I wasn't willing/able to wait..
A look at the other side and back. Yes, I can't help but put yellow stripes on anti-tank weapons, just to add some color.
Next up is two Dragon gunners with the weapons deployed.
Rear and other side. Hard to see, but the flak jackets, H-harnesses, and gear are pretty well modeled, all raised so they're easy to paint up. There's just one little complaint, which you can see on the right-hand guy: every man is carrying this boxy thing on his utility belt at dead center, between the two canteens. My problem is, I don't know what it is. We always put either our buttpack there, or (if you weren't wearing a buttpack) your first aid kit. The problem is, this thing doesn't appear to be either one, or anything else I recognize. It actually looks like the first aid kit, but it's way too big for that; the size reminds me of the buttpack, but it's the wrong shape for that. Anyway, a really small gripe, and I can certainly live with it.
Next up is the kneeling grenadier pose. On the left hand guy you can clearly see the gas mask (ahem, "field protective mask") carrier.
And from this angle you can clearly see they're both wearing the special grenadier vests, which is a pretty damn cool detail. I don't know if you can tell or not, but I painted some of the guys in jungle boots (green mesh sides) and some in combat boots (all black leathers).
The other grenadier pose. I really like the modelling of the 203.
Other side, again you can see the grenadier vest, and here you can see (on the left-hand guy) the rifle sling, which I thought was pretty cool as most manufacturers leave this off or put it on the wrong spot.
The first riflemen pose, man firing a LAW with his M-16 slung cross body muzzle down.
Reverse, with the gas mask carrier really visible on left, as well as the flak jacket's raised shoulder flaps (so you could run your H-harness under it).
Rifleman pushing forward with a LAW strapped to his back. Another really good pose in my opinion.
Reverse. The poor light and shadows makes it hard, if not impossible, to tell that I wen with my new 'normal' of painting up flesh in three different tones.
Ah, pics of what is my least favorite pose, and really just because of a personal quibble. I like the animation of the pose, my problem is simply with the troop's carriage of the weapon. It's probably just me, but in ten years in the Marine Corps I can't ever recall being outside a vehicle, moving around, with my weapon inverted like that. I would absolutely love the pose if the weapon had even a slight angle to it (about 30 would make sense, 45 degrees would be even better, in my humble opinion). In my experience you are quite frequently moving to and fro with your muzzle pointed to the deck, but you don't do it with your weapon perpendicular to the ground...
So of course this is the only pose that has four men (vice the normal two) allotted. It looks good from tabletop distance, you don't even notice, but up close it just looks funny to me.
Other side.
The next rifleman pose, firing offhand. I've got a little trouble with this pose as well. For all you shooters (I spent a couple years on the 2nd Marine Division shooting team) out there, take a good look at the pose in this pic and the one below it, and tell me what it reminds you of.
To me it looks like the shooting team, long-range offhand, the one you used with the 'blackstick' (M-116, as opposed to the 'longstick,' M-14). First, understand that on the range you use much different shooting positions than you use in combat. Second, you're wearing like three sweatshirts under a shooting jacket that you're cinched into so tight you can barely breathe. Third, you're firing with a very non-maneuverable (which some might say doesn't work very well in combat) 'loop-sling,' to help aid with stability in firing position, particularly the offhand, which is typically everyone's toughest position. In any case, with the M-16 it was harder to get jacked in for the offhand, so as another measure to help keep you tight you would walk up to the target, fact almost 180 degrees away from it, spread your legs a little wider than shoulder distance, then twist your torso back around towards the target. Start with your rifle at high 12 o'clock, dropping it as you exhale, and squeeze...
Anyway, that's what this pose reminds me of. Not a very good idea when people are shooting at you...
Opposite.
Another rifleman, kneeling, looks to be meant to pair up with the firing Dragon gunner.
Opposite.
A look at the boss, talking on the radio with his rifle slung cross body. Also, kudos for the pistol on his right hip, though he looks to need to add a little weight ;)
Opposite.
The RTO, and this pose aggravates me just a little, too. First, he looks to be leaning up against a wall that isn't there. Second, it took me forever to figure out what's in his left hand (you'll see better in the next pic)...
It's the handset; but I thought the LT was talking on the handset (certainly the boss isn't carrying a radio)? Lastly, he's carrying what appears to be the world's smallest PRC-77, and he doesn't have it in a pack or on an ALICE frame, it's just sort of stuck there somehow.
It is, once again, a very small issue, but honestly I've been spoiled by the detail in 15mm in general, and by Battlefront in particular.
First pose of the SAW gunners, kneeling. Since I'm appearing grumpy already, the legs and the SAW look a little short to me. But again, not even noticeable at skirmish-gaming distance, much less normal tabletop distance.
Opposite, a good look at the gear. I always like troops with backpacks on, but I'm not bothered by these guys' lack of packs as, especially with the ALICE packs (as opposed to the smaller patrol packs available with the Vector and MOLLE gear) you dropped them at the first sign of trouble.
And the last guy, another SAW gunner. It's hilarious that this is my favorite pose (sorry for the crappy, shadowy picture) and I only get one of them! But he looks really great to me, great movement, balance, and proportions.
Reverse.
So, that's the BF Team Yankee US Mech Platoon. I really hope I didn't come off as too grumpy, they're really good troops and I'm happy to have them. I think the issues are 1) I'm used to truly exceptional stuff from Battlefront, and 2) I've got a certain amount of 'this is how it should look' and desire for them to be perfect as these guys are from a time I was actually in the military, wearing and carrying that stuff.
I've been a busy little beaver; I still haven't played any games, but I finished these, QRF US desert infantry (up next), Peter Pig VC, and some Rebel Minis civilians and government agent types.
V/R,
Jack
Well, I'm officially sick of myself... After photographing these troops I went to put them away and discovered I'm out of storage space. Which is a clear indicator that I've gone way too far with my 15mm 'side' project. A quick rundown:
-African government troops with a PMC team
-African insurgents with a 1st World Special Forces team
-French Foreign Legion (temperate camo)
-UN troops in blue helmets (Rebel Minis' Chinese)
-US 90s infantry (temperate camo) (these guys)
-Modern Aussies (temperate camo)
-Modern Chechens
-Modern Russians (Eureka Minis, temperate camo)
-Modern Russians (Peter Pig, temperate camo)
-Modern US infantry (in multicam)
-Modern Brit infantry (desert)
-Modern desert insurgents
-Modern desert Fedayeen/ISIS
-Modern Western SOF (temperate)
-Modern Western SOF (desert)
-Modern US desert (QRF, haven't posted these yet)
-Modern Third World desert
-Vietnam US Marines
-Vietnam US SEALs
-Vietnam Viet Cong
-WWII Brits (NW Europe)
-WWII Germans (BF)
-WWII Germans (Command Decision)
-WWII US (NW Europe, Command Decision)
-WWII USMC (Peter Pig, just received)
-WWII Japanese (Peter Pig, on the way)
**I haven't posted any of the WWII stuff, some of which I've had for about seven years.
I'm probably forgetting some. In any case, so much for a side project.
Anyway, I wanted a US force in temperate (Woodland) for the 90s; I really wanted some of the 'old' QRF Modern US infantry, but I've had a hard time securing some, so I went with Battlefront's new US Mechanized Infantry for Team Yankee. Good, crisp sculpts with no flash; I have some issues with some of the poses, but in aggregate they look great and I'm happy to have them. Having said that, if any of you out in internet land have between 20 and 30 old QRF US infantry lying around, I'd love to get my hands on them. I'll trade you these guys (not trying to get rid of them, it's just that I only need one US 90s era platoon in woodland camo), or I'll pay cash, then have to offload these on Kyote ;)
The whole group, 27 troops. There are two officer looking figures, two RTOs, four Dragon gunners, four M-203 grenadiers, three SAW gunners, and the rest are riflemen with M-16A2s (four also carry M-72 LAWs). You see I did them up with some brown dirt and grass on the bases, and they're all in 80s/90s-era US Woodland cammies with PASGT helmets, flak jackets, and H-harnesses (which always cracked me up, they're actually a Y-harness, but for some reason we called them H-harnesses).
Again. On to the sculpts.
First up is one of my favorite poses, two guys moving forward with M-47 Dragons on their back. Sort of an iconic Cold War image for me.
Once again my pics suck, and I apologize. The 'new painting spot' I found with good light apparently only has good light in the late afternoon, and I wasn't willing/able to wait..
A look at the other side and back. Yes, I can't help but put yellow stripes on anti-tank weapons, just to add some color.
Next up is two Dragon gunners with the weapons deployed.
Rear and other side. Hard to see, but the flak jackets, H-harnesses, and gear are pretty well modeled, all raised so they're easy to paint up. There's just one little complaint, which you can see on the right-hand guy: every man is carrying this boxy thing on his utility belt at dead center, between the two canteens. My problem is, I don't know what it is. We always put either our buttpack there, or (if you weren't wearing a buttpack) your first aid kit. The problem is, this thing doesn't appear to be either one, or anything else I recognize. It actually looks like the first aid kit, but it's way too big for that; the size reminds me of the buttpack, but it's the wrong shape for that. Anyway, a really small gripe, and I can certainly live with it.
Next up is the kneeling grenadier pose. On the left hand guy you can clearly see the gas mask (ahem, "field protective mask") carrier.
And from this angle you can clearly see they're both wearing the special grenadier vests, which is a pretty damn cool detail. I don't know if you can tell or not, but I painted some of the guys in jungle boots (green mesh sides) and some in combat boots (all black leathers).
The other grenadier pose. I really like the modelling of the 203.
Other side, again you can see the grenadier vest, and here you can see (on the left-hand guy) the rifle sling, which I thought was pretty cool as most manufacturers leave this off or put it on the wrong spot.
The first riflemen pose, man firing a LAW with his M-16 slung cross body muzzle down.
Reverse, with the gas mask carrier really visible on left, as well as the flak jacket's raised shoulder flaps (so you could run your H-harness under it).
Rifleman pushing forward with a LAW strapped to his back. Another really good pose in my opinion.
Reverse. The poor light and shadows makes it hard, if not impossible, to tell that I wen with my new 'normal' of painting up flesh in three different tones.
Ah, pics of what is my least favorite pose, and really just because of a personal quibble. I like the animation of the pose, my problem is simply with the troop's carriage of the weapon. It's probably just me, but in ten years in the Marine Corps I can't ever recall being outside a vehicle, moving around, with my weapon inverted like that. I would absolutely love the pose if the weapon had even a slight angle to it (about 30 would make sense, 45 degrees would be even better, in my humble opinion). In my experience you are quite frequently moving to and fro with your muzzle pointed to the deck, but you don't do it with your weapon perpendicular to the ground...
So of course this is the only pose that has four men (vice the normal two) allotted. It looks good from tabletop distance, you don't even notice, but up close it just looks funny to me.
Other side.
The next rifleman pose, firing offhand. I've got a little trouble with this pose as well. For all you shooters (I spent a couple years on the 2nd Marine Division shooting team) out there, take a good look at the pose in this pic and the one below it, and tell me what it reminds you of.
To me it looks like the shooting team, long-range offhand, the one you used with the 'blackstick' (M-116, as opposed to the 'longstick,' M-14). First, understand that on the range you use much different shooting positions than you use in combat. Second, you're wearing like three sweatshirts under a shooting jacket that you're cinched into so tight you can barely breathe. Third, you're firing with a very non-maneuverable (which some might say doesn't work very well in combat) 'loop-sling,' to help aid with stability in firing position, particularly the offhand, which is typically everyone's toughest position. In any case, with the M-16 it was harder to get jacked in for the offhand, so as another measure to help keep you tight you would walk up to the target, fact almost 180 degrees away from it, spread your legs a little wider than shoulder distance, then twist your torso back around towards the target. Start with your rifle at high 12 o'clock, dropping it as you exhale, and squeeze...
Anyway, that's what this pose reminds me of. Not a very good idea when people are shooting at you...
Opposite.
Another rifleman, kneeling, looks to be meant to pair up with the firing Dragon gunner.
Opposite.
A look at the boss, talking on the radio with his rifle slung cross body. Also, kudos for the pistol on his right hip, though he looks to need to add a little weight ;)
Opposite.
The RTO, and this pose aggravates me just a little, too. First, he looks to be leaning up against a wall that isn't there. Second, it took me forever to figure out what's in his left hand (you'll see better in the next pic)...
It's the handset; but I thought the LT was talking on the handset (certainly the boss isn't carrying a radio)? Lastly, he's carrying what appears to be the world's smallest PRC-77, and he doesn't have it in a pack or on an ALICE frame, it's just sort of stuck there somehow.
It is, once again, a very small issue, but honestly I've been spoiled by the detail in 15mm in general, and by Battlefront in particular.
First pose of the SAW gunners, kneeling. Since I'm appearing grumpy already, the legs and the SAW look a little short to me. But again, not even noticeable at skirmish-gaming distance, much less normal tabletop distance.
Opposite, a good look at the gear. I always like troops with backpacks on, but I'm not bothered by these guys' lack of packs as, especially with the ALICE packs (as opposed to the smaller patrol packs available with the Vector and MOLLE gear) you dropped them at the first sign of trouble.
And the last guy, another SAW gunner. It's hilarious that this is my favorite pose (sorry for the crappy, shadowy picture) and I only get one of them! But he looks really great to me, great movement, balance, and proportions.
Reverse.
So, that's the BF Team Yankee US Mech Platoon. I really hope I didn't come off as too grumpy, they're really good troops and I'm happy to have them. I think the issues are 1) I'm used to truly exceptional stuff from Battlefront, and 2) I've got a certain amount of 'this is how it should look' and desire for them to be perfect as these guys are from a time I was actually in the military, wearing and carrying that stuff.
I've been a busy little beaver; I still haven't played any games, but I finished these, QRF US desert infantry (up next), Peter Pig VC, and some Rebel Minis civilians and government agent types.
V/R,
Jack
Subscribe to:
Posts (Atom)