Thursday, December 25, 2014

The OKH's Fire Brigade - KG Klink OOB Take 2

Okay, on the eve of battle I chickened out with my initial order of battle for the Fall Weiss campaign plan, "The OKH's Fire Brigade, Kampfgruppe Klink."  As usual, I am taking some liberties with TO/Es in order to make the situation 'game-able,' i.e., to fit what I want to do.  I originally started off with a battalion of Panzers and two battalions of rifles; this really scared me in terms of trying to track all those troops (knowing that one vehicle on the table is one vehicle, one stand is one squad or weapons team), so below I've 'down-sized' to a company of panzers, a company of rifles, and a reconnaissance company (heavy on motorcycle troops to give me extra infantry).

The patriarch, founding father, patron saint, original member, and Lieutenant Colonel of Panzer troops commanding the kampfgruppe:

                                                                Lieutenant Colonel Klink

Date/Location: 1 Sep 1939 - 6 Oct 1939, Poland (Operation Fall Weiss), Attached to 10th Army's 4th Panzer Division, Army Group South at Kreuzberg, striking northeast to encircle Army Group Poznan, then on to Warsaw.

Commanding Officer: Lt Col Klink
Executive Officer: 1st Lt Ost (acting, F11/12, Wound Badge, Inf Asslt Badge, F13)

Panzer Company -  Sgt Fahrmann (Pz III) (2 TK; Acting 2nd Plt PC F6/7) (Acting CC, F14)

1st Panzer Platoon - (KO, F3)
Vehicle Two -  (KO, F3)
Vehicle Three - (KO, F3)
Vehicle Four - (KO, F3)
Vehicle Five - (KO, F3)

2nd Panzer Platoon - Sgt Grossman (Pz III) (Acting PC, F14)
Vehicle Two - Cpl Mayer (Pz III) (1 TK)
Vehicle Three - Cpl Mettner (Pz III)
Vehicle Four - Cpl Harms (Pz II) 
Vehicle Five - LCpl Otjen (Pz II) (assumed F6/7) (1 TK, F12)

3rd Panzer Platoon - Sgt Friessler (Pz III) (4 TK; Acting PC F9/10)
Vehicle Two -  (Pz III, F9) 
Vehicle Three - Sgt Emmerich (Pz III)
Vehicle Four - (Pz II, F9)
Vehicle Five - (Pz II, F14)

4th Panzer Platoon - Sgt Mangold (Pz IV) (2 TK) (Acting PC, F14)
Vehicle Two -  Sgt Jurgens (Pz IV) (Wound Badge, F6)
Vehicle Three -  (Pz IV, F11)  
Vehicle Four - Cpl Graebner (Pz II)
Vehicle Five - Cpl Kapp (Pz II)

Schutzen Company - 1st Lt Freitag (Iron Cross 2nd Class, F1)

1st Grenadier Platoon - 
1st Rifle Squad - (Eliminated until replacements received, reorg F6/7)
2nd Rifle Squad - (Eliminated until replacements received, reorg F6/7)
3rd Rifle Squad - (Eliminated until replacements received, reorg F6/7)
4th Rifle Squad - (Eliminated until replacements received, reorg F6/7)
* LCpl Hackl (demoted, F1; he and other members of squad assigned as squad members to 4th Sqd, 3rd Gren Plt, F6/7)

2nd Grenadier Platoon - 2nd Lt Klugmann (Iron Cross 1st and 2nd Class, F2)
1st Rifle Squad - Sgt Aust 
2nd Rifle Squad - Sgt Haas (Iron Cross 2nd Class, F1)
3rd Rifle Squad -  LCpl Axthelm (assumed F8/9)
4th Rifle Squad - Cpl Lutz 

3rd Grenadier Platoon - 2nd Lt Tausch (Iron Cross 1st and 2nd Class, F16)
1st Rifle Squad - (Eliminated until replacements received, F16)
2nd Rifle Squad - Cpl Nader 
3rd Rifle Squad - Cpl Hauer (Wound Badge, F12) (Iron Cross 2nd Class, F12)
4th Rifle Squad - Cpl Kamphaus 

4th Grenadier Platoon - Sgt Mader (Iron Cross 2nd Class, Tank Killer Badge (1), F4) (Acting, F13)
1st Rifle Squad - Cpl Kandler
2nd Rifle Squad - (Eliminated until replacements received, F13)
3rd Rifle Squad - Cpl Imhofe (Iron Cross 2nd Class, F13)
4th Rifle Squad - (Eliminated until replacements received, F4)

Schwere Platoon - SSgt Dorn
MG Squad - LCpl Steinkamp (MG34) (reduced F1)
                   - Cpl Creuzburg (MG34)
Mortar Squad - (80mm mortar)
                       - Cpl Osswald (80mm mortar)
Field Gun Section - Sgt Oberlander (75mm gun)
                              - Cpl Kallmeyer (75mm gun)
Anti-Tank Gun Section - Sgt Kallenbach (PaK-36 37mm ATG) (Wound Badge, F15)
                                       - Cpl Drexler (PaK-36 37mm ATG)

Reconnaissance Company - 2nd Lt Weider (Acting, F15)

Armored Reconnaissance Platoon -  Off Cadet Distler (Sdkfz 231)
2nd Armored Reconnaissance Vehicle - Sgt Keck (Sdkfz 221) (Iron Cross 2nd Class, F13) (1 AC, F14)
3rd Armored Reconnaissance Vehicle - Sgt Pichler (Sdkfz 221, F11) (Iron Cross 2nd Class, F11)

1st Motorcycle Platoon - Sgt Gradl (Acting, F15, Wound Badge, F11) (Iron Cross 2nd Class, F11)
1st Motorcycle Squad - (Eliminated until replacements received, F11)
2nd Motorcycle Squad - Cpl Eisen (Acting, F15)
3rd Motorcycle Squad - LCpl Pankau (Iron Cross 2nd Class, F9) (Reprimanded for Cowardice, F13)
4th Motorcycle Squad - (Eliminated until replacements received, reorg F7/8)

2nd Motorcycle Platoon - Sgt Behrendt (Acting, F9) (Iron Cross 2nd Class, F15)
1st Motorcycle Squad -  LCpl Wilhelm (Acting, F9)
2nd Motorcycle Squad - Sgt Janke (Iron Cross 2nd Class, F7)
3rd Motorcycle Squad - (Eliminated until replacements received, F15)
4th Motorcycle Squad - (Eliminated until replacements received, F7)

Assault Engineer Platoon - 2nd Lt Orstens
1st Engineer Squad - Sgt Barkstrom
2nd Engineer Squad - Sgt Hafl
3rd Engineer Squad - (Eliminated until replacements received, F15)
4th Engineer Squad - Cpl Dilbertt

Assault Gun Section - Sgt Wagner (Stug III)
                                  - Cpl Gebhardt (Stug III)

Panzerjaeger Section - Sgt Dittrich (PzJgr I)
                                   - Cpl Taube (PzJgr I)

Notes:
F1: 2nd Lt Nessler (1st Gren Plt, executed for cowardice); Cpl Obst (3rd Sqd, 2nd Gren Plt, Wound Badge, campaign); lost ~20 KIA/WIA; caused ~30 KIA/WIA, captured ~20 EPW, 1 FG, 1 MTR; 1st Lt Freitag (Schutzen Co Commander) and Sgt Haas (2nd Squad, 1st Gren Plt) decorated for valor.

F2: Sgt Fittzbaum (V3, 3rd Panzer Plt, Wound Badge, campaign); lost ~20 KIA/WIA and 1 Panzer Mk III destroyed.  1 Sdkfz 221 was damaged, but recovered and put back into action; caused ~45 KIA/ WIA, captured ~35 EPW and 2 anti-tank guns; Lt Krugmann (2nd Gren Plt) decorated for valor.

F3: Cpl Landauer (1st Sqd, 1st Gren Plt, executed for cowardice; Cpl Knacke (V5, 1st Panzer Plt) decorated for valor, KIA; Sgt Grebel (V2, 1st Pz Plt), captured; Sgt Zedler (V3, 1st Pz Plt, Wound Badge, campaign); Lost ~50 KIA/WIA/POW, lost 3 x Pz Mk III, 2 x Pz Mk II; Caused ~25 KIA/WIA, destroyed 1 37mm ATG.

F4: 2nd Lt Schiffer (2nd Pz Plt, Wound Badge, campaign); Cpl Schonan (V4, 2nd Pz Plt, Wound Badge, KIA); Sgt Mader (1st Sqd, 4th Gren Plt) decorated for valor, Tank Killer Badge; Four of five tanks of 2nd Pz Plt knocked out; Lost ~35 KIA/WIA/POW, two Pz III, and two Pz II; Caused ~30 KIA/WIA, destroyed two medium tanks.

F5: Officer Cadet Hinkle (1st Gren Plt, Wound Badge, campaign); Lost ~20 KIA/WIA; Caused ~50 KIA/WIA, captured ~35 EPW.

F6: Lt Bohm (Pz Co Cmdr), Wound Badge, campaign, F6); Sgt Lowenstam (2nd Squad, 3rd Grenn Plt, Wound Badge, campaign, F6); Sgt Jurgens (V3, 4th Pz Plt, Pz Co), Wound Badge, rtn next fight, F6); Sgt Hasselbach (2nd Squad, 2nd Gren Plt, Wound Badge, campaign, F6); Lost ~50 KIA/WIA, one Pz III, and one Pz IV; Caused ~50 KIA/WIA, captured ~20 EPW, destroyed four 37mm ATGs.

F7: 1st Lt Unger (Recon Co Cmdr), Wound Badge, KIA, F7, recommended Iron Cross 2nd Class for leading three close assaults; Cpl Mathes (4th Squad, 2nd M/C Plt, Recon Co), Wound Badge, KIA; Cpl Zimmer (3rd Squad, 2nd M/C Plt, Recon Co), Wound Badge, Captured, F7, recommended Iron Cross 2nd Class for leading three close assaults; Sgt Janke (2nd Squad, 2nd M/C Plt, Recon Co), recommended for Iron Cross 2nd Class for assistance provided under heavy fire to Officer Cadet Distler's armored car; Lost ~40 KIA/WIA, ~15 EPW, one Sdkfz 231, and one Sdkfz 221; Caused ~50 KIA/WIA.

F8: Cpl Arndt (Schutzen Co, 3rd Sqd, 2nd Plt), Wound Badge, Campaign, F8; Sgt Pichler's Sdkfz 221 damaged, but recovered, as well as two other KG Klink armored cars lost on 8 Sept 1939; Lt Klugmann (Plt Cmdr, 2nd Plt) and Sgt Haas (2nd Sqd, 2nd Plt) mentioned in dispatches for valor, leading several close combats each.  This will not gain the Iron Cross 1st Class, but will count towards its achievement; Lost ~15 KIA/WIA, one Sdkfz 221 damaged but recovered; Caused ~40 KIA/WIA, captured ~10 POW, two 37mm ATG.

F9: Sgt Friessler (V2, 3rd Pz Plt) mentioned in dispatches for destroying two enemy tanks; Cpl Pankau (1st Squad, 3rd M/C Plt) recommended for Iron Cross 2nd Class for eliminating enemy commander and two rifle squads in close combat; 2nd Lt Wendt (Plt Cmdr, 2nd M/C Plt) Wound Badge, KIA, F9; 2nd Lt Gerhart (Plt Cmdr, 3rd Pz Plt) Wound Badge, Panzer Assault Badge, KIA, F9; Lost ~30 KIA/WIA, 1 Pz III, and 1 Pz II; Caused ~60 KIA/WIA, two 7TP medium tanks.

F10: Sgt Mangold (Vehicle 2, 4th Pz Plt) knocked out an enemy tank (F10); Lost ~10 WIA/KIA; Caused ~40 WIA/KIA and destroyed one medium (7TP) tank.

F11: Maj Schultz (KG XO), Infantry Assault Badge, Wound Badge, Campaign), recommended for Iron Cross 2nd Class for leading close combat against enemy tank and destroyed rifle squad and enemy commander, F11; Sgt Gradl (3rd Squad, 1st Motorcycle Platoon, Infantry Assault Badge, Wound Badge, recommended for Iron Cross 2nd Class for leading close combat against enemy tank and destroyed rifle squad and enemy commander, F11; Sgt Pichler (V3, Armored Car Platoon), recommended for Iron Cross 2nd Class, for using his armored car to assault an enemy tank, driving it back and allowing other units of the kampgruppe to redeploy, before being destroyed, F11, Sgt Sachs (2nd Squad, 1st Motorcycle Platoon), Infantry Assault Badge, Wound Badge, Campaign, F11; Lost ~50 WIA/KIA, one Sdkfz 221 destroyed, and one Pz Mk IV destroyed; Caused ~60 WIA/KIA.

F12: Cpl Hauer (3rd Squad, 3rd Gren Plt), Wound Badge, Infantry Assault Badge, recommended for Iron Cross 2nd Class for leading close assaults which eliminated to enemy squads; LCpl Otjen (V5, 2nd Pz Plt) scored one tank kill; Lost ~10 WIA/KIA; Caused ~50 WIA/KIA, captured approximately 20, and destroyed one enemy light tank.

F13: Officer Cadet Vetter (PC, 4th Gren Plt), Wound Badge, Infantry Assault Badge, killed in action.
-1st Lt Ost (Acting KG XO), Wound Badge, Infantry Assault Badge; Sgt Lehmkuhl (2nd Squad, 4th Gren Plt), Wound Badge, Infantry Assault Badge, Campaign; Cpl Pankau (3rd Squad, 1st MC Plt), reprimanded for cowardice; Cpl Imhofe (3rd Squad, 4th Gren Plt), recommended for Iron Cross 2nd Class for leading close assault which eliminated enemy western position, opening way for assault onto objective; Sgt Keck (V2, Arm Rec Plt), recommended for Iron Cross 2nd Class for placing his crew in mortal danger to secure, then defend the objective from enemy assault; Lost ~30 KIA/WIA; Caused ~55 KIA/WIA, captured ~10 personnel.

F14: 2nd Lt Loeb (Acting Pz Co CO), Wound Badge, Panzer Assault Badge, 2 TK, WIA, Campaign; Cpl Glucke (V5, 3rd Pz Plt), Wound Badge, Panzer Assault Badge, KIA; Officer Cadet Kleiber (PC, 4th Pz Plt), Wound Badge, Panzer Assault Badge, WIA, Campaign; Sgt Mangold (V2, 4th Pz Plt), 1 Tank Kill; Cpl Mayer, (V4, 2nd Pz Plt), 1 Tank Kill; Sgt Friessler (V2, 3rd Pz Plt), 2 Tank Kills; Sgt Fahrmann (Acting PC, 2nd Pz Plt), 1 Tk Kill; Sgt Keck (V2, Arm Rec Plt), 1 A/C Kill; Lost ~15 KIA/WIA. 1 Pz Mk II; Caused ~40 KIA/WIA, destroyed 7 tanks and 1 armored car.

F15: Lt 2nd Lt Wehner (Acting Recon Co Cmdr), Wound Badge, Infantry Assault Badge, recommended for Iron Cross 2nd Class for leading close assault which halted enemy armored attack,WIA, campaign; Sgt Albrecht (3rd Squad, Eng Plt) Wound Badge, Infantry Assault Badge, recommended for Iron Cross 2nd Class for leading close assault which halted enemy armored attack, KIA, Sgt Behrendt (Acting Plt Cmdr, 2nd M/C Plt), recommended for Iron Cross 2nd Class for leading close assault which eliminated enemy rifle squad and armored car; Cpl Zukert (3rd Squad, 2nd M/C Plt) Wound Badge, Infantry Assault Badge, KIA; Sgt Klivens (4th Squad, Eng Plt) Wound Badge, Infantry Assault Badge, WIA, campaign; Cpl Vogel (Mtr Tm, Schwere Plt) Wound Badge, KIA; Sgt Kallenbach (ATG, Schwere Plt), Wound Badge; Lost ~60 KIA/WIA, 1 ATG, 1 80mm mortar; Caused ~40 KIA/WIA, captured ~5 POW, destroyed one light tank, and one armored car.

F16: 2nd Lt Tausch (Plt Commander, 3rd Gren Plt), recommended for Iron Cross 1st and 2nd Class for leading close assaults which eliminated enemy central position, consisting of two field pieces, a machine gun, the enemy commanding officer, and two rifle squads; Sgt Schlessinger (1st Squad, 3rd Gren Plt), Wound Badge, Infantry Assault Badge, KIA; Lost ~10 KIA/WIA; Caused ~55 KIA/WIA, captured ~50 POW, destroyed MG, 76mm Field Gun, and a 37mm Anti-Tank Gun.

Casualties:
2nd Lt Nessler (1st Gren Plt, executed for cowardice, F1)
Cpl Landauer (1st Sqd, 1st Gren Plt, reduced F1,executed for cowardice, F3)
Cpl Knacke (V5, 1st Pz Plt, Iron Cross 2nd Class, Wound Badge, Panzer Assault Badge, KIA, F3)
Cpl Schonan (V4, 2nd Pz Plt, Wound Badge, Panzer Assault Badge, KIA, F4)
1st Lt Unger (Recon Co Cmdr), Wound Badge, Panzer Asst Badge, KIA, F7), Iron Class 2nd Class
Cpl Mathes (4th Squad, 2nd M/C Plt, Recon Co), Wound Badge, KIA, F7
2nd Lt Wendt (Plt Cmdr, 2nd M/C Plt, Wound Badge, KIA, F9)
2nd Lt Gerhart (Plt Cmdr, 3rd Pz Plt, Wound Badge, Panzer Assault Badge, KIA, F9)
Off Cad Vetter (PC, 4th Gren Plt, Wound Badge, Infantry Assault Badge, KIA, F13).
Cpl Glucke (V5, 3rd Pz Plt, Wound Badge, Panzer Assault Badge, KIA, F14).
Sgt Albrecht (3rd Sq, Eng Plt, Wd Badge, Inf Ast Badge, TKB (1) KIA, F15) Iron Class 2nd Class
Cpl Zukert (3rd Squad, 2nd M/C Plt, Wound Badge, Infantry Assault Badge, KIA, F15).
Cpl Vogel (Mtr Tm, Schwere Plt, Wound Badge, KIA, F15).
Sgt Schlessinger (1st Squad, 3rd Gren Plt, Wound Badge, Infantry Assault Badge, KIA, F16).
Sgt Grebel (V2, 1st Pz Plt, Captured, F3)
Cpl Zimmer (3rd Squad, 2nd M/C Plt, Recon Co), Wound Badge, Captured, F7, Iron Cross 2nd Class
Cpl Obst (3rd Sqd, 2nd Gren Plt, Wound Badge, campaign, F1)
Sgt Fittzbaum (V3, 3rd Pz Plt, Wound Badge, campaign, F2)
Sgt Zedler (V3, 1st Pz Plt, Wound Badge, campaign, F3)
2nd Lt Schiffer (2nd Pz Plt) Wound Badge, campaign, F4)
Officer Cadet Hinkle (1st Gren Plt, repl F1/2, Wound Badge, campaign, F5)
1st Lt Bohm (Pz Co Cmdr), Wound Badge, campaign, F6)
Sgt Lowenstam (2nd Squad, 3rd Gren Plt, Wound Badge, campaign, F6)
Sgt Hasselbach (2nd Squad, 2nd Gren Plt, Wound Badge, campaign, F6)
Cpl Arndt (3rd Squad, 2nd Gren Plt, Wound Badge, Campaign, F8)
Maj Schultz (KG XO, Infantry Assault Badge, Wound Badge, Campaign, F11) Iron Cross 2nd Class
Sgt Sachs (2nd Squad, 1st M/C Plt, Infantry Assault Badge, Wound Badge, Campaign, F11).
Sgt Lehmkuhl (2nd Squad, 4th Gren Plt, Wound Badge, Infantry Assault Badge, Campaign, F13).
2nd Lt Loeb (Acting Pz Co CO, Wound Badge, Panzer Assault Badge, 2 TK, Campaign, F14).
Officer Cadet Kleiber (PC, 4th Pz Plt, Wound Badge, Panzer Assault Badge, Campaign, F14).
2nd Lt Wehner (Act Rec Co CO, Wound Badge, F7 and F15, Campaign, F15) Iron Cross 2nd Class
Sgt Klivens (4th Squad, Eng Plt, Wound Badge, Infantry Assault Badge, WIA, campaign, F15).

Sunday, December 21, 2014

Fall Weiss Campaign Plan for KG Klink

My plan for Poland.

1.  Frontier, 1 Sept 1939, 
KG Klink forces crossing against defensive positions of Border Guards and National Defense units.
Date - 1 Sept 1939, 0500
3rd Grenadier Company (CO, 9 x Rifle Squad, 2 x MG, 1 x Field Gun) vs. Pole Border Guards (CO, 4 x Rifle Squad, 3 x Support roll)

2. The Battle of Mokra, 1 Sept 1939


2.1: KG Klink recce elements clash with defensive positions of 19th Uhlan Regiment in forest.
Date - 1 Sept 1939, 0630
(CO, 3 x Armored Car, 4 x Motorcycle Squad, 3 x Rifle Squad, 2 x Panzer vs CO, 5 x Rifle Squad, 4 x ATG, 2 x MG, 1 x Mortar)
2.2: KG Klink mechanized attack on defensive positions of  21st Uhlan Regiment in village.
Date - 1 Sept 1939, 0800
(CO, 5 x Panzer, 6 x Rifle Squad, 1 x MG vs CO, 6 x Rifle Squad, 4 x ATG, 1 x MG, 1 x Mortar)
2.3: 21st Armored and 12th Uhlan Regiments counterattack KG Klink in village.
Date - 1 Sept 1939, 1000
(CO, 8 x Panzer, 4 x Rifle Squad vs CO, 10 x Tank, 3 x Cavalry)
2.4: 21st Arm and 12th Uhlan fall back, 2nd Mounted Regiment carries attack on KG Klink in village. Date - 1 Sept 1939, 1100
(CO, 6 x Rifle Squad, 3 x Support [rolls] vs CO, 9 x Rifle Squad, 3 x Cavalry)
2.5: KG Klink mechanized attack on defensive positions of 2nd Mtd Regiment at railroad embankment. Date - 1 Sept 1939, 1500
(CO, 5 x Panzer [Hvy Tk Plt], 6 x Rifle, 1 x MG vs CO, 6 x Rifle, 4 x ATG, 1 x MG, 1 x Mortar)

The 4th Panzer Division fell back at 1700, minus the 12th Schutzen Regiment, which remained in the village.  However, due to 1st Panzer Division pressure in the southeast, the Poles withdrew during the night of 1 Sept 1939.  Following the capitulation of Mokra the 4th Panzer Division regrouped until 4 Sept 1939, then began its sprint for Warsaw, arriving at the southwestern suburb of Wola at 1700 on 8 Sept 1939, and immediately launched into a hasty attack, which was not seriously pressed.  An attack was conducted again on 9 Sept 1939, and suffered heavy losses.

3.  Assault on Warsaw (Wola suburb), 8-9 Sept 1939
3.1 KG Klink recce and armored elements launch hasty assault on defensive positions of National Defense troops in suburbs of Warsaw.  Date - 8 Sept 1939, 1700
3.2 KG Klink mechanized attack on defensive positions of 31st Infantry Division in suburbs of Warsaw.  Date - 9 Sept 1939, 0800

Following the unsuccessful assaults, German infantry units begin to filter into the suburbs to assume the attack, taking over from 4th Panzer Division, which is pulled out of the fighting as a reaction to Polish Armies Pomorze and Poznan concentrated near Kutno, first to counterattack the German forces, and when this proved impractical, in an attempt to break out and join friendly forces at Brest.  However, the 4th Panzer Division arrived on the east bank of the Bzura River (near its juncture with the Vistula) on 11 Sept 1939, trapping the Polish armies at the rivers.  4th Panzer Division skirmished with Polish forces from 12-16 Sept 1939, then participated in heavy fighting to reduce the pocket, which capitulated on 19 Sept 1939.

4.  Battle of Kutno, 12-19 Sept 1939
*This set of battles is un-numbered as I don't have a set of historical set of scenarios to use, so I will take into account the forces available (discounting casualties from previous fighting) then roll on the scenario and force generators from the rules ("5Core Company Command").  I anticipate playing at least one fight per day during the 'skirmish period" (12-16 Sept), then two or three fights per day during the "heavy fighting" days (17-19 Sept).*

Incidentally, during this battle the Soviets invaded Poland from the east (17 Sept 1939), sealing the Poles' fate.

4.1 and so on

Following the capitulation of the Polish Pomorze and Poznan armies, KG Klink is released from the operational control of the German 10th Army  on 20 Sept 1939, and is assigned to the German 3rd Army, so the KG immediately makes its way to western Warsaw, arriving on 21 Sept 1939, then east to the outskirts of Praga on 24 Sept 1939.  KG Klink moves into the attack on Praga on 25 Sept 1939, which is repelled.  Polish forces counterattack on the night of 26 Sept 1939, and KG Klink went over onto the attack one last time on 27 Sept 1939, before all Polish forces in Warsaw surrendered that night at midnight.

5. Battle of Praga, 25-27 Sept 1939

5.1 KG Klink recce and armored elements launch hasty assault on defensive positions of National Defense troops in Praga.  Date - 25 Sept 1939, 1000
5.2 Polish armored forces counterattack KG Klink infantry forces.  Date - 26 Sept 1939, 2300
5.3 KG Klink armored elements launch assault on defensive positions of Polish infantry in Praga.  Date - 27 Sept 1939, 0900

So, there's the entire campaign plan for Poland.  It looks like about 20 fights, and it's probably the shortest campaign of the entire war.  Let's see where this takes us.

V/R,
Jack

The OKH's Fire Brigade - KG Klink OOB

Yet another campaign plan, "The OKH's Fire Brigade, Kampfgruppe Klink."  As usual, I am taking some liberties with TO/Es in order to make the situation 'game-able,' i.e., to fit what I want to do.

The patriarch, founding father, patron saint, original member, and Colonel of Panzer troops commanding the kampfgruppe:

Colonel Klink

Date/Location: 1 Sep 1939 - 6 Oct 1939, Poland (Operation Fall Weiss), Attached to 10th Army's 4th Panzer Division, Army Group South at Kreuzberg, striking northeast to encircle Army Group Poznan, then on to Warsaw.

Commanding Officer: Col Klink
Executive Officer: Maj Schultz

Panzer Battalion - Maj Bohm

1st Panzer Company - 1st Lt Loeb
1st Panzer Platoon - 2nd Lt Grebel (2 Pz II, 3 Pz III)
2nd Panzer Platoon - 2nd Lt Zedler (2 Pz II, 3 Pz III)
3rd Panzer Platoon - 2nd Lt Mettner (2 Pz II, 3 Pz IV)
4th Panzer Platoon - Off Cadet Knacke (2 Pz II, 3 Pz IV)

2nd Panzer Company - 1st Lt Schiffer
1st Panzer Platoon - 2nd Lt Fahrmann (2 Pz II, 3 Pz III)
2nd Panzer Platoon - 2nd Lt Grossman (2 Pz II, 3 Pz III)
3rd Panzer Platoon - 2nd Lt Schonau (2 Pz II, 3 Pz IV)
4th Panzer Platoon - Off Cadet Mayer (2 Pz II, 3 Pz IV)

3rd Panzer Company - 1st Lt Gerhart
1st Panzer Platoon - 2nd Lt Friessler (2 Pz II, 3 Pz III)
2nd Panzer Platoon - 2nd Lt Emmerich (2 Pz II, 3 Pz III)
3rd Panzer Platoon - 2nd Lt Harms (2 Pz II, 3 Pz IV)
4th Panzer Platoon - Off Cadet Glucke (2 Pz II, 3 Pz IV)

1st Schutzen Battalion - Maj Freitag

1st Grenadier Company - 1st Lt Nessler 
1st Rifle Platoon - 2nd Lt Landauer (4 x Rifle Squad)
2nd Rifle Platoon - 2nd Lt Haas (4 x Rifle Squad)
3rd Rifle Platoon - 2nd Lt Nadler (4 x Rifle Squad)
4th Rifle Platoon - Off Cadet Hackl (4 x Rifle Squad)

2nd Grenadier Company - 1st Lt Klugmann
1st Rifle Platoon - 2nd Lt Aust (4 x Rifle Squad)
2nd Rifle Platoon - 2nd Lt Hasselbach (4 x Rifle Squad)
3rd Rifle Platoon - 2nd Lt Obst (4 x Rifle Squad)
4th Rifle Platoon - Off Cadet Lutz (4 x Rifle Squad)

3rd Grenadier Company - 1st Lt Tausch
1st Rifle Platoon - 2nd Lt Schlessinger (4 x Rifle Squad)
2nd Rifle Platoon - 2nd Lt Lowenstam (4 x Rifle Squad)
3rd Rifle Platoon - 2nd Lt Hauer (4 x Rifle Squad)
4th Rifle Platoon - Off Cadet Kamphaus (4 x Rifle Squad)

4th Heavy Company - 2nd Lt Vetter
MG Platoon - Sgt Steinkamp (8 x MG34)
Mortar Platoon - Sgt Vogel (4 x 80mm mortar)
Field Gun Platoon - Sgt Oberlander (4 x 75mm gun)
Anti-Tank Gun Platoon - Sgt Kallenbach (4 x PaK-36 37mm ATG)

2nd Schutzen Battalion - Maj Dorn

5th Grenadier Company - 1st Lt Mader
1st Rifle Platoon - 2nd Lt Lehmkuhl (4 x Rifle Squad)
2nd Rifle Platoon - 2nd Lt Imhofe (4 x Rifle Squad)
3rd Rifle Platoon - 2nd Lt Kandler (4 x Rifle Squad)
4th Rifle Platoon - Off Cadet Creuzburg (4 x Rifle Squad)

6th Grenadier Company - 1st Lt Osswald
1st Rifle Platoon - 2nd Lt Kallmeyer (4 x Rifle Squad)
2nd Rifle Platoon - 2nd Lt Drexler (4 x Rifle Squad)
3rd Rifle Platoon - 2nd Lt Kleiber (4 x Rifle Squad)
4th Rifle Platoon - Off Cadet Mangold (4 x Rifle Squad)

7th Grenadier Company - 1st Lt Jurgens
1st Rifle Platoon - 2nd Lt Graebner (4 x Rifle Squad)
2nd Rifle Platoon - 2nd Lt Kapp (4 x Rifle Squad)
3rd Rifle Platoon - 2nd Lt Behrendt (4 x Rifle Squad)
4th Rifle Platoon - Off Cadet Janke (4 x Rifle Squad)

8th Heavy Company - 2nd Lt Zimmer
MG Platoon - Sgt Mathes (8 x MG34)
Mortar Platoon - Sgt Gebhardt (4 x 80mm mortar)
Field Gun Platoon - Sgt Kossman (4 x 75mm gun)
Anti-Tank Gun Platoon - Sgt Taube (4 x PaK-36 37mm ATG)

Motorized Reconnaissance Company - 1st Lt Wehner
1st Armored Reconnaissance Platoon - 2nd Lt Unger (1 x Sdkfz 231, 2 x Sdkfz 221)
2nd Armored Reconnaissance Platoon - Off Cadet Distler (1 x Sdkfz 231, 2 x Sdkfz 221)
3rd Armored Reconnaissance Platoon - Sgt Pichler (1 x Sdkfz 231, 2 x Sdkfz 221)

Motorcycle Reconnaissance Company - 1st Lt Weider
1st Motorcycle Platoon - 2nd Lt Sachs (4 x motor rifle squad)
2nd Motorcycle Platoon - Off Cadet Gradl (4 x motor rifle squad)
3rd Motorcycle Platoon - Sgt Pankau (4 x motor rifle squad)
4th Motorcycle Platoon - Sgt Zuckert (4 x motor rifle squad)

Assault Gun Platoon - Sgt Wagner (5 x Stug III)

Panzerjaeger Platoon - Sgt Dittrich (4 x PzJgr I)


Saturday, December 20, 2014

The War Shall Proceed, i.e., I Finished Up My Early War Stuff

All,

As I'm sure you noticed, I didn't get any gaming in last weekend as I was working hard on finishing up my WWII early war stuff.  They are now ready to go, and so I have the minis ready to play out Germany's invasion of Poland (mind you, I don't have Poles, so Soviets will be standing in for them).  I just need to find time today to 1) clean up my toy room (get the troops and table ready), 2) get the admin side of things cleaned up (my German order of battle, and mission and force generators (need to modify Ivan's 5Core Company Commander mission and army generators just a bit), and 3) map out the campaign fights (I intend on doing a 'tree,' i.e., this is the first fight, which progresses to one of two different fights dependent upon who won the first one, and so on.  So here's what I've been working on:

Here's the whole set of units I've been working on.

Another look.  Mostly German and Russian, with a bit of Brits thrown in.  Everything in here is from Pendraken, except for two officer figures (one Soviet, one German) from Minifigs.

Three BT-7s, with Pendraken tank crew on the far left tank.

For the whole force, I glued the turrets, glued the tank crewman on, gave them a green spray prime, painted the tracks and MGs (and crewman), put a little rust on exhausts, maybe a dark green box or something, give them a blackwash, glue them to the base, flocked them, and maybe threw on a bush or two.  Even with that limited amount of steps it took me way longer than expected to do the whole force...

Three T-26s.

Two T-70s.  I should probably get more of these.

That was a sentiment that came up a couple times during this, but I don't want to wait to start my campaign any longer, so, "you go to war with the army you have."

Two KV-1s (on right) and an early T-34.  I have six more plastic Takara T-34s, not real sure why I bought this one...

Two BA-10 armored cars.

Three SU-76s.  I had actually done these up months ago, but finally got around to basing them up.  You can see I had drybrushed these as well, and added crewmen from gun packages.

Some Soviet cavalry.

Three bases (squads) of engineers, with flamethrowers and those damned anti-tank dogs that don't seem to have been all that widespread (much less effective), but seem to show up everywhere...

Four BA-64 armored cars.

Four 45mm Anti-Tank Guns (ATGs).  These appear to be the 'long' version, when I meant to get the short version.  Well, if you know me at all you know that I'll not let that bother me on the tabletop...

Two 76mm field guns, and the Soviet command stand (using a German truck and a Minifigs officer, along with one of the Pendraken Soviet engineers).

On to ze Germans...  Four Panzer Mk IIIs with 37mm guns, one sporting a Pendraken German tank crewman.

Two Panzer IIs.  It doesn't bother me one bit that I'm going to play Poland and France with zero Panzer Is, but I really wish I'd have gotten more Panzer IIs, as these were in widespread use deep into Barbarossa.  I only bought two because I was only going to use them as part of recon elements in Russia; I never really had any desire to play Poland or even France.  But then I read a book that 'talked' me into buying some French for gaming, and then Ivan put out his 5Core Company Command rules, and the idea to play a campaign spanning the entire war suddenly seemed like a great idea.

Three Pz Mk IVs with short 75mm guns.

Two Stug IIIs with short 75mm, and a PzJgr I with 47mm gun (and a spare ATG crewman standing in as a vehicle crewman).

My early war German recon: a Sdkfz 234, a Sdkfz 221, and a Sdkfz 222, which I'll proudly use through all the early war campaigns.  Here you can see the only vehicle markings I put on anything: simple white crosses on all the German vehicles.

Five stands of motorcycle troops.

Three anti-tank rifle teams; the Pendraken pack gives you ten ATR gunners.  I cut the rifles off half of them and put them on as assistants.

The 37mm ATGs and two 75mm field guns.

Three 50mm mortars (really hard to see as they're so small).

Not early war, but I finished up two Nebelwerfers.  My apologies for the nasty photo...

The German command stand.  I'm pretty sure they didn't have Sdkfz 250s in Poland and France, but somehow we must carry on.

Reverse.

On to the Brits.  Top left is a Cruiser (sorry, I forget which type off the top of my head), with two Matildas.  I do have a Matilda II on order that I intend on using in France as well.

Two of the little Vickers MG tanks.

Brit armored cars (that I'll use throughout the entire war; I have an identical set you'll see for my Desert Rats, as well).

My rather small fleet (compared to the Dear Mr. Travers) of Bren carriers.

Not early war, but I added some more M-3 halftrack personnel carriers, and one carting a quad-.50 around.  The M-3s are added to the four I already have.

Well, that's what I've been busting my butt trying to finish.  For those interested in seeing my other early war stuff:

Here's a link to my French:
http://blackhawkhet.blogspot.com/2014/02/for-my-dear-mssrs-ronan-and-le-manchou.html

And the Germans and Soviets:
http://blackhawkhet.blogspot.com/2013/10/german-and-soviet-companies-wwii.html

All that stuff should get me up to my campaign detour to the North African desert.

Standby for action!

V/R,
Jack

Sunday, November 30, 2014

Napoleonics for TMP Marketplace

All,

This is for a couple gentlemen expressing interest in picking up my 6mm Baccus Napoleonics, which have been languishing in a box for about a year now.  I'm asking $70 (which includes basic shipping in the US), for what is around $200 worth of raw lead.

Here's the whole shebang.  These are Brits and French, Waterloo-era.

12 skirmish bases of rifles, primed (a little red and gray also) casualties (both horse and infantry), 4 guns, caissons, and horse teams with Horse Artillery crews.

Brit/Allied cavalry: 1 unit of Blues, 2 Dragoons, and 3 Hussars (Mirlton/Busby).  Each unit has six cavalry troopers painted up, and three only primed (this is due to my changing rules/basing styles several times).

2 Brit Lt Dragoons, 1 KGL Lt Dragoons, 1 Scot's Greys, 1 Dutch Lt Cav (all are 6 painted figures, 3 primed).  Then there are a further 18 primed Dragoons, 18 primed Hussars (Shako), and 18 primed Lt Dragoons.

5 strips of officer figures (3 figures per strip), 20 strips of Highlanders (primed with red jackets and green kilts), and 5 Highlander command strips (primed).

40 strips of Brit Line Infantry (Belgic shako) and 7 command strips (primed, red jackets gray pants).

7 bases of French Line Infantry (60 x 30mm, flags attached, with 5 infantry strips and 1 command strip per base) and 1 base of Cuirassiers (9 figures).

5 Line infantry strips (primed), 21 Grenadier (in Bearskins, primed and white), and 4 Gren command stands (bare metal).

12 Legere skirmish stands, 1 unit of Chasseurs (6 painted, 3 primed), 2 guns painted and based, 2 guns primed (with accidental red jackets and gray pants, not sure what I was thinking), 4 caissons and horse teams.

1 unit of Horse Grenadiers (6 painted, 3 primed), 1 unit of Hussars (Busby, 6/3), 1 unit of Dragoons (6/3), 1 unit of Cuirassiers (3/6; yes that's 3/6, not 6/3), 1 unit of Carabiniers (6/3), 27 primed Hussars (shako), 18 primed Chasseurs, and 18 primed Dragoons.

Hope that helps.

V/R,
Jack

Monday, November 24, 2014

French Foreign Legion in Estonia, Fight 3

All,

It's 14 August 1993, and the Legion is in action in defense of Estonia's fledgling democracy once again.  Major Louis-Louis was intent on having his battalion press home its efforts to find, fix, and destroy Colonel Sirel's headquarters, when those plans were scrubbed due to reports representing an imminent threat: sources loyal to the liberal government reported the Sirellists had established a Surface to Air Missile (SAM) north of the capital, with 2km of the International Airport.  It would be a tragedy should this SAM bring down an airliner, and a disaster if it were to destroy one of the French C-130s bringing in men and supplies.  Currently public opinion was rather disinterested in the French intervention in Estonia, but Ffom Louis-Louis' standpoint, an incident such as this would be comparable to the Beirut Barracks bombing.  "Orderly!  Send Captain LaPieux's Sous-Groupement a Warning Order, standby to move in 1 hour.  And send for the Captain please, I wish to brief him personally."

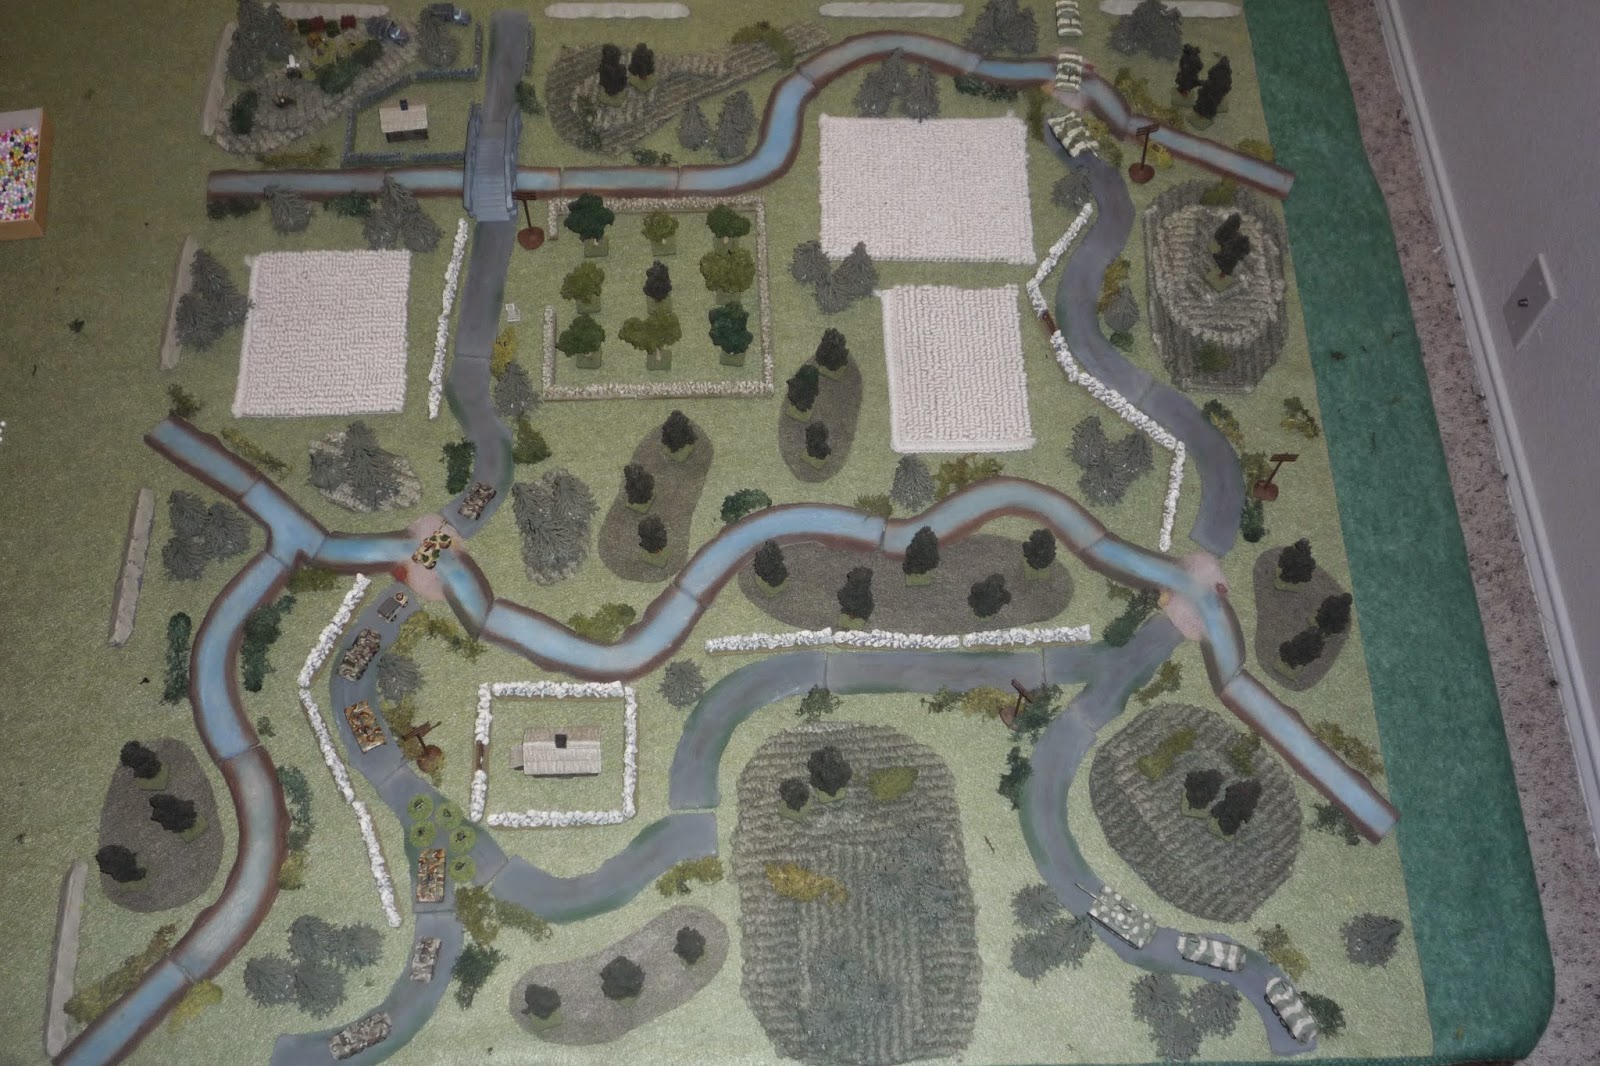
North of Talinn, the table is 3' x 3', with North being up.  Another VERY busy table, but I rolled for terrain, and the literal name of what I rolled up is "rough."  So, here is my interpretation of 'rough.'  Lots of trees, a few knolls, a few crop fields, a couple streams (can be forded by infantry, but not vehicles), and orchard at top center.

The French battlegroup: The CO and his group in a Land Rover driven by Cpl Methot.  Two HMMWVs, one with .50 cal (Cpl Navarre) and one with Mk19 (Cpl Desjardin). two "AMX-25s" (AKA, LAVs in French service, wink, wink), crewed by Lt Marcoud and Sgt Petit, respectively, and two AMX-10s, crewed by Lt Davault and Sgt Bernier.  Four squads of infantry: Lt Bisson, Lt Harpin, Sgt Oran, and Sgt Cheauvront.  There is also one Panhard available, crewed by Lt Patrie.

This is somewhat of an ad-hoc grouping as Capt LaPieux's Sous-Groupement suffered heavy casualties only a few days ago, and many of the Group's vehicles are still being repaired.  As it is, the Panhard and two AMX-10s in action were only just finished being repaired.

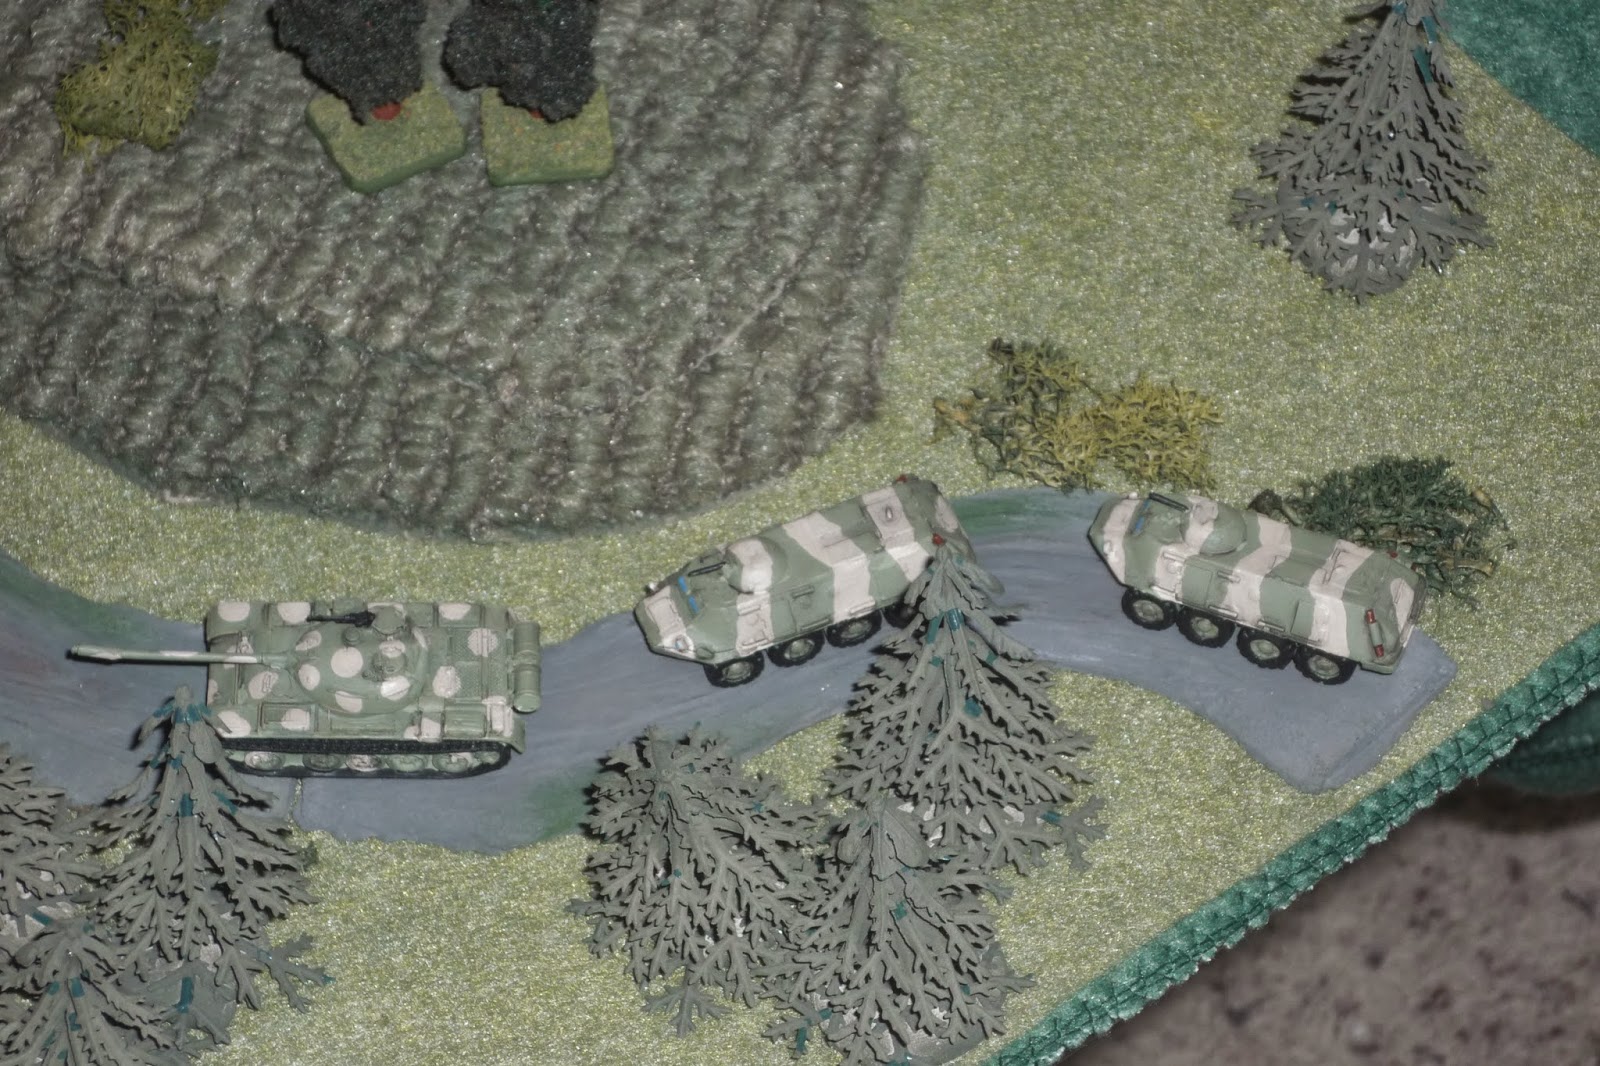
The Sirellist force, AKA the "Bad Guys."  The rebels have a squad of paramilitaries manning the SAM site, and throw together a mobile reaction force to challenge the French, in two platoons.  The first has a T-55, two BTR-70s, and two infantry squads, while the second platoon has a T-72, 2 BMP-2s, and two infantry squads.  All 'regular' infantry squads have RPGs.

Starting positions: the SAM site, with paramilitary squad, at top left (NW), the Sirellist 2nd Plt (T-72/BMPs) at top right (NE), and the 1st Plt (T-55/BTRs) at bottom right (SE).  The French start in the bottom left corner (SW).  The objective is to destroy the rebel SAM site, and the plan is simple: the force will be drawn into two forces, one (the Strike Force, with the CO leading) will charge up the road and over the bridge to destroy the SAM site, while the other (the Covering Force) will be left back to 'hold the door open,' which the entire Group will use to ex-filtrate the area, back through its portal in the Southwest.

The SAM site, with a launcher, radar, supplies/munitions, two trucks, and a paramilitary squad.

The enemy 2nd Platoon, in the Northeast.

The enemy 1st Platoon, in the Southeast.

The French column on the march: the Strike Force, led by Cpl Navarre's .50 cal HMMWV, Lt Patrie's Panhard, the CO's Land Rover (driven by Cpl Methot), Lt Marcoud's AMX-25 (hereafter referred to as 'LAV,' for simplicity's sake), and Lt Davault's AMX-10.  The Covering Force, with Sgt Oran's team on foot, Sgt Bernier's AMX-10, Cpl Desjardin's Mk19 HMMWV, and Sgt Petit's LAV.

Let's get ready to rumble!!!

The game starts with Sgt Oran leading his squad into solid blocking positions, and Sgt Bernier's AMX-10 took up position to their right (off camera to bottom).

In the top right (NE), the whole enemy 1st Platoon moves up, both BMPs disgorging their infantry.

Because of the extremely closed terrain (which negates the usefulness of much of the armor), the 1st Plt basically had two choices: 1) rush south down the road, team up with 2nd Plt, then move west to force the French blocking position and cut off the Striking Force.  Generally speaking, concentration of force/effort is a good thing, but the fact is that, in such closed terrain, it's often just not possible.  In my estimation, it didn't matter if the bad guys had 100 tanks, there simply wasn't room for them to operate, and even if the bad guys combined their platoons in the southeast, they'd still have to move west up the only road available, straight into the teeth of the French Covering Force.

So that left option 2: 1st Plt (in the SE) tries to force the blocking position, whilst the 1st Plt stays in the north, which led to another decision.  Should 1st Plt move quickly to meet the French Strike Force, or should the 1st Plt lay back, allow the French Strike Force to reach its objective, then strike, attempting to isolate and eliminate them, knowing that in either case the T-72 and BMPs were not destined to be of much use.  I figured the bad guys weren't all that hip to allowing the French to destroy their SAM site, i.e., the SAM site wasn't some sort of bait to lure the French into a trap, that the narrative made more sense that the bad guys had dispatched their regulars (with armor) into a less than favorable situation as they were desperate to keep the French off their SAM site, the existence of which they thought was unknown to the French.

In the SE, the Sirellists were unaware of the exact positions of the French, and in their haste to save the SAM site, the T-55 of 2nd Plt (top center) rushed north then turned west, looking to catch the French unawares.  The tank commander only had a second to scream "off the road" when he spied the flash of the launch from Sgt Oran's Eryx ATGM (bottom center), but it was too late, and the T-55 erupted in flame and secondary explosions.  Cpl Desjardin moved his HMMWV left (off camera at bottom left).

Back with 1st Bad Guy Plt in the northeast (bottom left), the plan was for the Sirellist tank and APCs to take up positions to overwatch the bridge, while their infantry moved up to block the French advance on the SAM site (just off camera at top right).  One infantry squad moved all the way to the road in the walled orchard (top left), while the other infantry squad headed for the walled farm at top right, but didn't make it as far (far right).

Sgt Petit, commanding the LAV in the Covering Force in the southwest, kicked out Lt Harpin's squad, the positioned his vehicle at the walled farm (center left).  Then Lt Harpin moved his men forward into the treeline (bottom right, with Sgt Bernier's AMX at bottom left, and Sgt Oran's team in the walled farm at center).

Cpl Navarre shot his HMMWV straight north, up the road (top), spotting the enemy infantry in the walled orchard (center right).  Lt Patrie then charged his Panhard up to the orchard, practically sticking the muzzle of his 90mm gun straight into the enemy's position.  Patrie fired, not causing any casualties, but suppressing them (red bead).  Lt Marcoud brought his LAV up (far left), dropping off Lt Bisson's squad off, while Lt Davault brought his AMX up (bottom).

Lt Davault fired his 25mm chain gun at the enemy troops in the orchard.  Again, no casualties, but they were already suppressed, and this burst of rounds caused them to fall back (top right).  Sgt Cheauvront's team then exited the AMX (bottom center).

Far left is the SAM site, with Cpl Navarre's HMMWV at far right.  The enemy infantry, starting at top right, sprinted across the road into the walled farm at center, next to bridge.  Meanwhile, the paramilitaries at the SAM site fired on Cpl Navarre's vehicle, and actually disabled the .50 cal.

Lt Marcoud then charged his LAV all the way up to the river, and pumped 25mm rounds into the infantry in the walled farm, pinning them, while Lt Bisson double-timed his men through the field and up to the river (bottom center), firing at the paramilitaries, who were suppressed and had to fall back (top left, with red bead).

The Sirellists feel things starting to slip away, and so decide it's time to force the issue in the southeast.  It starts with both BTRs moving up and debussing their infantry squads (walled farm holding Sgt Oran's team at top left, Lt Harpin's squad at far left).

But real quick back to the northwest at the SAM site, where Captain LaPieux ordered Cpl Methot to advance the Land Rover to the river.  Lt Bisson rushes his squad across the river, flanking the pinned rebel infantry.

And the Captain and his entourage debuss and splash into the river.

Back to the southeast, where the bad guys are getting pretty froggy...  Both infantry squads move up the hill, and one is able to pour very effective fire down on Lt Harpin's squad, causing two casualties and suppressing them.

Another red card comes out, and this is where I seriously considered cheating.  I mean, it would have made sense for the bad guys to move up one of their BTRs, right?  But I didn't, I stuck with the bad guy infantry.  Okay, I cheated a little bit, but it didn't work: the bad guys rolled up two activations.  I decided to use the first one to have the bad guys fire on Lt Harpin's squad again, knowing it may cause casualties, but hoping it would force Harpin's squad to fall back.  But, as my luck always goes, the bad guys' fire was ineffective, so they did what I always like to do: they charged down the hill into close combat with Lt Harpin's stricken squad...

Lt Harpin's squad was eliminated, the bad guys suppressed...

And then, the other bad guy squad came sprinting down the hill, screaming like banshees!  They reached the woods next to their suppressed comrades in the treeline.  At that point I was able to activate Sgt Bernier's AMX, but I only got one action point: okay, fight or flight?  I suppose I should have used the action to have the AMX flee to a safer position, but I didn't.  Berthier opened up on the enemy, getting an amazing three casualties!  But the bad guys were able to rally...

And the two survivors mounted Sgt Berthier's vehicle, prying open the hatches and dropping grenades inside, destroying the vehicle and eliminating the crew.  I shudder to think what would have happened if another red card or two came out, and the rebels were able to bring up their BTRs...

But I was lucky, and a black card came out.  Enraged, Sgt Petit (LAV at far left) slewed his turret right and poured 25mm rounds into Sgt Berthier's AMX (bottom left), killing one enemy and suppressing the other (red bead).  He then slewed the turret back to the left and engaged the other rebel squad in the treeline (the ones that overran Lt Harpin's squad, center), killing one and causing them to run for their lives (bottom right).

Back in the northwest, near the SAM site, Captain LaPieux gets the HQ section, then orders them (far left) and Lt Bisson's squad (top) to close assault the pinned rebel squad.

The bad guy squad was eliminated (bottom right), though the HQ section and Lt Bisson's squad both suffered a casualty.  I want to quickly close with the suppressed paramilitaries at top, before they have a chance to rally, but both Lt Bisson's squad and the HQ element exhaust themselves...

Again, I want to force the issue, so I get a bit hasty, and try rushing Cpl Navarre's HMMWV up the road (north is to bottom right corner, with Lt Bisson's squad, HQ element, and SAM site just off camera to right) across the bridge.  But the enemy 1st Platoon's armor is finally able to make itself useful: the T-72 opens up and blasts Cpl Navarre's HMMWV to hell.

So Sgt Cheauvront moves his team into the orchard (bottom left), intent on getting to grips with the suppressed enemy squad (top center), then get his ATGM into action against the enemy armor that just destroyed Cpl Navarre's HMMWV (top right).

And Sgt Cheauvront is able to charge his men into close combat, in which I fight two rounds with some of the worst dice-rolling you've ever seen.  My incompetence with the dice-rolling costs me dearly: Cheuvront's squad wins, but loses two men and is pinned, while the enemy loses three men and the two survivors surrender.  This may not sound all that bad, but charging into close combat with a full-strength squad in good order, against an understrength squad that was suppressed, really should have been a walk over.  I expected to come out of it with no casualties, maybe a pin...  Sgt Cheauvront's squad is exhausted...

Lt Davault, in his AMX, leads Cpl Methot's Land Rover up the road towards the bridge, though they don't dare move up there as the enemy armor is still in overwatch of the bridge (Sgt Cheauvront's men are at top right, with Cpl Navarre's burning HMMWV on the bridge).

Sgt Oran's squad exhausted itself, while Sgt Petit (center) dismounted his LAV and moved to Sgt Bernier's burning AMX, capturing the cowering rebel rifleman.  Cpl Desjardin maneuvered his HMMWV onto the road, across the ford, up north next to Lt Patrie's Panhard near the walled orchard.

And that was the end of Turn 1.  The Covering Force (bottom left) has lost an AMX and an infantry squad, but they've destroyed a tank and eliminated an infantry squad, and the two BTRs opposite them are unwilling to move on the Covering Force without infantry support, and the only squad left is suppressed.  Once that squad is able to get itself back into fighting shape, expect the bad guys to put some (more) pressure on the Covering Force.

In the north, the Strike Force has taken a few casualties and lost a HMMWV, but otherwise is progressing well towards the objective, having mostly eliminated all enemy infantry in vicinity of the SAM site.  Captain LaPieux would really like to get something done about the enemy armor to the east, but overall they are not in a position to influence the fight, so long as the French stay off the bridge.  Capt LaPieux does intend on trying to neutralize the armor; he doesn't need the bridge to accomplish his mission, but it would make life much easier (and quicker).

And with that, Sgt Cheauvront acknowledges and follows his Captain's orders.  He rallies the remains of his squad in the walled orchard, moves up to the wall, and promptly fires the Eryx ATGM at the enemy T-72, BAM!   Scratch one T-72.  Before the enemy could react, Cheauvront's team fired again, damaging one of the BMPs, whose crew decided discretion was the better part of valor.  The remaining BMP (top right) returns fire with its 30mm gun, to no effect, and so Cheauvront's men fire a third time, slightly damaging the BMP.

On the other side of the road (at the SAM site), Lt Bisson's men hop the wall and move on the cowering paramilitaries, who are only too happy to hand over their weapons and be taken into custody.

Then Bisson's squad moves west and begins rigging the whole affair with demolitions.  Not pictured, the remaining BMP activates again and pins Sgt Cheauvront's men in the walled orchard.

With 2/3 of the enemy's northern armor taken care of, Lt Dassault drives his vehicle onto the bridge and pushed Cpl Navarre's burning HMMWV clear.  Cpl Methot's Land Rover follows Dassault, and Doc begins loading the HQ and Lt Bisson's casualties.

Not pictured, but in other notable news, the bad guy infantry in the south try to rally themselves but fail, and are exhausted, which means the two BTRs there will sit tight, not wishing to confront the French Covering Force without infantry support.

Lt Patrie is perplexed in his Panhard (yuk, yuk); he wants to eliminate the remaining BMP, but the only way to get at a clear line of fire is from the bridge.  "I know what I must do; Driver, forward, and halt on the bridge.  Gunner, load armor-piercing, prepare to engage enemy armor, 3 o'clock, center vehicle, range 100 meters!"  The bang of the 90mm gun was immediately followed by the crash of the shell into the BMP.  Not a kill shot, simply caused some engine damage, but after witnessing their compatriots die or run off, the BMP's crew was not going to hang around to eat another 90mm round.

Meanwhile in the south, Cpl Desjardin reversed course and headed south down the road, and joined Sgt Petit's LAV.  They both moved up to Lt Harpin's squad, dismounted, and began treating and loading the wounded and dead.  Sgt Oran's team (off camera to right in the walled farm) stood watch.

Lt Patrie's Panhard (bottom center), having silenced the last of the enemy's armor in north, reversed off the bridge (top left) and took up station at the southern end of the walled orchard, while the HQ element loaded into the Land Rover and headed south (right behind Panhard).  Lt Marcoud moved his LAV into the orchard and began loading up Sgt Cheauvront's casualties.

Cpl Desjardin remounted his HMMWV and moved back, taking up watch on the west side of the walled farm (holding Sgt Oran's troops), while Sgt Petit remained on foot, guiding his LAV into position to begin rigging Sgt Bernier's AMX for tow.

Lt Patrie's Panhard, and the HQ Land Rover continued south, now at the walled farm.

While Lt Davault dismounted, removed the casualties from Cpl Navarre's burning HMMWV, and dropped two thermite grenades into the HMMWV, destroying its weapons and comm gear.

That's the end of Turn 2, and Turn 3 started with the bad guy infantry in the south managing to rally, so stand by for some excitement with them and the two BTRs.  If the rally had not been successful, this would have been a simple walk-off...

So, with explosives set at the SAM site, Lt Bisson's men rush to Lt Davault's AMX and load up.

Davault's AMX crosses the bridge (off camera t left) and hauls butt all the way to the southern ford, while Sgt Cheauvront's men (in the orchard at left) fall back to Lt Marcoud's LAV and load up.

Now, on to our final act!  It starts with the bad guy infantry charging up and over the hill (at top right), ending up in the woodline (center right) where Lt Harpin's squad had been wiped out by these same guys.  Then the first BTR pops up on the lower part of the hill (top center, vehicle on right), and Sgt Oran's squad (center, in walled farm) quickly pops a rocket into it, killing all aboard.  The other BTR activates and pulls alongside its burning partner, firing at Sgt Oran's men, dropping one and pinning the squad.

Cpl Desjardin (HMMWV at bottom center) swings his Mk19 right and pumps a string of 40mm grenades into the treeline, causing two casualties and suppressing the enemy squad (red bead).  Then the enemy BTR activates again, and again uses its 14.5mm HMG on Sgt Oran's troops, but they're already using their shirt buttons to dig deeper into the earth's surface, and they experience no further ill effect.

Then the BTR acts again, and this time his aim is true, causing two more casualties amongst Sgt Oran's squad, and causing the survivors to fall back (survivors at left, behind wall with red bead, the three casualty figures at right show their previous position).

Cpl Desjardin (HMMWV at center) reloads, and fires another burst of grenades into the enemy infantry (bottom right), eliminating them.  Then Lt Patrie's Panhard (center right) moves up and fires a 90mm round into the last BTR, blowing it up.  Capt LaPieux (center left, at Land Rover), dismounts with his HQ element and begins helping Sgt Oran police up their casualties in the walled farm, while Lt Davault's AMX continues south (bottom left center), and Lt Marcoud's LAV (top left) catches up to the column.

The remaining men on foot mount up, and with all men and vehicles accounted for, the French column sets off to return to base.

And the explosives set at the SAM site do their job.  Mission accomplished once again, but once again at a price.  The Legionaires once again gave good account of themselves, and Capt LaPieux reflected this in his debrief with Maj Louis-Louis.  "Very good, nice work Captain.  Is that all?"  "Well, yes, Sir, I believe so."  "You believe so?  Come now, what is it, Pepe?"  "I'm concerned, Sir.  While not as well armed, led, or organized as we, these Sirellists are proving quite tenacious.  For example, that charge by their light armor this afternoon; they had no chance of preventing us returning home, much less accomplishing our mission, yet at us they came, guns blazing.  And I'm concerned at their level of popular support."  "Is that so?  The President's cousin (the French President's cousin is the President of Estonia) assures us the Sirellists are but a small minority of the former Soviet military, and their supporters amongst the local populace are an even smaller percentage."  "Yes, Major, of course.  But in our past two engagements, the enemy was not initially there, but then they were.  I mentioned they were not properly organized, but that's because, in both cases, they were hastily thrown together as a reaction to our thrusts."  "Your point, Captain?"  "Well, my point would be that someone is providing them information regarding our movements.  Our operational security remains top notch, and so it would seem someone with insider access must be communicating with our foes."  "Indeed.  We must be on our guard for treachery."

Losses:
Sirellists: 27 casualties, 8 captured, two tanks, and two BTRs (the two BMPs were damaged, but, as the rebels own the field, they should be able to recover and repair them).
French: Lt Harpin's squad was eliminated, Lt Bisson lost 1, Sgt Oran lost 3, Sgt Cheauvront lost 2, Sgt Bernier's AMX-10P crew was lost, as was Cpl Navarre's HMMWV crew, for a total of 14 casualties.  One HMMWV was destroyed beyond repair (indeed, it was blown in place), though Sgt Bernier's AMX-10P was towed back to base for repair.

I need to go and update the campaign roster (which will have been done prior to you reading this), as we've lost a few leaders, and I need to account for the decorations for valor.  Speaking of that, while the Legionaires accounted themselves well, sometimes in some desperate fighting, and they performed heroically, none accounted themselves above and beyond to the point of individual recognition.  Lt Patrie's Panhard seemed to me to come the closest, certainly distinguishing itself by continuously placing the vehicle and crew in danger to good result (the bad guy infantry in the walled orchard, moving into the exposed position on the bridge to destroy the BMP, and moving into the exposed position in the road to destroy the last BTR).

Another fun fight, a little on the long side (Fight 2 as 4 hours, and this one was 3 hours!).  Additionally, I made two mistakes in the creation of my scenario:
1) I had too many vehicles and not enough infantry on both sides, particularly given the close terrain.  In my head I actually pictured a lot of close-in fighting, cat-and-mouse escapades in the many treelines, fields, knolls, and walls.  But I screwed up the force composition, which meant the fights would necessarily be restricted to the roads.  Which is not at all unrealistic in modern fighting, just not what I'd dreamed up.

2) I screwed up in terrain placement.  This is directly related to problem #1, in that I had too many vehicles and not enough infantry.  Given the fact of too many vehicles, the mistake I made was in placing too much terrain in the northeast, closing off the bad guy armor's ability to influence the battle.  There simply was no avenue for them to move west, minus heading south to link up with the other platoon, then pressing west into the Covering Force's roadblock.  So, that was my screw up, not understood until the game started and there was really nowhere for the T-72 and BMPs to go...

Nevertheless, it was still fun, and I look forward to my next opportunity for the Legion to cover itself in glory.  In my last post I mentioned using this burgeoning issue as the seed for a larger campaign, that is, 'civil war' in the Baltic states of Estonia, Lithuania, Latvia, and Poland, amongst pro-Western supporters of liberal government, and pro-Russian "Sirellists," who wish to return to Soviet-style government and economics.  What's going to happen is that I intend on playing 7-10 of these fights of the Legion in Estonia, and then the French will leave and I'll move them to another hotspot, like the Balkans, the Middle East, or Africa.  This campaign will end either with the French killing Colonel Sirel, or the French trying to kill Colonel Sirel but failing and losing in dramatic fashion, enough to force the French to leave the country.

In either case, the stage is set for the Baltic State 'Civil War': either Sirel has been martyred, or he has been lionized.  Stay tuned.  We've got the holiday coming up this week, always a busy time, but I shan't neglect my wargaming responsibilities, no matter how much the wife hates me.  I intend on getting some painting done, then getting Legion games in while I'm off from work on Friday, Saturday, and Sunday.  I also want to get back to my 6mm stuff...

V/R,
Jack