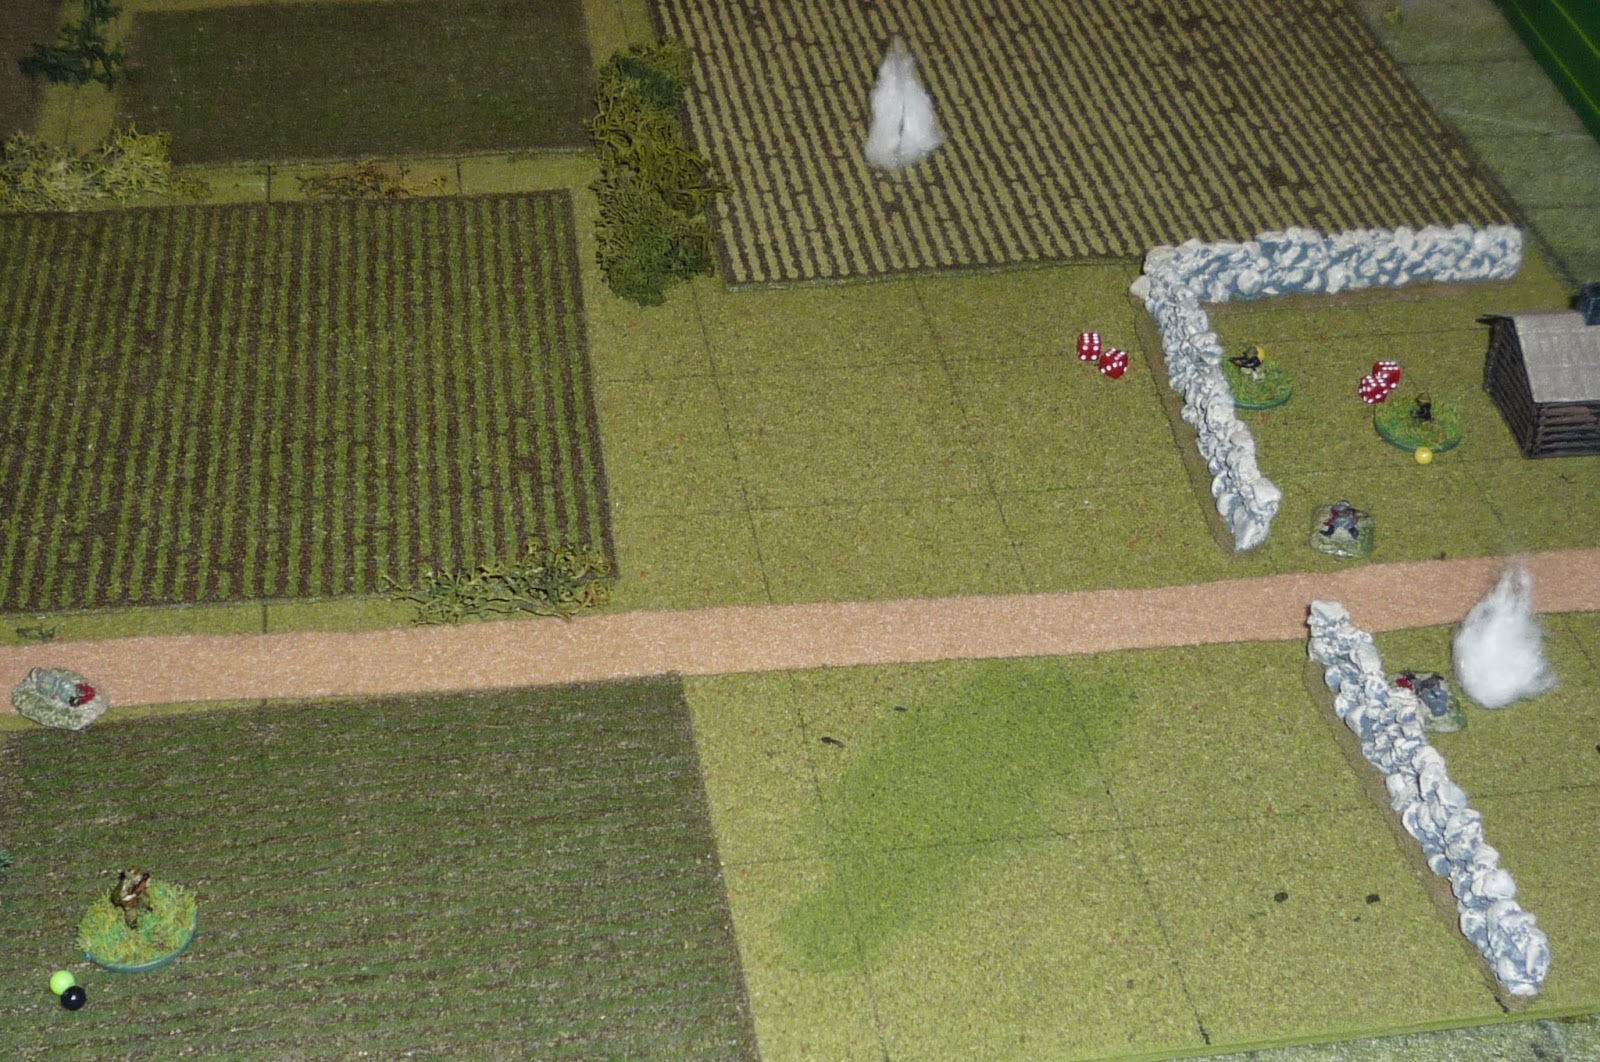
All,
Following the vicious fight for Hill 475, the Brigade pulled back to its base and sent out patrols to the west, chasing the NVA towards the Cambodian border. Little contact was made and it appears the NVA made good their escape. Routine patrols resumed until two UH-1s were shot down in two days by HMGs to the west. Aggressive patrolling was conducted to try to locate and destroy the NVA HMGs, which had downed three helicopters so far, to no avail. Intel suggested the NVA was working more closely with the local VC, and the weapons were being kept on the move throughout the local network of villages so as to keep them hidden from the Americans. To counter this, Brigade decided to implement the "Strategic Hamlet" initiative, wherein smaller villages would be packed up and moved to several larger villages which would theoretically be easier for the Brigade's forces to keep an eye on.
Several of these relocations have been conducted by the Brigade and have gone off without a hitch.
It's 13 November 1967 and the squad has been sent west to the village of Kai Yao, where they will pack up the villagers and move them east to a larger village...
Overview, South is 'up.' The ville of Kai Yao is at bottom right, the squad in column on the trail, entering from bottom left, with rice paddies to either side of the trail.
The squad, from right to left: Fuqua, Stallworth (w/M-60), Brown, Russell, Thomas (M-79), Sgt Banaszak, Ham (M-79), Swan, Bradley, Shell, and Kolb as 'Tail-End Charlie.'
The village, with the villagers standing by for evacuation as leaflets were dropped three days ago notifying them (and the VC) of the pending relocation.
The squad moves up and Banaszak confers with the village honcho.
Team 1 (Russell's) provides security at top right while Team 2 (Bradley's) provides security at center left and Banaszak begins to lead the villagers out of their homes. Explosives were set on a one-hour timer to raze the village once evacuated.
The squad begins leading the villagers east to their new home...
As local VC move in on the east, blocking their escape route.
And the south, in the treeline (at top of board).
And even taking up positions to the west, in the just abandoned village.
And all hell breaks loose. The VC in the east (top left) open up first, initiating the ambush. A LMG opens up lightly wounding Kolb and Russell (center, two guys with yellow beads), quickly followed by rifle fire from the same location, and Sergeant Banaszak goes down (center, on the trail just in front of the villagers)!
This is quickly followed by the VC in the south (top) opening up on the column, and Russell goes down, seriously wounded. The VC LMG in the south opens up, missing everything but adding quite a bit of stress, while Stallworth (bottom center, on trail) goes prone and returns fire with the M-60.
Lastly, the VC that infiltrated the village (far right) open up, and Brown goes down, along with three villagers. The rest of the villagers go prone.
Then the unmistakable 'thump' of outgoing mortar rounds is heard, three of them (blue beads for target locations).
Kolb (center, in paddy with black, yellow, and green beads) drops prone and returns fire to the east (left), and Swan (left most GI on trail) does the same, while Spec4 Shell can't take it anymore, drops his weapon, and runs screaming to the north through the paddies and into the treeline (off camera to bottom). Incredibly, Fuqua does the same, following the trail blazed by Shell, while Ham (bottom left) drops behind the bushes and begins sobbing...
Something finally goes right when Thomas musters the testicular fortitude to actually get in the fight. He drops prone and fires at the VC in the village (blue bead for his M-79 grenade).
Perfect hit! One man is down while the other two are lightly wounded and take quite a bit of stress.
Bradley can't take it anymore and he, too, flees. However, he doesn't keep running, instead he runs north and drops behind a paddy dike (this will prove costly for him, but not as costly as it will be for Shell and Fuqua).
And then the mortar rounds hit. While the first and last rounds are wildly inaccurate and have no effect, the middle round hits right on target, killing three villagers and two water buffaloes (I don't have waterbull carcasses!).
The squad regains its equilibrium and the fight begins to turn, thanks to Thomas and his M-79, and now Stallworth (bottom center), who opens up with devastatingly accurate machine gun fire on the south treeline (top).
Stallworth starts left and sweeps right, firing off a whole belt of ammo. On the left the two VC receive a light wound and a serious wound, while in the center both VC are put out of the fight. On the right, the last VC receives a bunch of stress.
Then I apparently missed a picture... Swan, near the eastern end of the US column, opens up on the VC in the east, lightly wounding one, while they return fire and lightly wound him.
Then Ham snaps out of it and gets his Blooper in action, firing two rounds into the VC in the east. The first misses the target, but lands on the LMG gunner (far left), lightly wounding him, while the second round hits on target, seriously wounding the center and right-hand VC.
Kolb (bottom far left, with seriously wounded Russell just to his right and 'down' Banaszak to bottom right on trail) can't muster any guts and drops prone, sucking on his thumb, and receives more enemy fire from the south VC (top). So does Stallworth (bottom right), but no one is hit.
Thomas (bottom left) remains in his steady prone position and cranks out two more grenades at the VC in the ville, with first first missing horrendously (top center), and the second hitting right on top of a VC rifleman, putting him down. Four M-79 grenades in rapid succession, putting two of their comrades down, is too much for the remaining VC rifleman and the VC 50mm mortar, and they both high-tail it out of the area!
Meanwhile, three badly wounded VC (two in the east, one in the south) manage to escape by crawling off board.
Stallworth keeps firing his M-60, the barrel glowing white-hot, putting the far right (top right) VC rifleman in the south down, but missing the far left VC (top left), who somehow passes his morale test and opens up on Kolb. This is just too much for the young lad, and he hops up and runs to the north. Luckily Bradley is waiting there, having somewhat regained his marbles, and he tackles Kolb, keeping him from completely running off into Indian Country.
Swan (bottom left) passes his test, moves up, and fires, putting the last VC (top center) down, fight over...
The VC suffered 6 KIA, and three WIA. The three WIA escaped, along with three of their uninjured brothers who ran.
US casualties:
Sgt Banaszak - Had a round bounce off his helmet, gave him a concussion, light duty until 18 Nov 67.
Pvt Brown - Took a round through the forearm, China Beach until 26 Nov 67.
Sgt Russell - Took a round in the hip, China Beach until 3 Dec 67.
Pvt Swan - Took some bullet splinters in his face, patched up and back in the lineup.
Spec 4 Shell and Pvt Fuqua are Missing in Action.
Sgt Bradley and Pvt Kolb were reprimanded for cowardice, and Bradley was reduced in rank to PFC.
On a side note, four villagers and two water buffalo went down, so while the village was relocated, not a resounding success...
Hope you had a good time!
V/R,
Jack
Monday, May 26, 2014
Friday, May 23, 2014
"In Country," Game 9 (28 Oct 1967)
All,
Following their last fight, the battalion spent several days recuperating at the LZ, performing working parties in support of the battalions in the line, and conducting security patrols around the LZ perimeter. On 28 Oct 1967 1st Battalion was thrown back into the line, and the squad was on point for a combat patrol heading up Hill 475 as the 201st Brigade continued its attempts to wrest control of the hill from the NVA entrenched there.
The squad received no replacements, but several of its previously wounded members were returned to full duty (Corporal Ham, Sergeant Bradley, Spec4 Stallworth, and Pvt Brown). The squad's mission was to patrol up the main axis of attack, locate the next enemy defensive line, and punch through it on their way to the top. They crossed the friendly lines at 0830, the line of departure at 0845, and the previous enemy line (from which the enemy had fallen back from) at 0915, and we pick up the action at 0945.
Overview of the table, with north being to the right. Once again I'm playing solo on a 3' x 2' board. The enemy baseline is to the right (north), the US baseline to the left (south), and the squad is patrolling up a trail leading north, entering from the bottom left. You can see three enemy bunkers on the table, with Bunker1 at top center, Bunker2 at top right, and Bunker3 at bottom right.
Looking north at the enemy bunker line: Bunker1 at left, Bunker2 at top center, and Bunker3 at right. Moving up the trail you can see one squad member, Spec4 Shell, on point. All troops on the table are starting unspotted except Shell and the man immediately behind him (just off camera at bottom), Pvt Swan, who are starting as spotted as they are without cover on the trail, moving right into the NVA kill zone.
Bunker1, the western most bunker, holding two hidden (violet beads) NVA with rifles.
Bunker2, the northern most bunker, holding two hidden NVA, the leader and an RPG gunner.
Bunker3, the eastern most bunker, holding two hidden NVA riflemen.
The squad, moving up the trail south to north, from right (closest to enemy) to left: Shell, Swan, Ham, Mansfield, Sgt Banaszak, Sgt Bradley, Stallworth (carrying the squad's machine gun), and Brown. Because of how the casualties have worked out, the squad is in the field without either of its M-79 grenadiers.
Shell is on point (bottom center), not happy with Banaszak reaming his ass about running away in the last fight and putting him on pointman duty. As he's grumbling to himself while moving up the trail, he sees or hears or just feel something bad about to happen. As he moved up he had already noted a clearing to the right leading into a foliage-heavy treeline, but as he scanned again, suddenly he could make out the outline of an NVA bunker (top center). He just opened his mouth to yell a warning when AK-47 fire erupted...
Behind Bunker3, where both NVA rifleman have opened up on Shell (top right) and Swan (top left). The NVA at right delivers a full magazine of 7.62mm rounds in Shell's direction, but miraculously Shell is not hit! The NVA on the left fires at Swan, missing him with two bursts, but the third lightly wounds him. Due to the outbreak of automatic weapons fire, Bunker3 is spotted.
Shell (center) passes his test (caused by the shock of three bursts of AK fire), moves right, drops prone, and returns fire (at Bunker3, bottom right), stitching 5.56mm rounds into the sandbags but hitting no one, while Swann (top left) is stunned from his wounds and simply drops prone to avoid incoming fire. At this point he's not even scared, he's just thinking, 'Swannie, don't you dare run away again, that @#$% Banaszak will shoot you just like he said!"
No sooner had Bunker3 opened up on the point element than Banaszak understood the threat and what he must do. "Ambush front, base of fire, I'm moving right" he yelled as he shook out of his pack and web gear, stuffing frags and extra magazines into his cargo pockets. Banaszak then sprinted off the trail to the right, continuing up the right side until almost face to face with the bunker, then dropped prone. As the NVA are focused on the Americans to their front, Banaszak remains unspotted, though all his sprinting through the jungle will make it easier for him to be spotted.
The NVA leader in Bunker2 (bottom center) spends a couple actions and is able to spot the rest of the squad (top center) on the trail, then calmly levels his AK at Swan, lying on the trail, and puts a burst into him, seriously wounding Swan.
The RPG gunner, also in Bunker2 (bottom center, with Bunker1 at far right and Bunker3 at far left) fires a rocket at Corporal Ham (top, on trail behind Swan), but misses badly to the left (you can see the cotton puff at top left).
The NVA in Bunker1 (bottom center, looking east at Bunker3, top) managed to see Banaszak (just right of Bunker3) as he darted and flitted through the undergrowth at top, and open up on him, missing twice.
Bradley, a "Shake and Bake" Sergeant and still an FNG, seems a bit unsteady and unsure of what to do, so Stallworth, the veteran, takes charge. "Brown, take this, and give me your rifle," Stallworth says as he hands over the M-60. "We've got bunkers at right, front, and now another one just opened up on the left. You too move up to that knoll; it should block most fire coming from the front bunker, and get the Pig in action against that left bunker, and I'll swing around to the left so we can roll them up. Once that's done, watch for my signal, then shift fire to the center bunker and we'll do it again."
With that, Bradley (bottom center) sprints up to the knoll, flops down behind cover, and manages to spot Bunker1 (top center). You can see the badly wounded Swan at far right.
An NVA in Bunker1 (bottom left) spots Brad (right center) and opens up, missing three times, while Brown sprints up and goes prone next to Bradley, firing at Bunker1 but missing. You can see Ham on the trail right behind Bradley and Brown, and Shell at top center.
While that is going on, Stallworth (bottom left) sprints off the trail to the left, looking to get around Bunker1 (top center, with Brad and Brown at bottom right on the knoll). Stallworth, not wanting to push his luck too much, drops prone and fires at Bunker1, missing.
Ham (bottom center on trail, with badly wounded Swan just ahead of him and Brad and Brown to his left on the knoll), can't muster the courage to do too much, so he drops prone, spots Bunker2 (top center), and fires at the RPG gunner, missing.
Mansfield (bottom center), who was till at the rear of the squad on the trail, exercises some initiative in the lack of orders or direction, and moves up into the treeline on the right (east) side of the trail and opens up on Bunker3 (top center), where his rounds rip into one of the NVA riflemen, seriously wounding him. He fires again at the remaining rifleman, but misses...
Banaszak saw the NVA rifleman go down as a result of Mansfield's fire, and he's feeling a little shaky from the fire he received from Bunker1 (off camera at top left), so he sits tight and figures he'll just fire and put down the other NVA in Bunker3. Well, he fired, but nary a hit was scored (though you can see the red dice indicating the stress it caused).
In Bunker1 (top center), one of the NVA riflemen is forced to test because of Bradley, Brown (both bottom center), and Stallworth's (top left) fire, and he decides to call it a day, dropping his rifle and running. Brown unloads a whole belt into the bunker, but doesn't hit anything, while Bradley drops into the fetal position. For his part, Stallworth pops up, sprints ahead, then dives back down for cover, getting closer to Bunker1.
In Bunker2 (bottom center), the RPG gunner shakes off his stress and fires another rocket, this time at Mansfield. Incredibly (with my die rolling), the rocket detonates right at Mansfield's feet, collapsing him in a bloody pile and putting him out of the fight. Mansfield is under that white cotton puff at top center, with Shell just below it to the left and Swan and Ham to the right. Brad and Brown are just to Ham's right, while Banaszak is off camera to Shell's left, near Bunker3.
The RPG detonation (bottom right) and Mansfield going down shocks Ham (bottom center next to palm tree to right of trail) into action; he crawls right to get behind cover, then fires two bursts at the NVA RPG gunner, missing both times, while the NVA leader responds with three errant bursts of his own.
Meanwhile, the NVA in Bunker3 (off camera to right) fails his test, drops prone, and begins sobbing at the thought of the Yankee Devil, Banaszak, camping right outside his door, while Shell (bottom center) decides he doesn't really want to go anywhere, so why not take up a good prone firing position to deliver timely and accurate rifle fire on the enemy resident in Bunker2 (top center). Well, it pays off, and soon the RPG gunner is well ventilated (seriously wounded, not out of the fight). Shell fires again and the NVA leader winces in pain (lightly wounded).
The remaining NVA rifleman in Bunker1 (top center, his partner ran) opens fire on the knoll (bottom right), lightly wounding the M-60 gunner, Brown, then pivots to his right and fires at Stallworth (bottom left), but misses.
At this point I am severely unhappy with the NVA in Bunkers 1 and 3; both bunkers (and now, even Bunker2, as the RPG gunner is down) are down to one man, and both of those men had a ridiculous amount of stress on them (one had 12 and the other 8), but neither ran! I really thought/hoped they were gonna run, but they stuck it out...
Swan begins dragging his seriously wounded behind back down the trail towards the US baseline, while the seriously wounded NVA in Bunker3 does the same.
And then something happened (again) that seriously @#$%ed me off... Time for Banaszak to be the hero again, right? So Banaszak (far left) pulls a frag out, sweeps away the safety clip, pulls the pin, and tosses it towards Bunker3 (left center, with one NVA in it and the seriously wounded NVA to bottom right, trying to crawl to safety), a mere three inches away.
Well, the grenade misses. Okay, stuff happens. But I roll to see where it lands, and here's what I rolled: 10 inches at one o'clock!!! He threw a frag at a bunker 3 inches away, but managed to throw it 10 inches past the bunker!!! You can see the blue bead marking the grenade in the jungle at far right. Don't misunderstand, I'm loving these rules, I just think the scatter roll needs to be revisited for hand grenades as I don't believe this has any 'real-life' precedent; that's some depth perception problem, or, "Gee, I didn't know my own strength!"
So, seeing his grenade sail off into the wild blue yonder, Banaszak decides to just empty the remainder of his magazine into Bunker3, and ends up lightly wounding the NVA in there. The NVA tests and passes, so he fires at Banaszak and misses, then turns and fires at Shell (top left) and misses.
Shell tests and is good to go, so he says hell with it, pops up, sprints up to Bunker3, sticks his muzzle through the firing slit, and unloads. NVA down, Bunker3 cleared!
And then the improbable occurred (again, which will have War Panda ranting about my magic dice); Sergeant Bradley (bottom center, on the knoll with Brown, who's a little shaken up by all the enemy attention he's been receiving) seemed to shake off all the noise, fire and confusion, and a sudden calm came over his face. 'If I don't handle this situation, they're going to kill me,' he thought to himself. He calmly raised his rifle, good bone support, tight sling, good stockweld, Blam! He missed the NVA in Bunker1 (top center, with Stallworth at top left). Dammit! He resighted in, good sight alignment, good sight picture, aim center mass, squeeze, squeeze, squeeze, Blam! NVA down, Bunker1 is cleared.
Then he slid left, adjusting his firing position to take Bunker2 under fire (Brad's at bottom center left, just left of the trail, Bunker2 at top center). Nice and calm, squeeze, Blam! NVA leader down, Bunker2 cleared. "Holy Crap, good shooting Sarge!" exclaimed Brown. "Yeah, nice shooting there, Tex," croaked Ham (just right of trail at bottom), fairly impressed with the new guy. "Let's go fellas" says Bradley, nice and cool like.
Brown (bottom center) covers Bradley and Stallworth as they physically clear Bunker1.
While Banaszak and Shell do the same at Bunker3, capturing a badly wounded NVA.
Then the squad moves up, with Brown (bottom left) covering while everyone else converges on Bunker1, consolidating there and capturing another wounded NVA...
While Ham preps Swan and Mansfield for MEDEVAC.
Another mission accomplished, another fun game. To me it's great in these rules how you never know what's going to happen, how one action can suddenly swing things (I was really worried when the RPG put Mansfield out of the fight), and how you can't overly influence things; I thought Banaszak was going to do the hero thing again, but it didn't really matter what I wanted or thought. I do want to do something different with the scatter roll for hand grenades though; that's about five times that I've had a guy throw a grenade then end up missing by at least 8 inches...
The NVA suffered three KIA and two captured (both seriously wounded), while one man got away by running early in the fight. The squad took three casualties as well:
Swan - Rock/bullet splinters peppered his face and temporarily messed him up, he's on light duty until 1 Nov 1967.
Brown - Brown had a round crease his shoulder, he's at BAS until 3 Nov 1967.
Mansfield - Poor Ray had that RPG impact directly under him, looks like he's losing a leg and being evacuated to the World, tour finished.
V/R,
Jack
Subscribe to:
Posts (Atom)